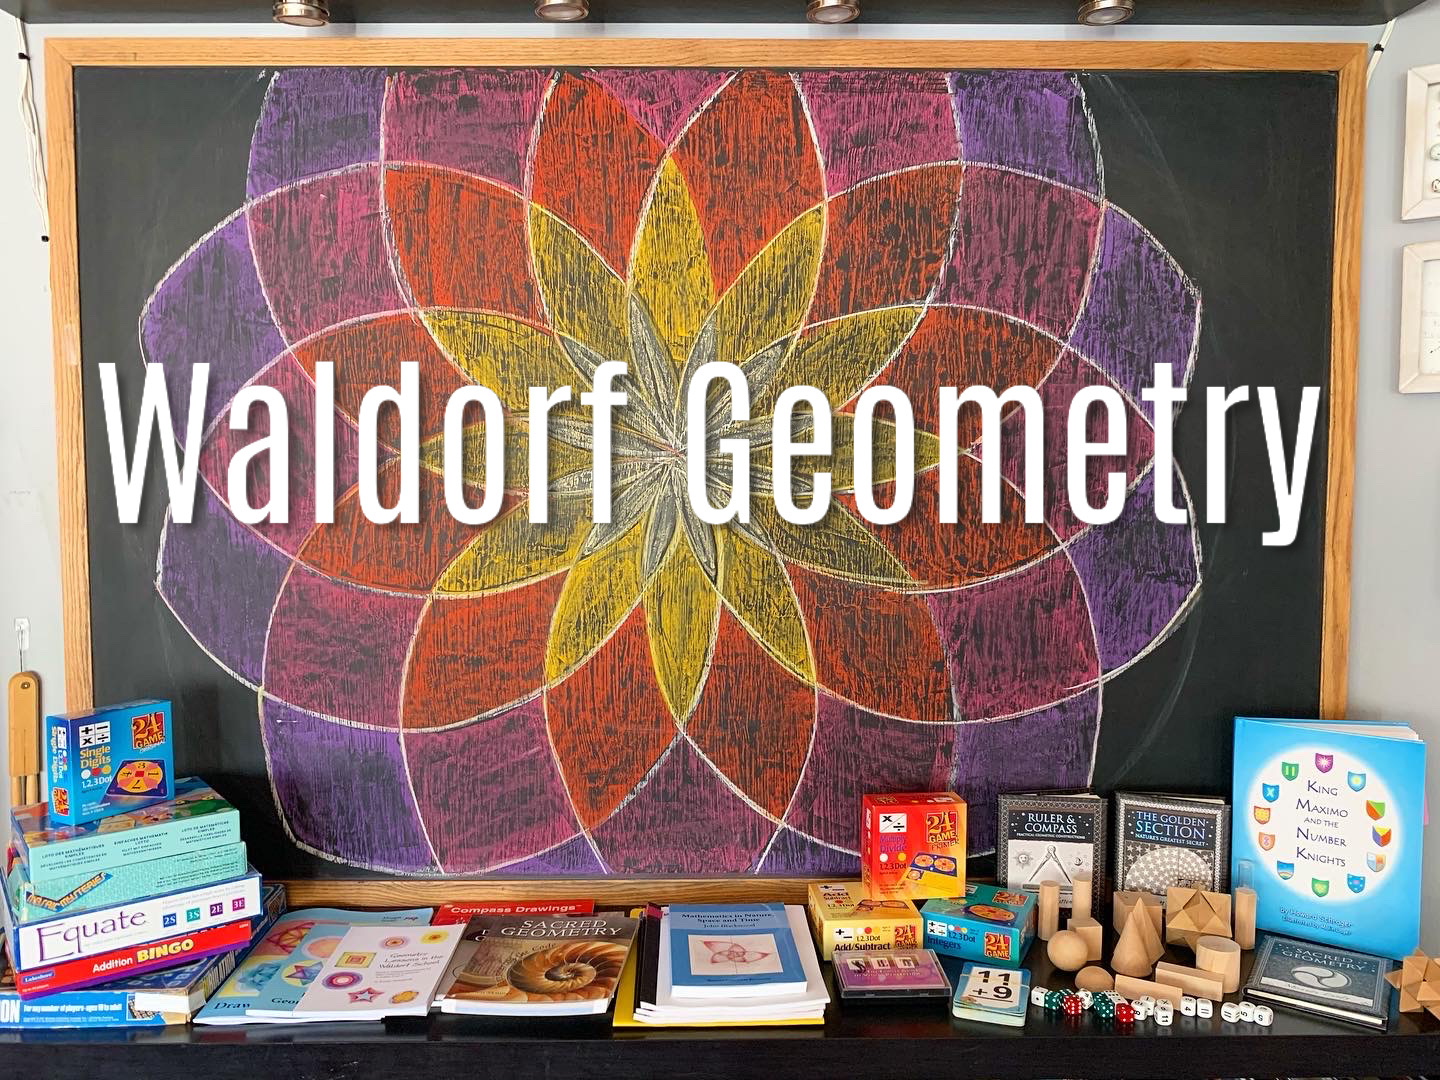
My favorite subject of all of the math blocks is geometry taught the Waldorf way. It might even be my favorite main lesson block of all! Though Botany and Astronomy are right up there in the top three. What makes the Waldorf approach so engaging in this subject area is all the art that accompanies the lesson. If that last sentence sent a way of anxiety through your being, take care, I’ll ease your fears about Waldorf geometry with plenty of tutorials and lots of encouragement.
Geometry Resources for Elementary, High School and Beyond
Geometry is one of the most fascinating fields of math a student will encounter, in my opinion. There’s so much you can do when children are young with simple math centered on identification of shapes and solids. While introducing geometry this way and with picture books may not reflect the Waldorf approach authentically, it has been our approach in our homeschool for years. I love adding living books into our lessons because I’m often at a loss for stories of my own. Plus, I am not a teacher by profession and rarely solely rely on a curriculum, so I appreciate the breadth and depth of the books and resources available.
Buying guide
Affiliate links used on this page
How to Put Together a Geometry Main Lesson Block
Over the years, I’ve put together several math main lesson blocks and a number of geometry blocks. What sets these blocks apart from other math blocks is the level of engagement the teacher and student experience with each lesson. There are no dry lessons. The upside is obvious: full engagement means maximum learning and high possibility of retention. The downside is that it takes a lot time, a fair amount of planning and the occasional (sometimes frequent) disappointment when lessons don’t go as planned or you (both teacher and student) struggle with achieving the forms you are striving to make.
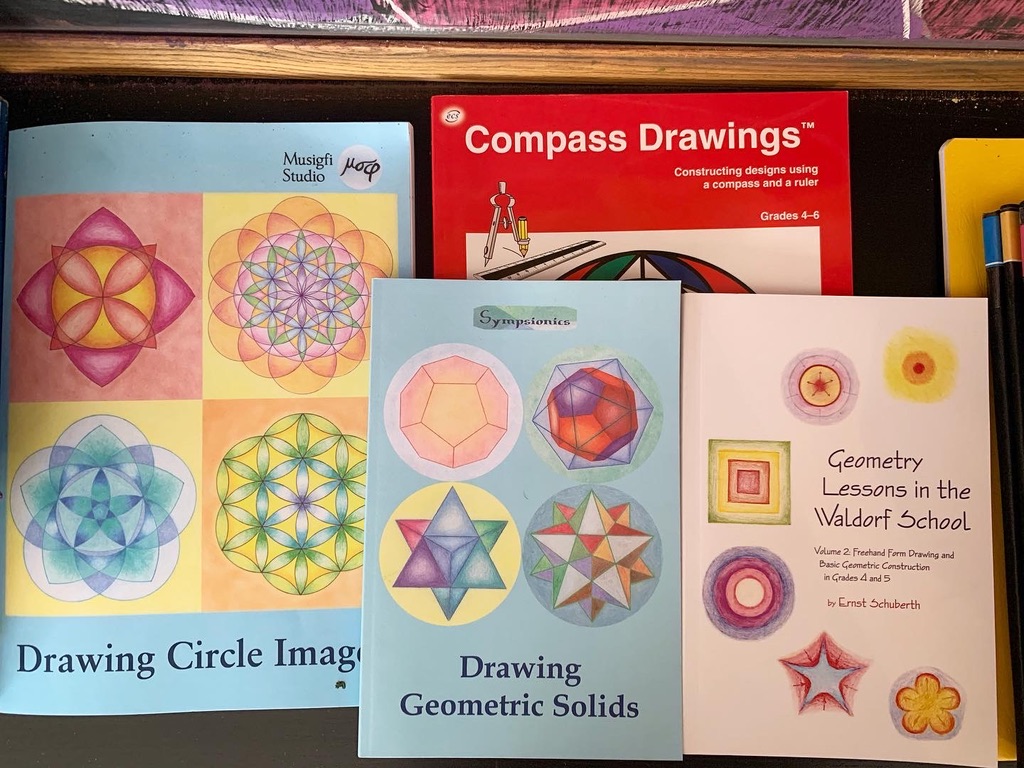
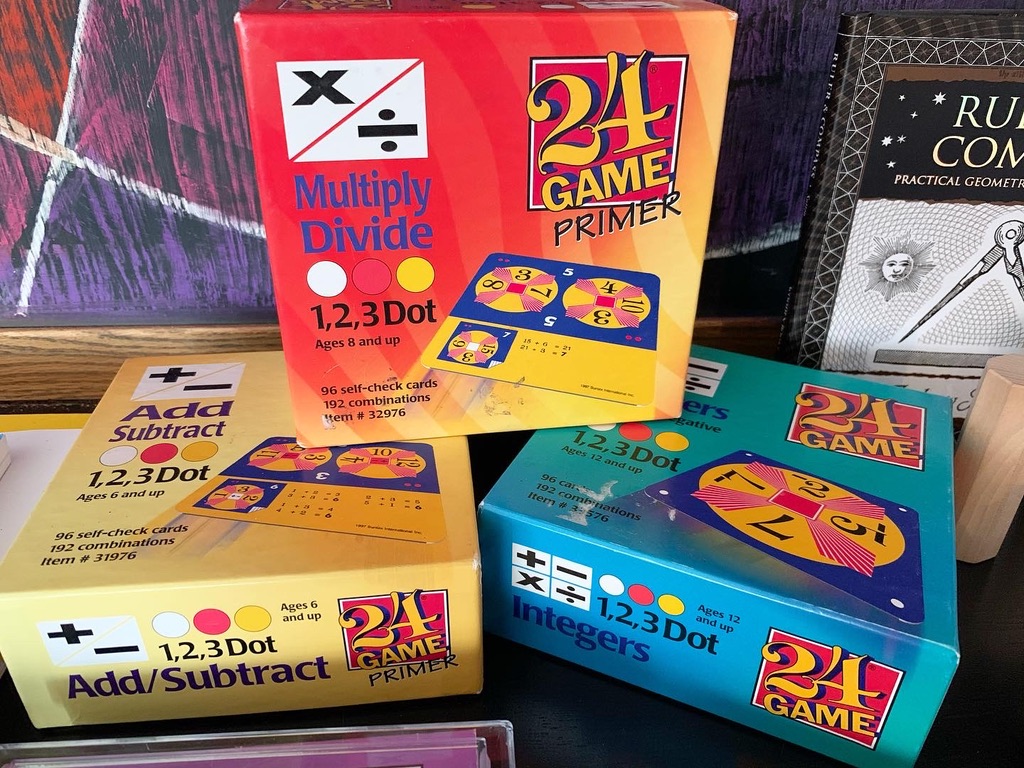
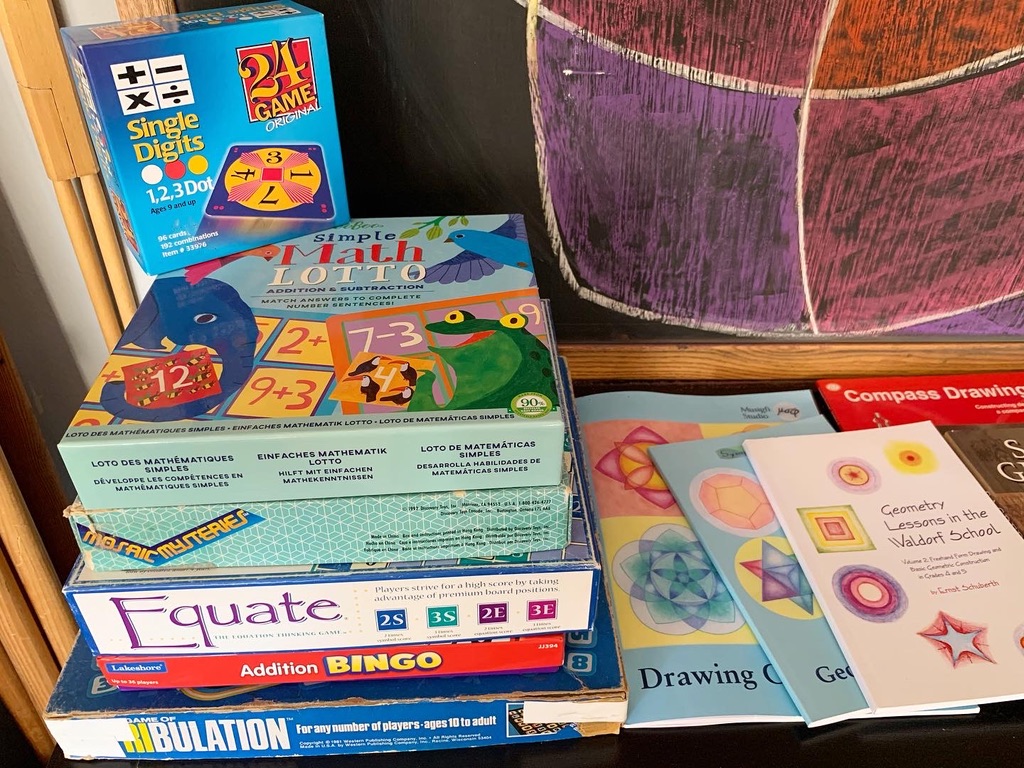
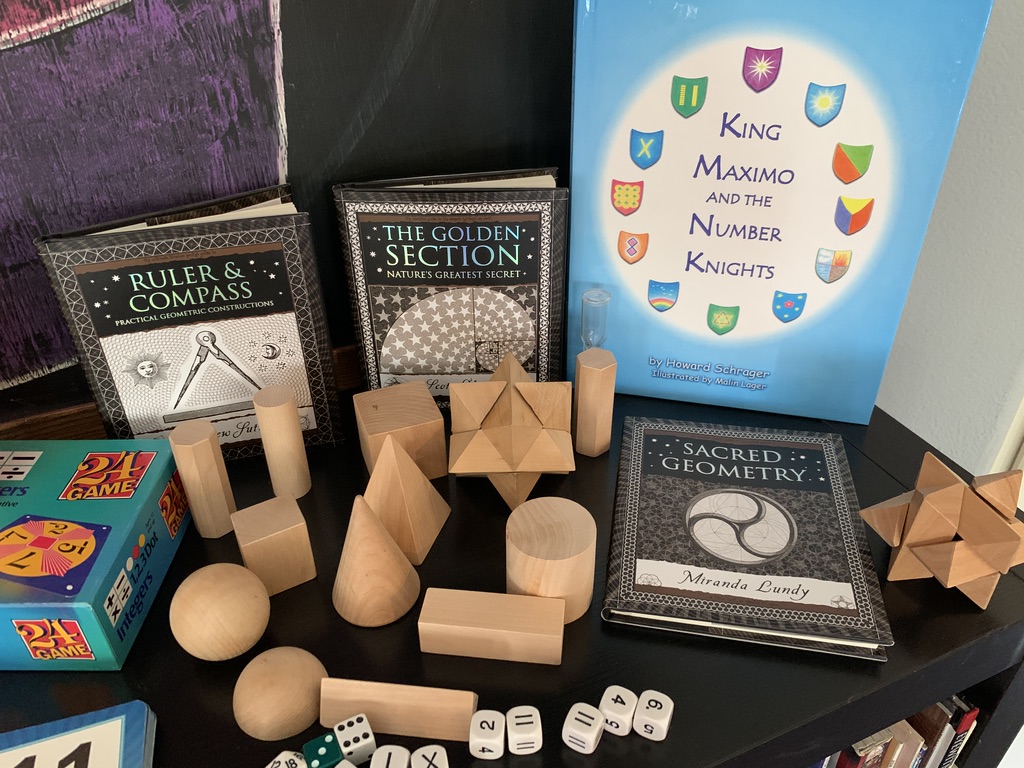
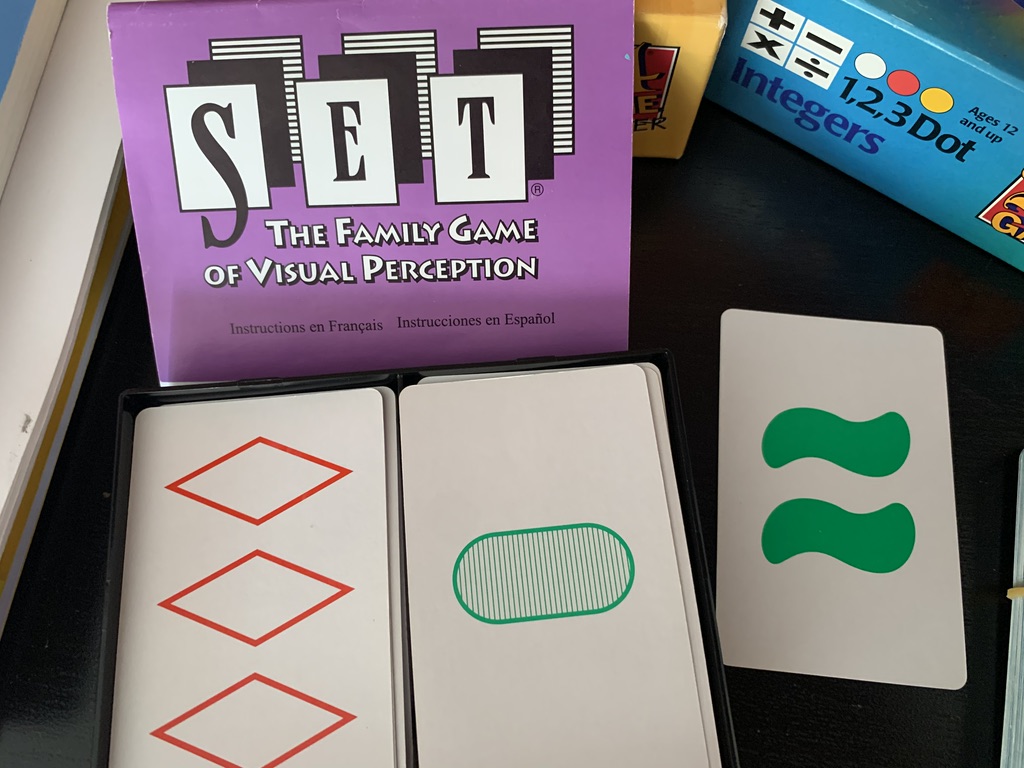
When putting together a unit, I look for a number of resources to enrich our experience. While math blocks are different than other blocks in that I’m not likely to have a set of recipes like a geography unit or a historical fiction for a history unit, I will plan for us to cook and alter recipes so that fractions can come to life real applications and I will include a number of math books, especially picture books, when possible. One thing I won’t go without with putting together a math unit are games! I find math games to be some of the best ways to truly understand math concepts and master basic math skills. New for this unit are Islamic Geometric Design books that were gifted to our family from Siraj Bookstore.

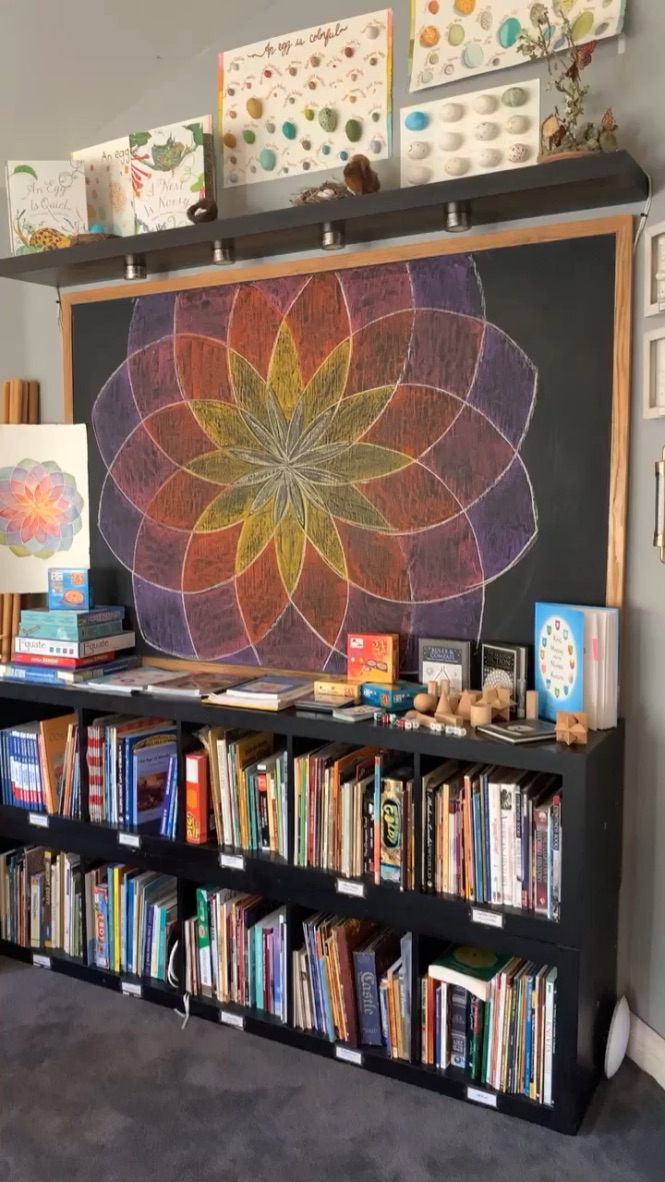
12 Division Of A Circle | Chalk Drawing
Amazon Affiliate links used on this page
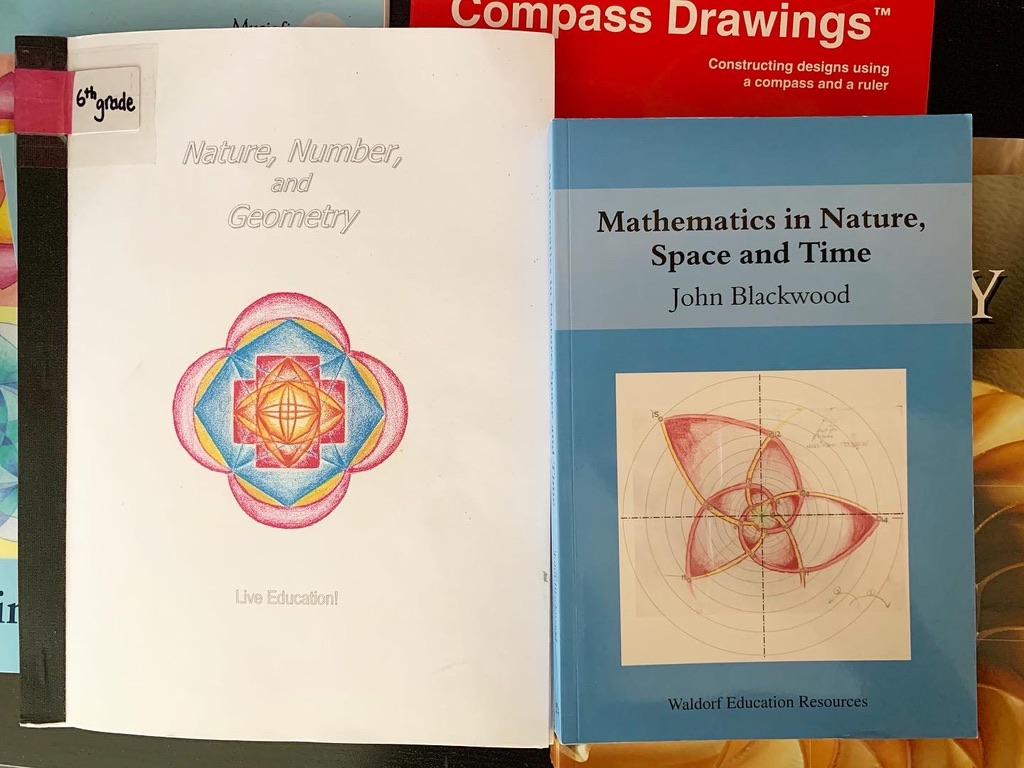
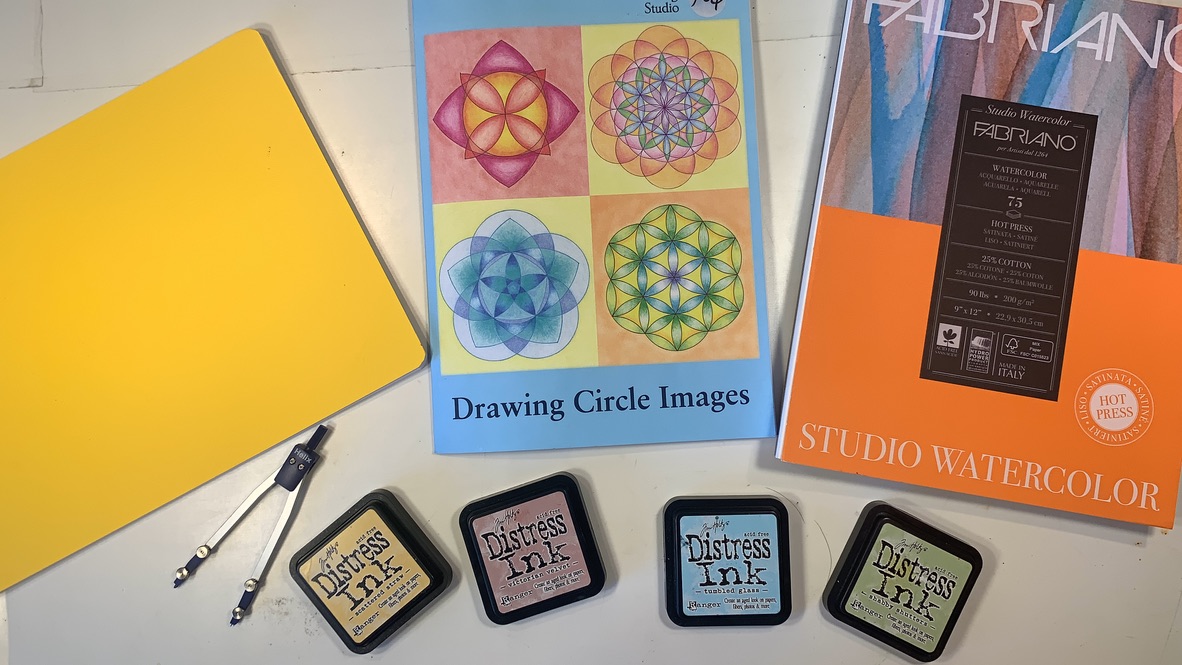
Geometry chalk drawings are my favorite and most satisfying because they are simple (though not easy) to make and look so beautiful when complete. This 12-division of a circle is a geometric shape we’ve done before in our geometry blocks before using Distress Inks, and it looks spectacular on a chalkboard. You will need a Chalkboard Compass to do this drawing as I can’t think of an alternative. But the investment is well worth it. For this and all my chalk drawings, I use Sargent Art Chalk Pastels. I like these chalks because they are highly pigmented and I like the vibrant look of the final results. I also used the workbook Drawing Circle Images as inspiration for this project as well as the Grade 6 Live Education Waldorf curriculum. You can find more Geometry tutorials on this blog post as well as video tutorials for our Math Main Lesson Block.
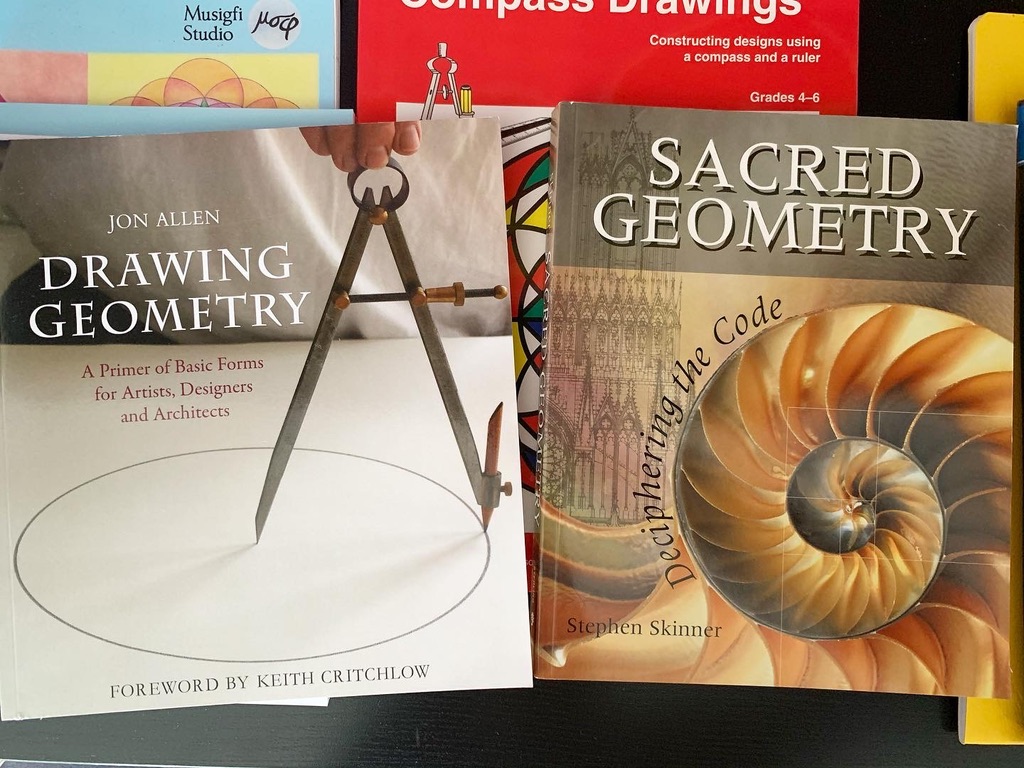
Sacred Geometry
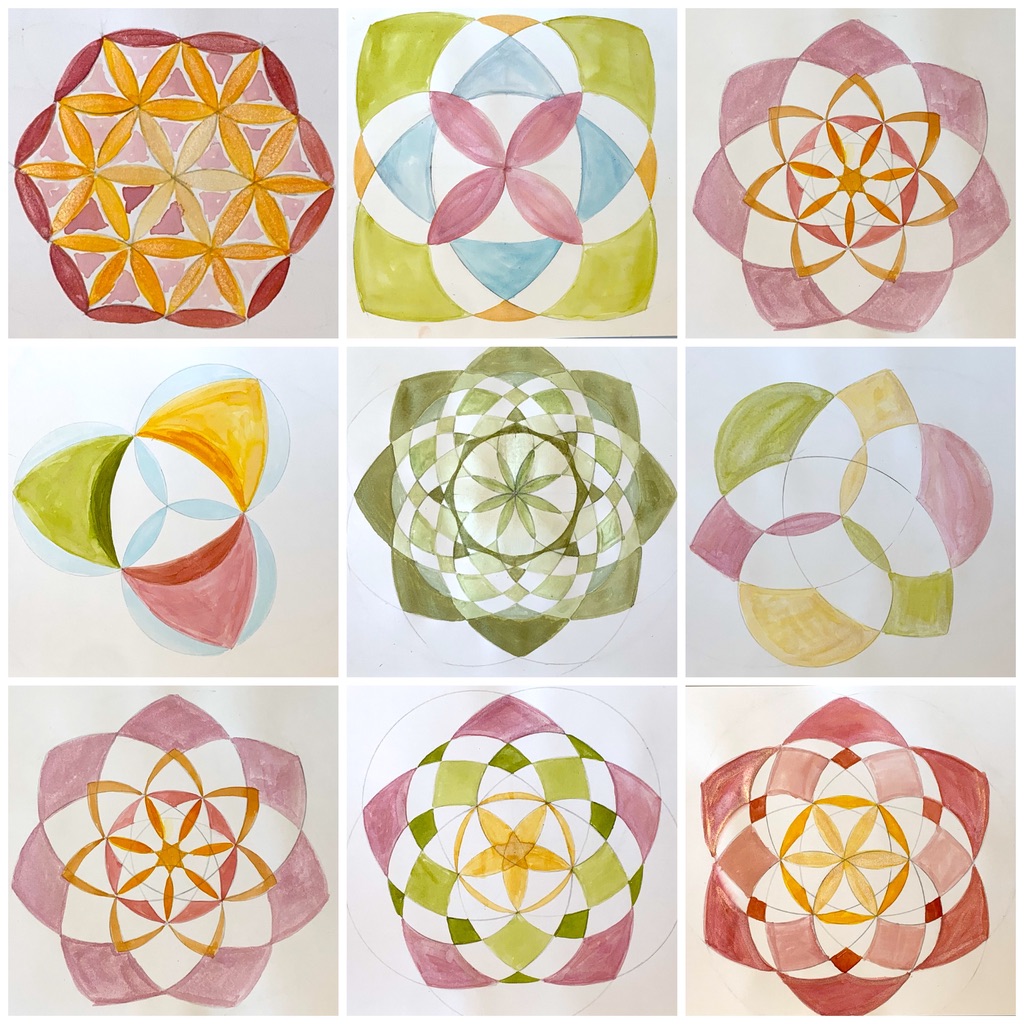
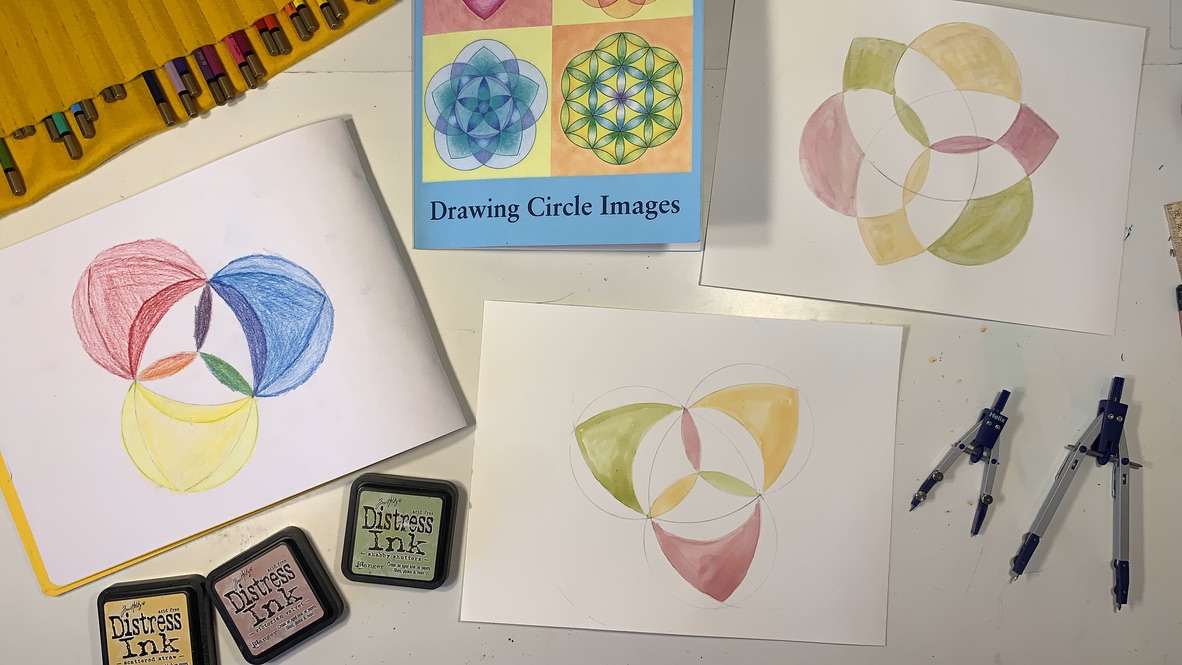
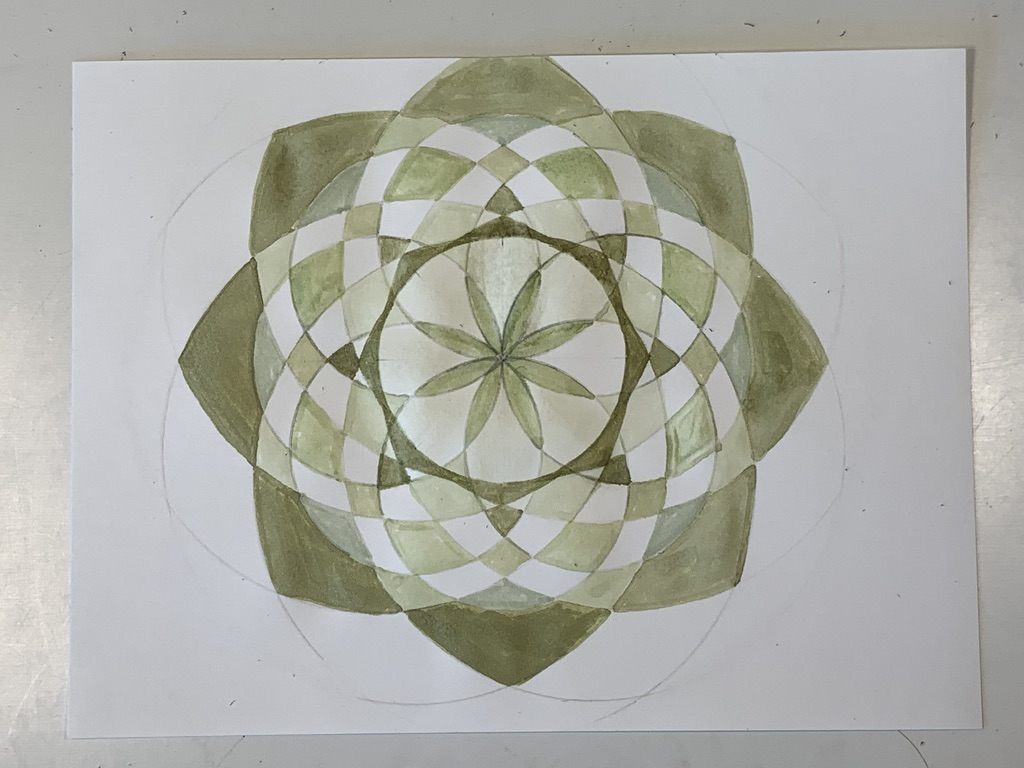
Waldorf geometry is one of the most beautiful main lesson blocks. I love the Waldorf approach to teaching math and especially geometry. In the following series, I go from 3-fold to 12-fold symmetry of a circle in short tutorials. I use the book Drawing Circle Images as inspiration for this series. I use Fabriano hot press 90lb. watercolor paper and Distress Inks to paint in our final images. For these projects, you’ll also need a compass, ruler and pencil. I love the way our projects turned out and even tried a few chalk drawings of circle symmetry on our front porch and driveway.
Buying Guide
Affiliate links used on this page
LIVE Homeschool Lesson | Waldorf Geometry | Threefold Symmetry
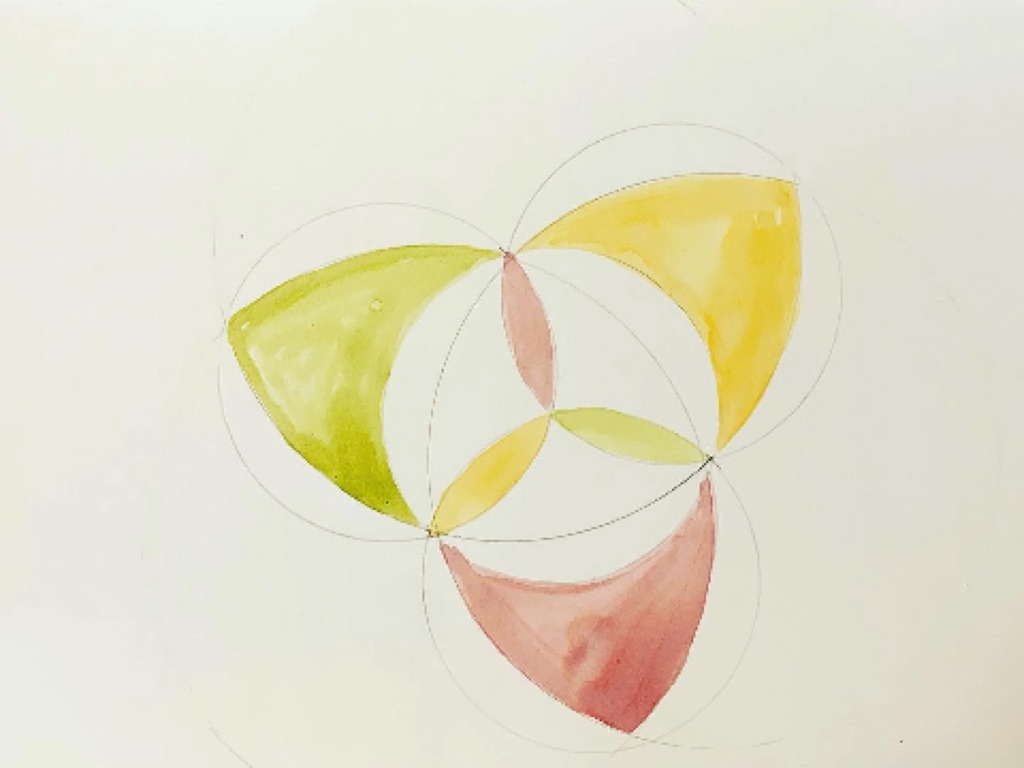
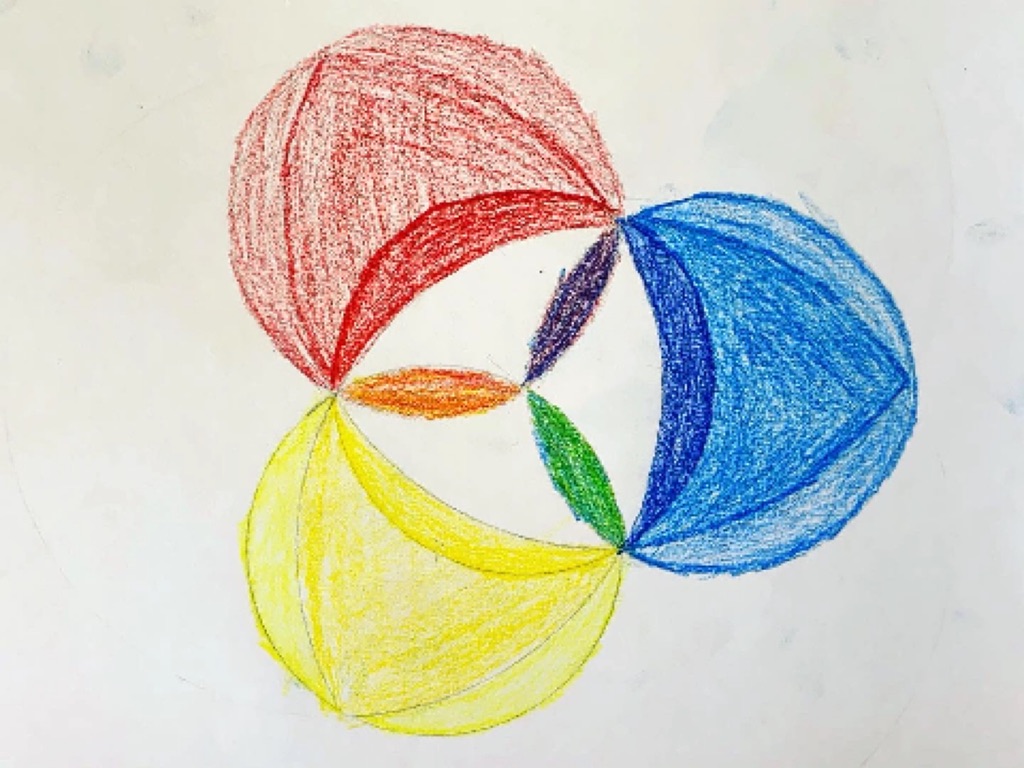
Today’s lesson is a LIVE geometry lesson I did with my 13-year-old son. He and I work through 3-fold symmetry of a circle using the book Drawing Circle Images. We (or I should say I) encountered a problem. I did the design different than the book, and it took me a few minutes to recognize my error. In so doing, we discovered a new design that looks just as beautiful. That’s the thing about these designs, once you see the pattern, you can experiment with arcs of differents radii to discover new final designs. Then of course, you can still choose one of many ways to color in your design for a magnificent end result.

How To Draw 3-Fold Symmetry | Geometry Tutorial
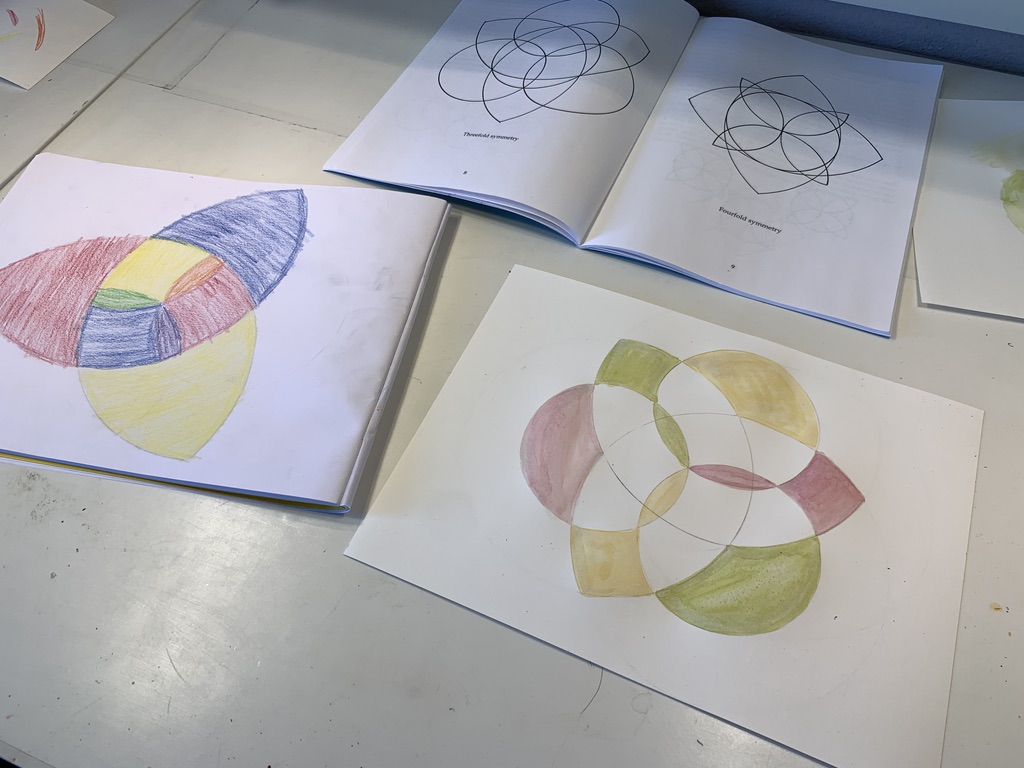
Circle symmetry is one of the most beautiful geometric projects you can easily do with your students. While some symmetries are more complicated, 3-, 4-, 6-, 8- and 12-fold are fairly straightforward and can be achieved with moderate effort and skill, in my opinion and experience. Today’s project is a tutorial for threefold symmetry. While you can explore this design and come up with creative ways to paint or color in the shapes, it’s not my favorite. I like the symmetry starting at 6-fold symmetry. But, I’d love to see what you come up with. Maybe your creative way of painting this design will change my mind. Honestly, the possibilities are endless and that’s exciting.
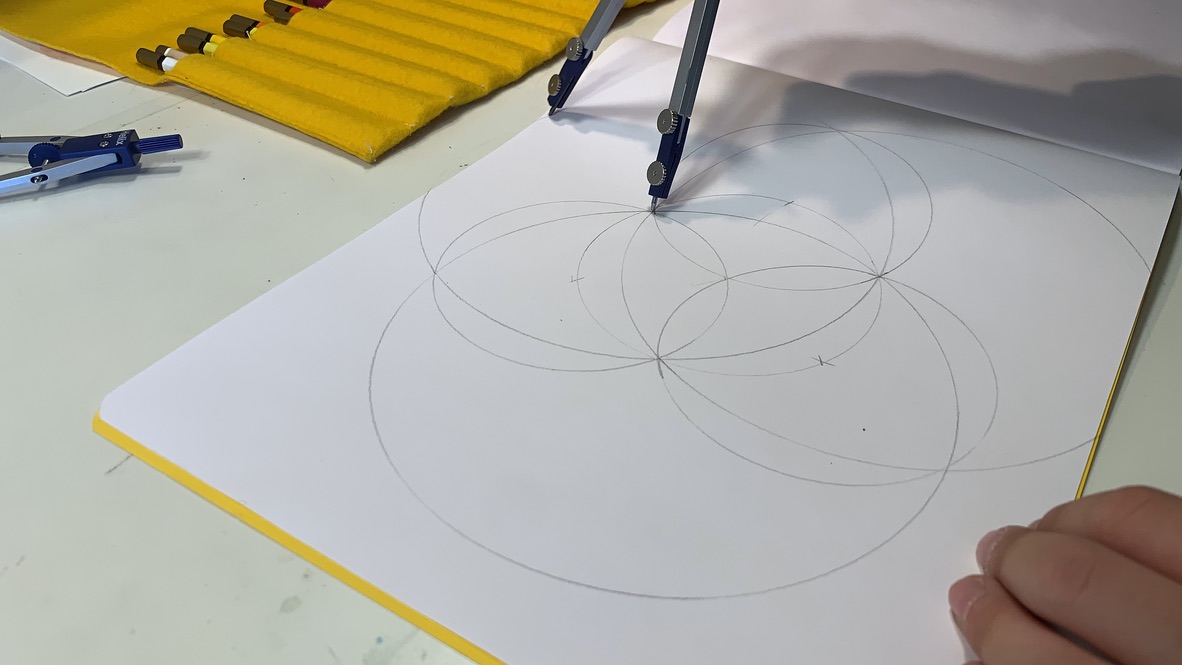
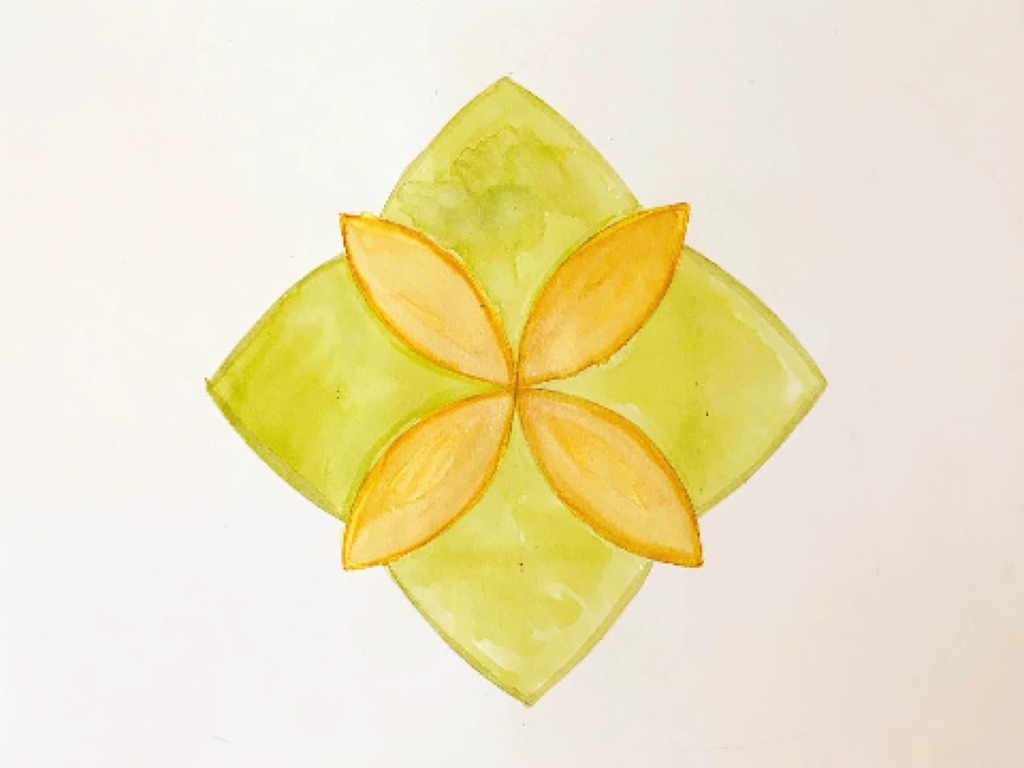
How To Draw 4-Fold Symmetry | Waldorf Geometry Tutorial
Today’s project is a tutorial for fourfold symmetry. You can explore this design and come up with creative ways to paint or color in the shapes. In this video I show you two ways to make 4-fold symmetry using the book Drawing Circle Images. You can find links to the materials I used in the blog post that accompanies this video. I use Distress Inks as my watercolor medium. I like the way these inks dry and the range of colors offered.
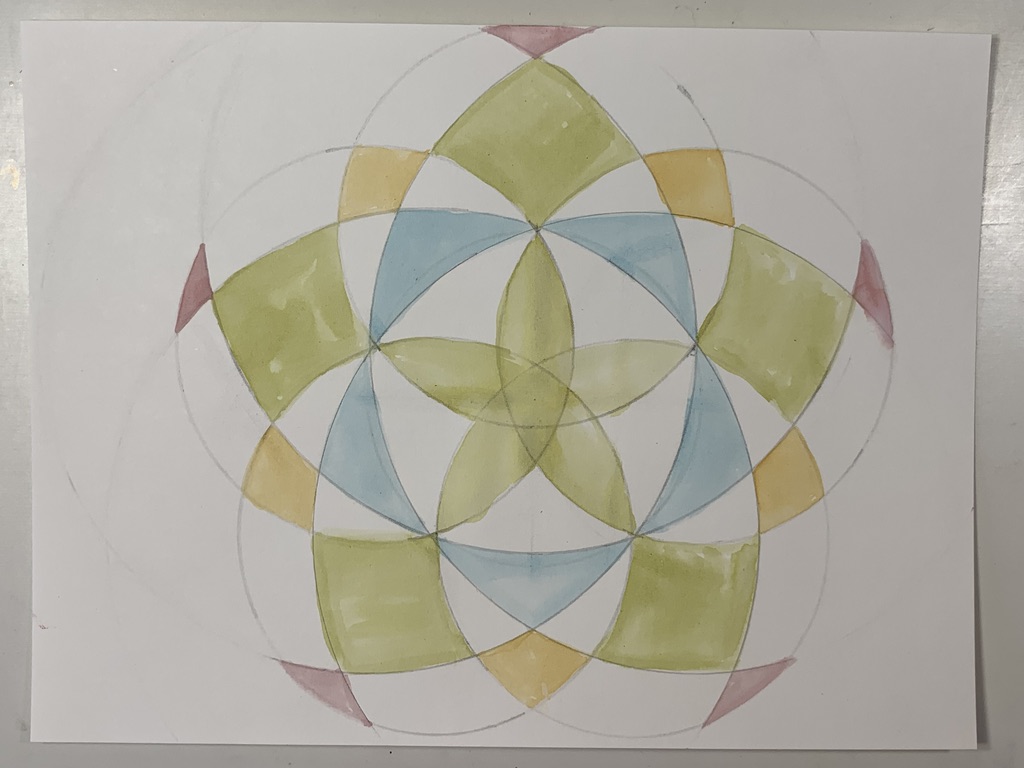
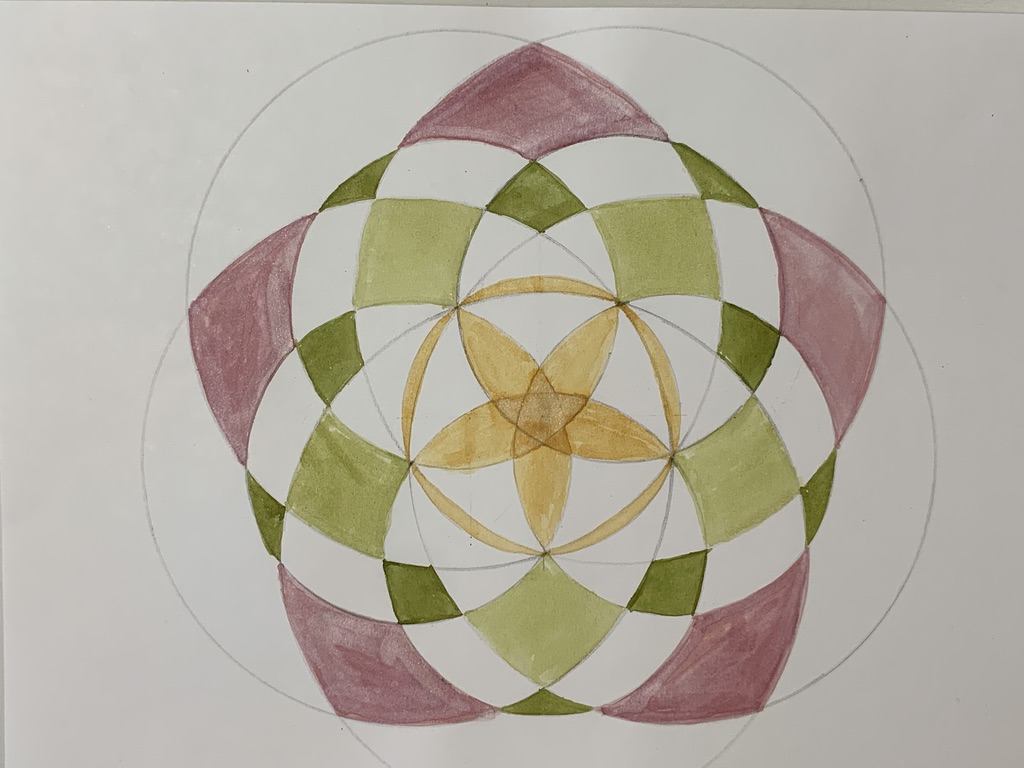
How To Draw 5-Fold Symmetry | Waldorf Geometry Tutorial
Fivefold symmetry is the first challenging shape to explore in my opinion. You begin with fourfold symmetry, then re-adjust your radius to to be the distance between the two arcs on the circle and place your compass on one point and draw a new arch. Connect the arcs with a ruler and now you have the two points which create the distance between each of the five arcs to get five-fold symmetry. This one took a while for us to achieve and there was a fair amount of starting over and frustration which I have edited from the video. I highly recommend that you buy Drawing Circle Images so you can have a step by step set of instructions because it does take a bit of practice for some of these. You can find links to the materials I used in the blog post that accompanies this video. I use Distress Inks as my watercolor medium. I like the way these inks dry and the range of colors offered.
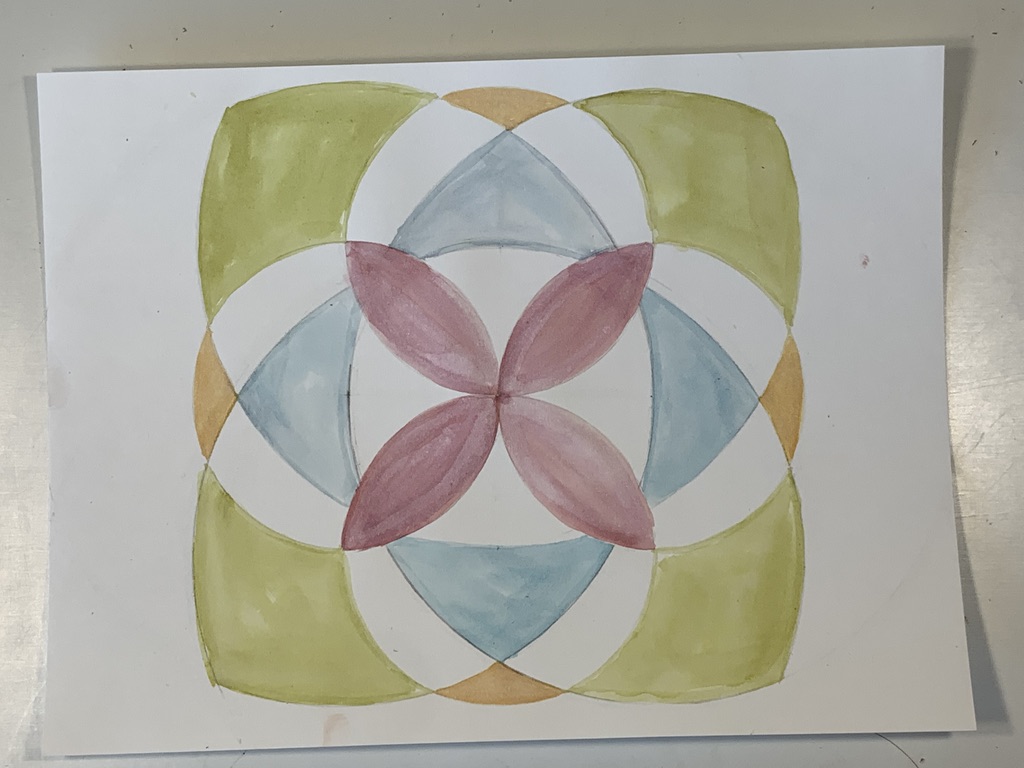
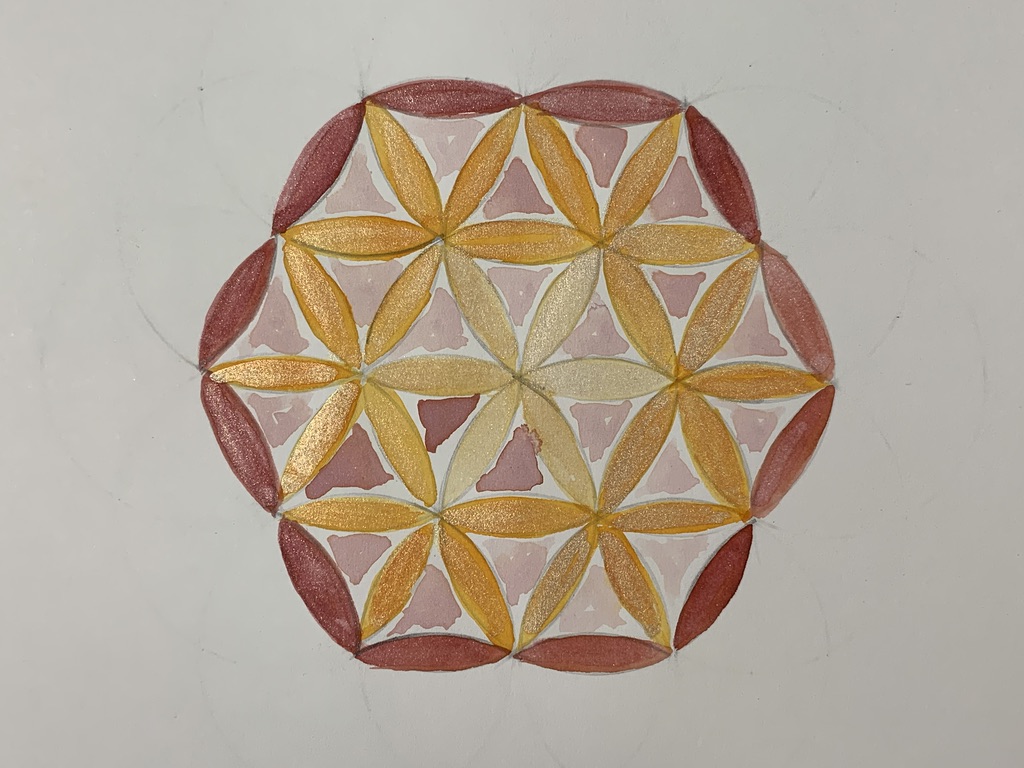
How To Draw 6-Fold Symmetry | Waldorf Geometry Tutorial
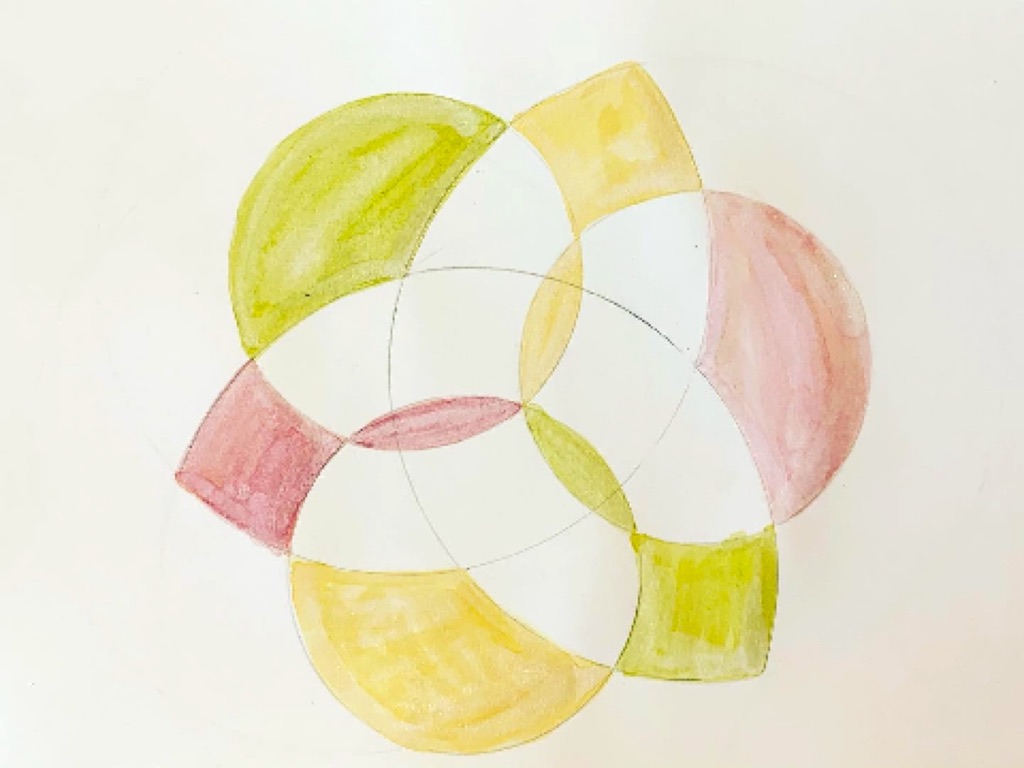
Sixfold symmetry is one of the easiest of the complicated designs, in my opinion 🙂 I find this one to be one of the most beautiful designs because from sixfold symmetry comes the hexagon and that shape is seen in tile work across the world. The design opportunities are endless. I love the way this one turned out and can’t wait to explore this design again. This is the easiest of the symmetries because the arcs to divide the circle into 6 parts is the radius. So all you have to do it position your compass on the circumference and mark 6 arcs. How you do your secondary circles and which parts you decided to fill in is where the uniqueness of each design comes through.

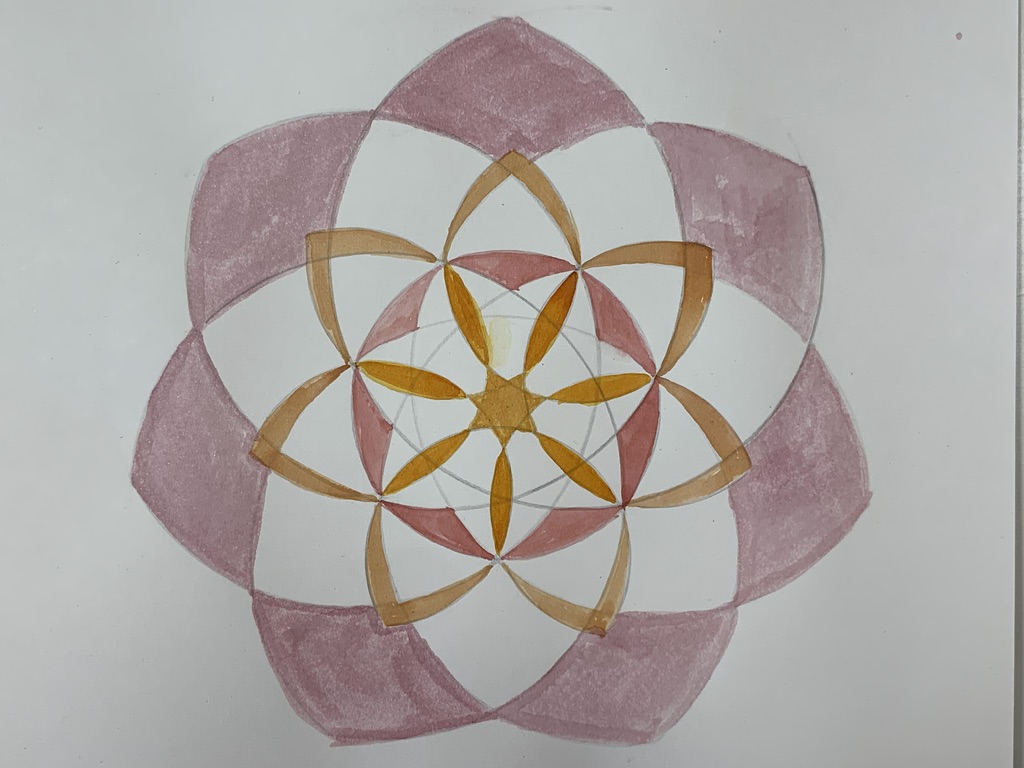
How To Draw 7-Fold Symmetry | Waldorf Geometry Tutorial
I LOVE 7-Fold symmetry. It’s my favorite of all the fold symmetries we did during this series. I love the way the center overlaps. Depending on how you paint it, you can get some spectacular results. For this tutorial we needed to follow the example in the book which included a table with measurements on what to set your compass to achieve the symmetry.

How To Draw 8-Fold Symmetry | Waldorf Geometry Tutorial
To construct eightfold symmetry, you need to start with fourfold symmetry which we did in an earlier tutorial. Once you draw arcs on the outside of the circle and and connect them to make a square, you can draw arcs between each of the four corners to achieve 8-fold symmetry. You can see two different designs emerge depending on how you color in each shape. I love the way this one looks in the end in part because of my color choices. What I like about this one is the intricacies of of the final result.

How to Draw 9-Fold Symmetry | Waldorf Geometry | Tutorial
Initially I thought ninefold symmetry would be simple because achieving 3- and 6-fold symmetry is fairly simply, but I was wrong. I attempted this several times and I show the challenges in the video, so you know this one isn’t as easy as it seems. For this shape, we need to follow the chart provided in the book. I adjusted and readjusted my compass multiple times but the divisions were not equal. Finally, after several attempts I got it. I’m glad I persevered because this turns out to be a stunning design in the end. Of all the designs so far, 7- and 9-fold symmetry are my favorite!
How To Draw 10-Fold Symmetry | Waldorf Geometry Tutorial
Tenfold symmetry is stunning! I love the designs in which the arcs don’t cross the center of the circle by spiral just around it instead. For 10-fold symmetry, you construct your circle as you would fivefold symmetry. Then at each of those arcs, you draw a line from the arc through the center of the circle to get a point on the opposite side of the circle. In this way, your original five arcs become 10 and now you can begin drawing small and large circles around each point. This design creates a unique circle interior which supports many choices in how to color in the design. Tenfold symmetry is a fun one to play around with.
How To Draw 11-Fold Symmetry | Waldorf Geometry Tutorial
Elevenfold symmetry is the last in the series where we needed to use the book’s chart to construct the divisions of a circle. In truth, I prefer the symmetries that can be achieved through geometry rather than through a chart that gives the measurements for the each circle. In the end, this design is beautiful and reminiscent to 12-fold symmetry which we have done before.
How to Draw 12-Fold Symmetry | Waldorf Geometry Tutorial
Twelvefold symmetry is very satisfying to make. You can construct 12 divisions of a circle using basic geometry. Once the 12 divisions are complete, you can choose which areas to paint or color in to give your final design a unique feel. I definitely like this symmetry, and what’s fun about it, is that you can continue to extend it beyond the page for additional spectacular designs. The book does suggest a design we opted not to use and if you buy the book, I highly suggest you try some of the designs we didn’t do.
More Geometry Videos!
12 DIVISION OF A CIRCLE | WALDORF GEOMETRY
Math is beautiful and arguably the most beautiful math is geometry. Geometric designs are all around us, and when we pause and recognize them, their mysteries are revealed. This lesson, the 12 division of a circle, is one such project. When a circle is divided into 12 sections with circles of the same diameter, the results are nothing short of stunning. Once the math is complete, it’s time to color or paint in the sections, allowing magnificent designs to emerge.
I’m using the Live Education Waldorf Curriculum for grade 6 for lesson inspiration and Josie Lewis Art for color inspiration for this project. Art supplies are from A Child’s Dream Stockmar watercolor paints, Paint Jars, Paint brushes are a mix of cheap synthetic fiber brushes and high quality all natural fiber brushes. I used 90lb. 14″x11″ watercolor paper by Fabriano and Resist medium.
The Beauty of Math | Waldorf, Geometry & Pi Day | March 14
It’s Pi Day again. On March 14th (3.14) mathematicians around the world celebrate the beauty and mystery of the circle. Today, I’m sharing three projects that we did for a geometry lesson as part of our Ancient Greece main lesson block.
The first project today is similar to one we did recently in which I walk you through constructing the 12 divisions of a circle. For this project I used Distress Inks by Tim Holtz in a range of colors from yellow to red to green. I used a resist medium to keep the watercolors from bleeding into other sections. I finished off the project with Mr. Huey’s Shimmer Spray in Shine. For the second project, I used my Silhouette Cameo to make an original design. I then cut out the pieces on kite paper and on adhesive backed cardstock to make templates. I placed the whole design on contact paper with I also cut on my Cameo. I did an alternative and arguably easier design by just layering twelve circles in rainbow color. Both look nice, but were really time consuming. If you didn’t have a Silhouette Cameo, you could use a cup to trace a circle. Cut a total of 13 and arrange 12 of them symmetrically around the first circle. Then remove the original circle and you’re left with a similar design. It looks great on kite paper or tissue paper so the light can shine through.
Pi Day Math Books, Activities and Crafts
What’s Pi Day? It’s the 14th day of March 3.14! It’s just a fun day to celebrate this amazing number. Do you even know how to find pi? It’s actually pretty easy to find, and we got pretty close to pi. How close? Check out the video to find out! I also share 3 projects, 1 game and 4 books…get it? 3.14 😉
Don’t forget to check out the other channels participating in the Pi Day festivities: Pi Day Playlist
If you like the game, here’s a tutorial I made on how to play it as well as others like it. 24 game is a fun, challenging and educational math game. I also share my Geometry projects on my channel. These are creative, artistic math projects that are both educational and enjoyable to do. We got a lot of our ideas from our Waldorf curriculum as well as the book String, Straightedge and Shadow geometry book.
How To Do A MATH Unit Study | GEOMETRY
Geometry is one of my favorite main lesson blocks and I have a few videos on how I put together a Math and Geometry unit. Enjoy this first look at how I put together a unit from the YouTube archives! Along with the math picture books and Waldorf curriculum you can also see a number of math games we love.
Division of a Circle: Geometry
While reading the book “String, Straightedge, and Shadow” by Julia E. Diggins, we came across the chapter that explains the six-part division of a circle and we decided to recreate the project. For this project you’ll need a compass, watercolor paper, watercolors, embossing pen, embossing powder and an embossing tool. You can skip watercoloring this image and simple do the six division of the circle using a compass. You can color in the image with color pencils or leave it blank.
Chalk Drawing: Geometric Shapes
As part of our Waldorf geometry unit, we are learning how to create shapes by shading them from the periphery, from the center and from intersecting lines. Join me as I make three chalk drawing to accompany this unit. These drawings are for the first couple lessons in geometry and serve as an introduction to shapes. We depart shortly from the lesson plan to spend more time and the terminology of quadrilaterals and explain the various types (rectangle, square, parallelogram, etc.) and some attributes of each before moving on to the next lessons.
Triangles | Geometry & Art
Today we are making triangles from intersecting lines. We’ll only color in the triangles formed and leave the other shapes blank. We are using a Waldorf curriculum from Live-Education. Watercolors and watercolor paper can be found at Blick Art Materials. Embossing pen, powder and heat tool can be found at local craft stores. This is a beautiful representation of triangles created by intersecting lines. You have to make sure not to color in other shapes, so it encourages you to pay attention to the angles and sides of each shape. This project was for my 8th grader, but my 4th grader joined in and did a great job too. Alternatively, you could do this project with penciled lines filled in with color pencil.
Geometry: Symmetry with Triangles
Today we are making symmetrical images using triangles. We are using a Waldorf curriculum from Live Education. Other materials used for this project: watercolor paper, spray adhesive, watercolors (we used distress inks), and scissors or the Silhouette Cameo. After cutting and coloring multiple sets of triangles, we assembled mirror images on a paper sprayed with adhesive. The whole project can be laminated to keep the pieces in place. This an artistic representation of symmetry and geometry.
Geometry: Organic Shapes from Triangles
How can you shape a curved image from triangles? Watch this video to find out. We cut small triangles out of watercolored paper and turned it into a beautiful organic image that resembles a fern or droopy leaf. We are using a Waldorf curriculum from Live Education. Materials for this project: Colored paper, paper, scissors, spray adhesive or glue stick. Materials can be found at local crafts stores.
Geometry: Cascading Triangles
Cascading triangles are a beautiful representation of triangles in motion. You can simplify this project and just draw it with pencil for a stunning image that appears to be moving or you can add color in with watercolor pencils or color pencils. Materials for this project include paper, ruler, pencil and color pencils. Duration: 10-20 minutes Level of difficulty: easy
Interior Angles of a Triangle
This quick and easy projects demonstrates how the interior angles of a triangle equal 180 degrees. All you need is a piece of paper and a pair of scissors.
Geometry: Degrees of a Circle
While working with our Live Education Waldorf curriculum from we decided to do the project on “Angles and Degrees” three different ways. We’ll do this project with watercolors, watercolor pencils and color pencils. We will divide the circle into acute angles, a right angle and an obtuse angle. We will color in each section with a different color, then mark the angle. he first project uses watercolors, embossing powder and an embossing pen. This method involves special tools and materials that can be found at local craft stores or from Blick Art Materials. Materials for this project: watercolor paper (or drawing paper), watercolors (we used Distress Inks), embossing pen, embossing powder, and heat tool. You can also do this project with watercolor pencils or color pencils. Tools needed: protractor, compass and a ruler.
Pythagorean Theorem
How did Pythagoras show that the square of two sides of a right triangle equal the square of the hypotenuse? Watch as we recreate the proof from the 6th century. First we will construct a square with only a compass and a straight edge, just as Pythagoras would have done (only he might have used string instead of a compass). Then we will construct a smaller square within that square. Further divisions of the square will reveal that squares of the smaller sides of the triangle will equal the square of the hypotenuse. This is an amazing demonstration that you will be fascinated by. This visual demonstration clearly shows the Pythagorean theory.
How to Make a Perfect Square: A Geometry Demonstration
While reading “String, Straightedge and Shadow” by Julia Diggins, we came across a chapter on constructing a square using ‘string’ and ‘straightedge’. Watch as I show you two methods for creating a perfect square, just as Pythagoras himself would have done…only we use a compass instead of string 🙂
Geometry: How to Make a Hexagon and an Equilateral Triangle
This short demonstration show how to construct a hexagon and an equilateral triangle using just string and straightedge, or in today’s terms a compass and a ruler. We are reading the book “String, Straightedge and Shadow” by Julia Diggins for our geometry unit for homeschool. We learned how to make six equal divisions in a circle to construct a hexagon. I’ll also show you how to make a single equilateral triangle.
Geometry: How to Make the Five Regular Solids from Paper
Watch as we make three dimensional ‘solids’ from paper. We used 90lb. watercolor paper and our Silhouette Cameo to make the five regular solids as discovered by Pythagoras in the 6th century BC. We were inspired by the book “String, Straightedge and Shadow” by Julia Diggins which we are reading for our geometry unit for homeschool. If you don’t have a Silhouette Cameo to cut out these shapes, don’t worry! Just go to my website and download the template and make them on your own. All you need is a printer, scissors and tape!
Tangrams
After reading the book The Warlord’s Puzzle, we decided to make our own set of tangrams. I took a picture of the tangrams from the book and imported it into my Silhouette Cameo‘s program. I traced the image and reconfigured them and then used the Cameo to cut the shapes.
How To Make A Mandala
As part of our geometry unit we decided to piece together a mandala using watercolor paper we painted in beautiful autumn colors and cut into diamonds and triangles using our Silhouette Cameo. You can find the watercolor paper, watercolors (we used Distress Inks by Tim Holtz) and spray adhesive from Blick Art Materials. We found inspiration for this project from the image on the cover of our Live-Education Geometry curriculum. We sprayed our paper with spray adhesive and then assembled the mandala with triangles and diamonds. The pieces adhered well, but we sent the finished pieces through the laminator to ensure that none of the pieces would fall off. These make nice decorations for fall and can be easily hung in a window.
How To Make The Five Regular Solids: Plato Glo Mobile Kit
We used the kit “Plato Glo Mobile” from Rainbow Resource to make sturdy three dimensional shapes. The five regular solids were discovered by Pythagoras and his Secret Brotherhood in the 6th Century BC. We recreate them using bamboo sticks and the rubber connectors. If you don’t have this kit, don’t worry! You can use toothpicks and wax (or Play-Doh or clay). I show you how easy it is to use the materials you probably already have around the house.
Opening Activities for Geometry Block
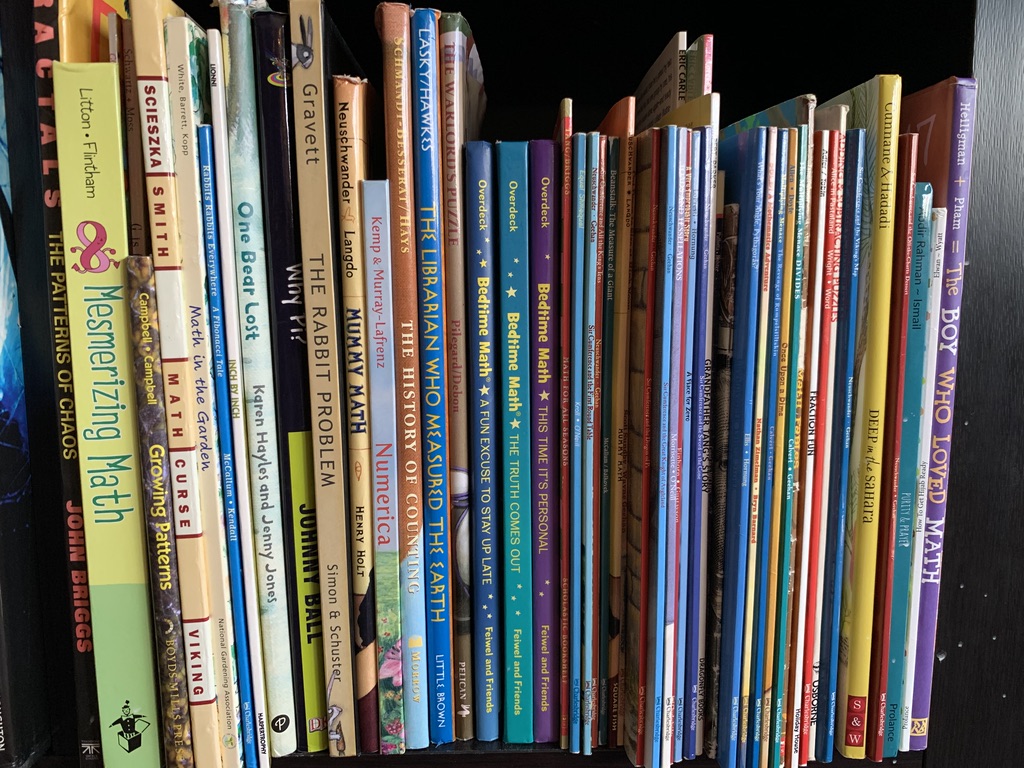
Math Picture Books
I love adding picture books to our main lesson blocks, and I’m so pleased with the math picture books that are available now. For a complete list of math picture books that we’ve used over the years, check out this blog post.
Math Games
We love our math games! In fact, I made a whole blog post just on the math games we love and play regularly, as well as some we only moderately love and play occasionally. Check out math games blog post here.
Mental Math
Mental math is the process of doing math problems in your head. Generally it’s math you already know, but are aiming for proficiency and mastery. Mental math calls on capabilities of memory, math ability and the ability to work out math problems in your head without a paper and pencil or calculator.
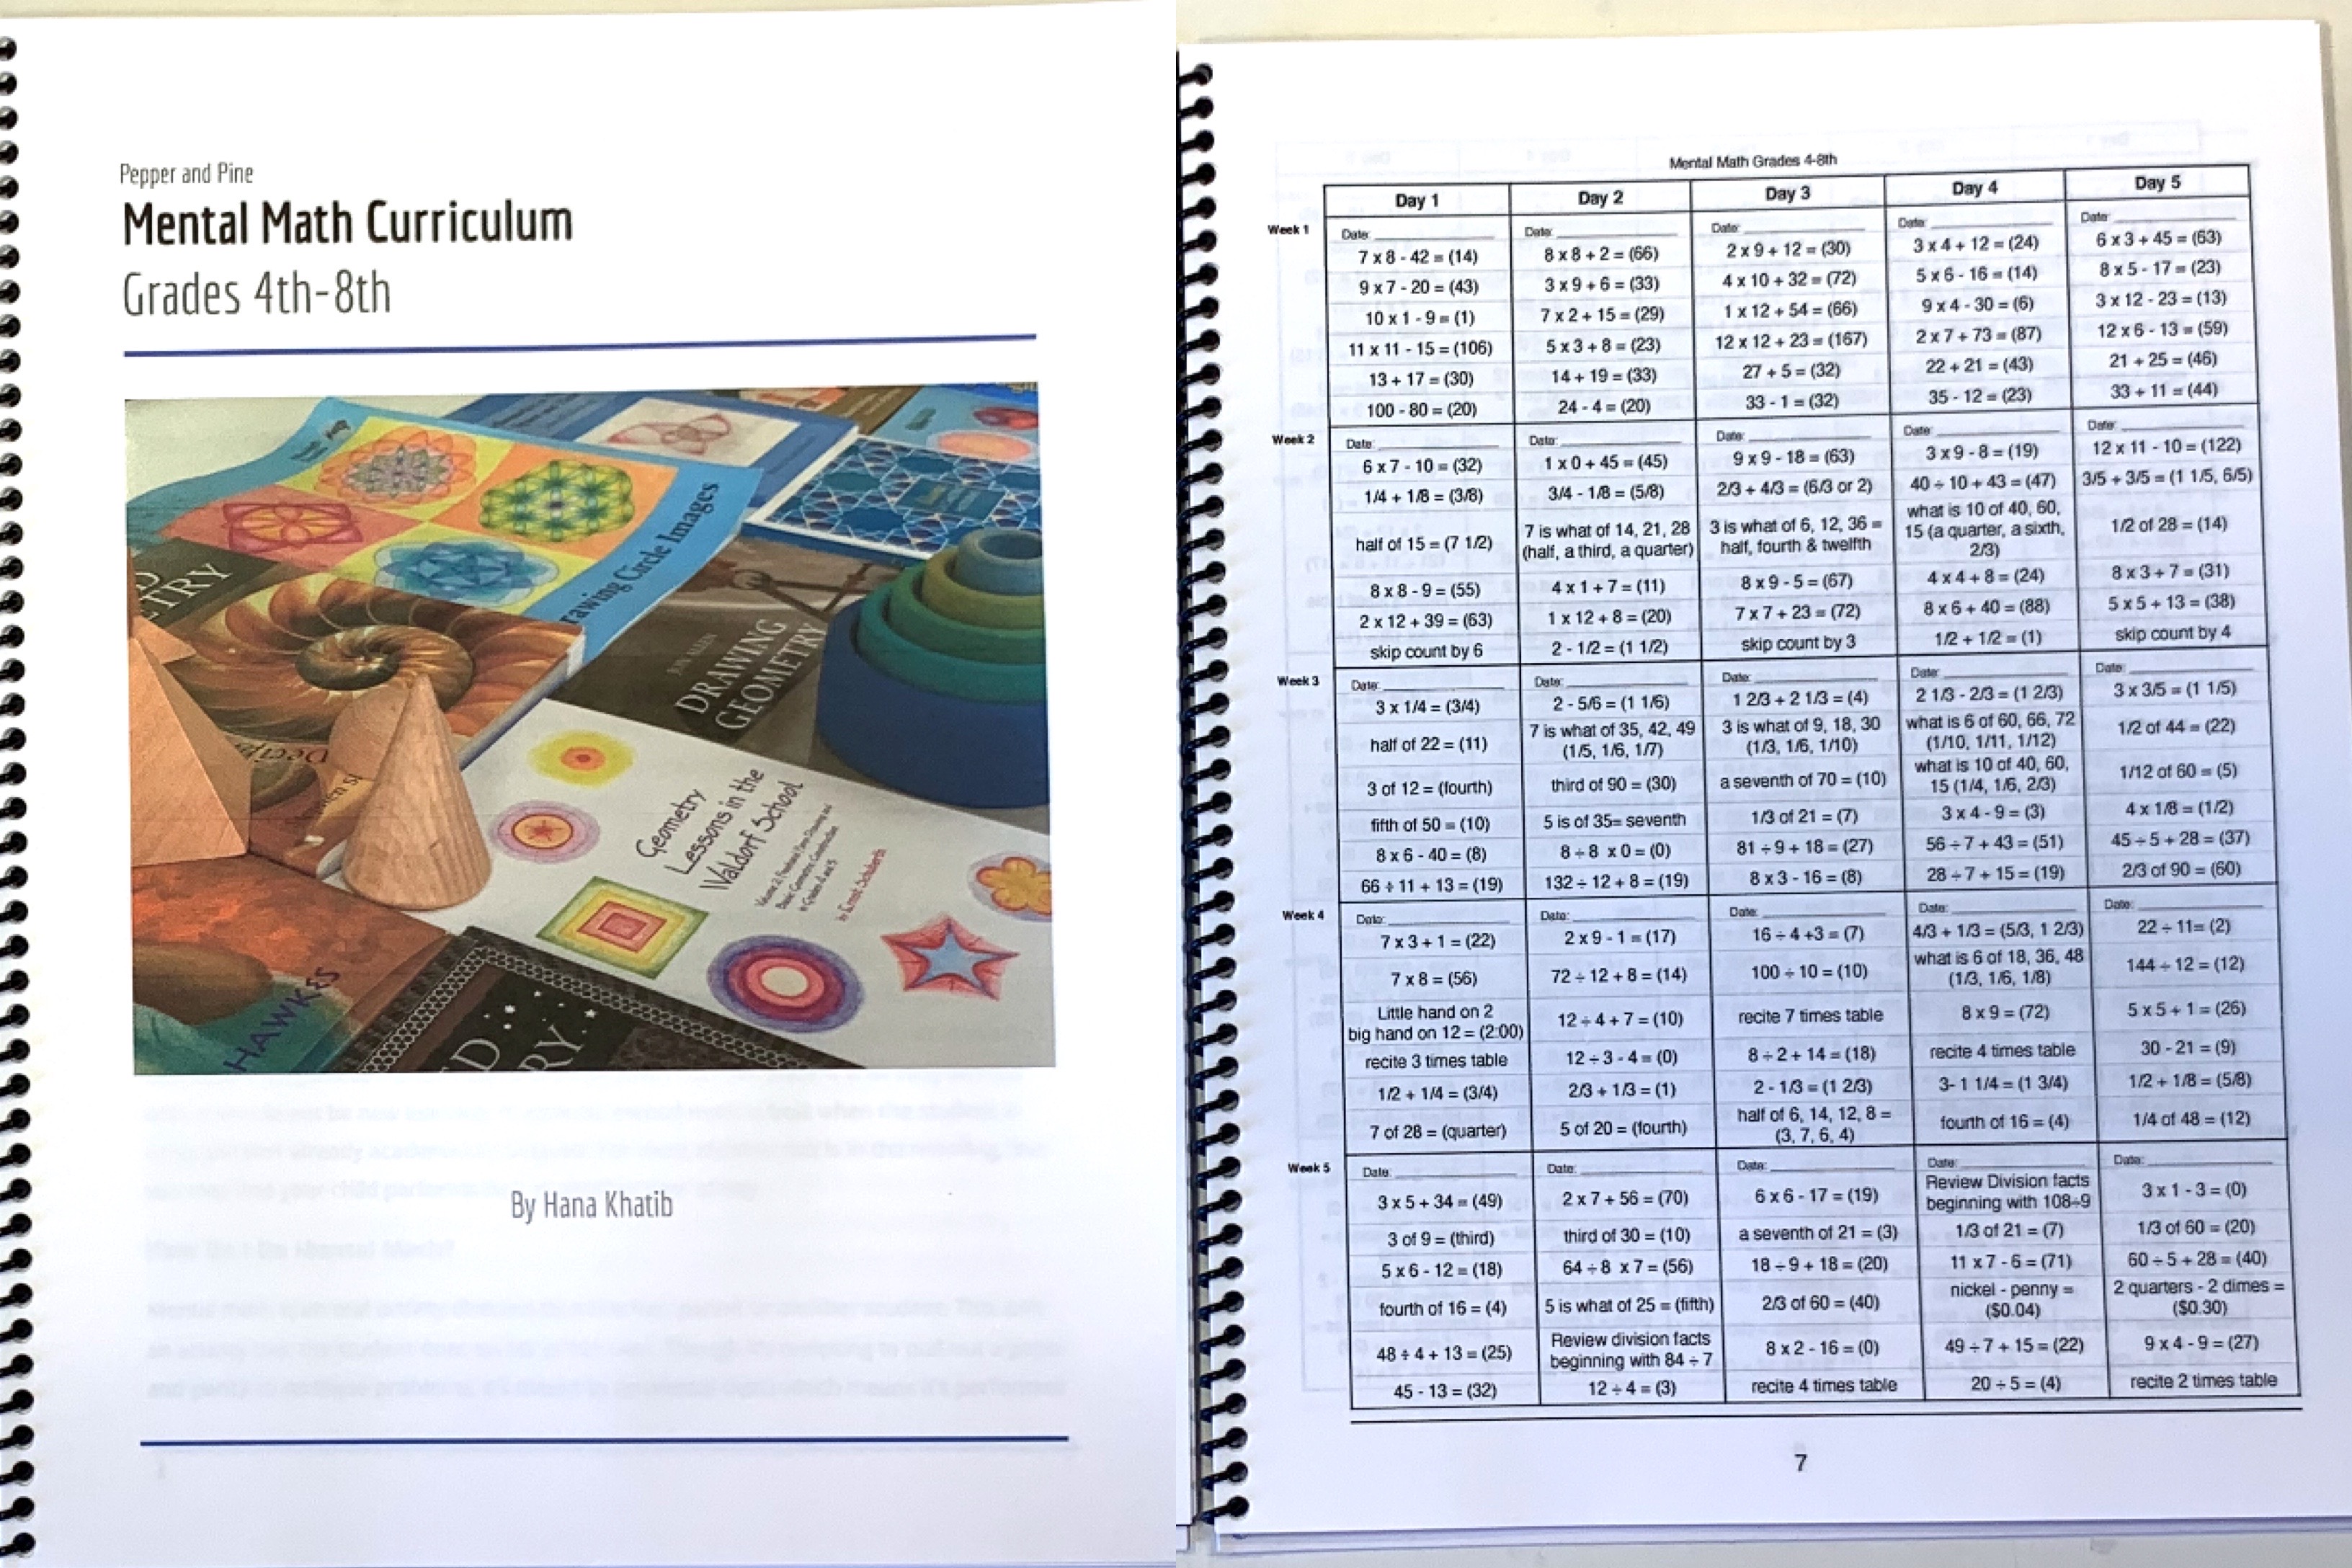
Mental math the Waldorf inspired way (and with my own additions), involves two part questions (more so as the children grow, less so when they are first starting out), in which two different math operations are completed in one problem. One other significant difference you’ll find with mental math the Waldorf way is that sometimes the answer is offered and the solutions are discovered. It looks something like this: “What makes 12?” You ask a student. “3 x 4,” a student offers. “4 x 3,” another student says. “6 x 2” another chimes in. “24 divided by 2,” yet another student says. You can quickly see how many answers there can be. While not many questions are posed this way, they are scattered throughout the worksheets.
Thank you for the detailed Waldorf Math ideas and lessons shown on Youtube. Very appreciated!! 🙂
Thank you so very much for this very detailed blog post! I love it. It will be very helpful. I am really interested in the Live Education! Geometry and Numbers curriculum but saw on their website one cannot purchase it unless buying the entire curriculum. Are there ways to purchase it by itself, possibly used? If so, where?