Upcycled, repurposed and beautiful
I love making things. I love the creative aspect of crafting. I love it even more when I can repurpose items. Here is a collection of projects and tutorials that don’t require a lot of time, and often you can do them with things you have around the house.
Clothespin Planner | Meal Planner
These fun clothespin planners are a great way to visualize your week, especially if you have children. You could use them to show the activities you have planned, or who you are visiting but adding photos or images to the clothespins. We are using ours to meal plan. I have magazine clippings and personal photos of the recipes we would like to try to ones we already love that are our visual meal planner for the week. I have a huge stack of recipes from Hello Fresh, as well as dozens upon dozens of magazine recipe clippings that the children and I can choose from. I find the images of the food we want to make more appealing than a written meal planner and this way the family always knows what we are having and can make requests on their own.
Then when it comes time to shop for the week, I can see what ingredients I need based on the recipe directions from the recipe card or magazine clipping (or my personal photos which I’ve included my recipe on the back). I love this new way of meal planning as it involves the whole family in a fun and interactive way. I’ve been taking photos of the meal and recipes I make for years and years, so now my next project is to make my own recipe cards on 4″x6″ prints and store them in a recipe box so the family can easily pick and choose based on the meals I’ve made in the past.


How to Make an Oil Diffuser
Recently a friend gifted us a diffuser. The ones with sticks in a jar. My 10-year-old daughter loved it! And asked if we could make them. As a homeschooler and avid crafter, not only did I say yes to the idea, we did it right then! I repurposed various supplies and thankfully, I had everything on hand. We used old honey jars and other decorative jars we had been saving, I have a variety of essential oils to choose from, we used 1/8 inch dowels (you could use bamboo skewers) which I bought to make double pointed knitting needles, I had sea glass from our visits to the beach and gems and crystals from our geology unit for homeschool.
I trimmed down the dowels using a hand saw to 9 inches, but you can choose any size. The ones we bought were 12 inches long. I added decorative stones and gems or sea glass to the jar and filled it with water. I added 10-20 drops of essential oils. I used Young Living Peace and Calming and my daughter use Butterfly Express Spearmint. We inserted the dowels and stirred the oil into the water. It will naturally rest on top and eventually the water and oil will creep up the dowels.
After about 12 hours, your space will fill with the scent of your diffuser. Air circulation will affect the reach of the scent. I find them to be quite strong, especially in a small space like a bathroom. We put them all around the house. I like that they are all natural as I’m sensitive to perfumes and strong smells. We’ve only just made these so I don’t know how long they will last, but you can leave a comment if you are curious, or you can message me on Instagram.
This project was super fast and my daughter ended up making 5 within an hour. To make it easier for her, she skipped trimming the dowels. She looked around the house for jars and would have made more if she had found more jars. I think they make a great gift and find them to be a wonderful project for children because it’s so easy. Adult supervision is necessary when working with essential oils.


1 Minute Crafts | Upcycle a Tin Can
This is a super easy upcycling craft you can do with any tin can and some decorative paper. Just use electric tape along the edge of the can to protect yourself from sharp edges. File down any protruding edges before applying tape. Use double stick tape to adhere scrapbook or watercolored paper to the outside of the tin can. Be sure your can is thoroughly cleaned inside and out before taping your paper in place.
Check out my other tutorial videos here!
How to Cover a Macbook Box | DIY Upcycling Tutorial
Did you recently get a laptop? Before recycling that box, consider covering it and make it a stylish decorative box. Make sure it’s well made and sturdy. All you’ll need for this project is lokta paper (found at dickblick.com), spray adhesive, scissors (I prefer non-stick scissors), label pulls, and metal brads. You can find a lot of supplies from Blick Art Material. The Metal pulls can be found at LillianOlive Etsy shop. Duration: 15 minutes Level: intermediate Cost: $5/large box, less for the smaller boxes
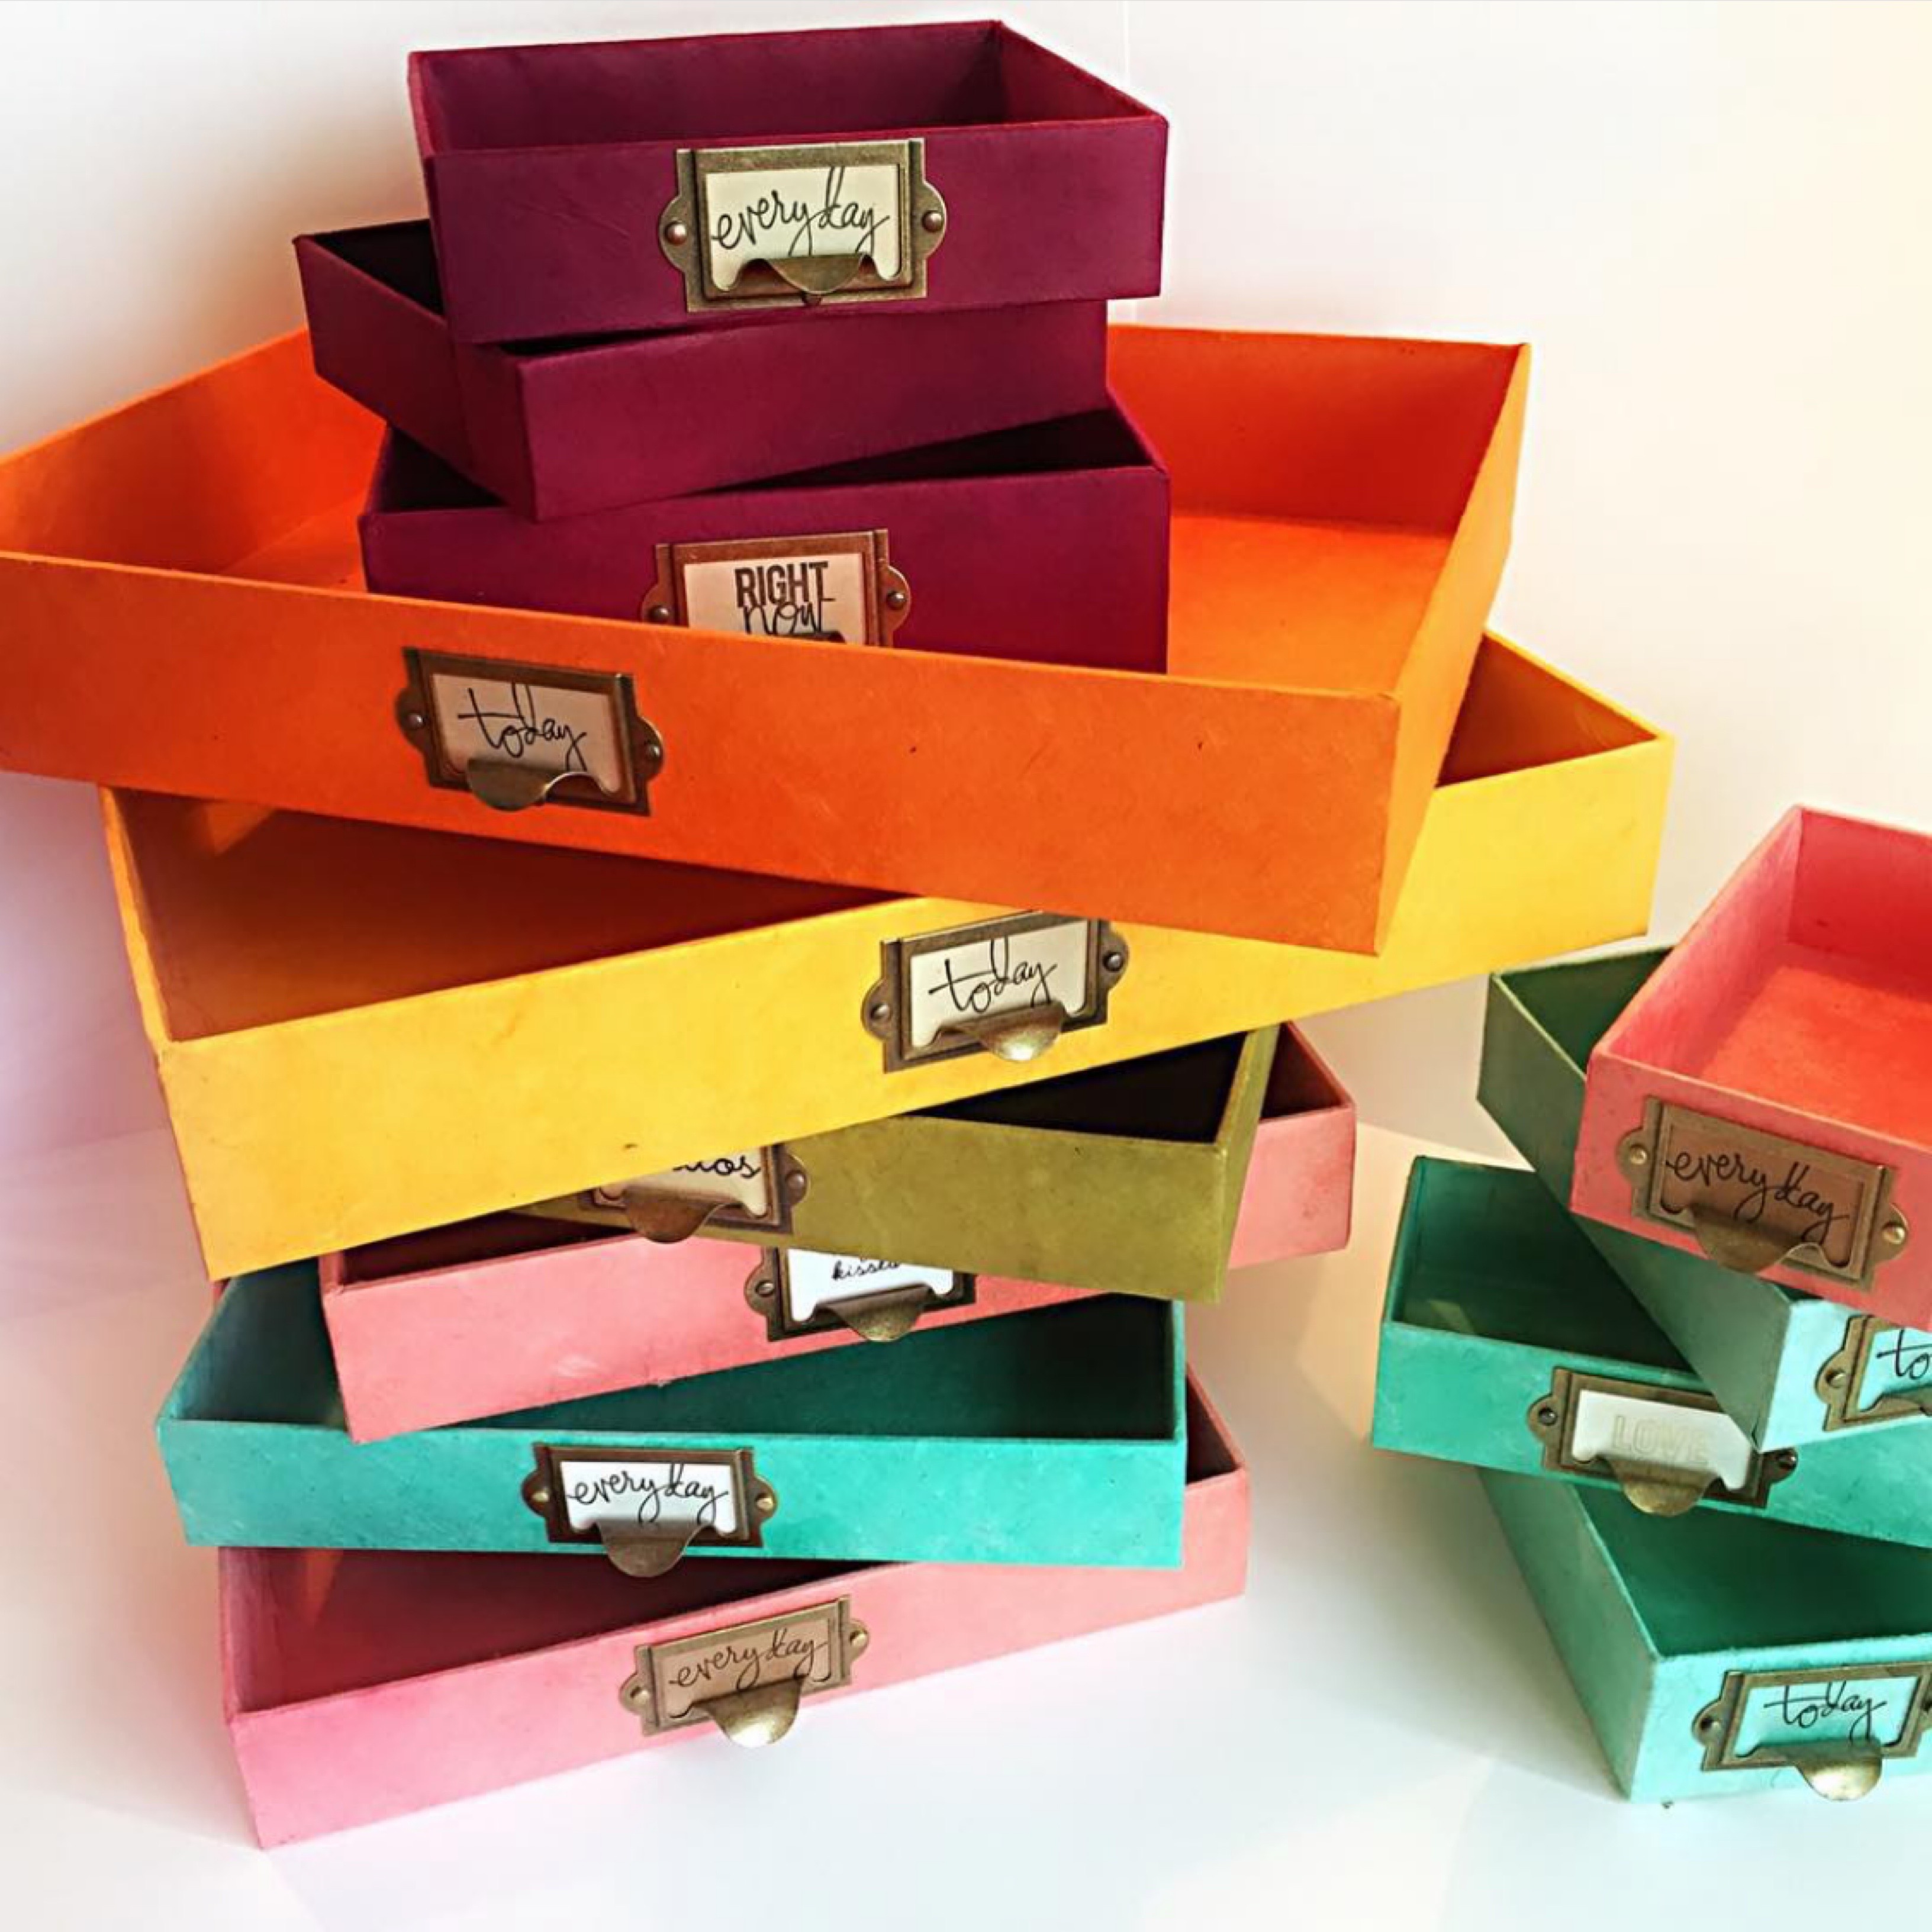
How to Make a Decorative Box | Upcycle DIY Project
Guess what!? I was going through the Pepper and Pine video archive and missed this video! I never released it, though there are several similar to this one that I did. I thought I’d share this blast from the past. I made this video over 2 years ago when I had just started my channel. I hope you enjoy this little bit our Pepper and Pine history. Upcycle any box! In this double tutorial, I make some mistakes. Watch to see how you can remedy some problems associated to cover boxes in this upcycling tutorial. Make sure it’s well made and sturdy. All you’ll need for this project is lokta paper (found at dickblick.com), spray adhesive, scissors (I prefer non-stick scissors), label pulls, and metal brads. The Metal pulls can be found on Etsy.
How to Cover Any Box | Upcycle Tutorial
Upcycle any box! Make sure it’s well made and sturdy. All you’ll need for this project is lokta paper (found at dickblick.com), spray adhesive, scissors (I prefer non-stick scissors), label pulls, and metal brads. The Metal pulls can be found on Etsy.
Upcycle an iPhone Box | DIY Tutorial
Upcycle your iPad, iPhone or Macbook boxes into these charming decorative boxes. For this project you’ll need any sturdy box. I find that the Apple products boxes or any sturdy made box, Lokta paper (found at dickblick.com), spray adhesive, scissors (I prefer non-stick scissors), label pulls, and metal brads. The Metal pulls can be found on Etsy.
Upcycle an iPad box | DIY Tutorial
Upcycle your iPad, iPhone or Macbook boxes into these charming decorative boxes. For this project you’ll need any sturdy box. I find that the Apple products boxes are really well made but any sturdy made box, Lokta paper, spray adhesive, scissors (I prefer non-stick scissors), label pulls, and metal brads. The Metal pulls can be found on Etsy.
Upcycle Project | How to Make Pencil Holders from Tin Cans
Take any tin can and transform it into a pencil holder. Or use it to organize your art supplies! This super easy project is so satisfying and easy. Cover your cleaned tin can with construction paper, cardstock or make your own with watercolor paper. I’ll show you two techniques using Tim Holtz Distress Inks as watercolors. For this project you’ll need clean tin cans (any size) watercolor paper, watercolors, paint brushes, double-stick tape, clear tape, electrical tape, scissors and salt (optional). This is a great upcycling project that kids and adults will have fun doing.
How to Make Bar Lotion and Lip Balm
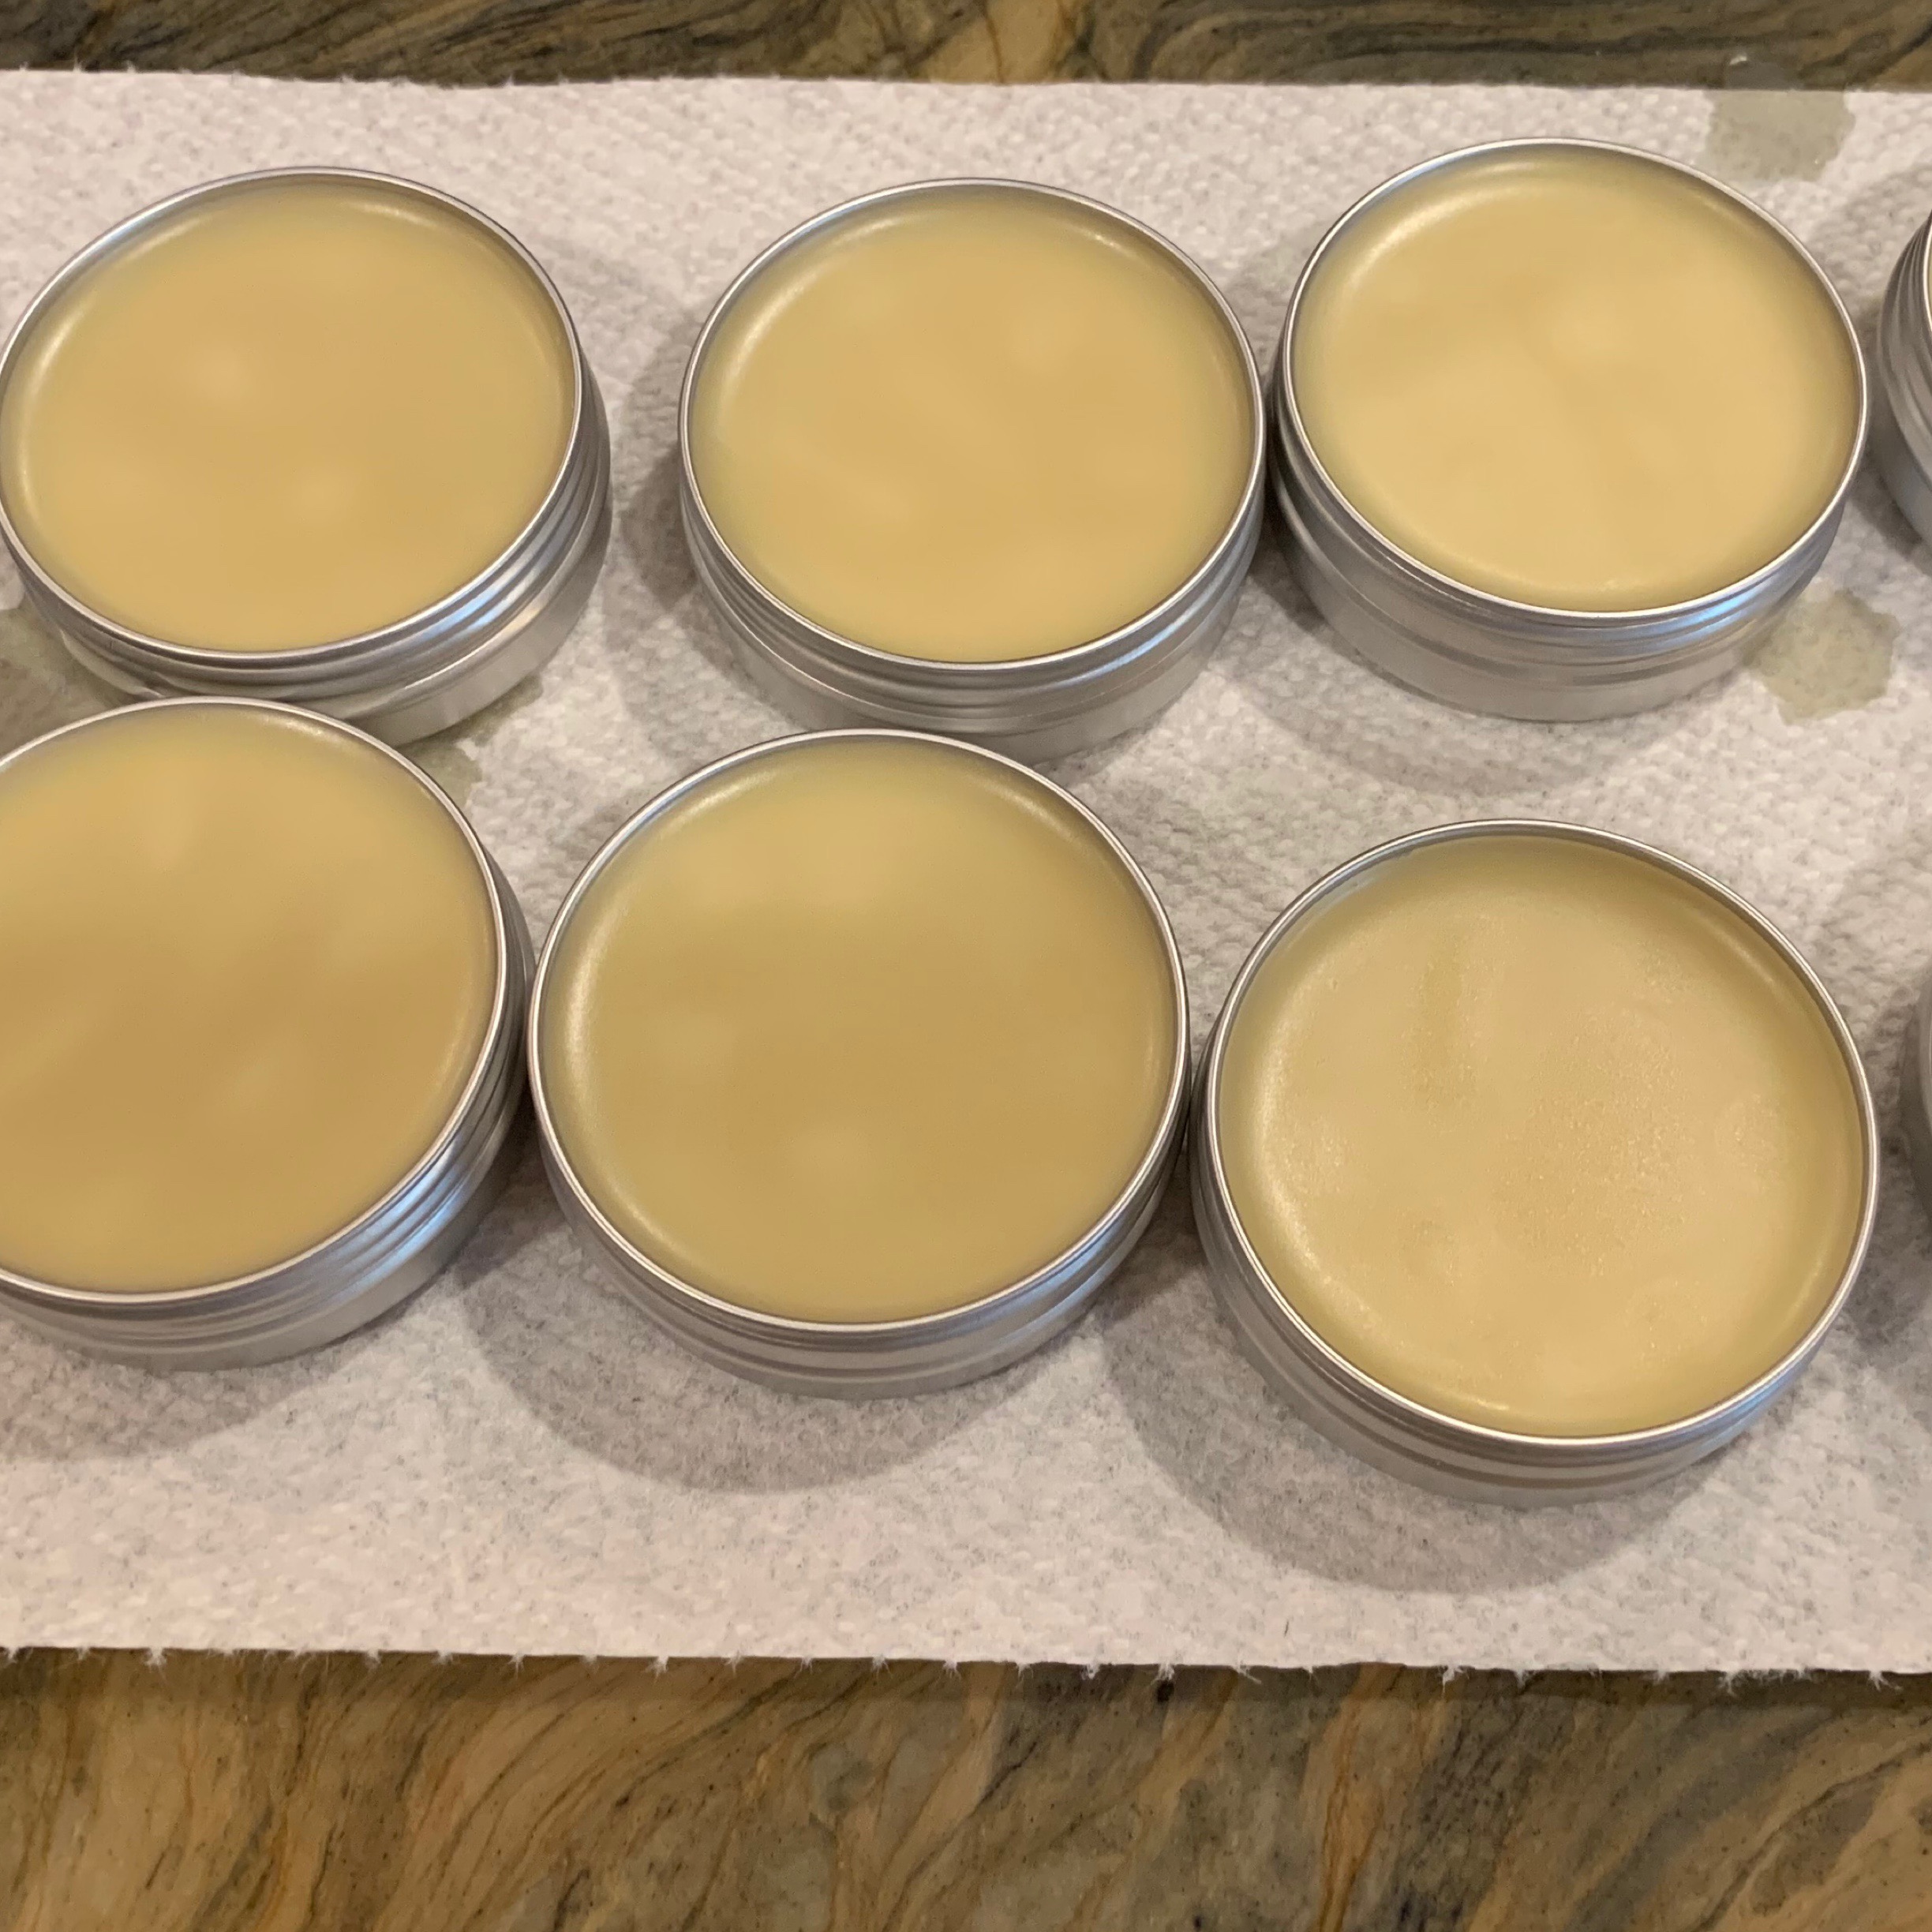
This is hands down the best lotion ever! I’ve upgraded the ingredients, and this time around, I’m loving this even more than the first time we made bar lotion. This formula is super simple and the supplies are easy to find. I purchased everything from Amazon except the coconut oil which I got from Trader Joe’s.

Bar lotion formula: 1:1:1 ratio of Coconut Oil, Texas Beeswax, and Shea Butter. I used 1/2 cup of each with 2 teaspoons of lavender oil for the bar lotion. For the lip balm, I used 1/4 of each ingredient and 2 teaspoons of peppermint oil.
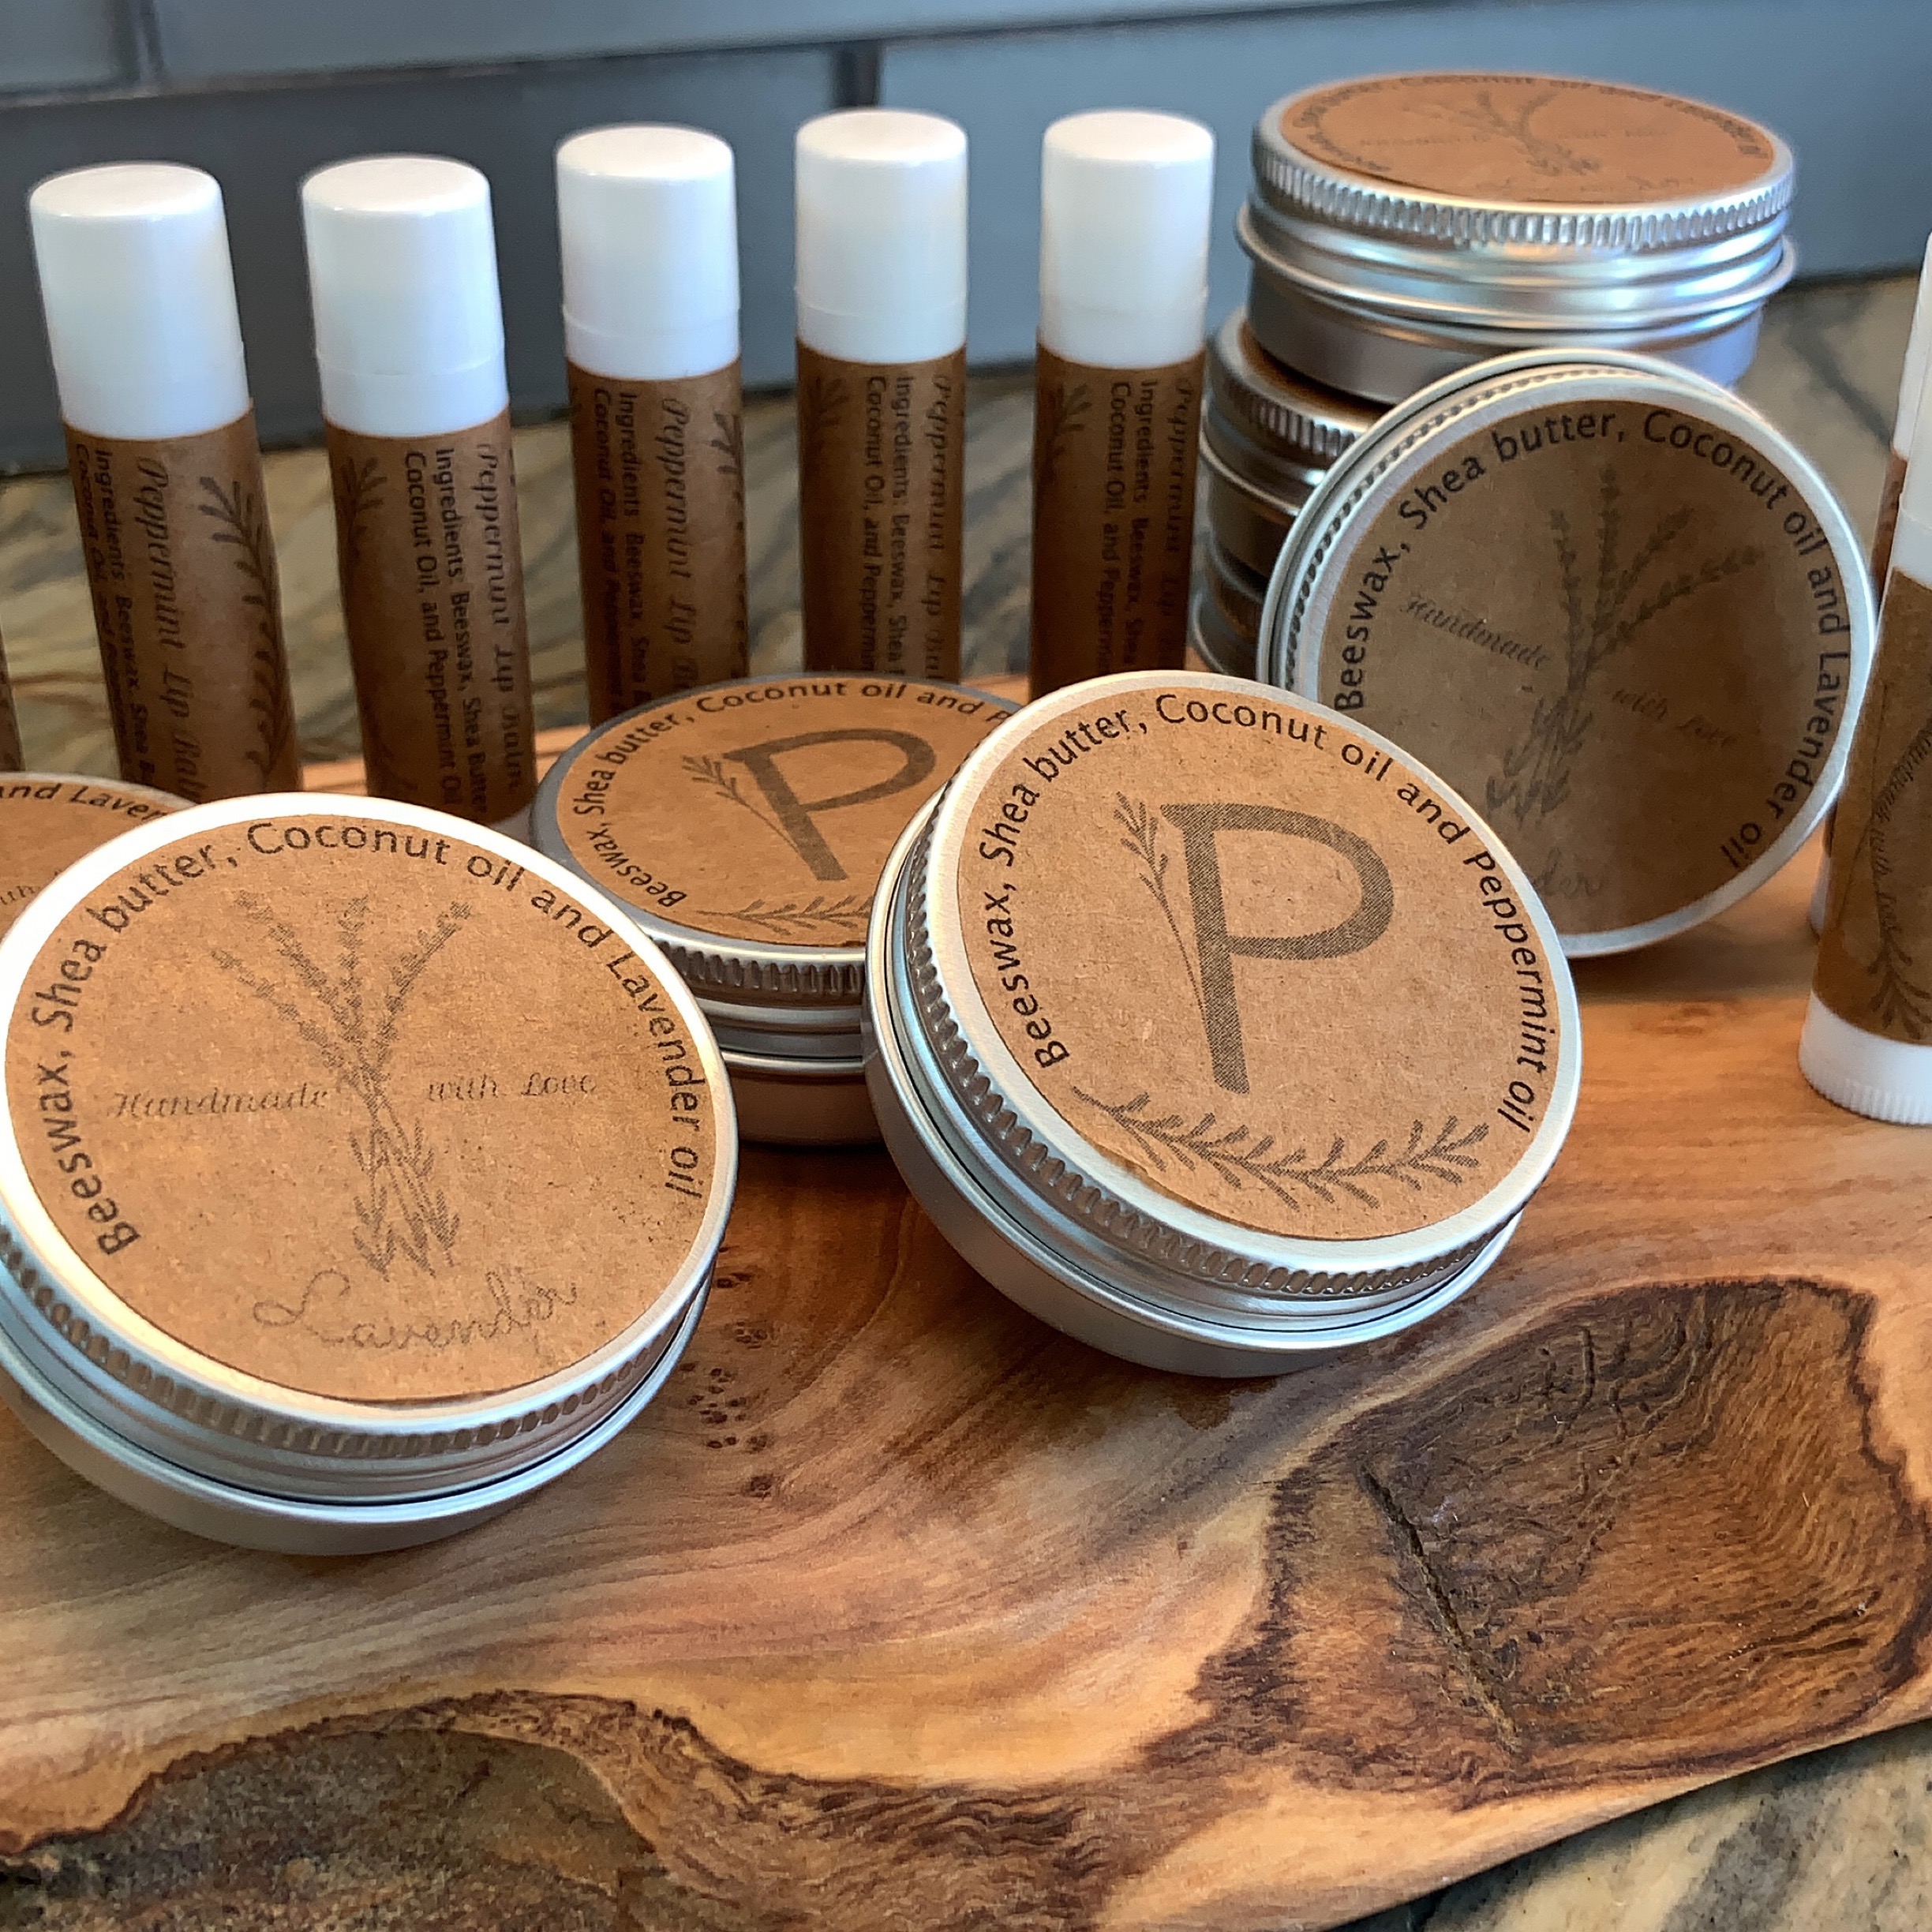
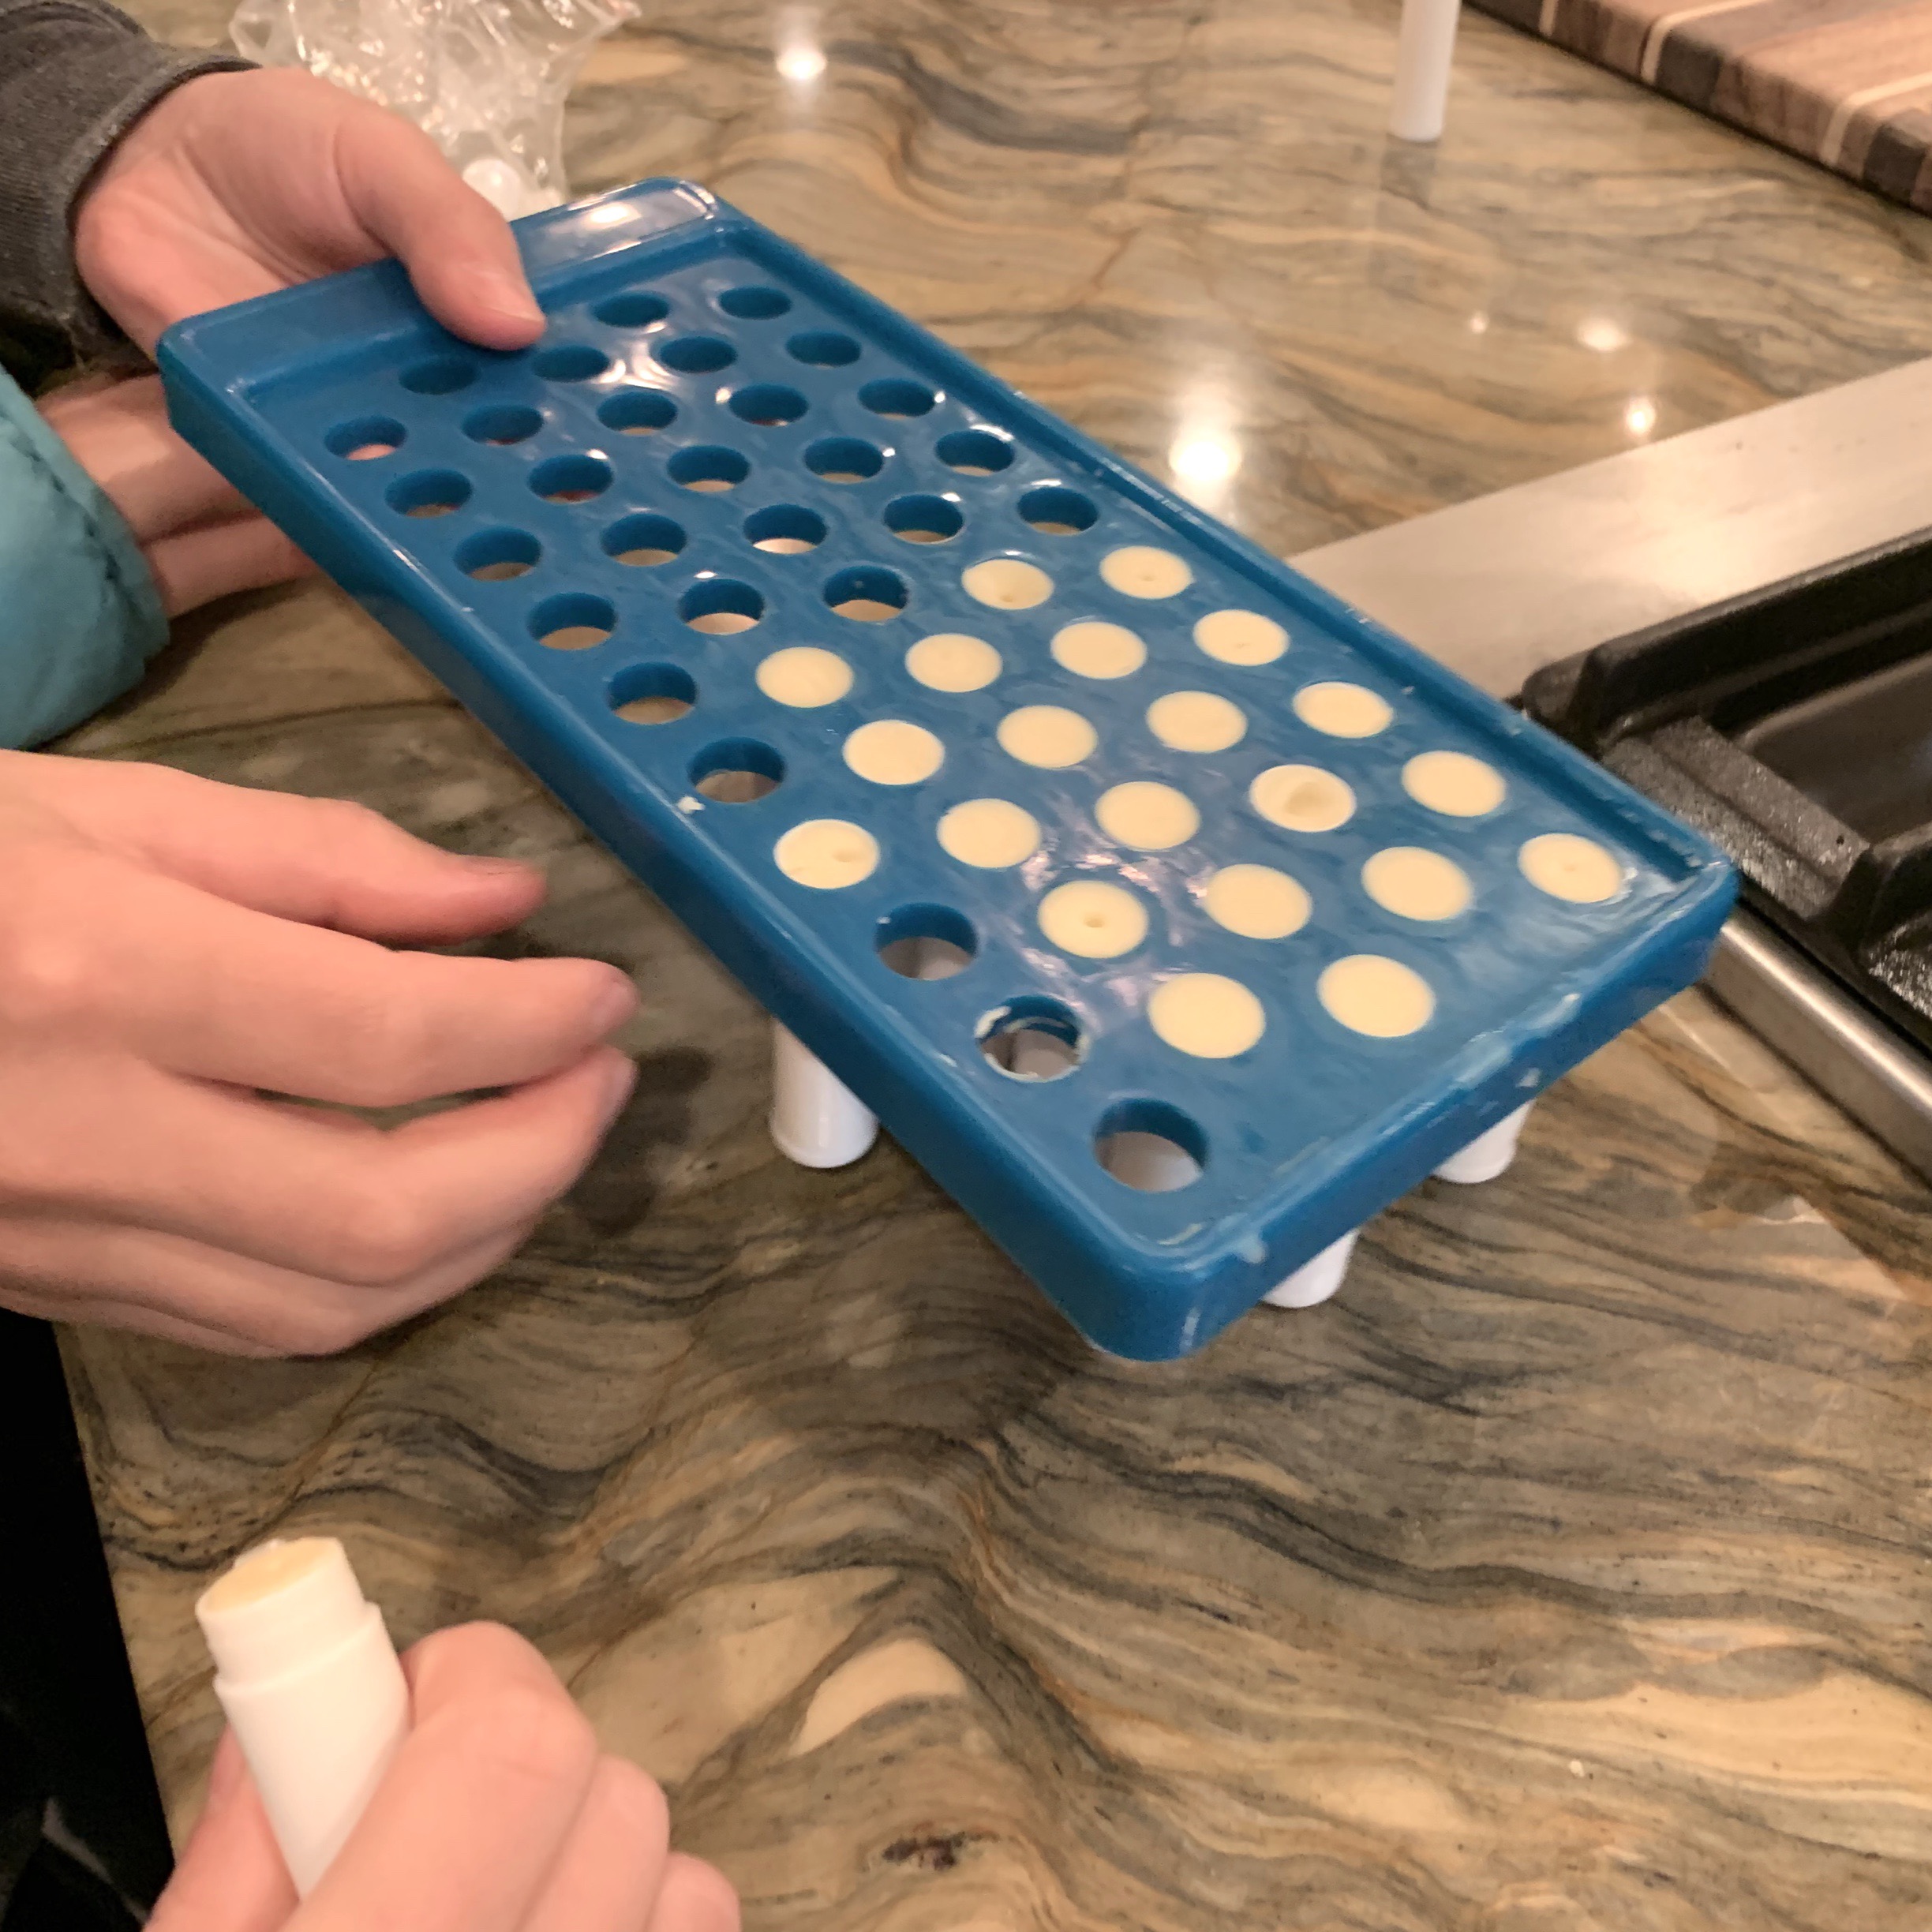
For this project we used a lip balm kit which included a tray, scraper, lip balm tubes and labels. To store the bar lotion, I bought metal tins that hold about 4 tablespoons of lotion and it makes the finished product look so professional!
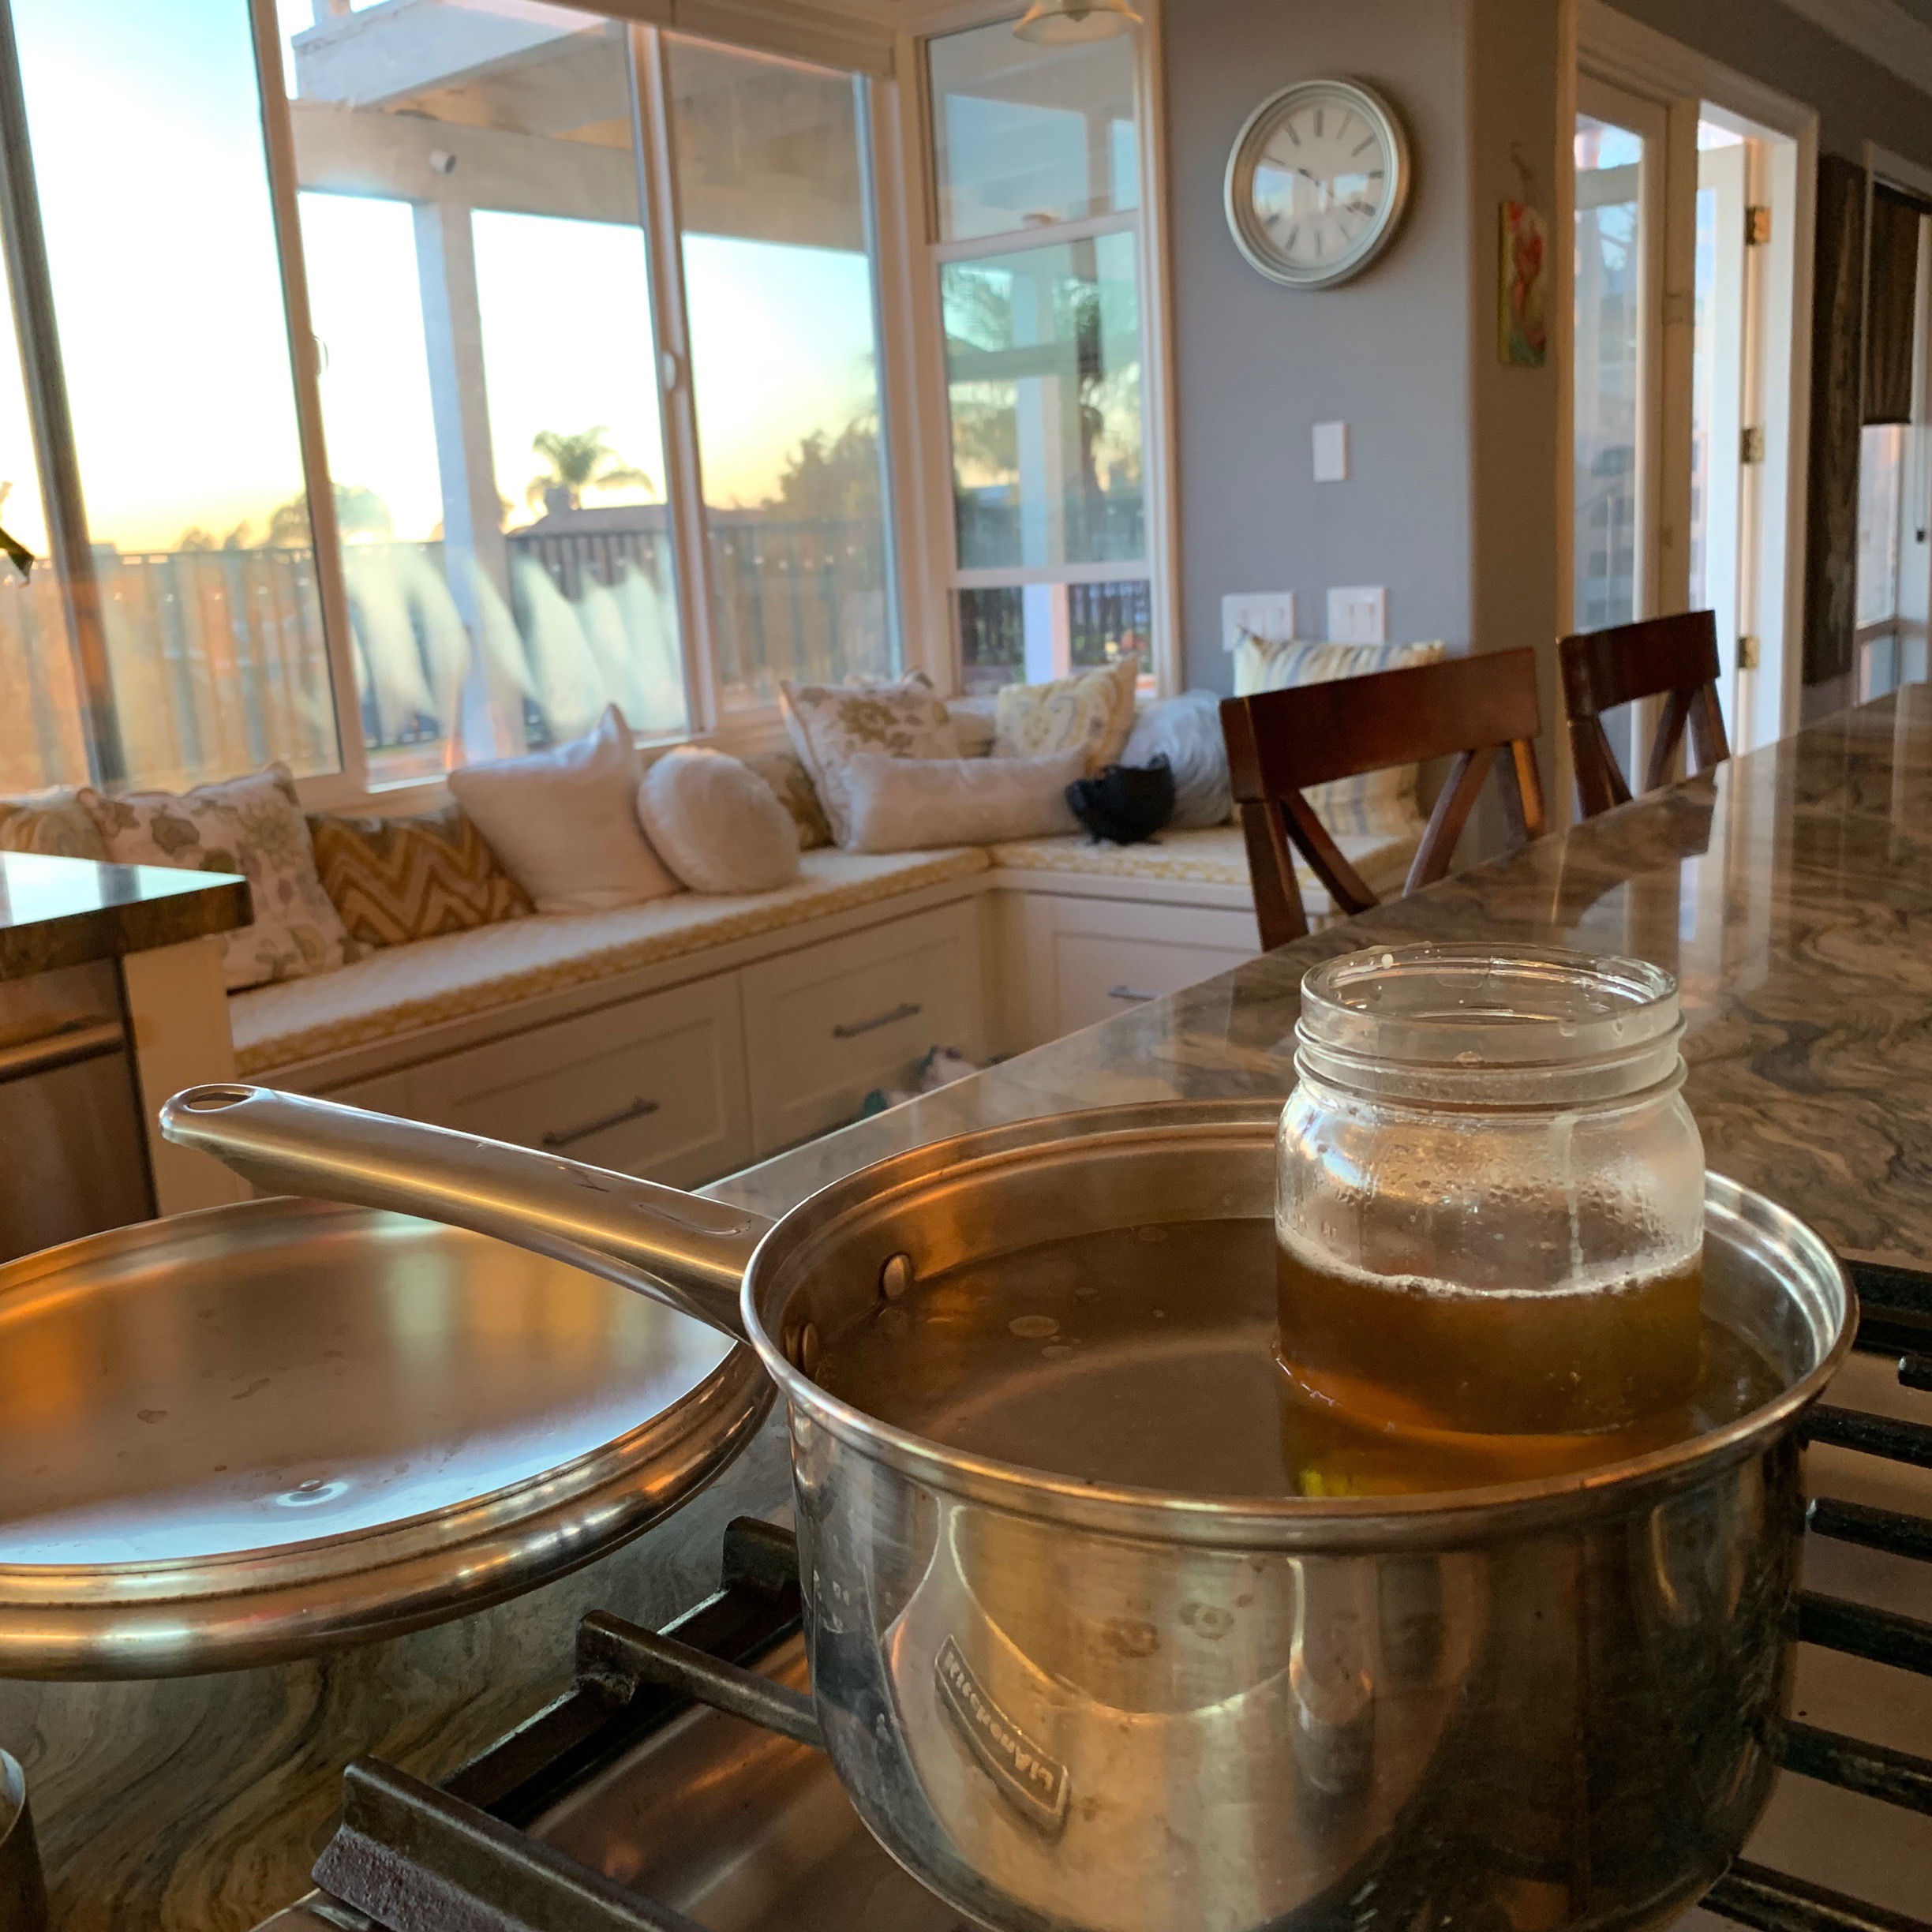
Here are a couple tips while making bar lotion and lip balm. First, you can use equipment you already have, so there’s no need to shop for a special pan or jars. I used a saucepan with with a couple cups of water. I put it on the stove on medium heat. To the pan I added a glass jar for the ingredients.

If the ingredients are solid, you may need to melt them to measure them. Since I already have a candle making pan, I used it to melt the beeswax. You can buy beeswax pellets if you want to avoid that. They’ll melt faster and they’re easier to measure. I placed the jar of coconut oil in the same pot I used to make the lotion and warmed it enough to measure out what I needed. Once everything is measured, add it to the jar (I used an old honey jar) in the pot with hot water. Keep an eye on it. Once everything is heated all the way through, let it cool, but not harden before adding the essential oil. In my opinion, I think it keeps the oil from evaporating. Next, you can fill the metal tins or lip balm tubes.
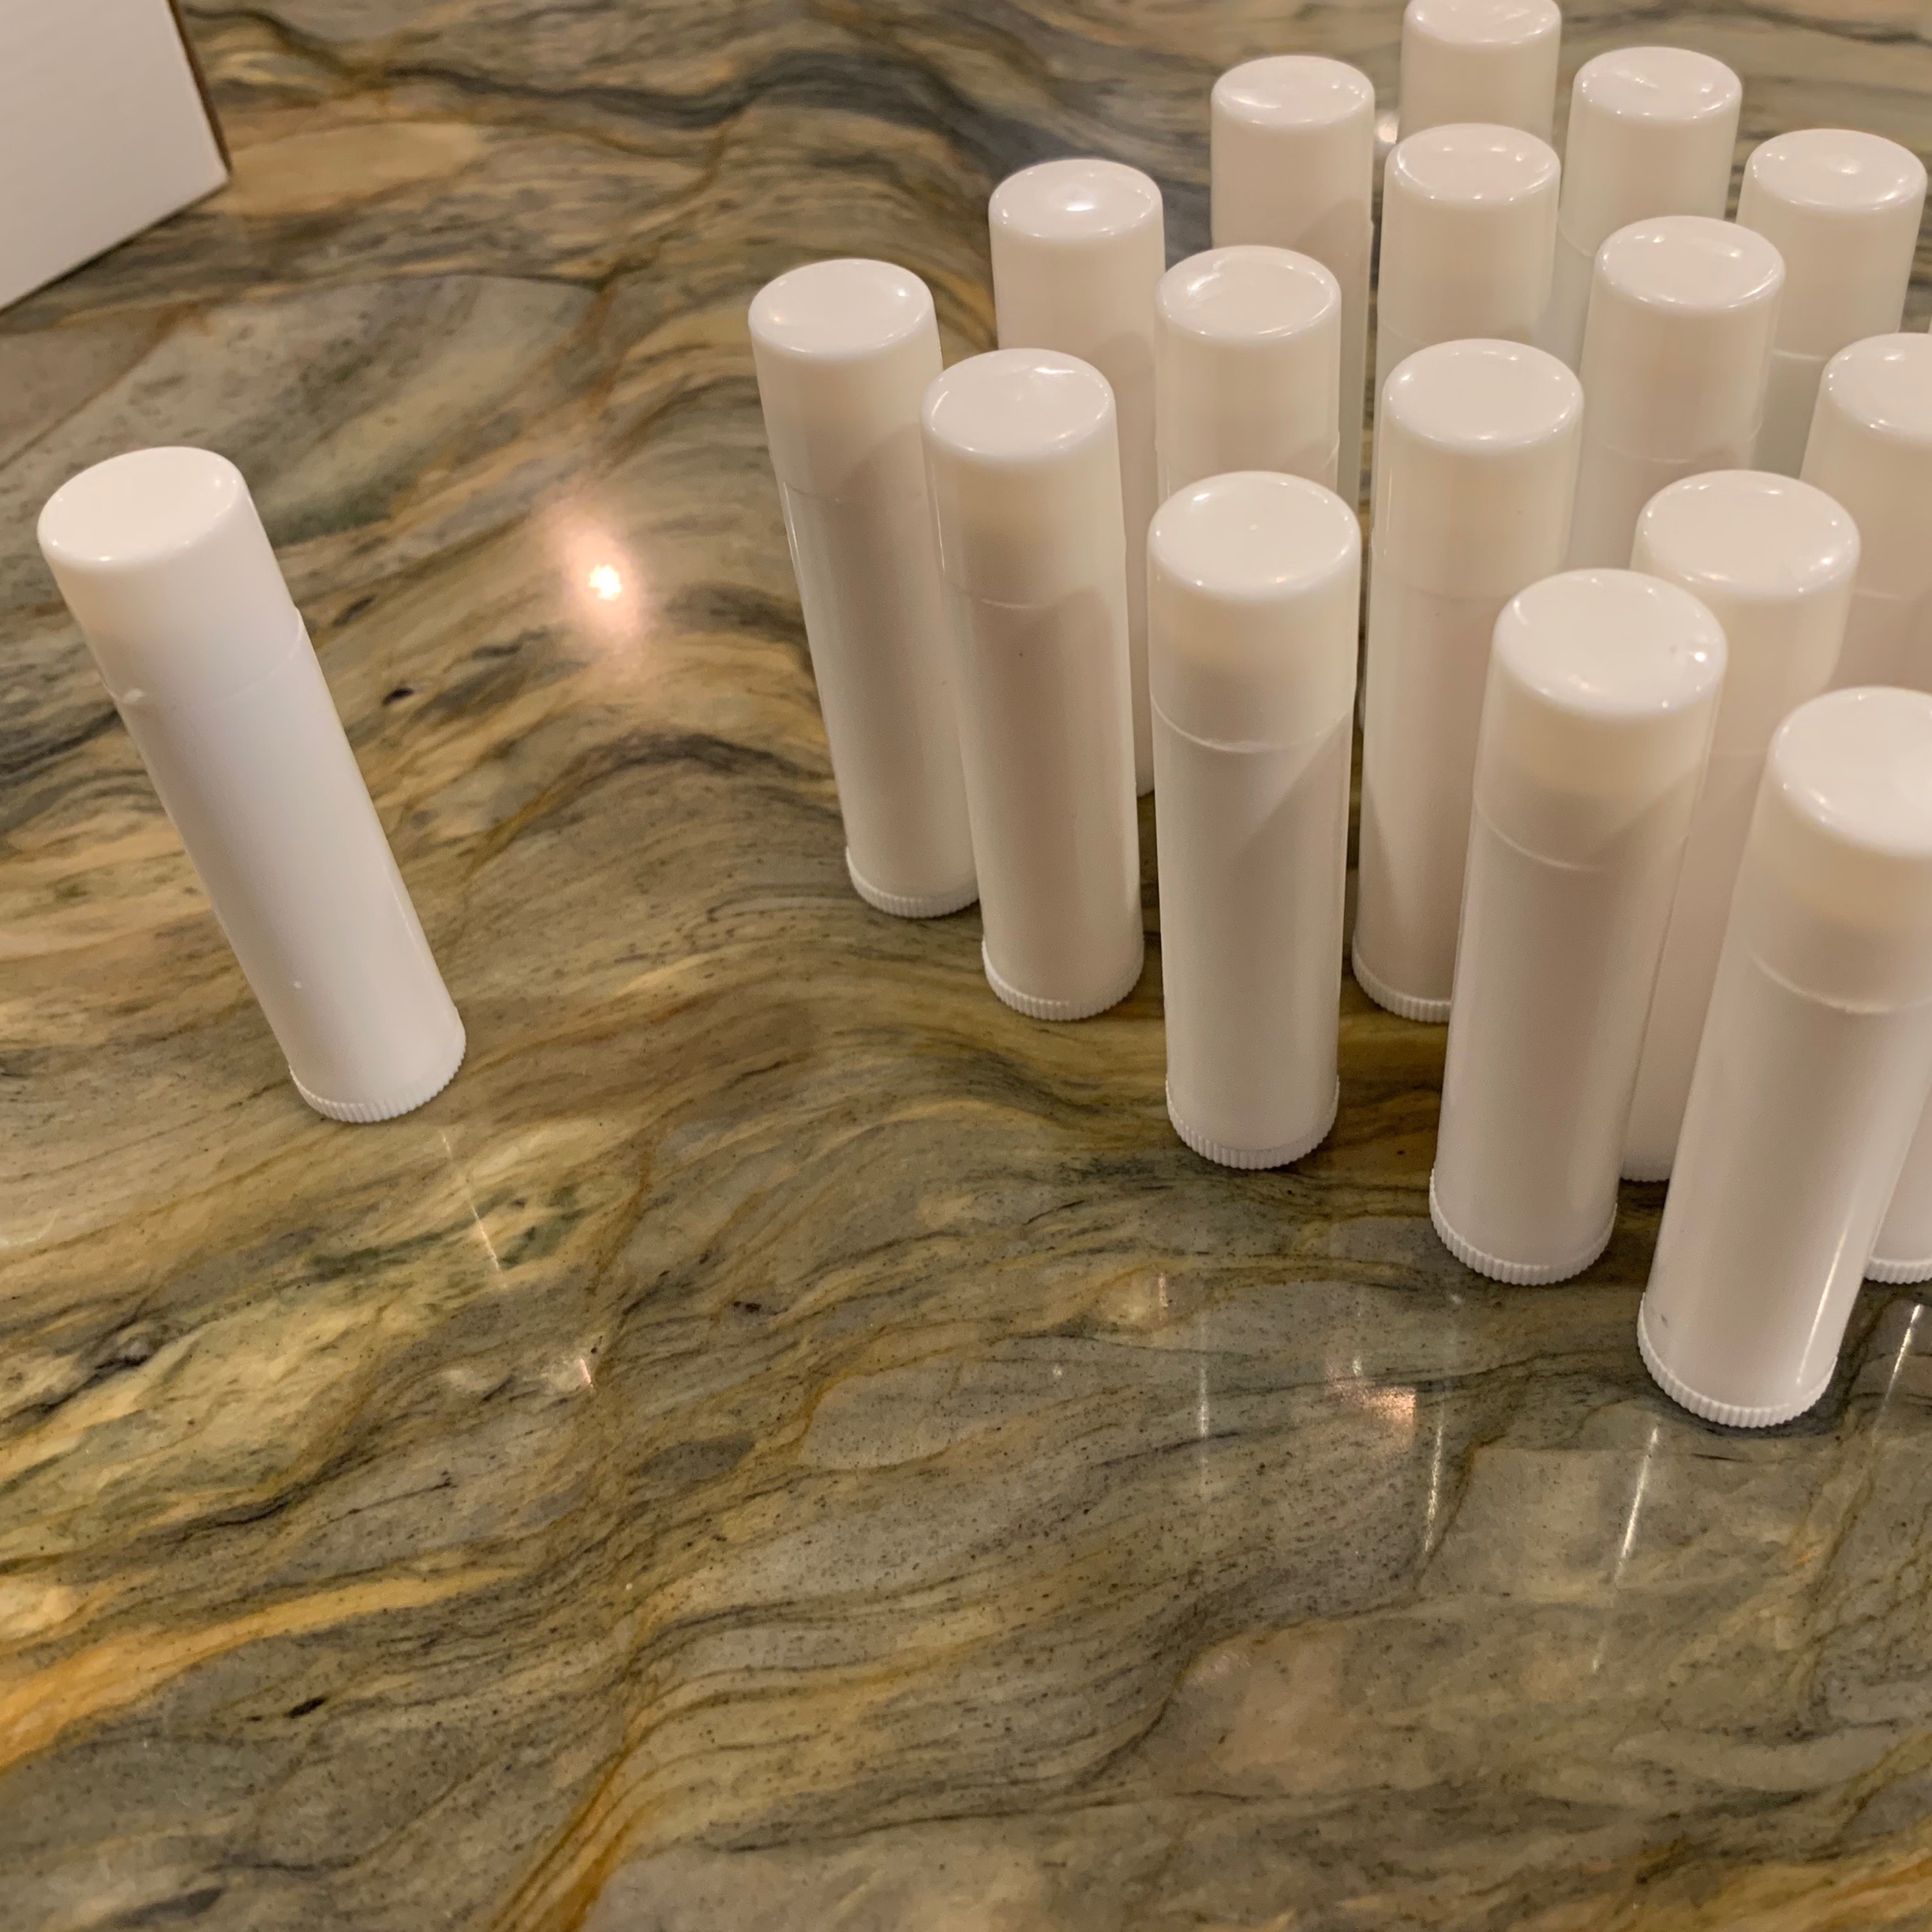
Be sure you let the liquid cool if you are filling lip balm tubes. If you fill the tubes with liquid that too hot, it may seep out of the tubes. I highly recommend the kit we got. The tray and scraper made filling the tubes easy and clean. Plus, you can reuse any of the mixture that cools on the tray by scrapping it and warming it up again.
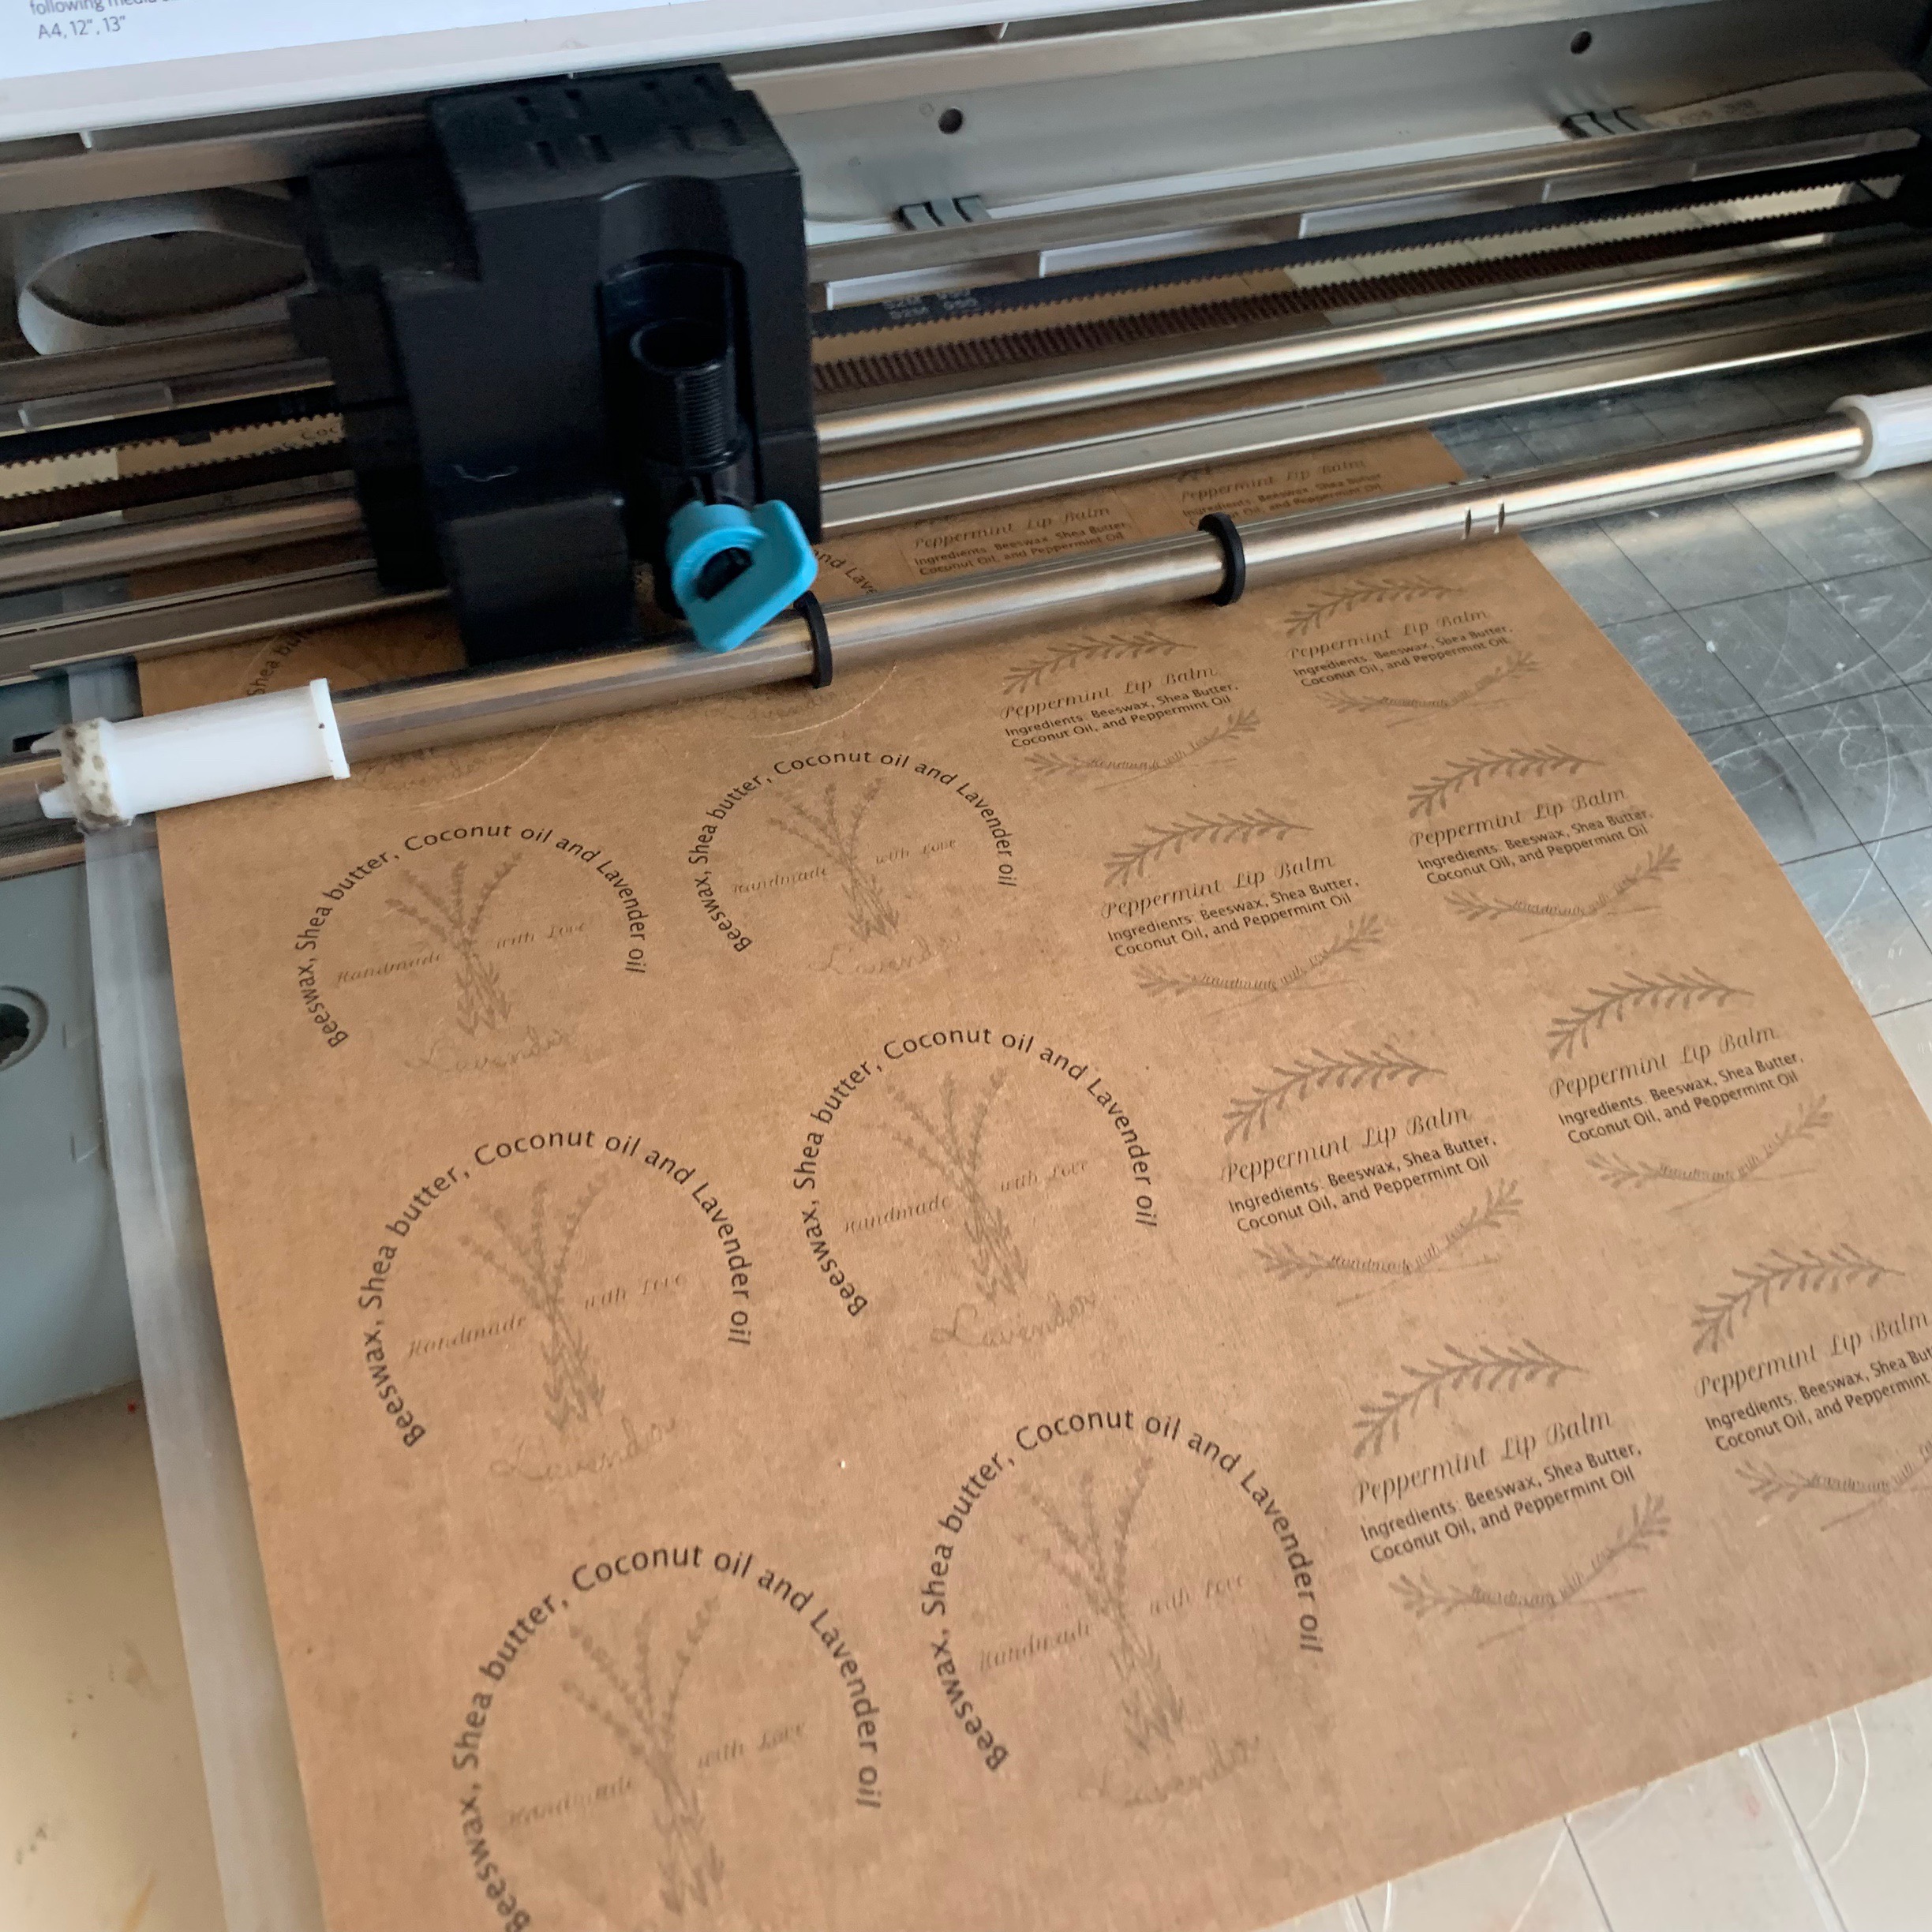
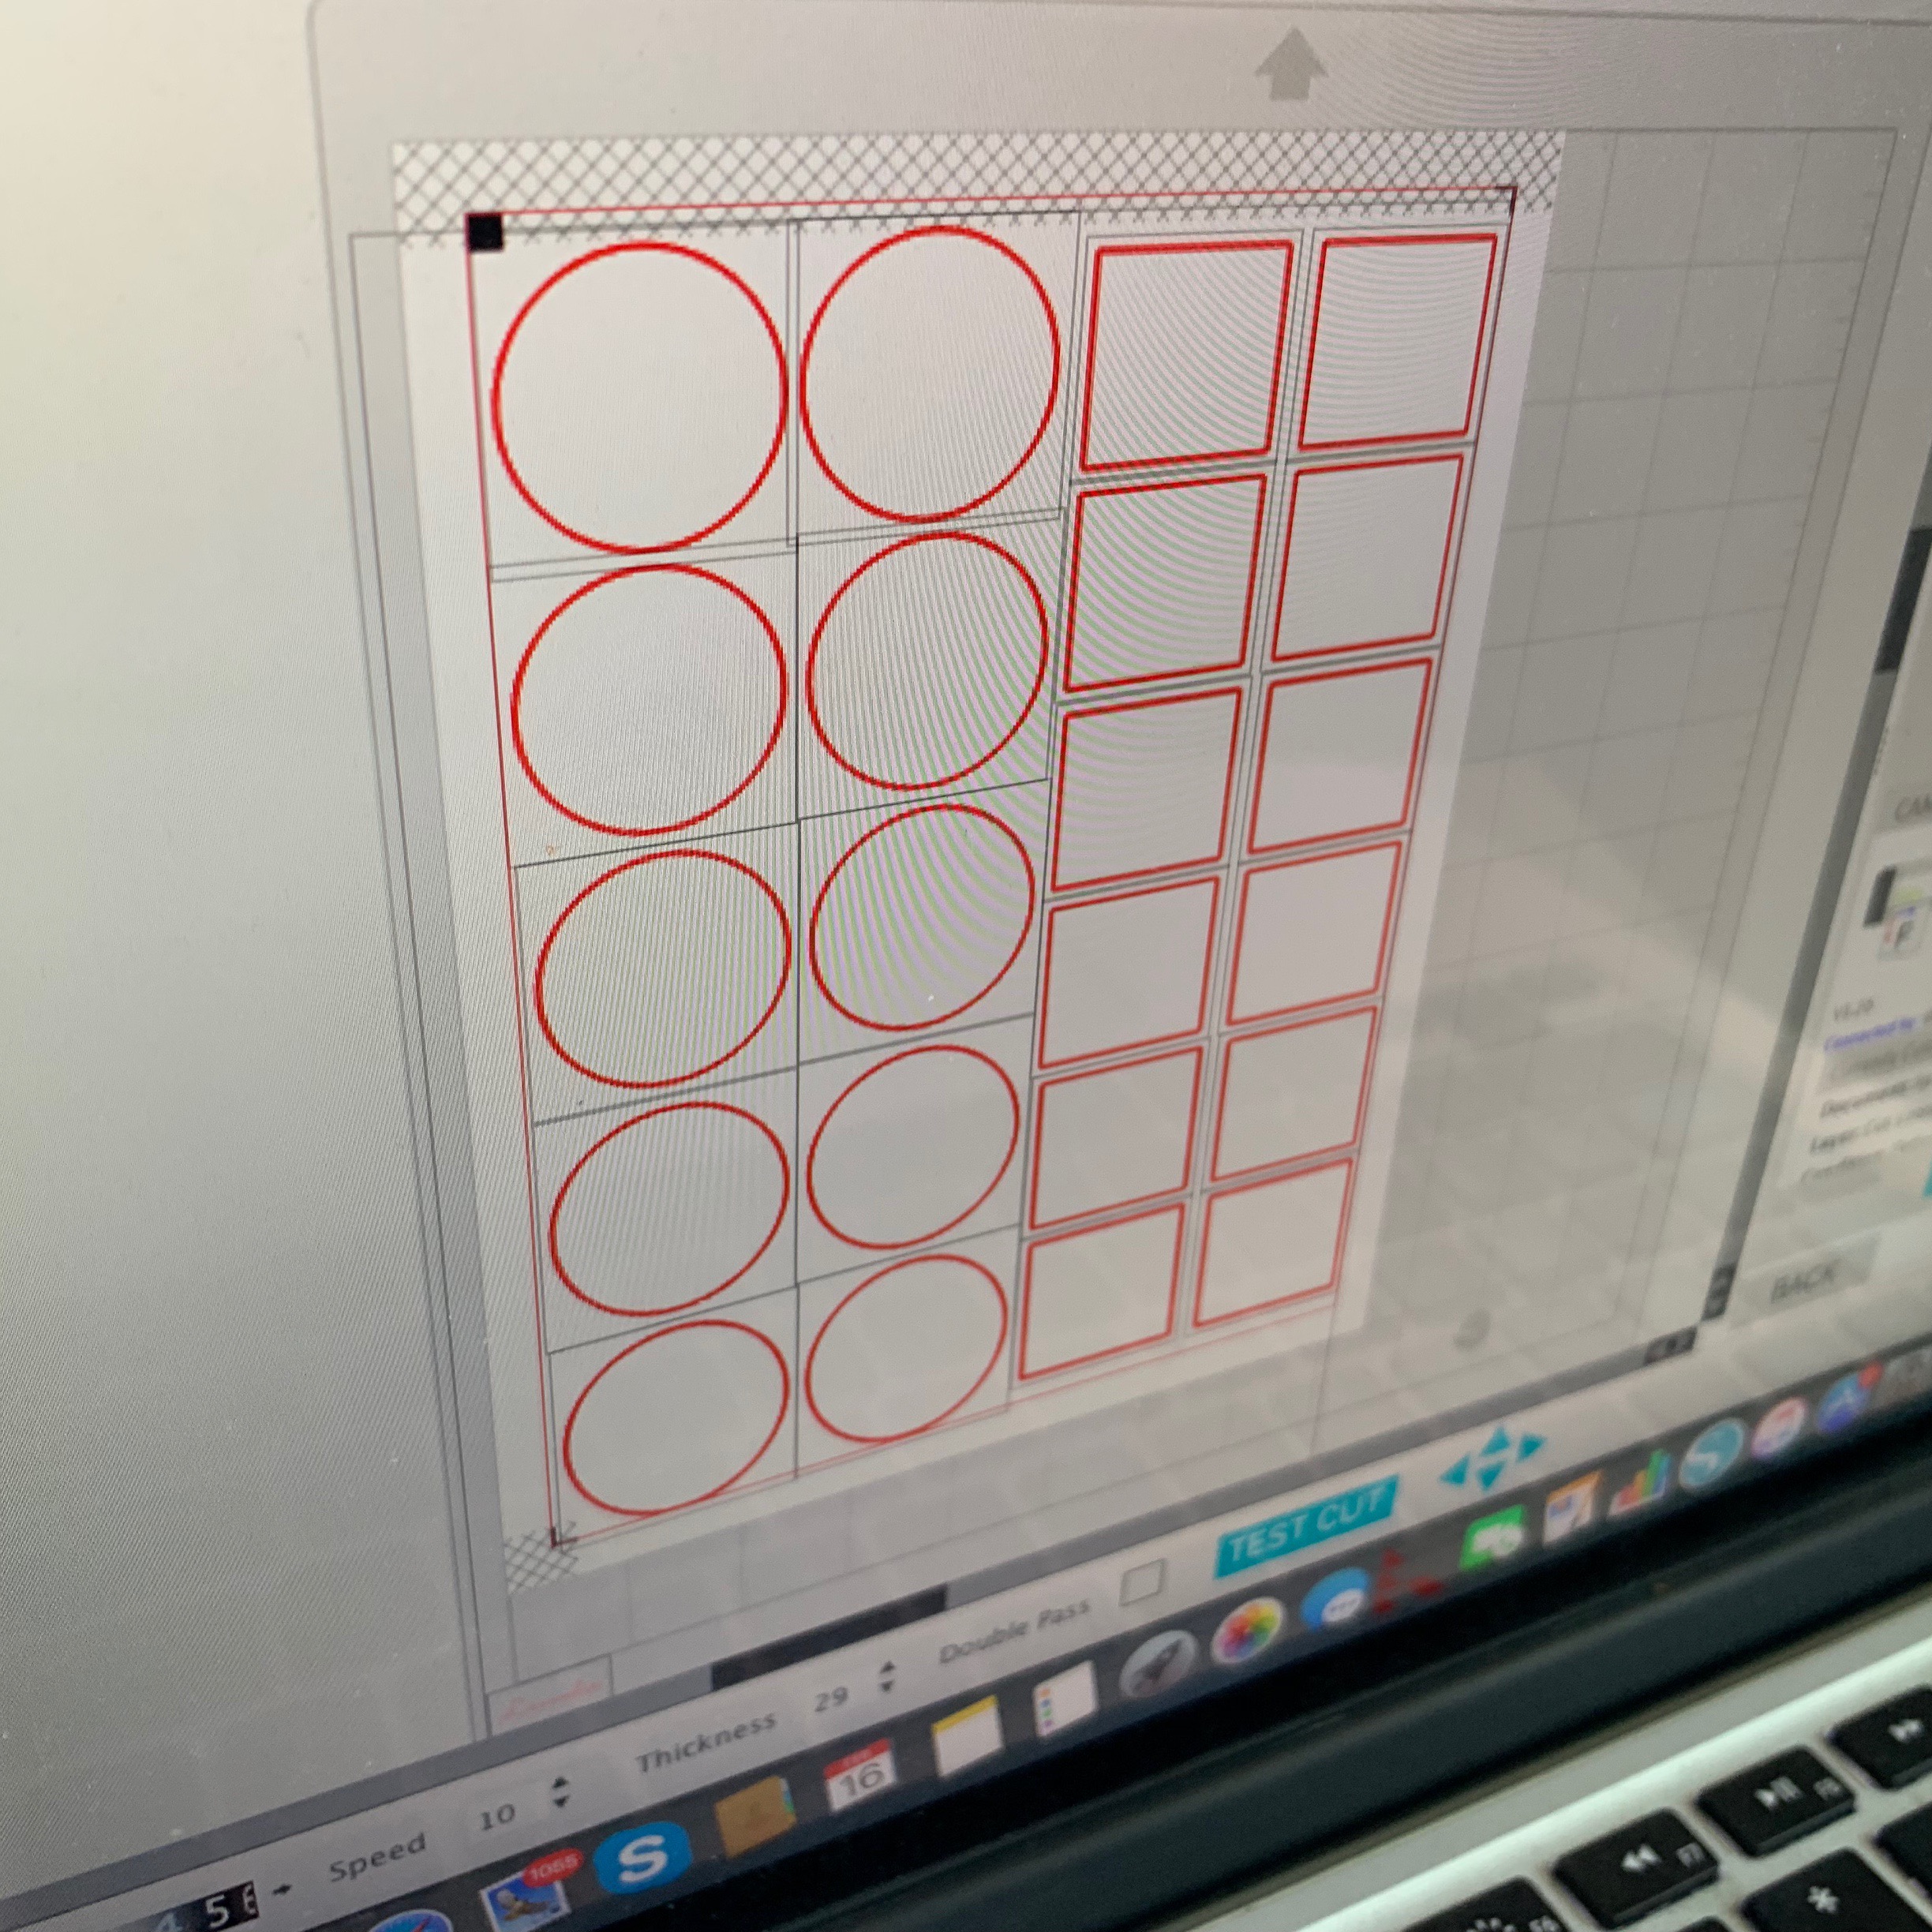
While the metal tins didn’t come with labels, the lip balm tubes did. I decided to make my own using adhesive kraft paper and my silhouette cameo. You can download my template and cutfile and customize it if you wish!
You can play around with the amount of beeswax you use if you wish to have a softer bar lotion. If you live in a warm area, making a harder bar lotion will ensure that it stays solid. Since doing this project, I’ve learned about other essential oil formulas to help with specific issues like headaches, stress and growing pains. My current favorite is lavender for calming and peppermint for headaches.
Find me on YouTube, Twitter, Instagram and Facebook