The ancient civilizations blocks for the Waldorf curriculum for year 5 is fairly extensive having continued from the previous year’s exploration of Norse mythology, the civilizations of Akkad and Sumer and the study of the Buddha and the Jataka Tales. For year 5, the student will cover the ancient civilizations of India, Persia, Mesopotamia, Egypt and finally Greece. Greek history and ancient Roman history will also be covered in year 6.
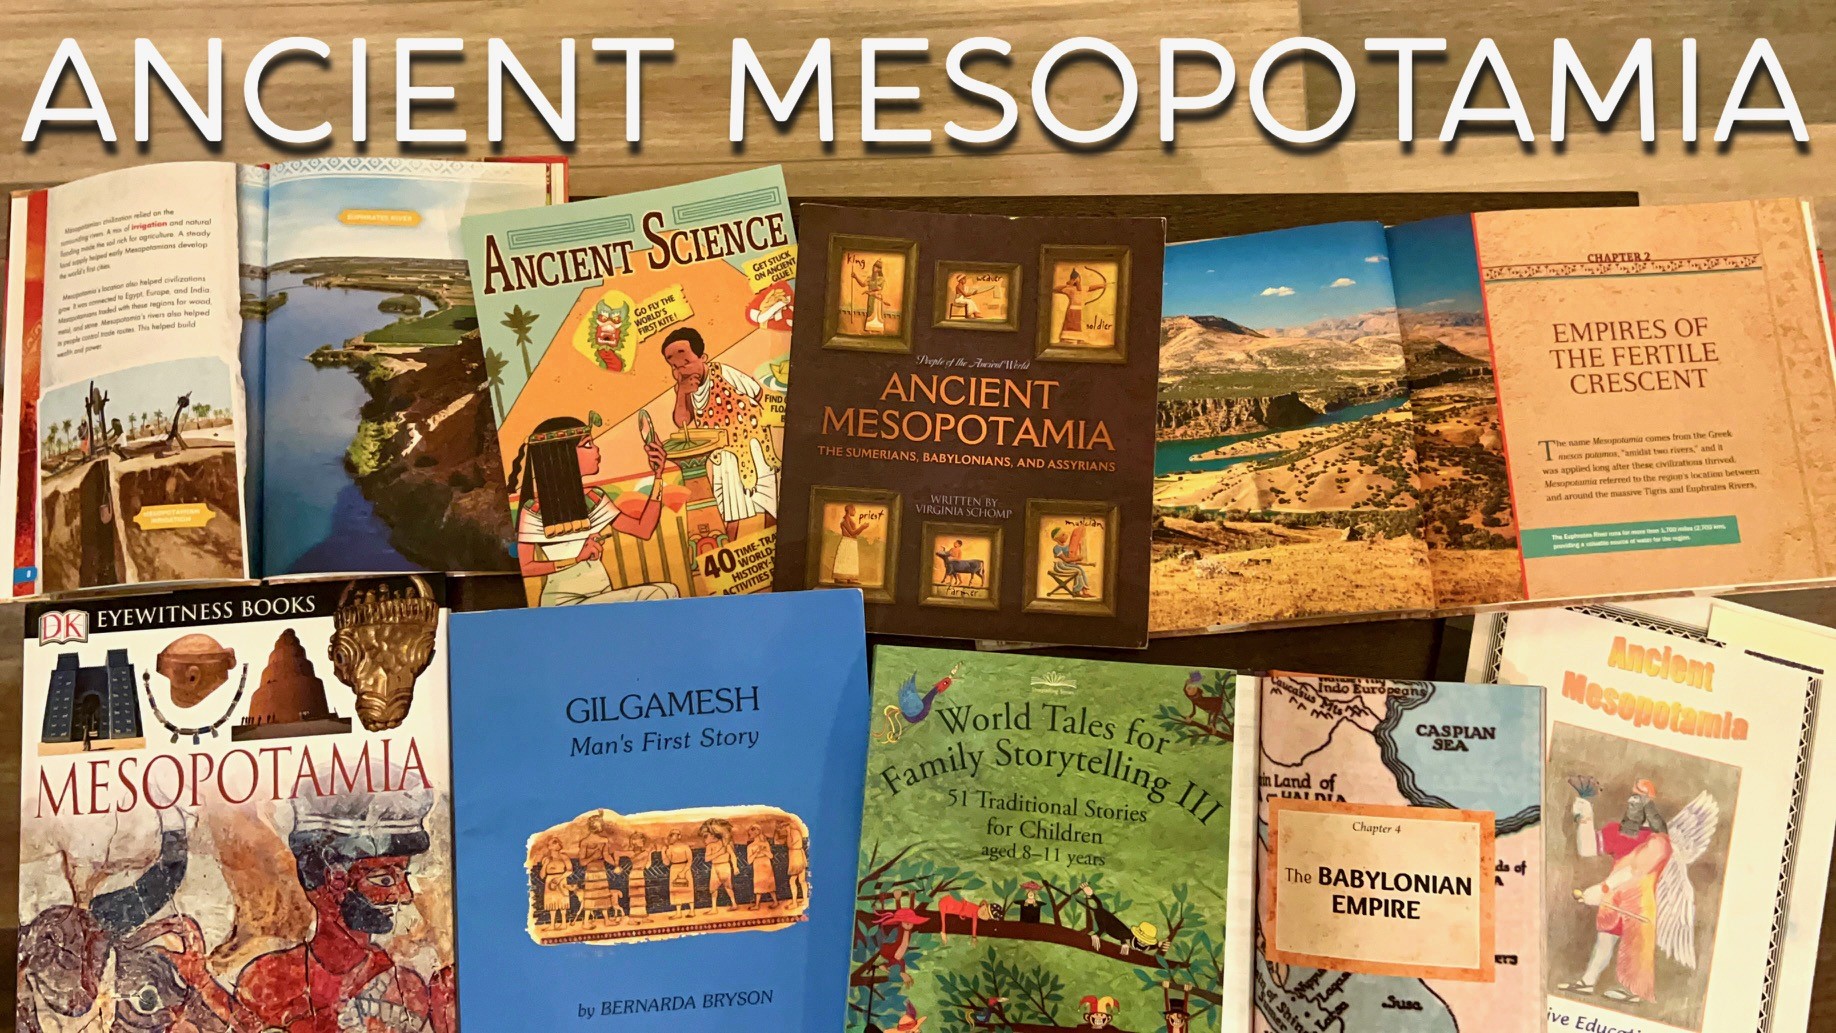
For this unit, we opted to stay fairly close to the curriculum, Live Education Waldorf curriculum Ancient Mesopotamia . Usually we would add additional resources like picture books, biographies, historical fiction, craft books, cook books and more. This time, we included books we already had in our home library with the addition of a few library books (only one of which we used). The best book for this unit, and one I highly recommend (whether you are using a Waldorf approach) is Gilgamesh Man’s First Story by Bernarda Bryson. This book is wonderfully written, engaging and covers the mythology of Gilgamesh deeply and thoroughly. We found a couple of science activities to do in Ancient science, by Jim Wiese , but sadly our sugar crystals didn’t grow, but we made some amazing smelling sugar syrup!
Books & Resources
- Live Education Waldorf curriculum Ancient Mesopotamia
- Gilgamesh Man’s First Story by Bernarda Bryson
- Main lesson books by A Child’s Dream
- Sergeant Art Square chalk pastels
- Blick Matte fixative
- World Tales for Family Storytelling, volume 3 51 traditional stories for children, aged 8 to 11 years by Chris Smith
- Ancient science, by Jim Wiese
- Ancient Mesopotamia Blastoff Discovery by Sara Green
- Peoples of the Ancient World Mesopotamia, The Sumerians, Babylonians, and Assyrians, written by Virginia Schomp
- DK Eyewitness books Mesopotamia Discover the Cradle, Civilization – the Birthplace of Writing, Religion, and the Rule of Law, written by Phillip Steele
- Ancient Civilizations, Ancient Mesopotamia by Tom Head
- Discover Ancient Mesopotamia, by Stephen Feinstein
- Religious resources:
- Stories of the Prophets by Imam Ibn Kathir
- Tales of the Prophets: Prophet Ibrahim and Prophet Yusuf (PBUH) written by Abdul Hasan Ali Nadwi and Ehsanul Nadwi
- The Sacrifice of Ismael and Eid Al-Adha story By ALM books
- Tell me about Hajj by Saniyasain Khan
Main Lesson Book
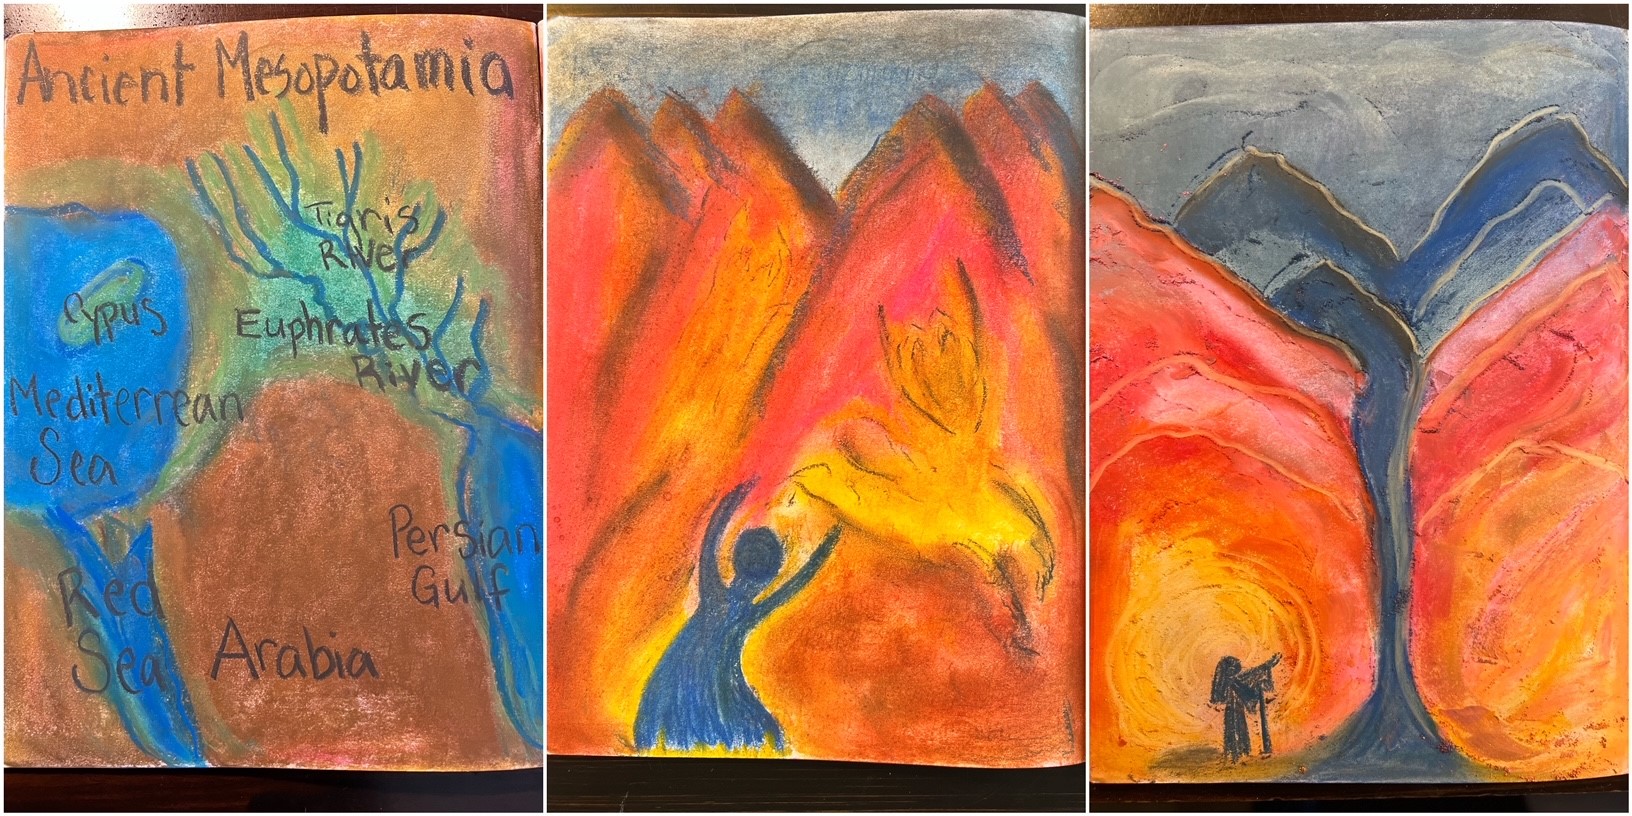
We continued with our art medium of chalk pastels and really started to hone our skills this far in to our ancients main lesson block (this is the third of the year). We really like the way our art turns out and its fast and easy. What it’s not is clean! We are getting chalk dust everywhere and we are very careful to clean it into the trash can or use a wet paper towel to clean it up. Be sure not to blow on your work! This is probably the messiest art medium we’ve used, but the results are pretty stunning. Be sure to fix your work with a spray fixative. We used Blick Matte fixative and sprayed our work outside and left it outside until the smell subsided.
Projects
How to Make an Ancient Clay Wax Tablet
We had to do this project 3 times before it worked and this is after the first time I tried this project back in 2010. Back then, I made a ‘book’ from cardboard/chipboard and lined the edges with extra chipboard to make a lip on the edges. Then I filled the cavity with melted wax to make a reusable wax tablet as part of our ancients’ main lesson blocks. That project worked about once, and very quickly it was apparent that chipboard was not the right material for a project like this. It’s been 14 years since that mishap. I’m attempting this project again as I homeschool my last child. This time, partly because of an abundance of clay, I thought we could make it with clay and add wax as before and the wax wouldn’t soak through the chipboard or spill out everywhere. Well, the wax still spilled everywhere and now we ran into two more issues, which needed to be fixed if we were going to have a successful go at this project.
We used clay from Aardvark Clay. While this clay is meant to be fired, we let it air dry. To avoid cracking, use a final piece at least a quarter inch thick, any thinner and the tablet is likely to break. To avoid breakage while drying, form tablet on a plastic wrapped clipboard so you can easily lift clay tablet before or after drying.
This time, when the clay lay drying in the sun, it curled up on all sides. I mistakenly thought I could gently press it back down, but it cracked into several pieces. I added more clay to the broken pieces and made sure the clay was extra wet and repaired the clay tablet. The problem was that I should have started from scratch because the piece was not as sturdy as it would have been had it been remade from scratch. This time, I added parchment paper to a baking tray and laid parchment paper over it and weighted it down with some pyrex dishes and baked it in 5 minute intervals at 350 degrees. All was as well as could be once I removed it from the oven. I added my melted wax and it still spilled over the edges! I recommend 1/4 inch lip or higher.
Once the wax cooled, we found it to be too hard to carve into and ended up using it as a tablet for dry erase markers which was novel but remains unused. We attempted one more design. I used Sculpey UltraLight Oven Bake Clay and designed a smaller tablet with a lip on all sides. Once again this lip was too short and the wax spilled over. This time I mixed beeswax with coconut oil (maybe 1:1 ratio) and the wax was just right. We could write or press cuneiform letters and gentle warm the wax to reform or use our fingers to gentle press the wax back to form to reuse again.
How To Build A Ziggurat
Our handmade Ziggurat took 2 hours to make spread over several days. This project can be modified so it’s suitable for children as young as 7 years. The challenging parts of this project are the details like the staircase and arched opening, but doing three rectangular structures layered upon themselves with one staircase is good enough to get the general idea of a Ziggurat.
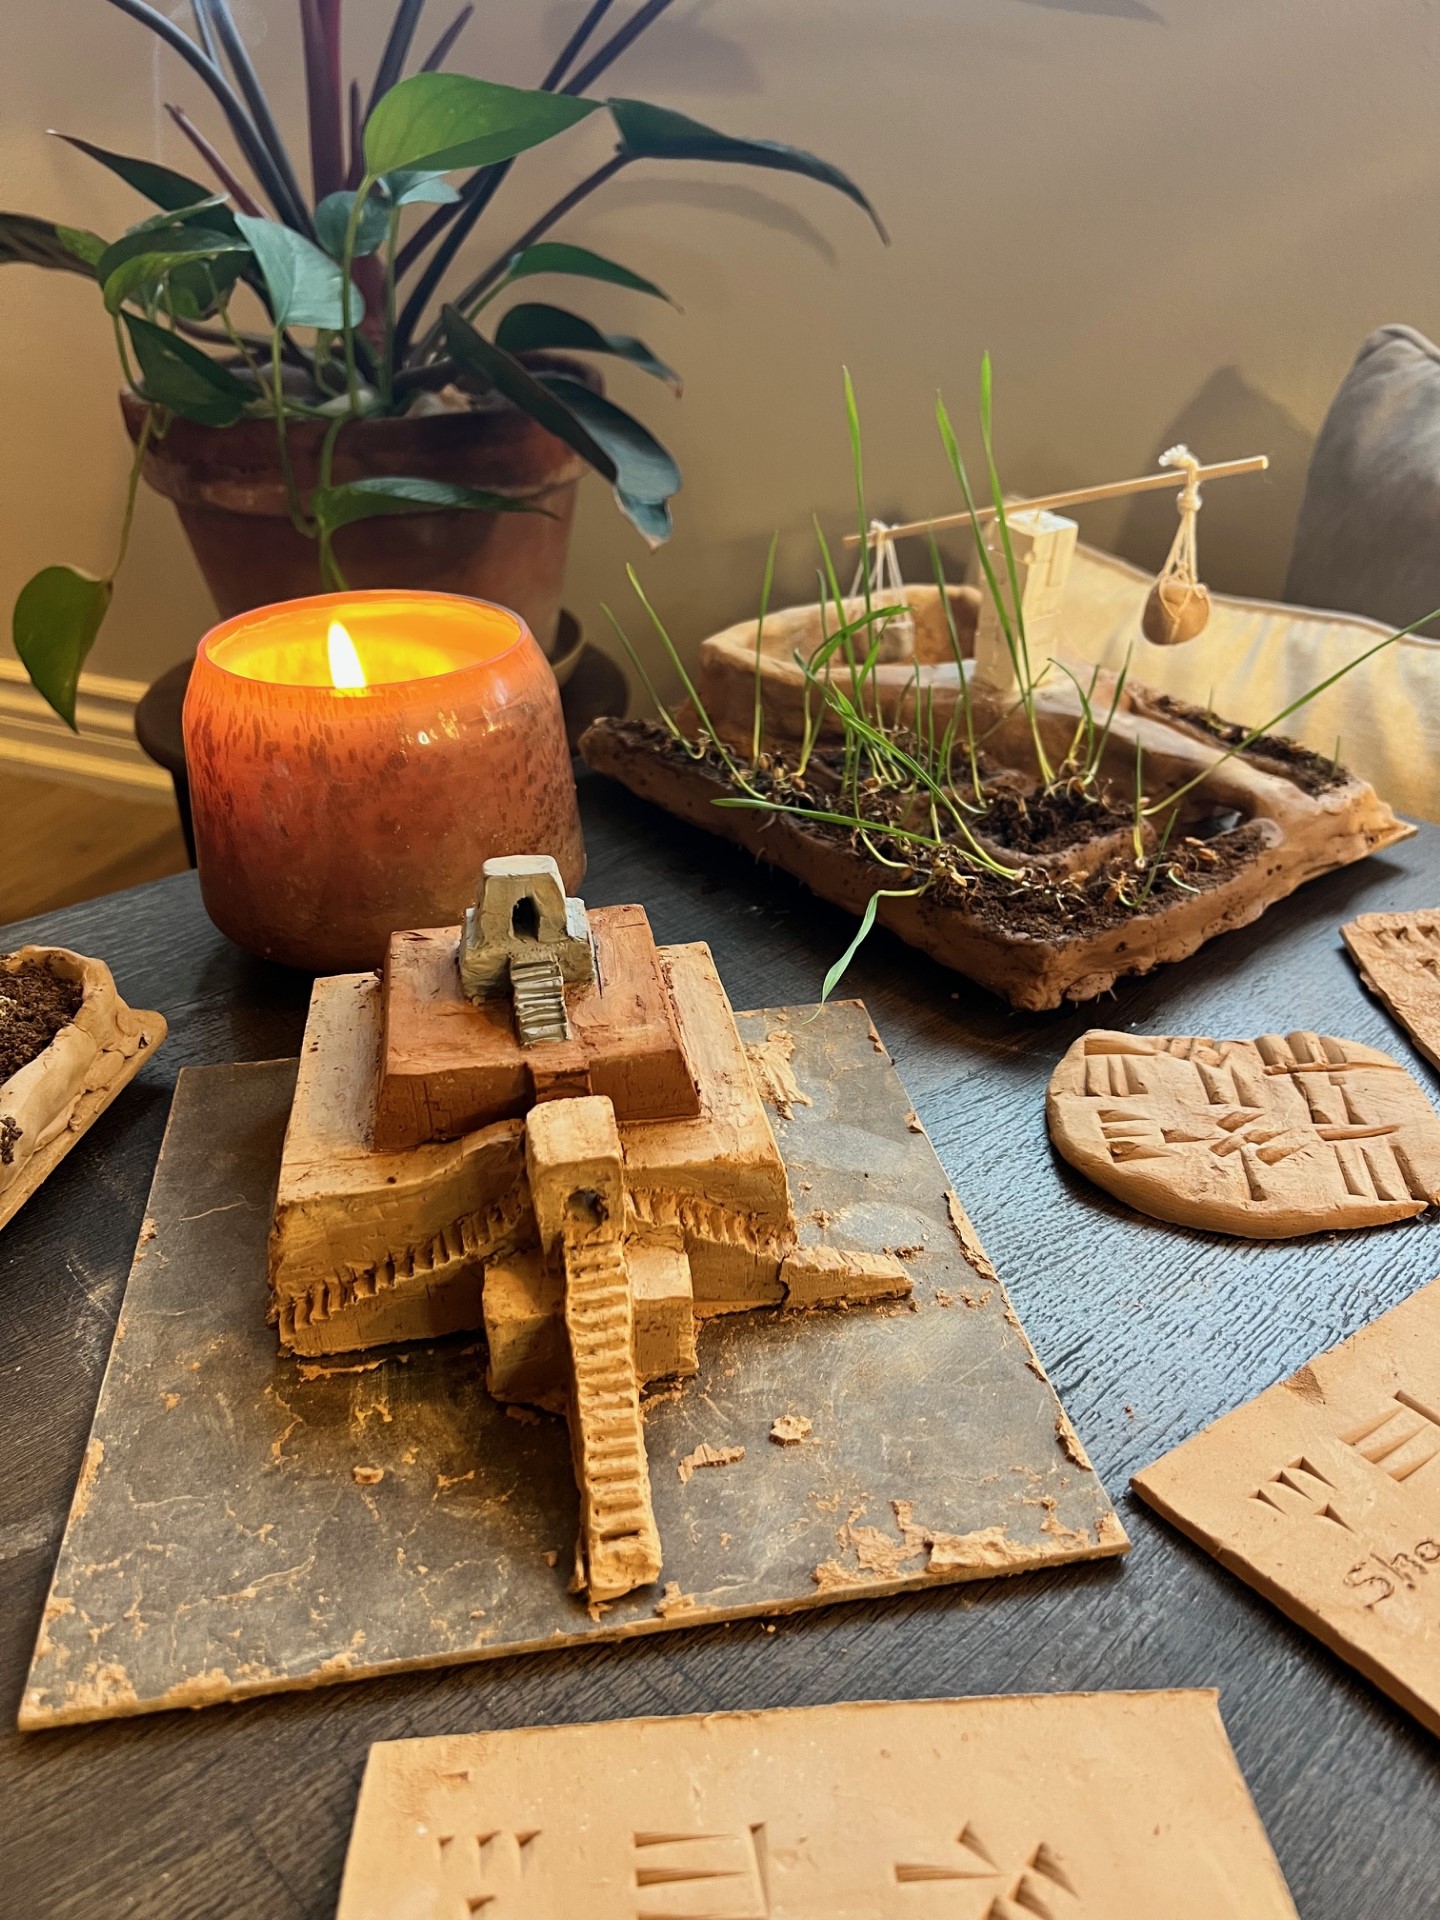
We used a Claybord from Blick Art Supplies measuring 8 inch square. The clay is from Aardvark clay and is in 3 different colors and cone numbers. Since we are not firing our clay in a kiln, as we are air drying, we didn’t mind mixing clay of different cone numbers. We rehydrated our clay in water as we bought it years ago and it had dried to a point of being unusable. I placed it in a large plastic tray and filled it with water. I turned the clay over after 12 hours so all sides were submerged in the water. The clay became useable once again and maybe too wet! Once we formed our ziggurat, we had better precision in forming and cutting the clay when the clay had dried for a day or two. Other supplies were our clay tools. It’s been years since we bought them, but I’m sharing an alternative to the ones we used. If you don’t have tools as these, you may use a toothpick or popsicle stick. We also used a baking scraper which came in very helpful at the end of the project. It took several days up to 1-2 weeks for our ziggurat to dry completely. We only had breakage on one staircase. The ‘ground’ cracked completely, so I removed it, but the structure dried very well with almost no cracking.
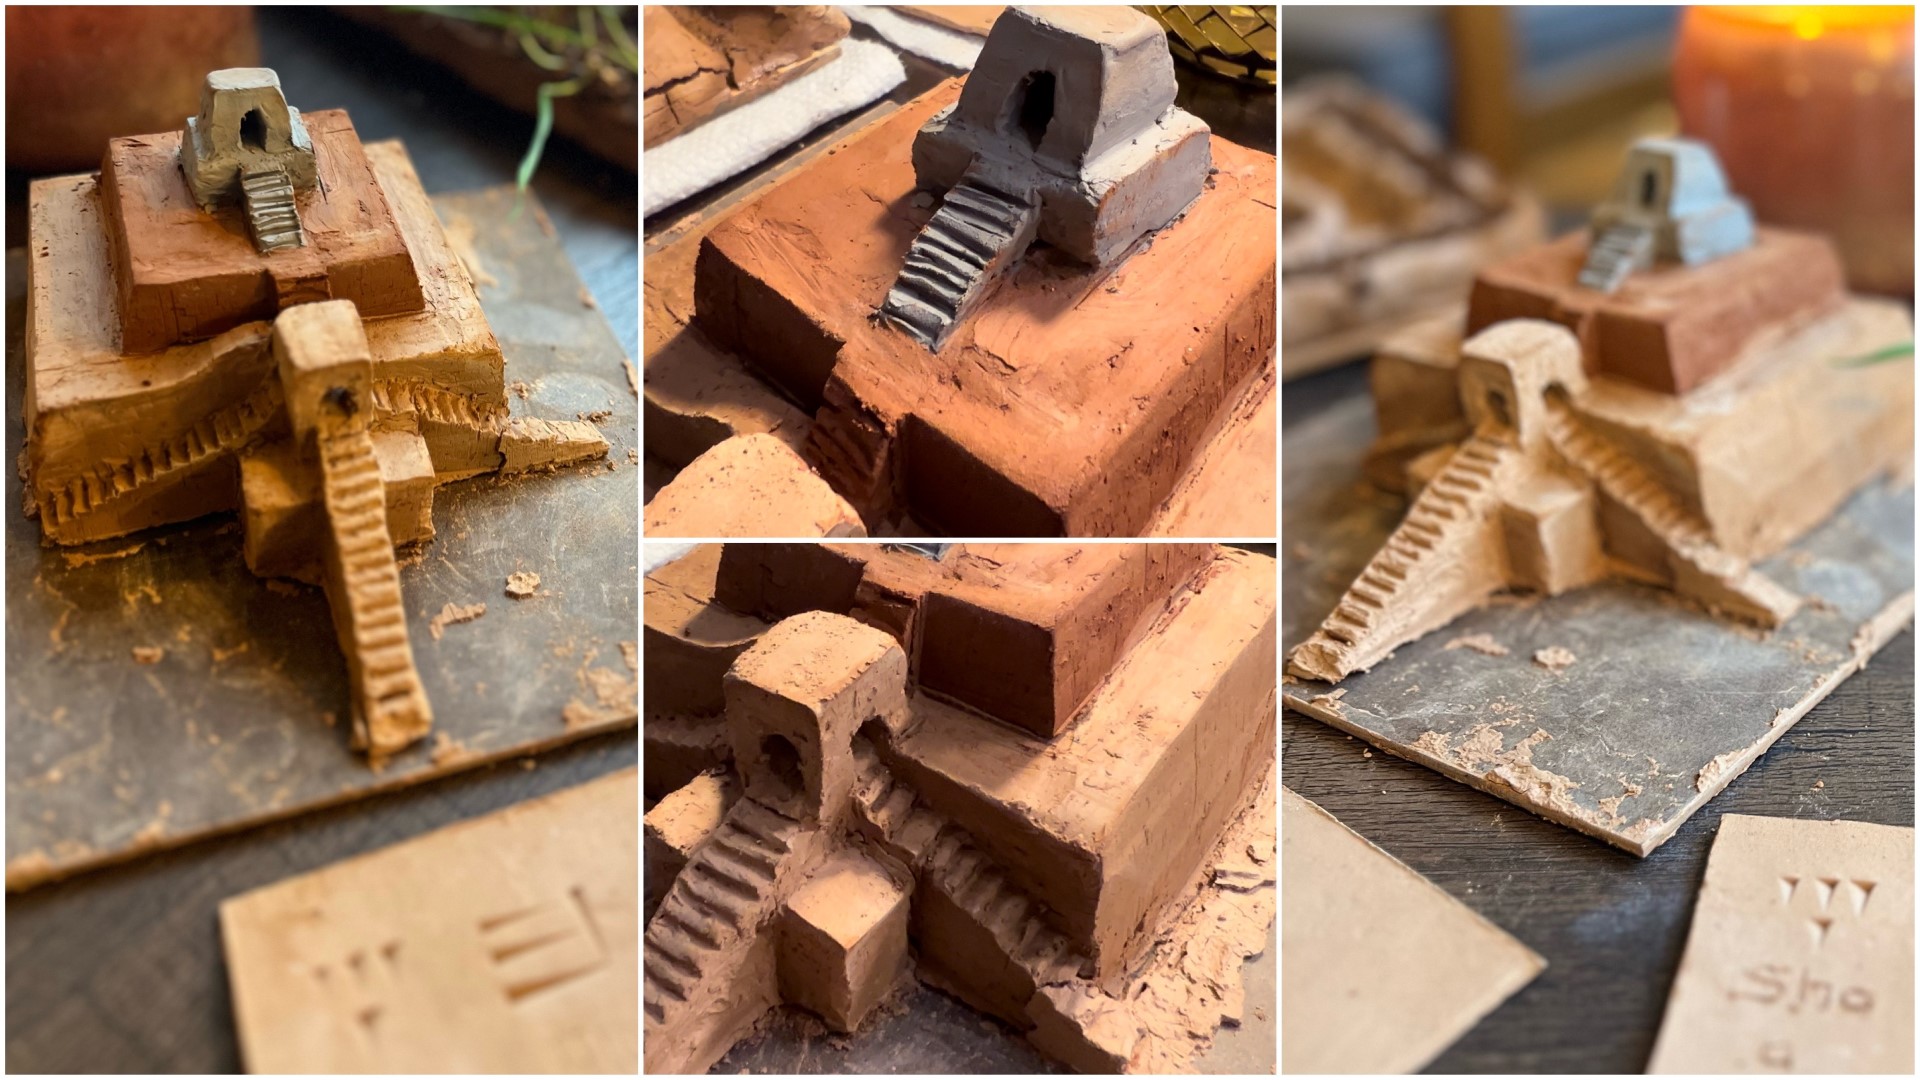
Now that our ziggurat has dried completely, it had turned slightly lighter. It’s quite durable, save the staircase and it now resides in our school room. Since doing this project, I have found alternative to the ClayBord. The Dollar Tree sells non-stretched canvas measuring 8 inch squared for only $1.25. It’s a suitable alternative and in fact, once the project is complete it lifts from the board fairly easily so the board may be used again.
Cuneiform Clay Tablet
This was one of the fastest easiest projects we’ve ever done. Not only easy, but so instructional and experiential. With just a few materials, you, too, can make your own cuneiform tablet. We used clay from Aardvark Clay. While this clay is meant to be fired, we let it air dry. To avoid cracking, use a final piece at least a quarter inch thick, any thinner and the tablet is likely to break. To avoid breakage while drying, form tablet on a plastic wrapped clipboard so you can easily lift clay tablet before or after drying. We used a chopstick as our writing utensil. Cuneiform writing is a mix of short and long strokes. We used our Live Education Waldorf curriculum for Ancient Mesopotamia for the phrase we wrote: Heaven and Earth. We cut our clay with a homemade tool of wire twisted around two dowels. We easily sliced portions of clay off our block. The clay had dried out considerable since we purchased it years ago, but I soaked it in water for 12 hours and it was soft enough to work with. I probably could have soaked it for 2-3 hours and it would have been soft enough. Once we formed the clay to the desired size, we rolled it out with a wooden roller. If you didn’t have this miniature tool, we could use a rolling pin. Keep the thickness at least 1/4″ to reduce breakage once dried. If you didn’t have clay, you could use Sculpey, Ultralight Oven Bake clay. Once you do your writing, you could bake it for 15-20, then paint it.
How to Make an Ancient Shaduf
We made an ancient shaduf using Aardvark clay and bricks and filled the fields with wheat berries. We have made shadufs before, and honestly, those were easier and more historically relevant. I tried a new one based on an illustration in our Waldorf main lesson book for Ancient Mesopotamia and while I think it was beautiful and even functional in the end, it was time consuming and not quite what I was hoping for. So stay tuned! An easier, more affordable, faster version is coming up, iA. We planted wheat berries in the ‘fields’ and that was new and different and looked so pretty, but watering those berries in those tiny soil-filled compartments was a challenge. We managed but water got everywhere and if the clay got too wet is disintegrated and if it got too dry on the thin parts it crumbled. If you want to use clay, I suggest polymer clay or my favorite, Sculpey UltraLight Oven Bake clay. Instead of bricks for a tower, I would suggest clay or even better, sticks for a more traditional and authentic shaduf. Shadufs are hand powered, so a counterweight is necessary and the ability to swing it from the water source to the channels is also necessary.
Recipes
With one basic dough recipe, you can make dozens of breads with subtle changes like adding olive oil, replacing water with milk and/or yogurt, adding eggs (makes dough softer), and changing the ratio of flour to water. For this recipe, I used my bread maker to make the dough. Using setting 8 (which takes 1.5 hours), I made dough to make mini pitas. I made this dough drier to make these pitas because I planned to roll out the dough and use a metal circle cutter to form the pitas. When making a dry dough, versus a 1:1 or 1:1.5 dough which I use to make pizza puffs or focaccia, I like to use my Kitchenaid or bread maker because it does the kneading for you. The bread maker is also great to use on cooler days because it gentle warms the inner compartment to aid in rising.
Recipe: 3-4 cups of flour, 1 teaspoon of salt, 1/4 teaspoon of yeast, 1.5 cups of water, 1-2 tablespoons of brown sugar (or sugar), and 2 tablespoons of olive oil. Using lukewarm water, add water, sugar, yeast and oil to a bowl or bread maker. Gently mix. You may let it sit to let the yeast bubble, but I rarely do that. I usually add everything together, only recently mixing salt with the flour, but my dough has always risen unless my water is hot. Add flour and salt and mix and knead until incorporated. Let it rise for 1-4 hours. You may let it rise in the refrigerator overnight. Roll out dough to 1/8-1/4 inch thick (thickness doesn’t matter too much as long as you are consistent so it bakes evenly, the thinner the dough, the quicker it bakes). I used a circle cutter to make the pitas. I brushed olive oil on each one. I used parchment paper over an aluminum tray. I preheated the oven to 420 degrees and bakes for 5-8 minutes. Keep on eye so as not to over bake. Remove from oven and serve with hummus or the Indian food seen at the end of the video.