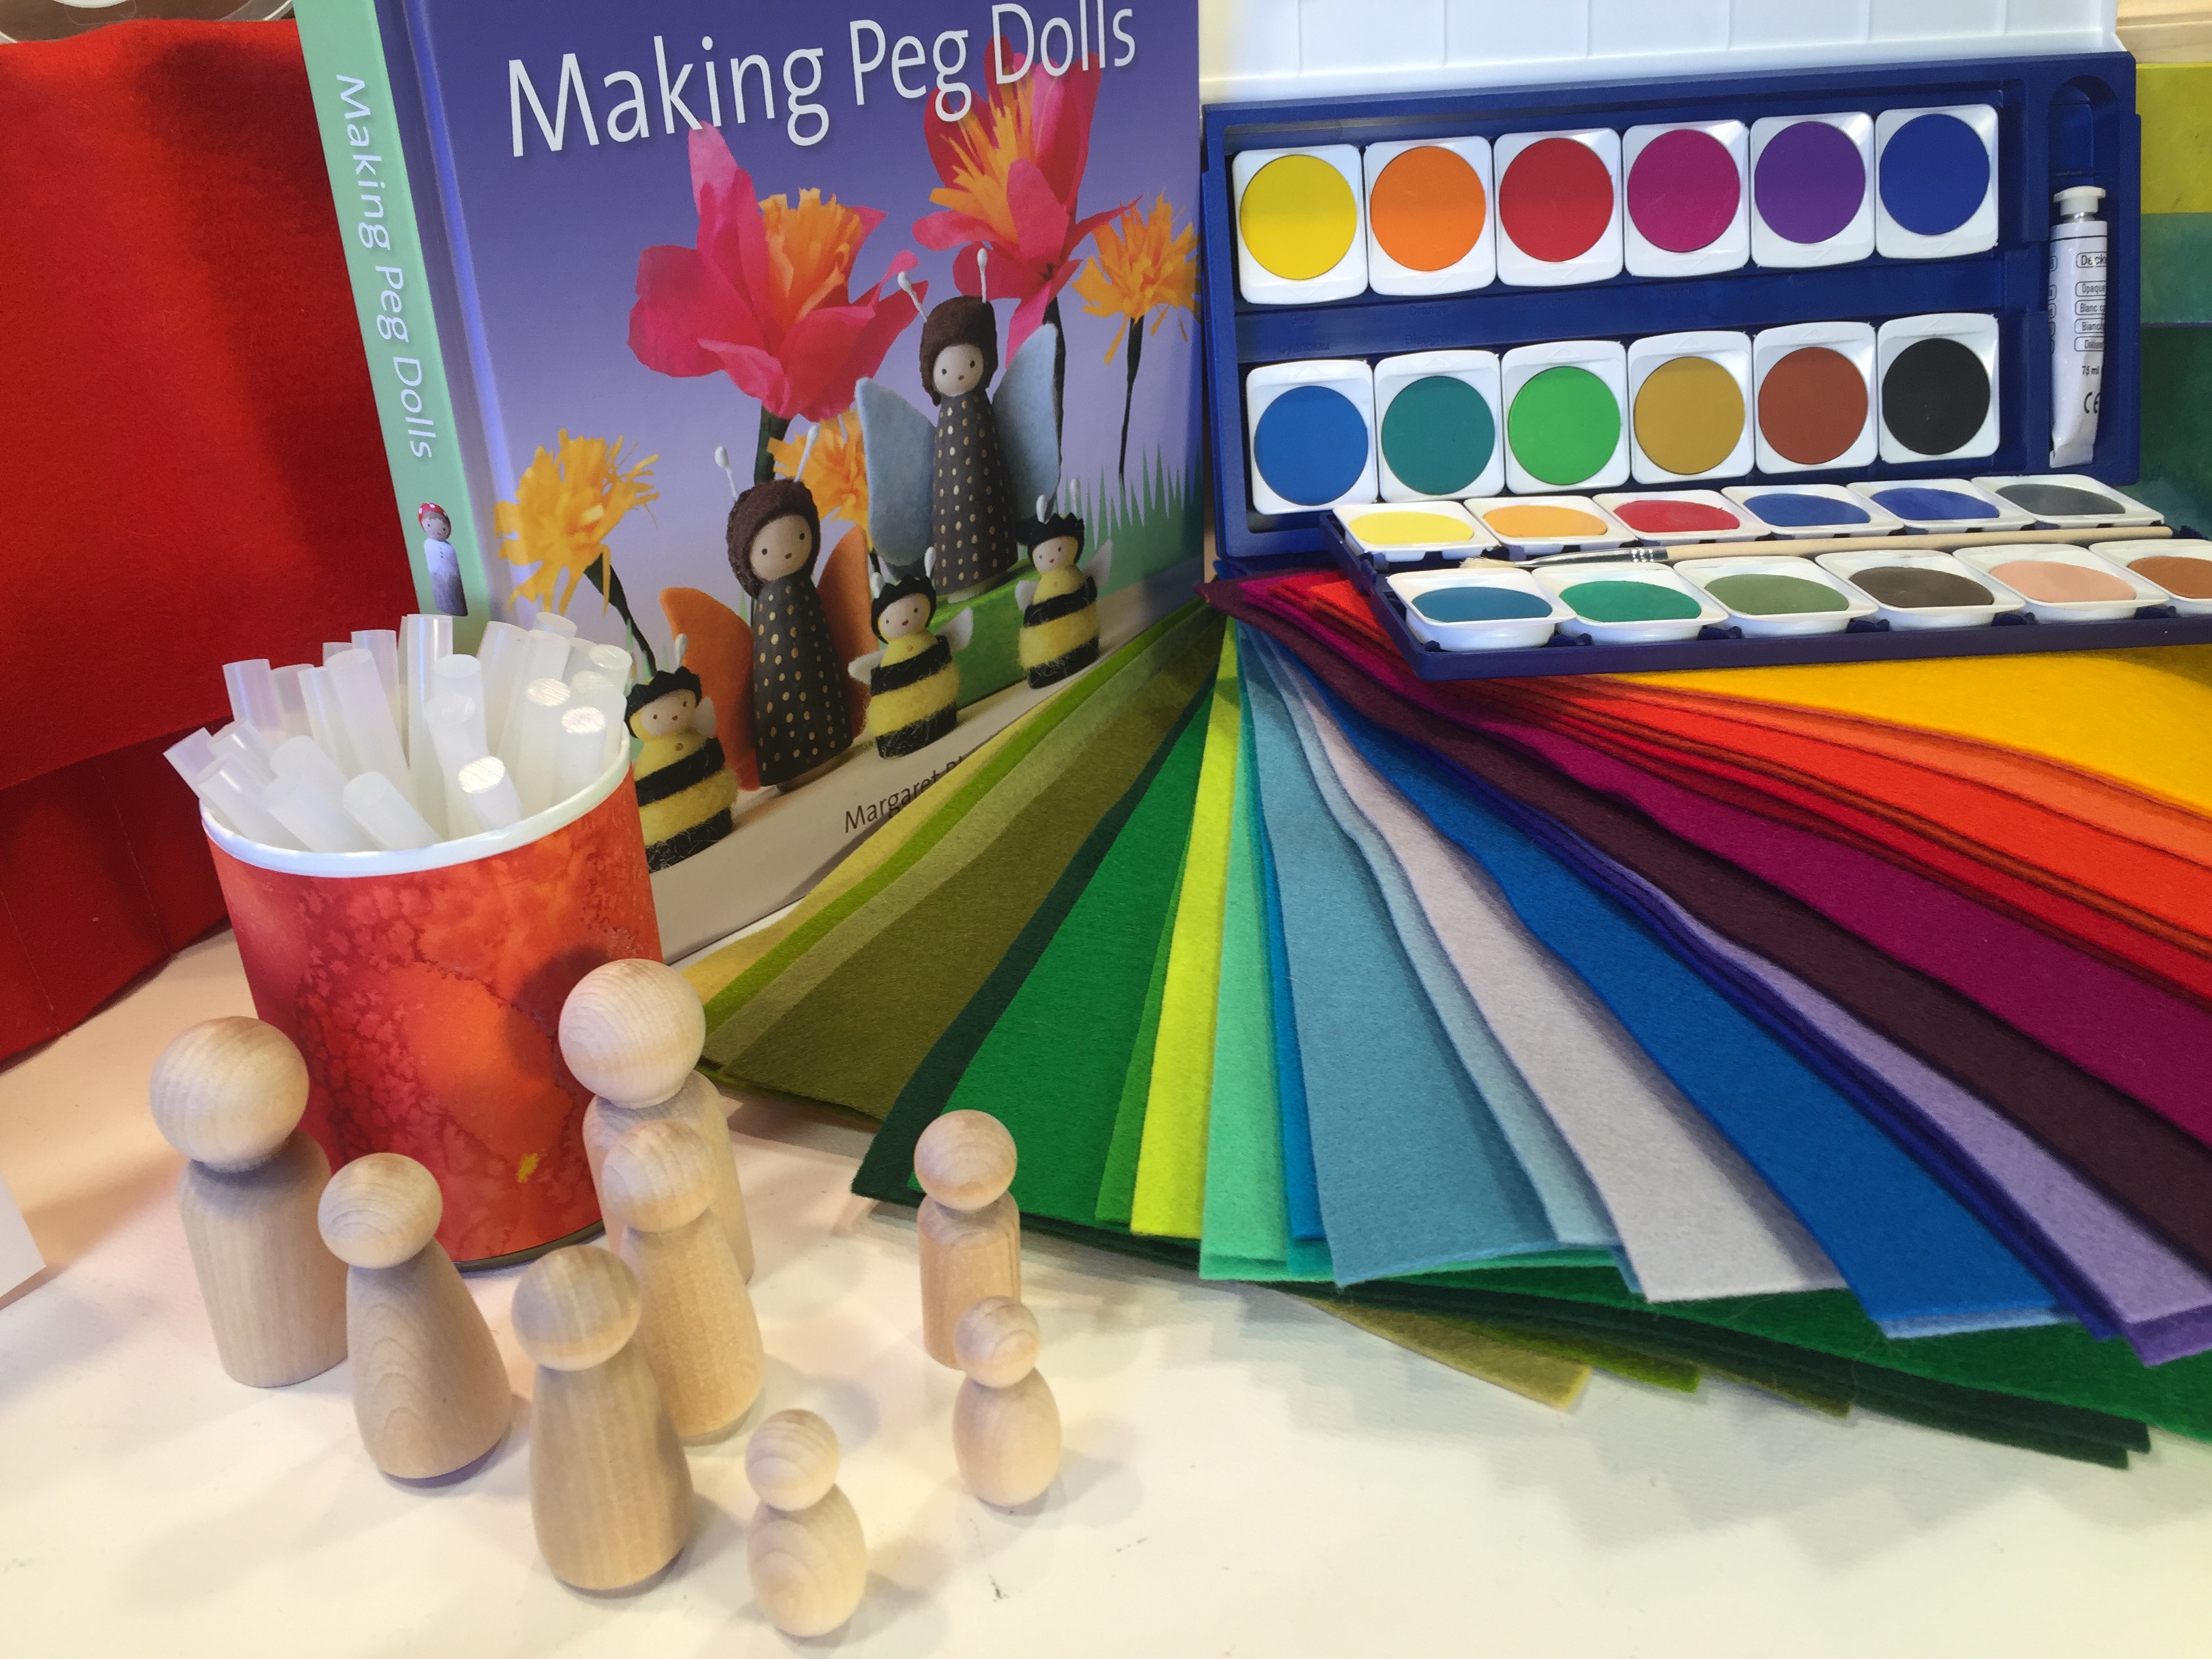
For years I made finger puppets using wooden molds that are larger than peg dolls and include a hollowed center. Then I discovered peg dolls and started making those. I’m still partial to finger puppets because I like the larger size, but the availability and versatility of peg dolls makes them a better option. All the supplies I’ve used to make my finger puppets and peg dolls have been purchased from A Child’s Dream. Our peg dolls and finger puppets are used in our homeschool for anything from pretend play to math. What I especially appreciate about the peg dolls is that they come in many sizes from bunting baby, tiny, small, large, extra large and female shape large and female shape extra large. While I occasionally use the female shape, I prefer the neutral shape for both male and female peg dolls. I also typically use the Holland wool felt for clothes and accessories for our peg dolls and finger puppets.
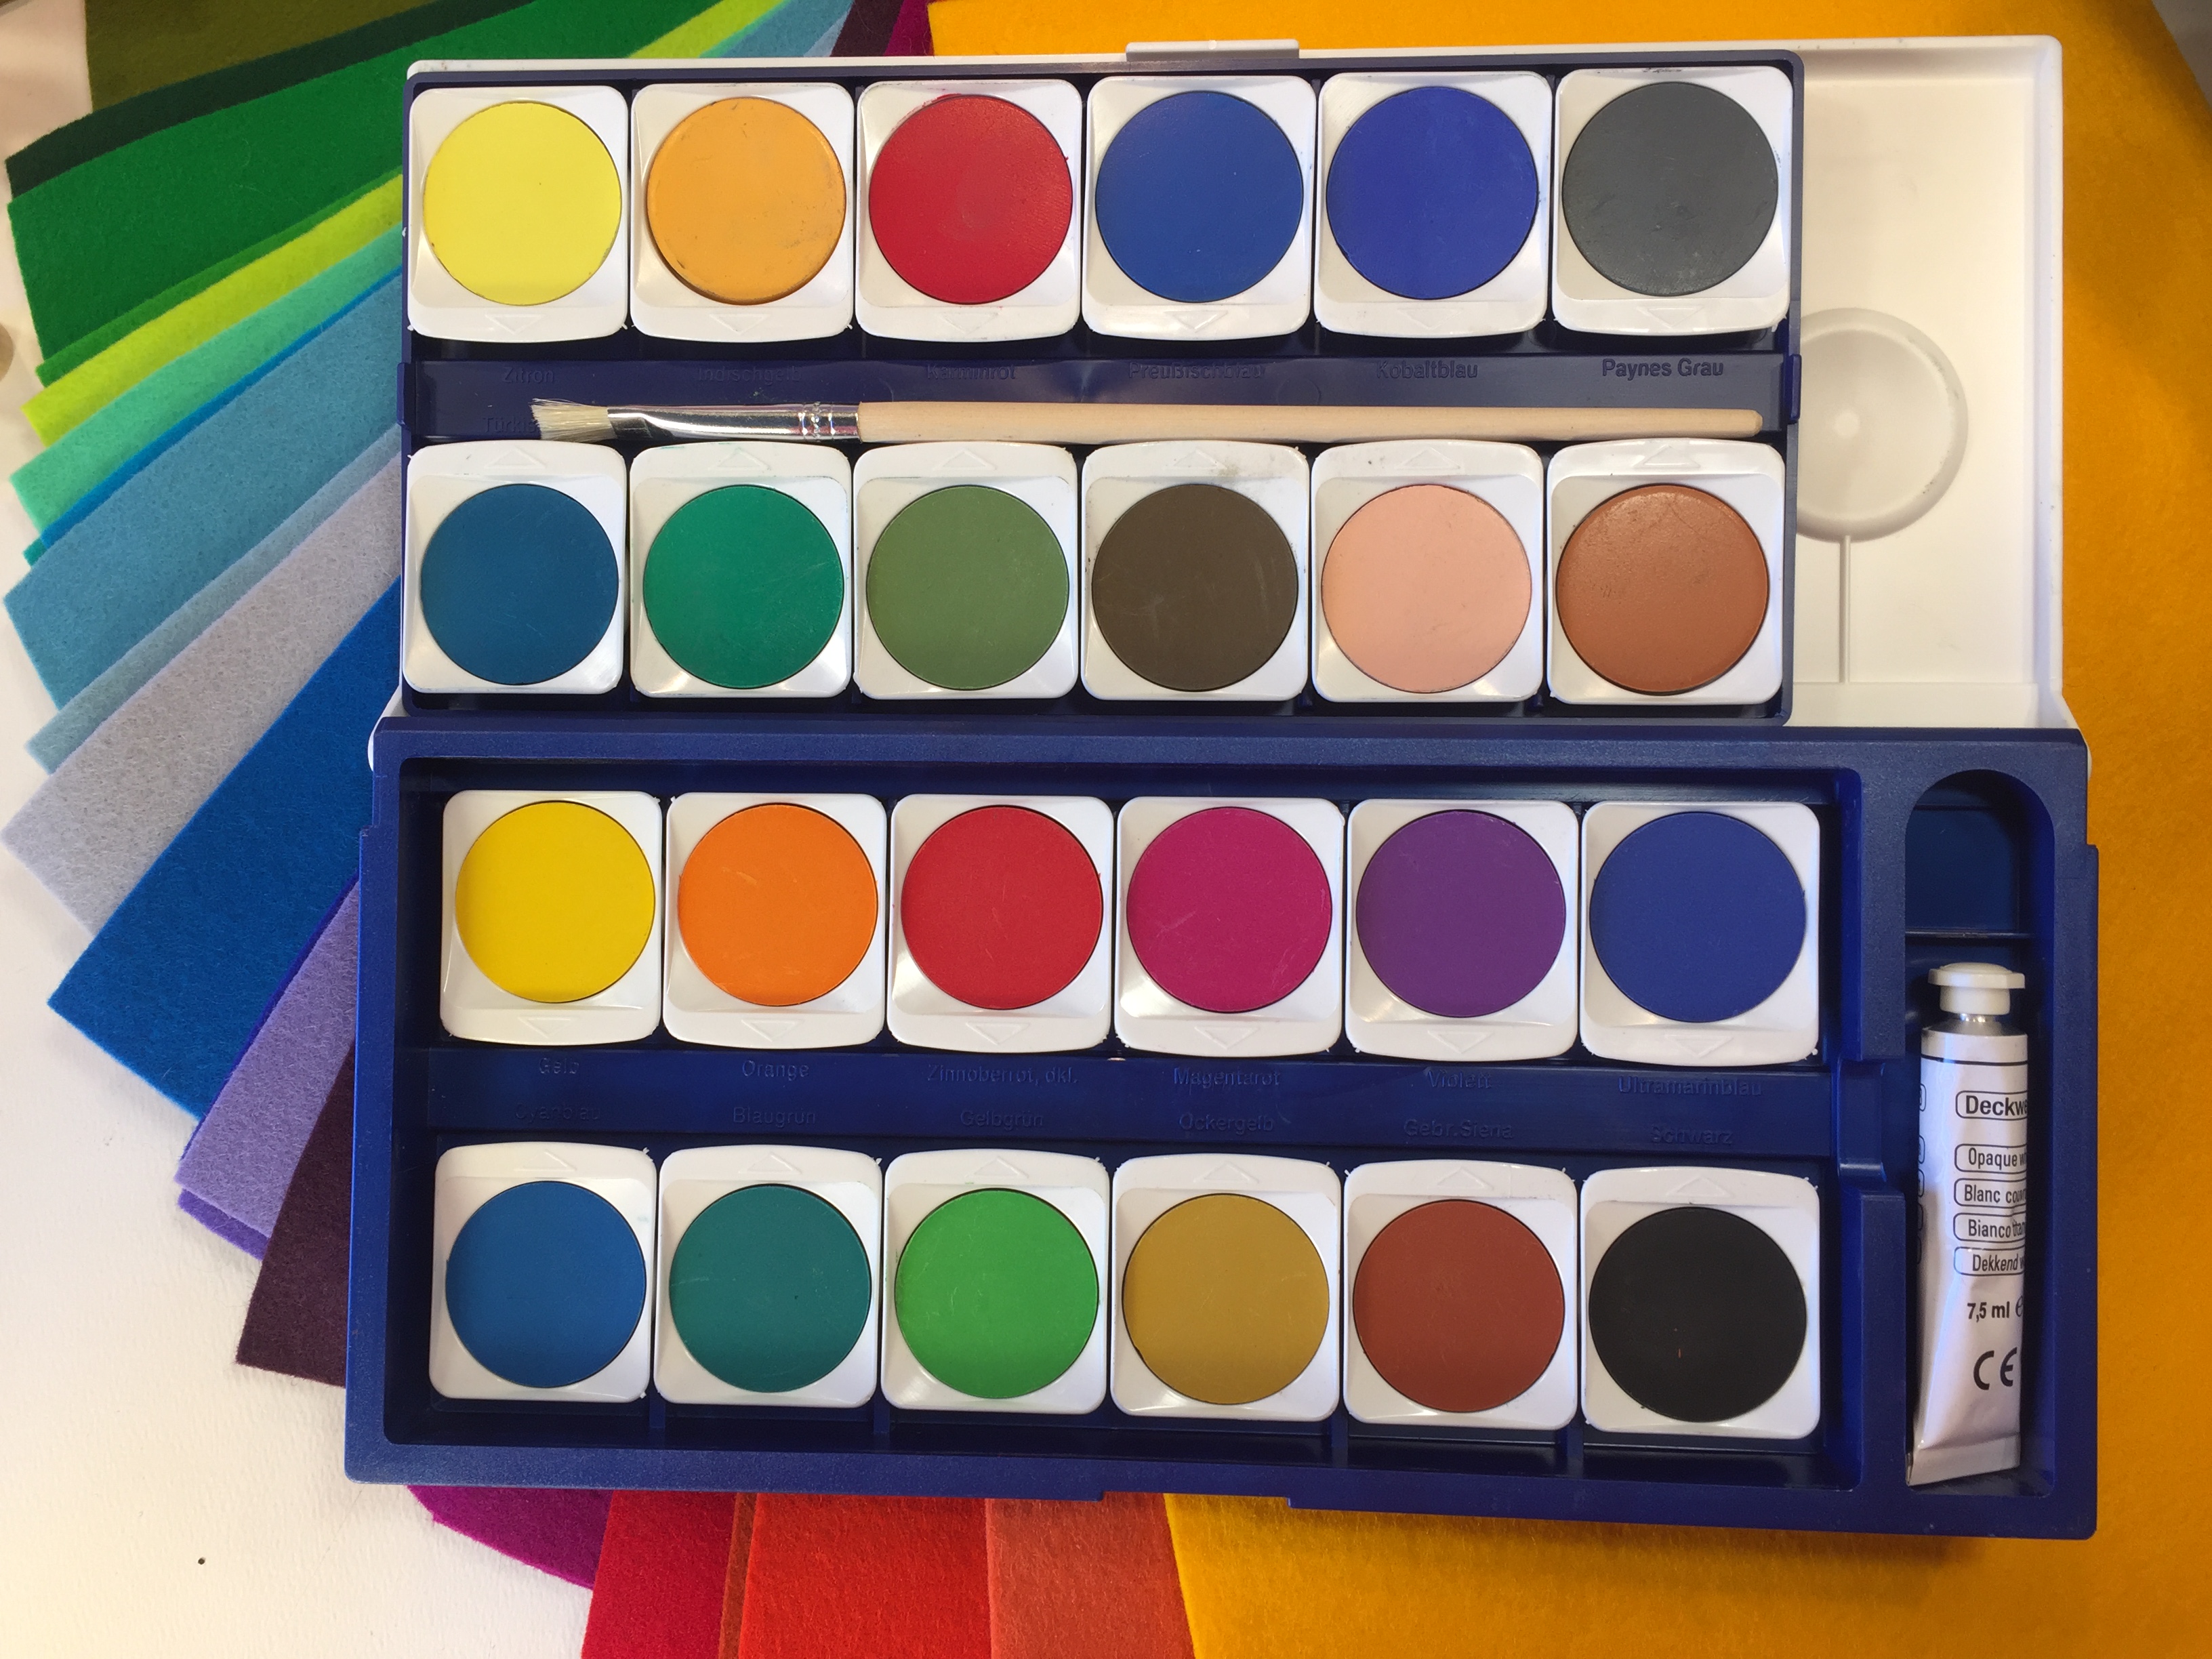
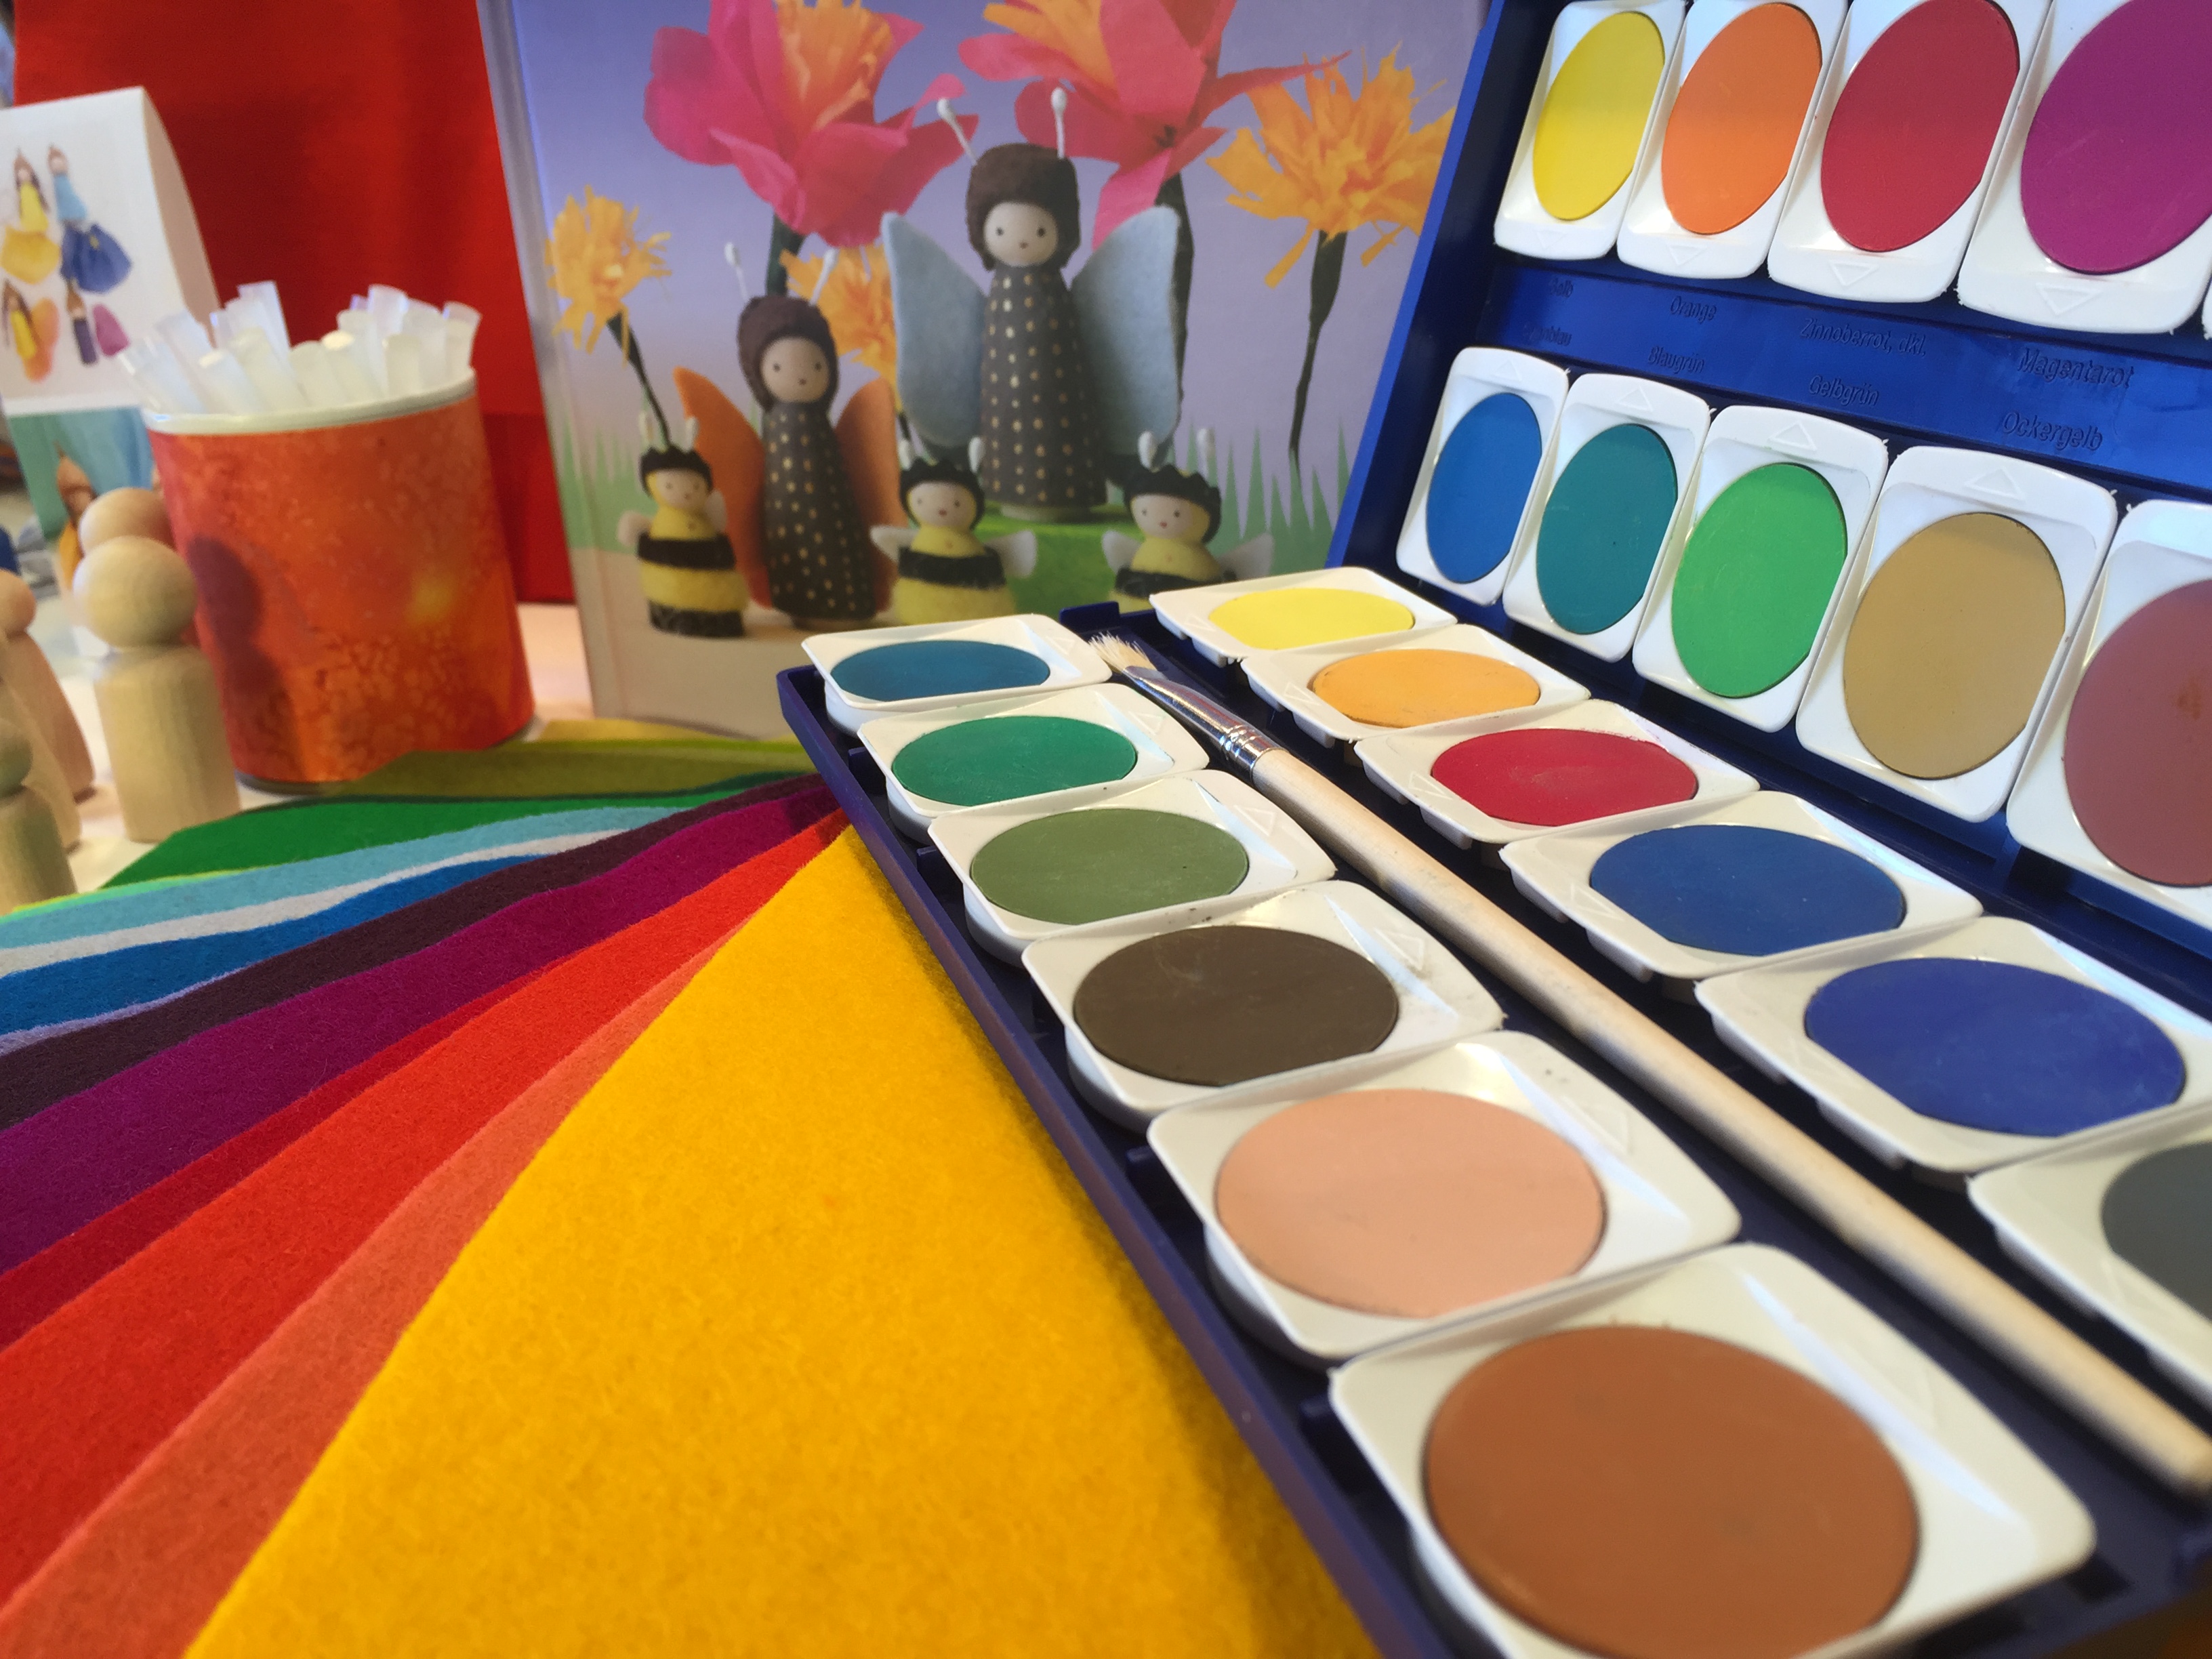
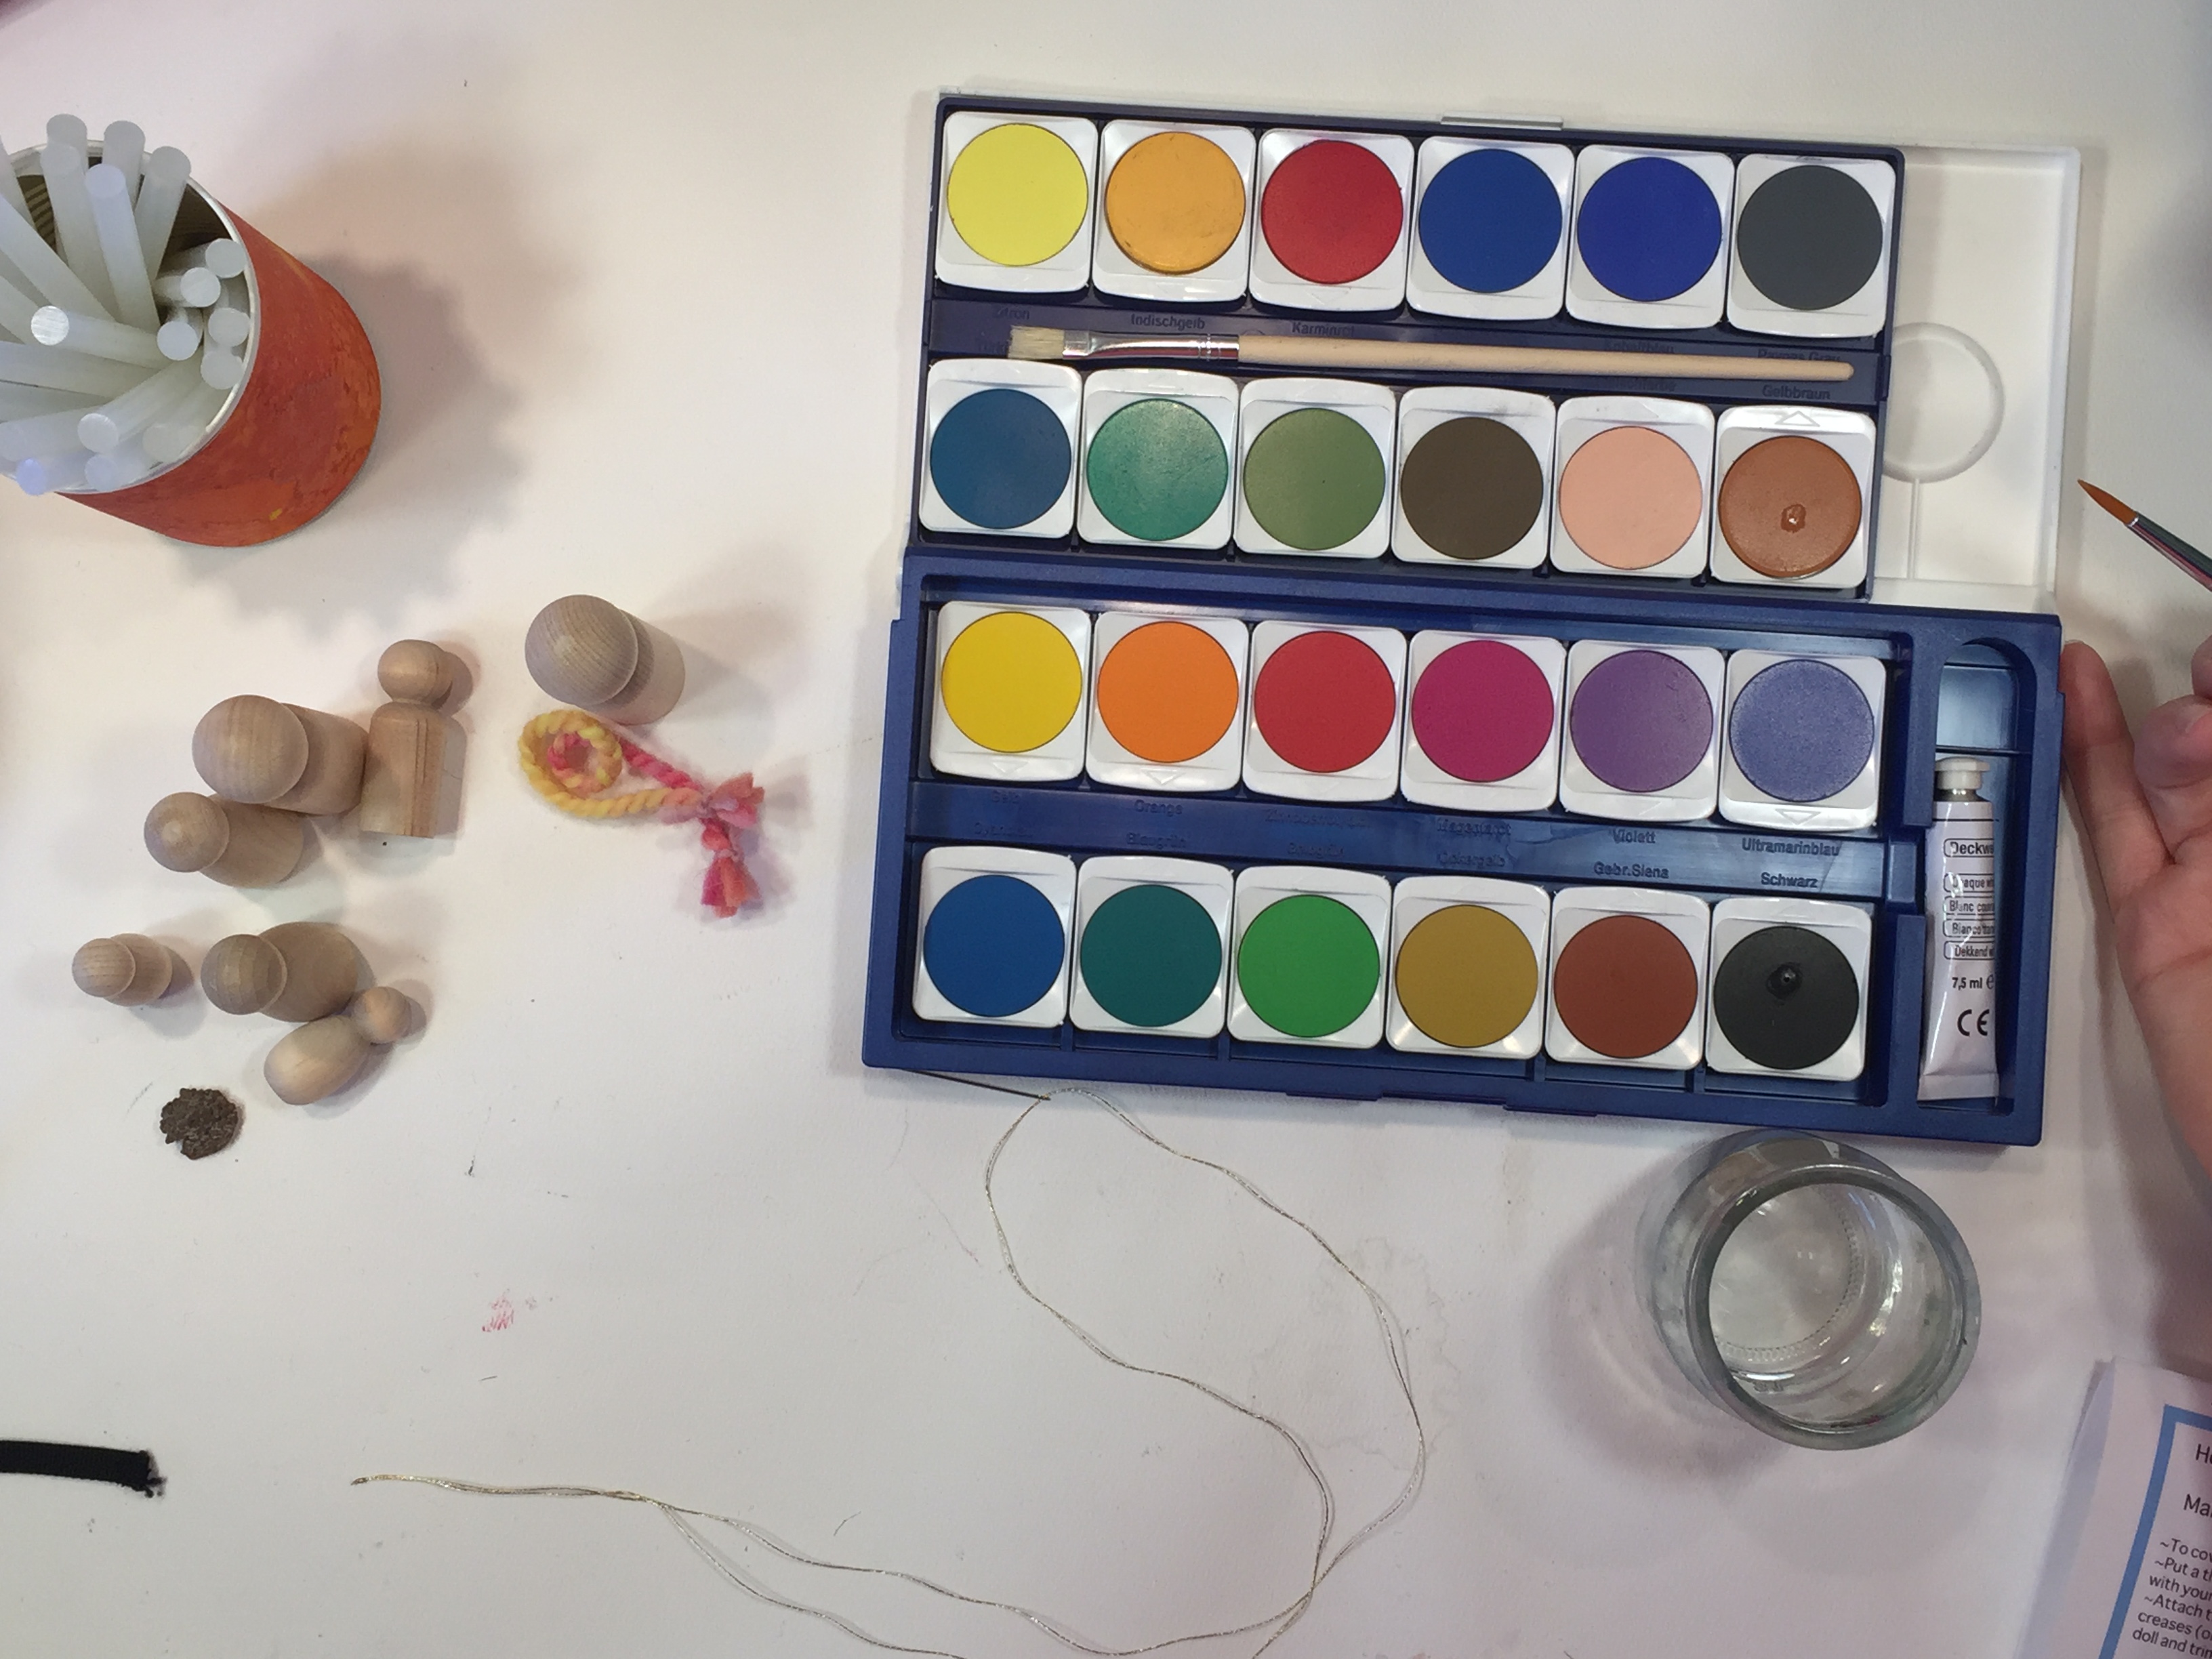
Occasionally I’ll use other materials like beads, sticks and metal accents to accessorize the decorate our peg dolls. Adding these additions is not safe for children under 3 years of age, so please be mindful when adding these items to your peg dolls. Additionally, many peg dolls are small and chokable, so be mindful of the smaller peg dolls as they are not suitable for toddlers. I use a hot glue gun to adhere both accessories and clothing to the peg dolls. I also use it to adhere the hair to the peg dolls and finger puppets. I like using bulky weight Lamb’s Pride wool yarn, but I have used worsted weight and mohair as well. While I didn’t used to paint our finger puppets, I do often paint our peg dolls with Lyra Opaque Watercolors. I like these paints because you can still see the wood grain. If you want more a more opaque look, you can add a bit of the white paint that comes in the set or add a bit of white acrylic paint to the watercolors.
Over the years we have many hundreds of peg dolls. Here are a few of the tutorials. Enjoy!
Peg Doll Hat Pattern Comparison
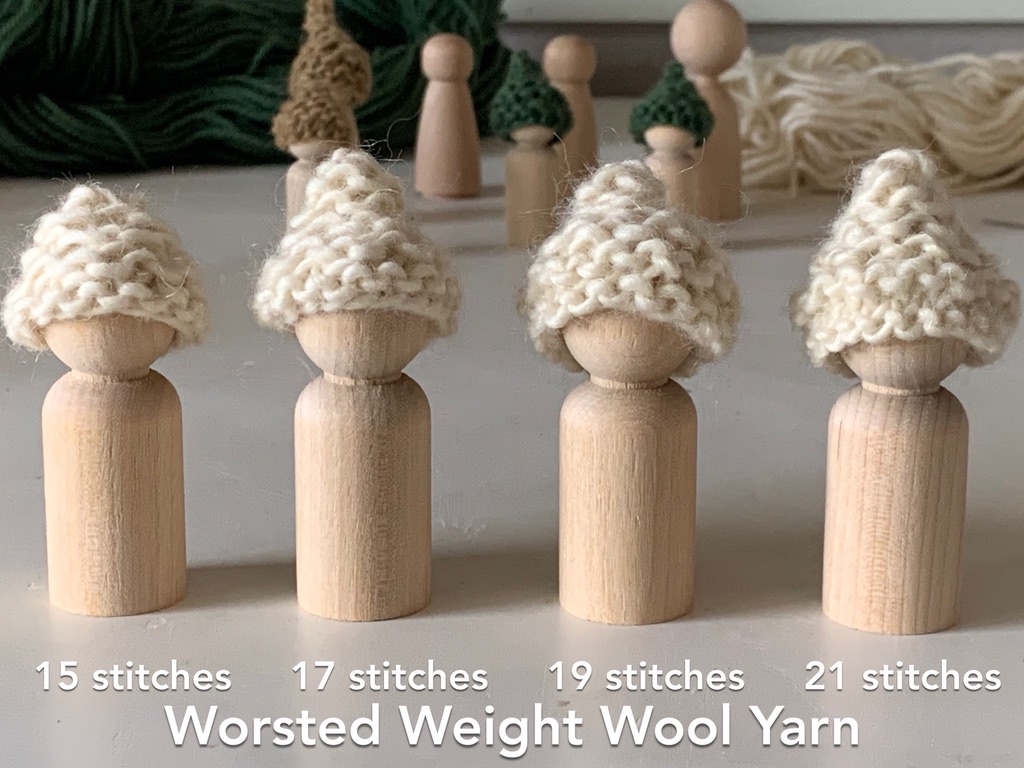
Once you learn the basic pattern for a hat, you can alter it to make it bigger, smaller or more pointy. For this project, I used sock, sport and worsted weight. I also altered a pattern I found in the book Making Peg Dolls by Margaret Bloom on the Martinmas peg doll tutorial. After talking with Margaret to get permission to share my version of the pattern, she let me know that the book is being reprinted and a new updated hat pattern is expected. While you can crochet or knit in the round to make hats and beanies, this tutorial used the basics of knitting with two needles and readily available supplies. The skills you’ll need to know or learn for this tutorial are casting on, knitting, decreasing (knit two together) and binding off. You’ll also need a sewing knitting needle to sew the hat together.
Small Beanie
The smallest mini beanie pattern calls for worsted weight yarn and size 7 needles. This size beanie fits the large male/unisex peg doll and finger puppets. The pattern for this basic hat is as follows:
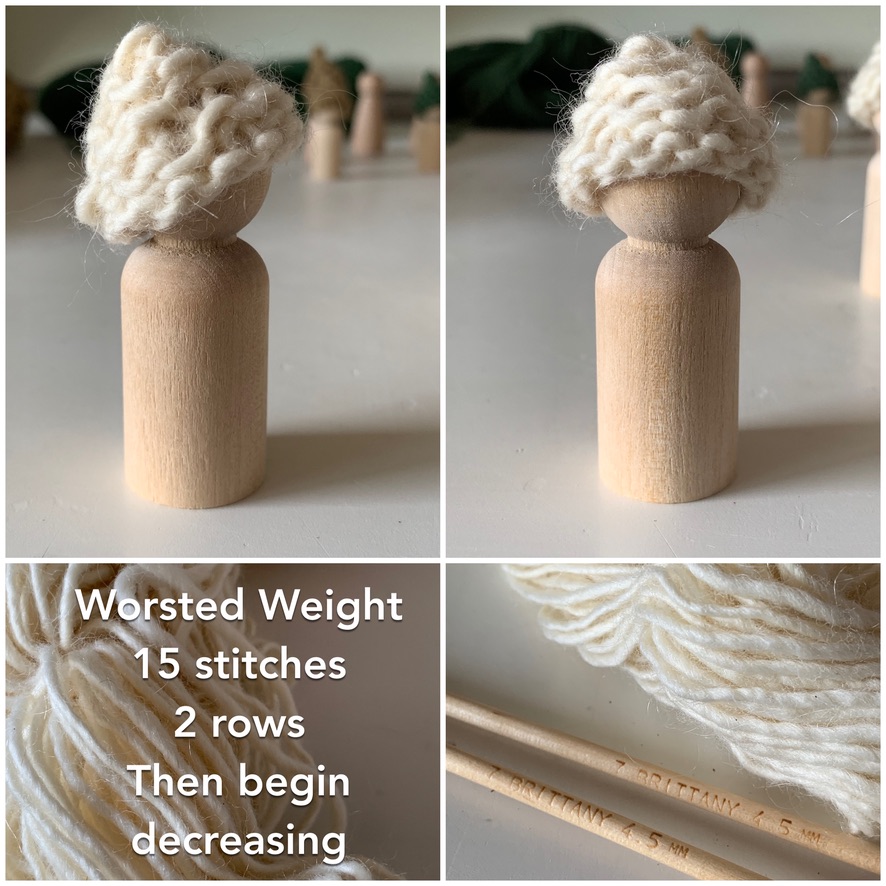
- Cast on 15 stitches
- Knit 2 rows
- Knit 2 together, knit 1 (repeat for the whole row)
- Knit 1 row (should be down to 10 stitches)
- Knit 1, knit 2 together (repeat for whole row)
- Knit 1 row (should be down to 7 stitches)
- Knit 1, knit 2 together (repeat for whole row)
- Knit 1 row (should be down to 5 stitches)
- Knit 2 together, knit 1, knit 2 together
- At this point, you can add an extra row of knitting for a pointier hat or you can bind off
- Bind off when you have 3 stitches left
- Sew triangle piece together with blunt or pointy sewing knitting needle.
Medium Beanie
The medium beanie pattern calls for worsted weight yarn and size 7 needles. This size beanie fits the large male/unisex peg doll and finger puppets. The pattern for this basic hat is as follows:
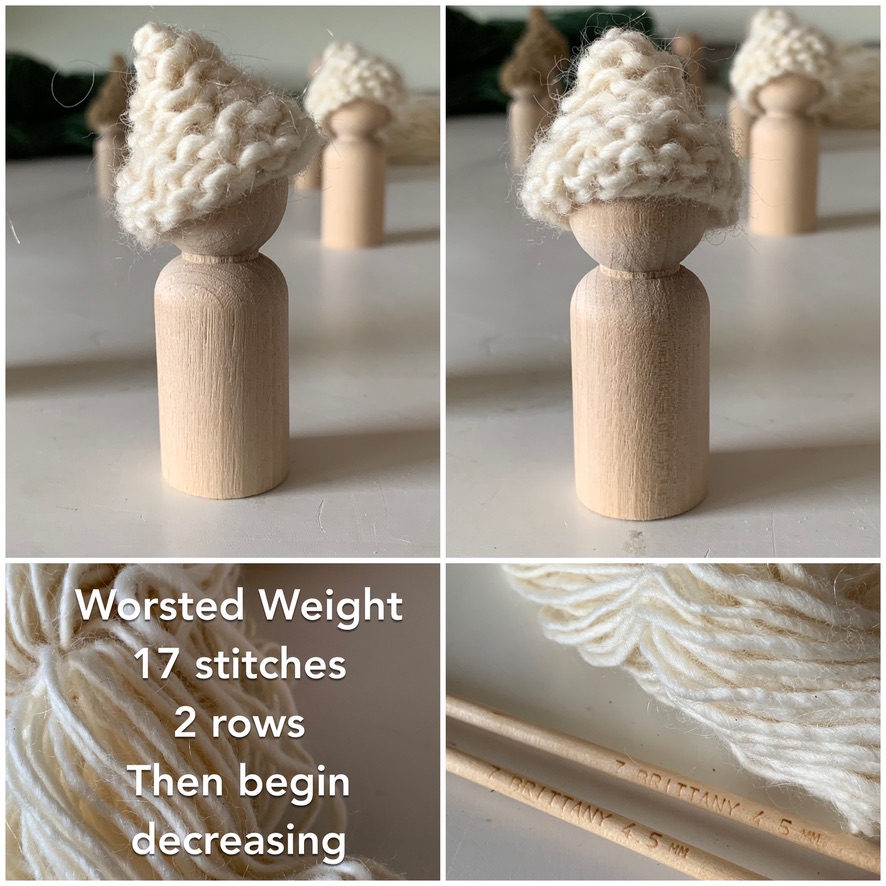
- Cast on 17 stitches
- Knit 2 rows
- Knit 2 together, knit 1 (repeat for the whole row)
- Knit 1 row (should be down to 11 stitches)
- Knit 2 together, knit 1 (repeat for whole row)
- Knit 1 row (should be down to 7 stitches)
- Knit 1, knit 2 together (repeat for whole row)
- Knit 1 row (should be down to 5 stitches)
- Knit 2 together, knit 1, knit 2 together
- At this point, you can add an extra row of knitting for a pointier hat or you can bind off
- Bind off when you have 3 stitches left
- Sew triangle piece together with blunt or pointy sewing knitting needle.
Large Beanie/Hat
The medium beanie pattern calls for worsted weight yarn and size 7 needles. This size beanie fits the large male/unisex peg doll and finger puppets. The pattern for this basic hat is as follows:
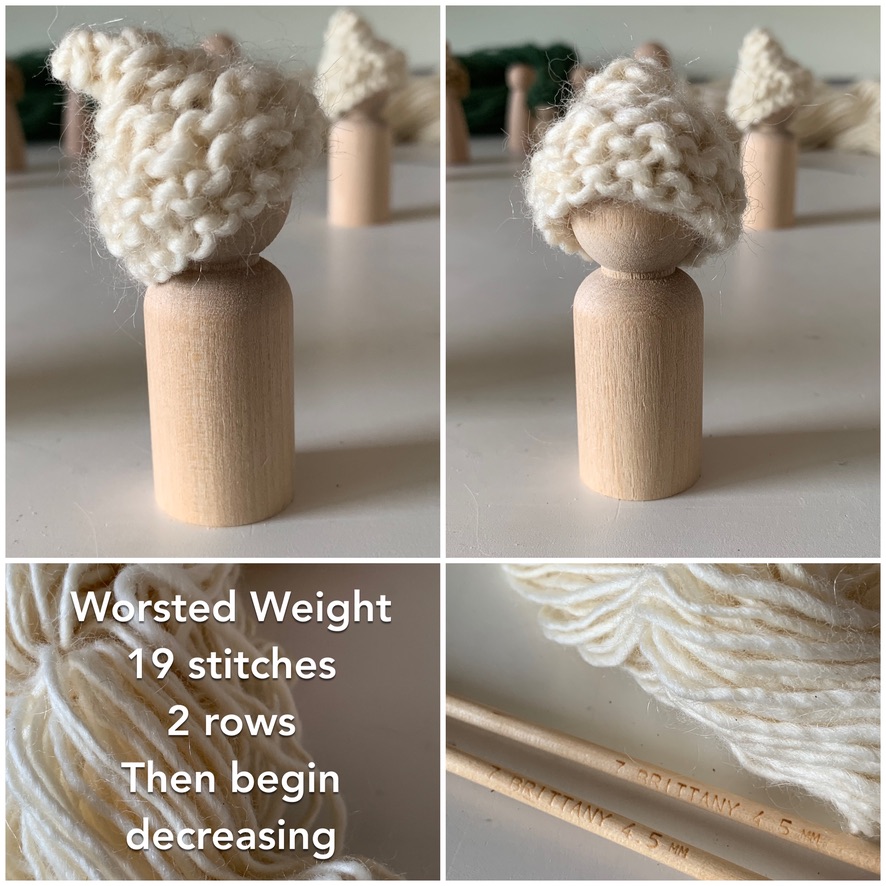
- Cast on 19 stitches
- Knit 2 rows
- Knit 1, knit 2 together (repeat for the whole row)
- Knit 1 row (should be down to 13 stitches)
- Knit 1, knit 2 together (repeat for the whole row)
- Knit 1 row (should be down to 9 stitches)
- Knit 1, knit 2 together (repeat for whole row)
- Knit 1 row (should be down to 6 stitches) *Skip this row for beanie shape rather than pointy shape
- Knit 1, knit 2 together (repeat for whole row)
- At this point, you can add an extra row of knitting for a pointier hat or you can bind off
- Bind off when you have 3 stitches left
- Sew triangle piece together with blunt or pointy sewing knitting needle.
Extra large beanie/hat for peg doll, finger puppet and extra large peg doll
The medium beanie pattern calls for worsted weight yarn and size 7 needles. This size beanie fits the large male/unisex peg doll and finger puppets. The pattern for this basic hat is as follows:
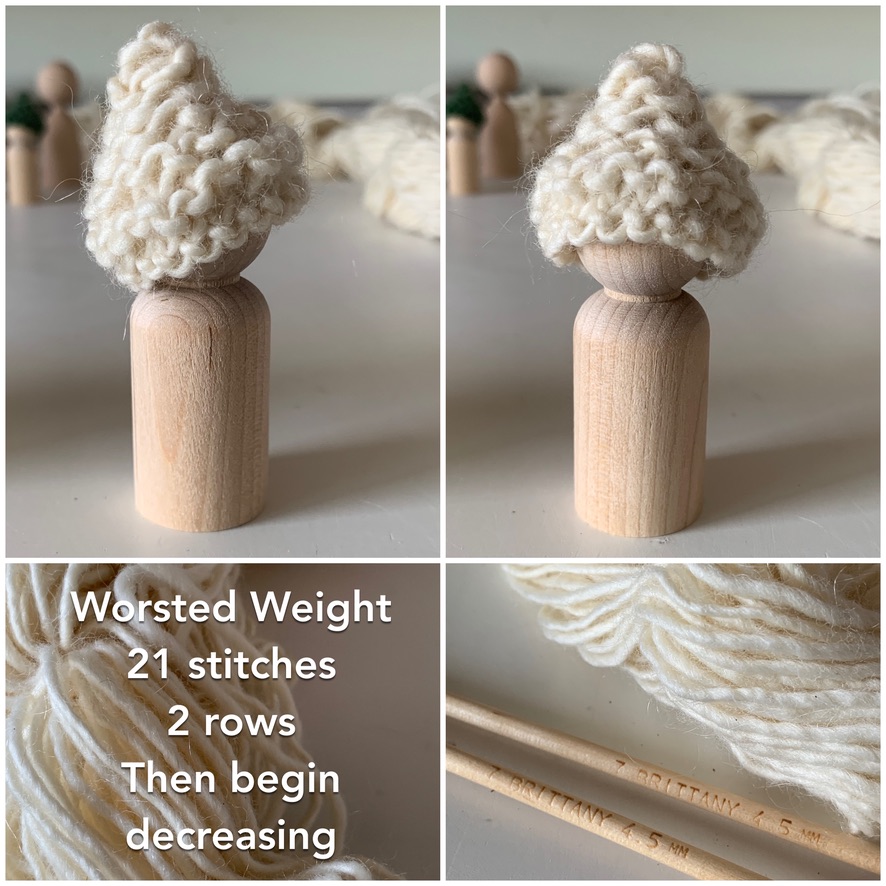
- Cast on 21 stitches
- Knit 2 rows
- Knit 1, knit 2 together (repeat for the whole row)
- Knit 1 row (should be down to 14 stitches)
- Knit 2 together, knit 1 (repeat for the whole row)
- Knit 1 row (should be down to 9 stitches)
- Knit 2 together, knit 1 (repeat for whole row)
- Knit 1 row (should be down to 6 stitches) *Skip this row for beanie shape rather than pointy shape
- Knit 2 together, knit 1 (repeat for whole row)
- At this point, you can add an extra row of knitting for a pointier hat or you can bind off
- Bind off when you have 3 stitches left
- Sew triangle piece together with blunt or pointy sewing knitting needle.
Hat for female or medium peg doll
The small hat for the mama/female peg doll and medium peg doll pattern calls for sport weight yarn or sock/finger yarn and size 5 needles. This size beanie fits the large male/unisex peg doll and finger puppets. The pattern for this basic hat is as follows:
- Cast on 13 stitches
- Knit 4 rows
- Knit 1, knit 2 together (repeat for the whole row)
- Knit 1 row (should be down to 9 stitches)
- Knit 2 together, knit 1 (repeat for whole row)
- Knit 1 row (should be down to 6 stitches) *Skip this row for beanie shape rather than pointy shape
- Knit 2 together, knit 1 (repeat for whole row)
- At this point, you can add an extra row of knitting for a pointier hat or you can bind off
- Bind off when you have 3 stitches left
- Sew triangle piece together with blunt or pointy sewing knitting needle.Sew triangle piece together with blunt or pointy sewing knitting needle.


Hat for medium peg doll
- Cast on 13 stitches
- Knit 2 rows
- Knit 1, knit 2 together (repeat for the whole row)
- Knit 1 row (should be down to 9 stitches)
- Knit 2 together, knit 1 (repeat for whole row)
- Knit 2 together, knit 1 (repeat for whole row)
- Bind off when you have 3 stitches left
- Sew triangle piece together with blunt or pointy sewing knitting needle.Sew triangle piece together with blunt or pointy sewing knitting needle.


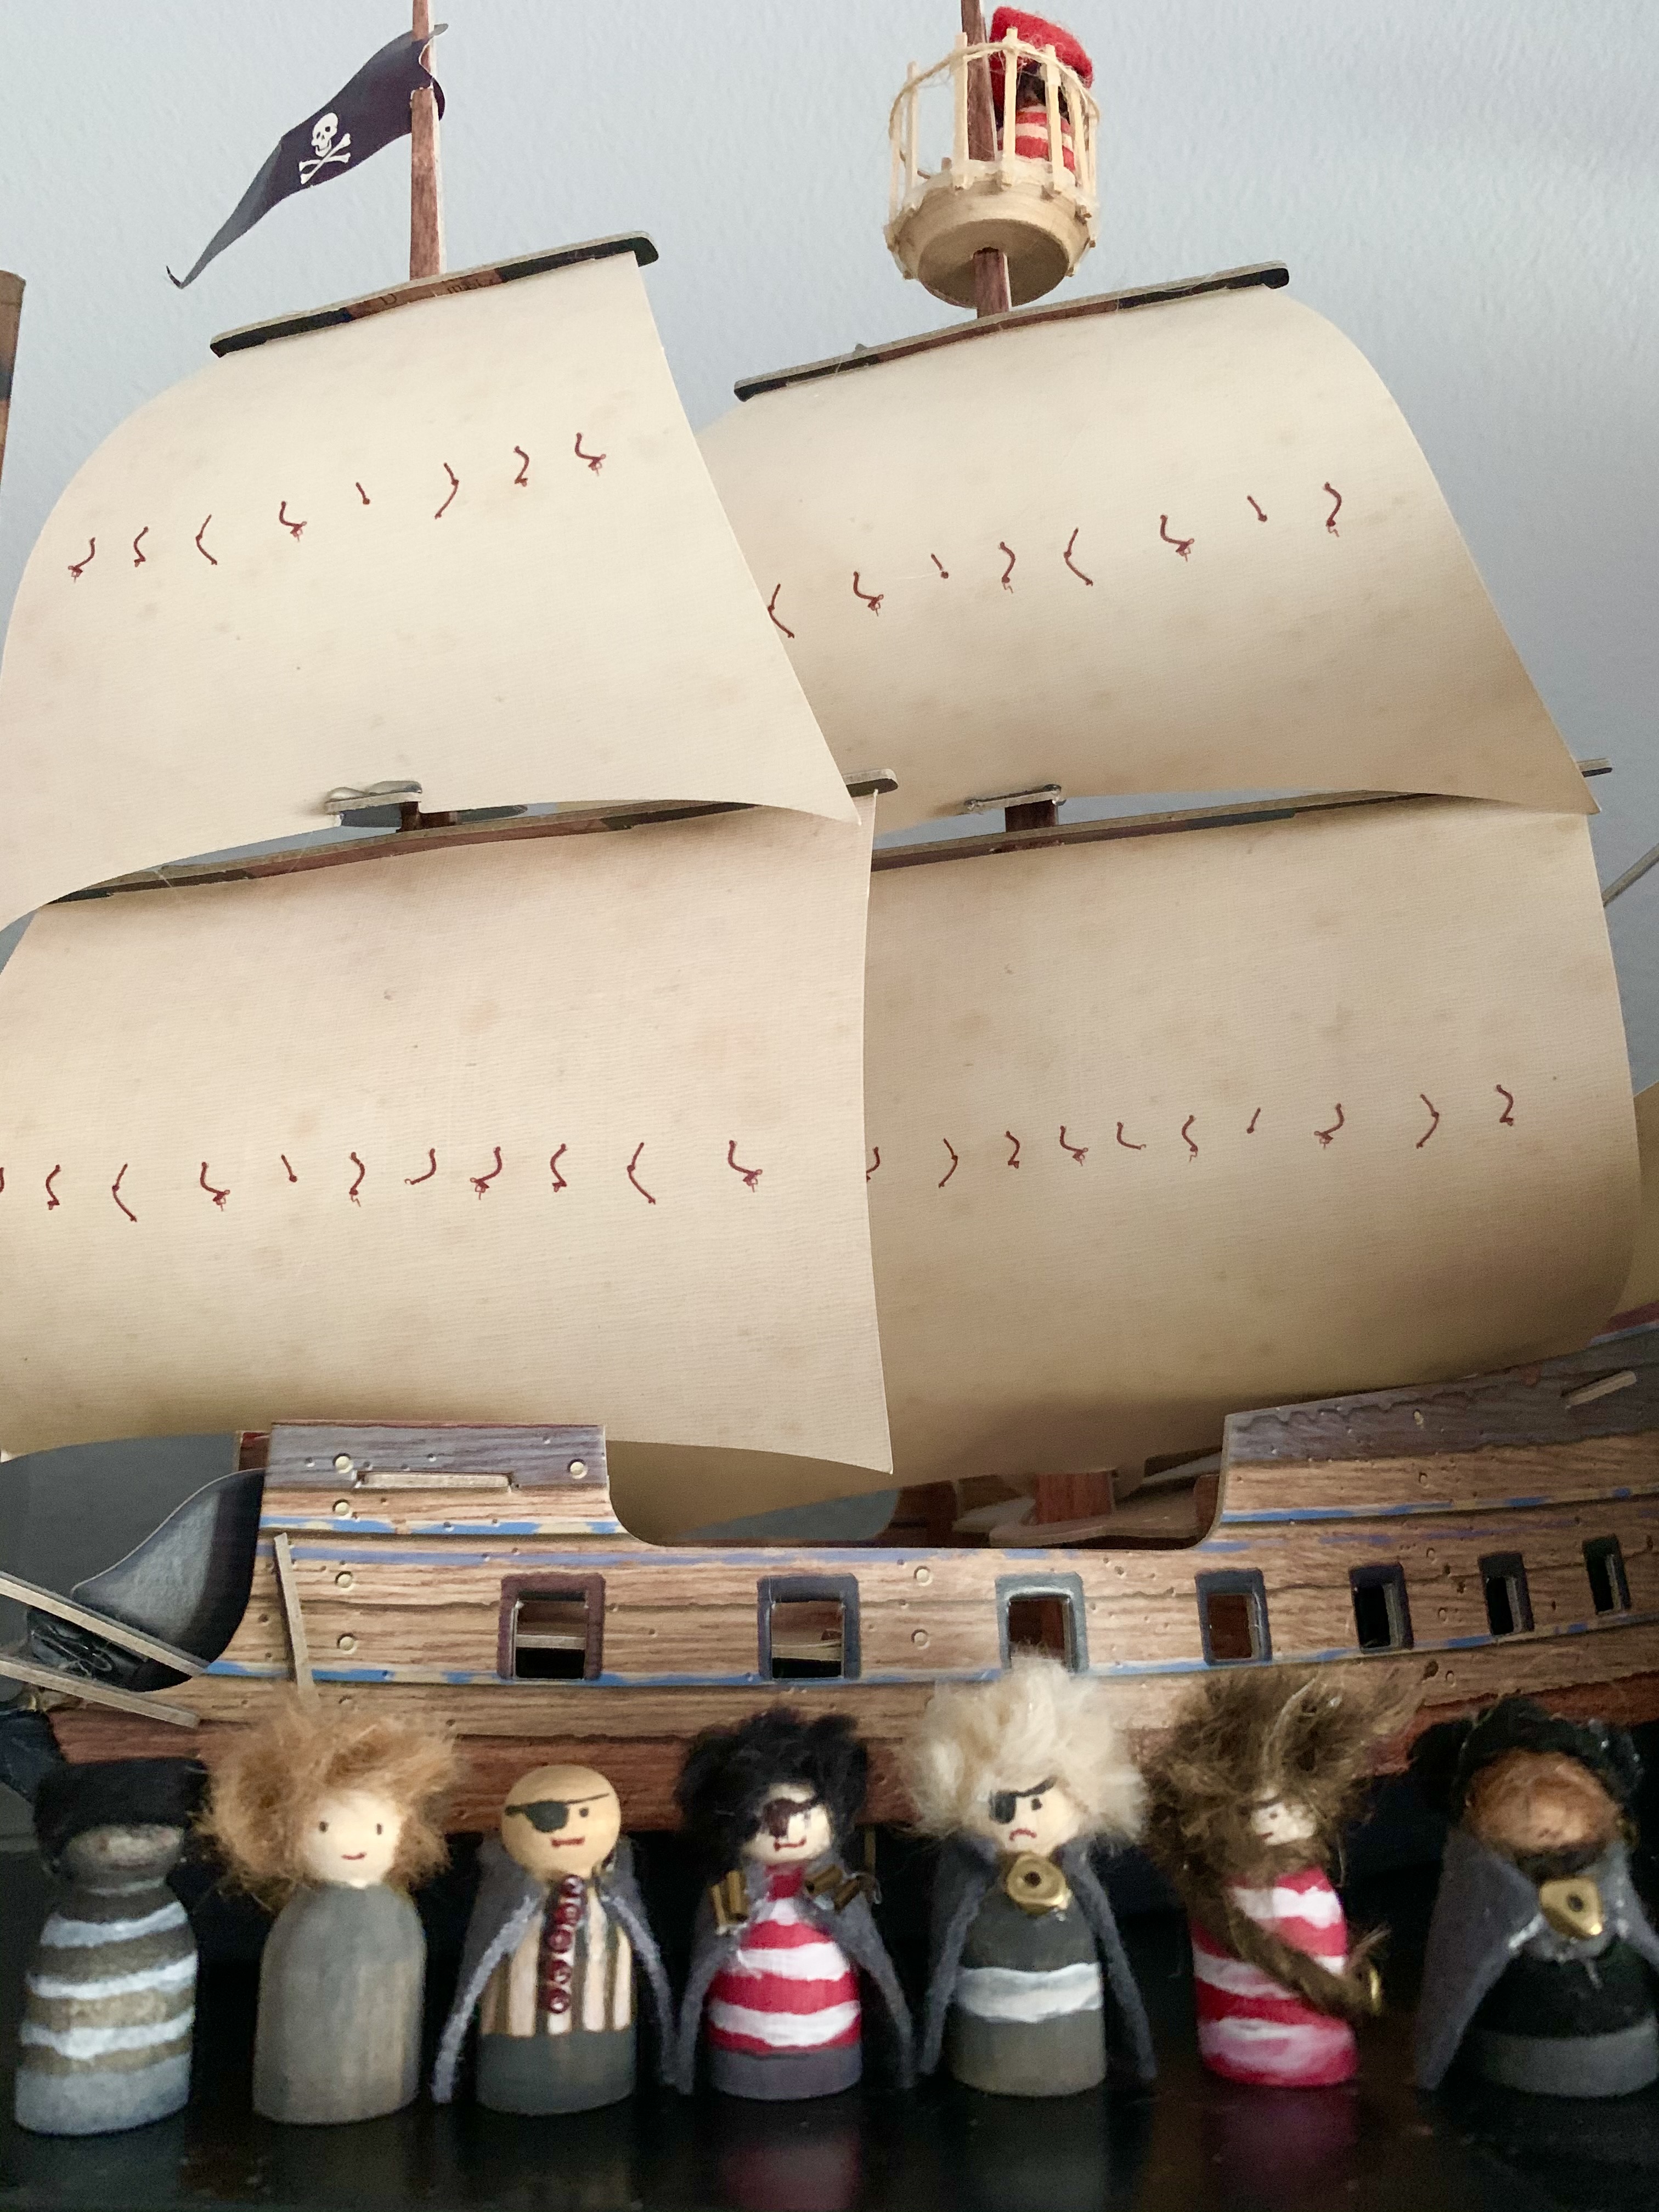
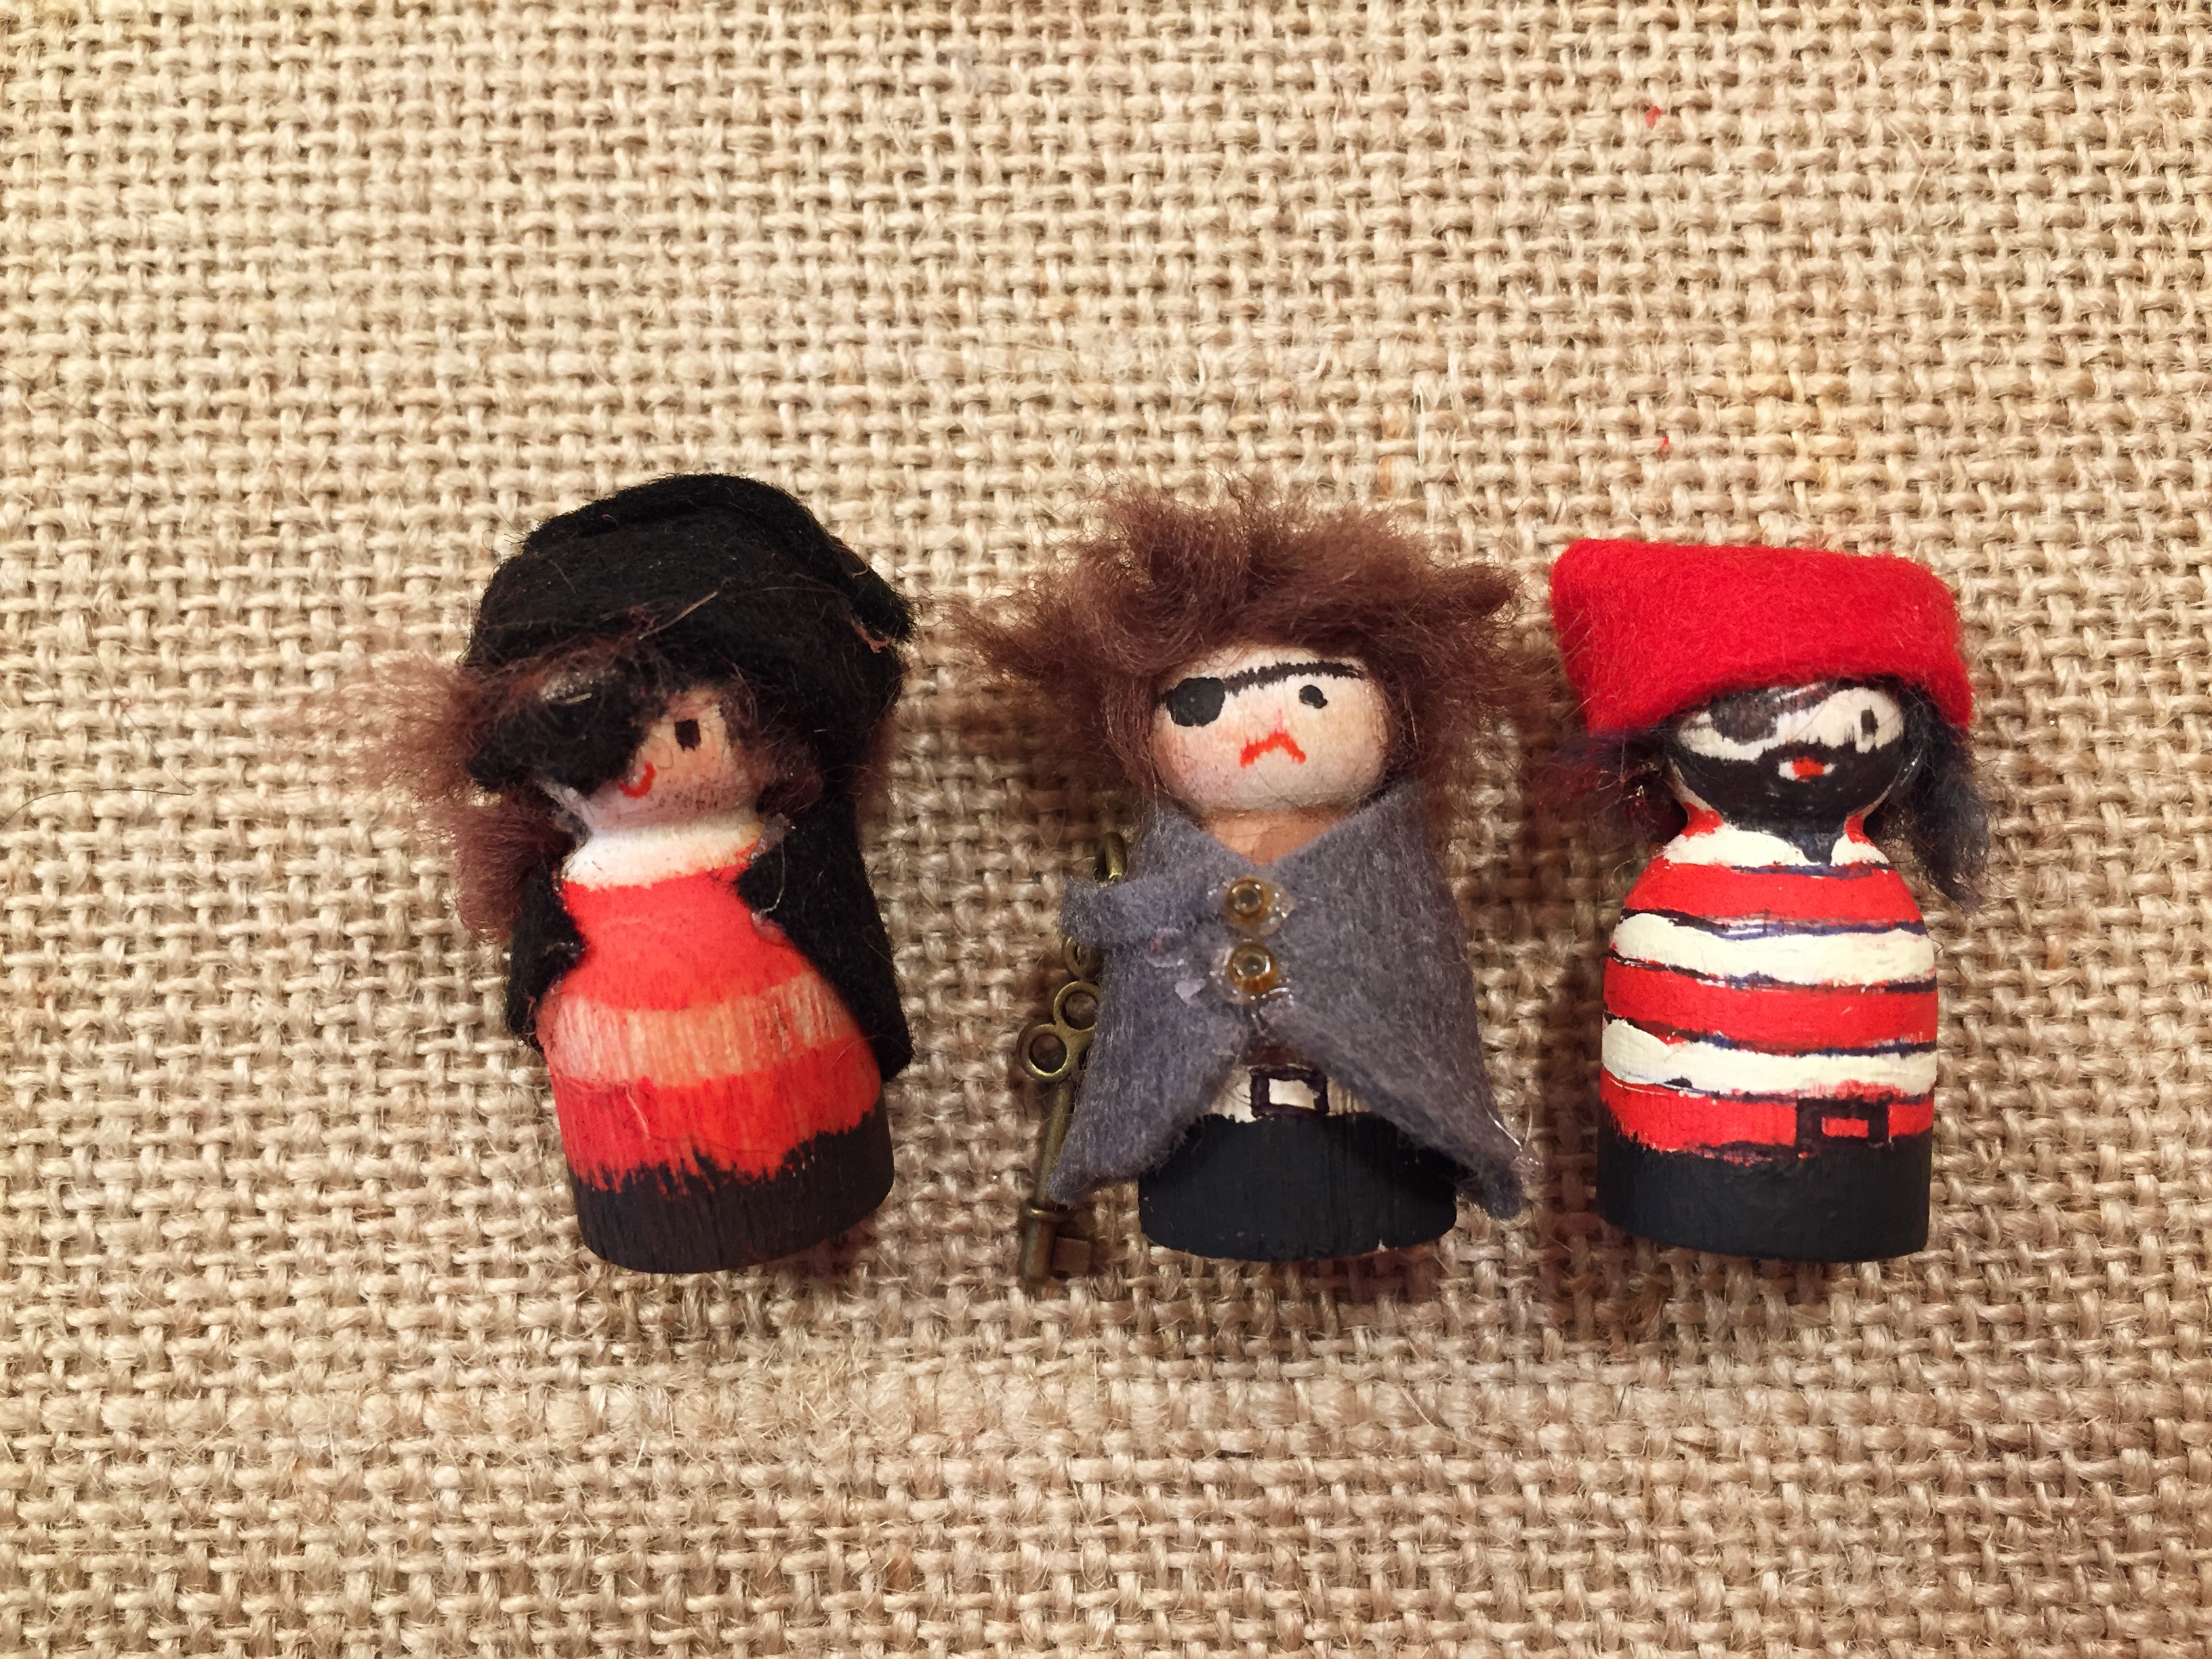
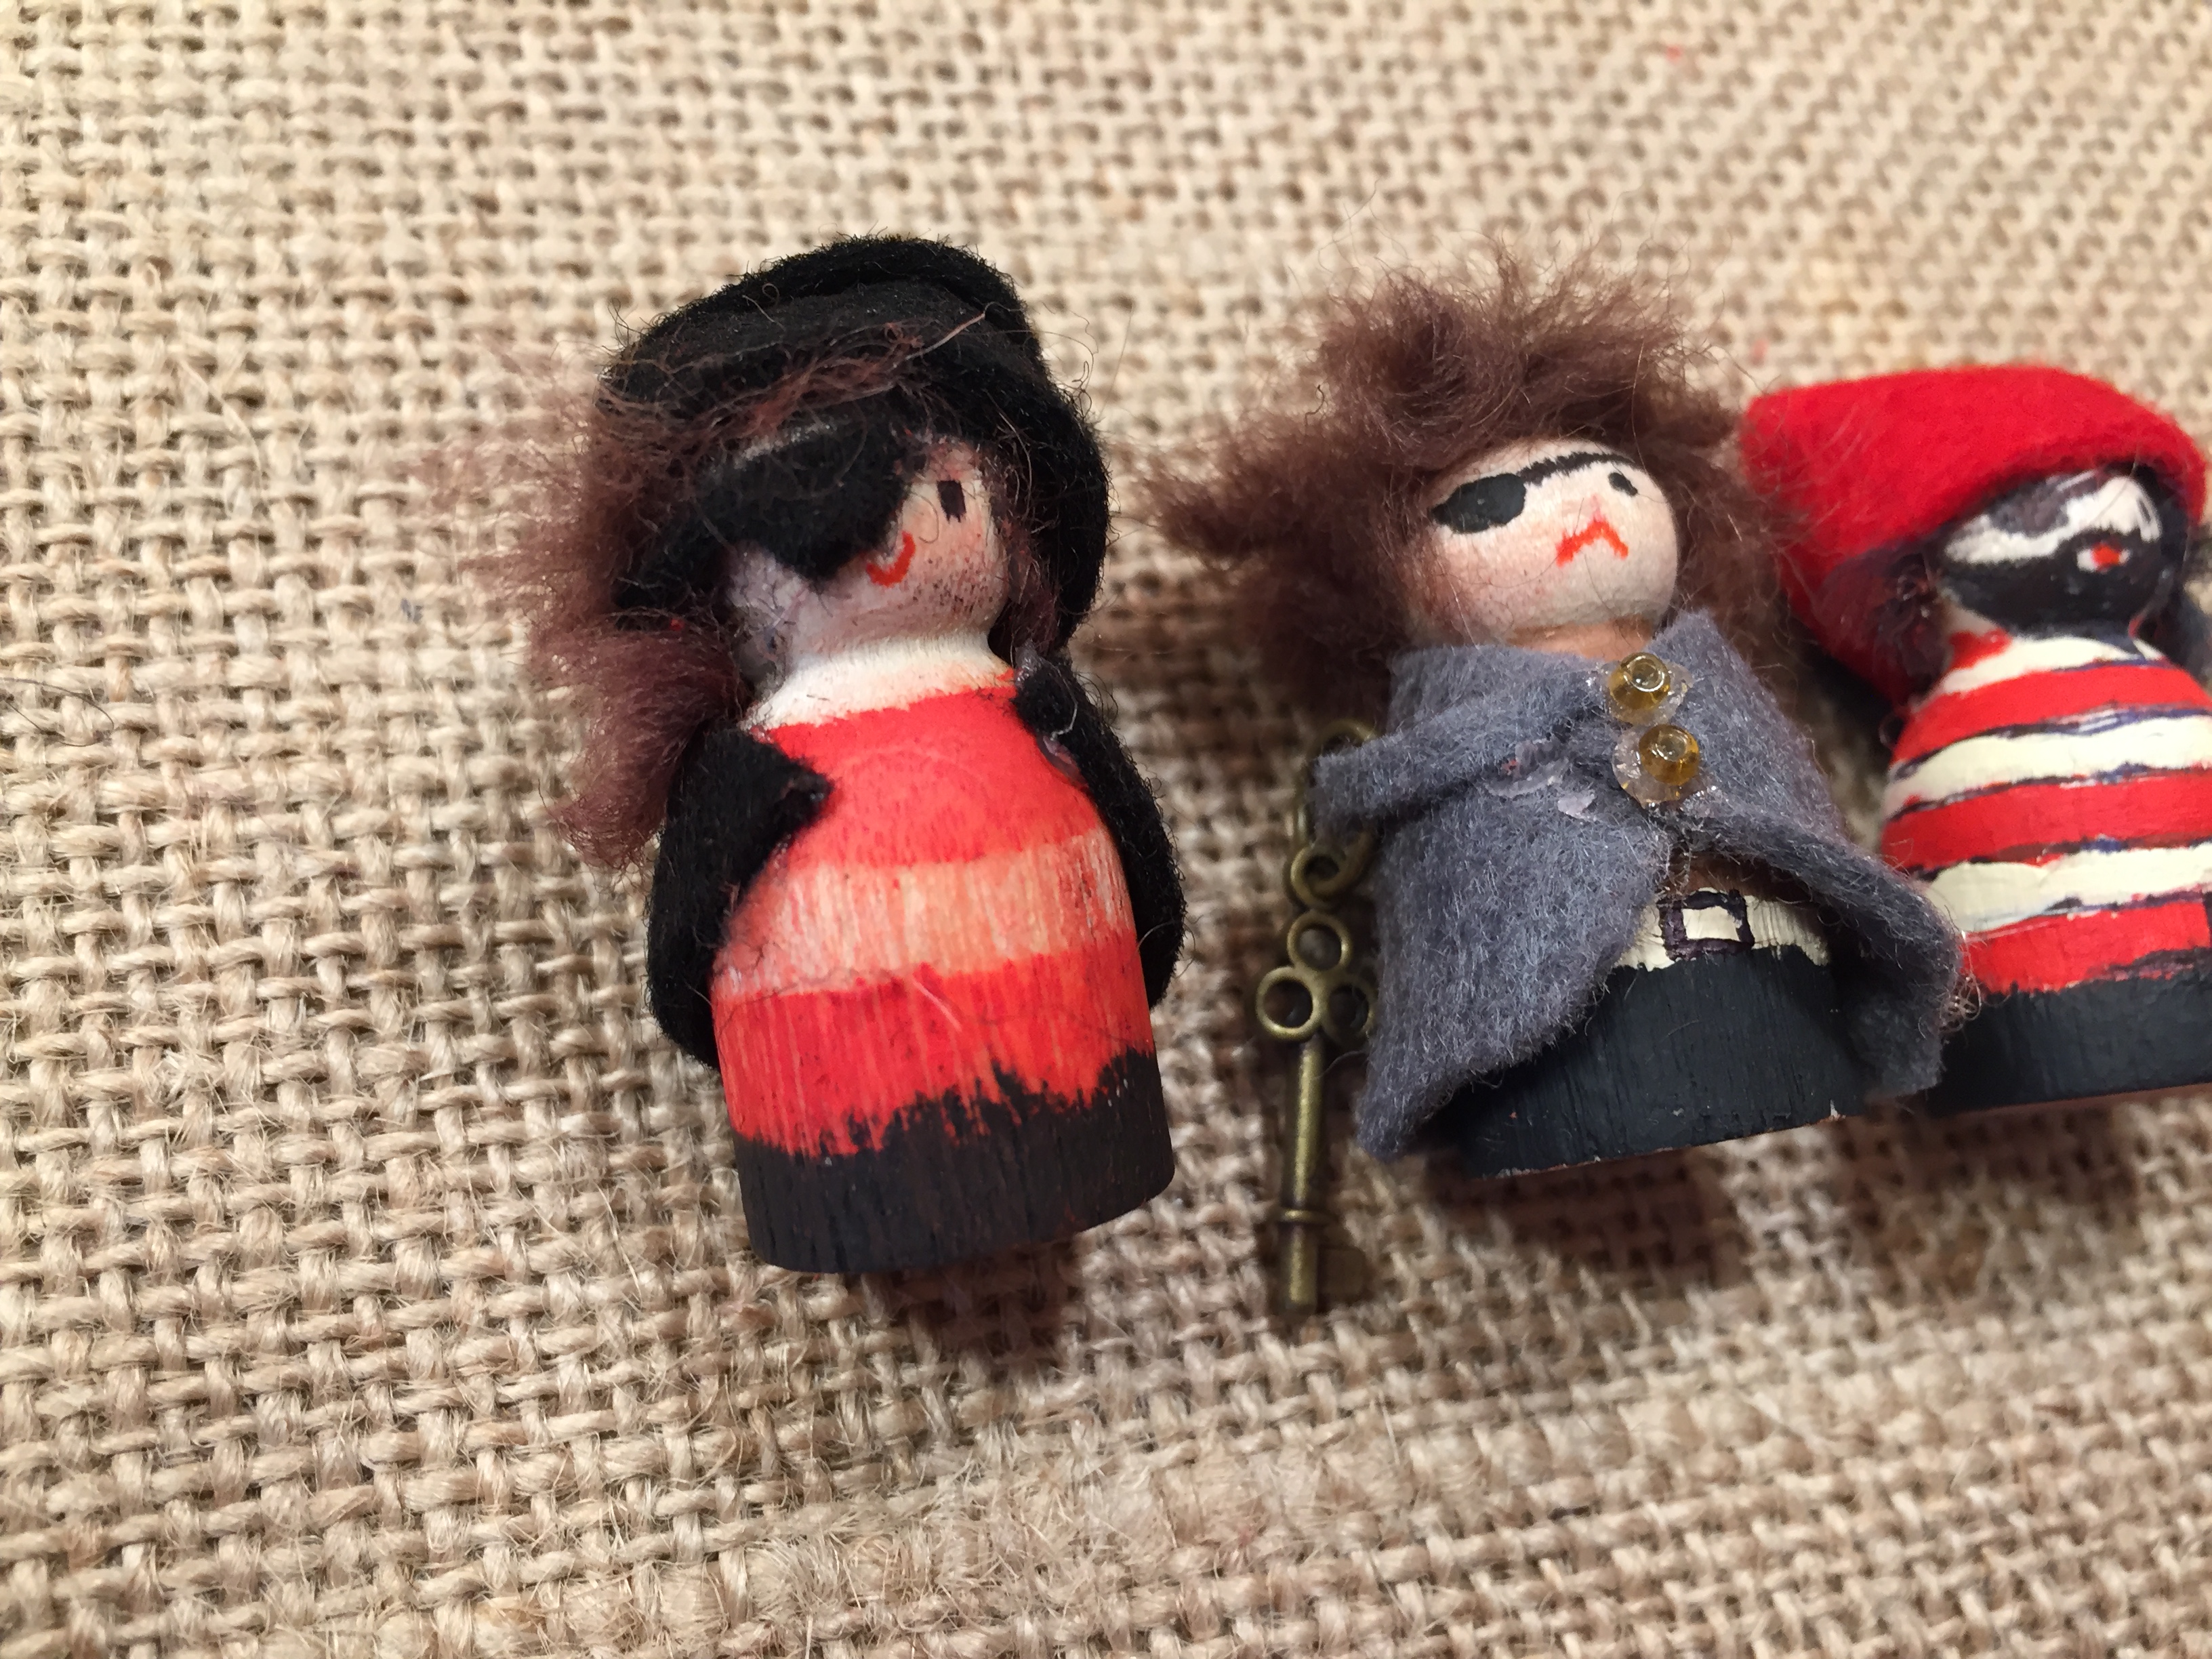
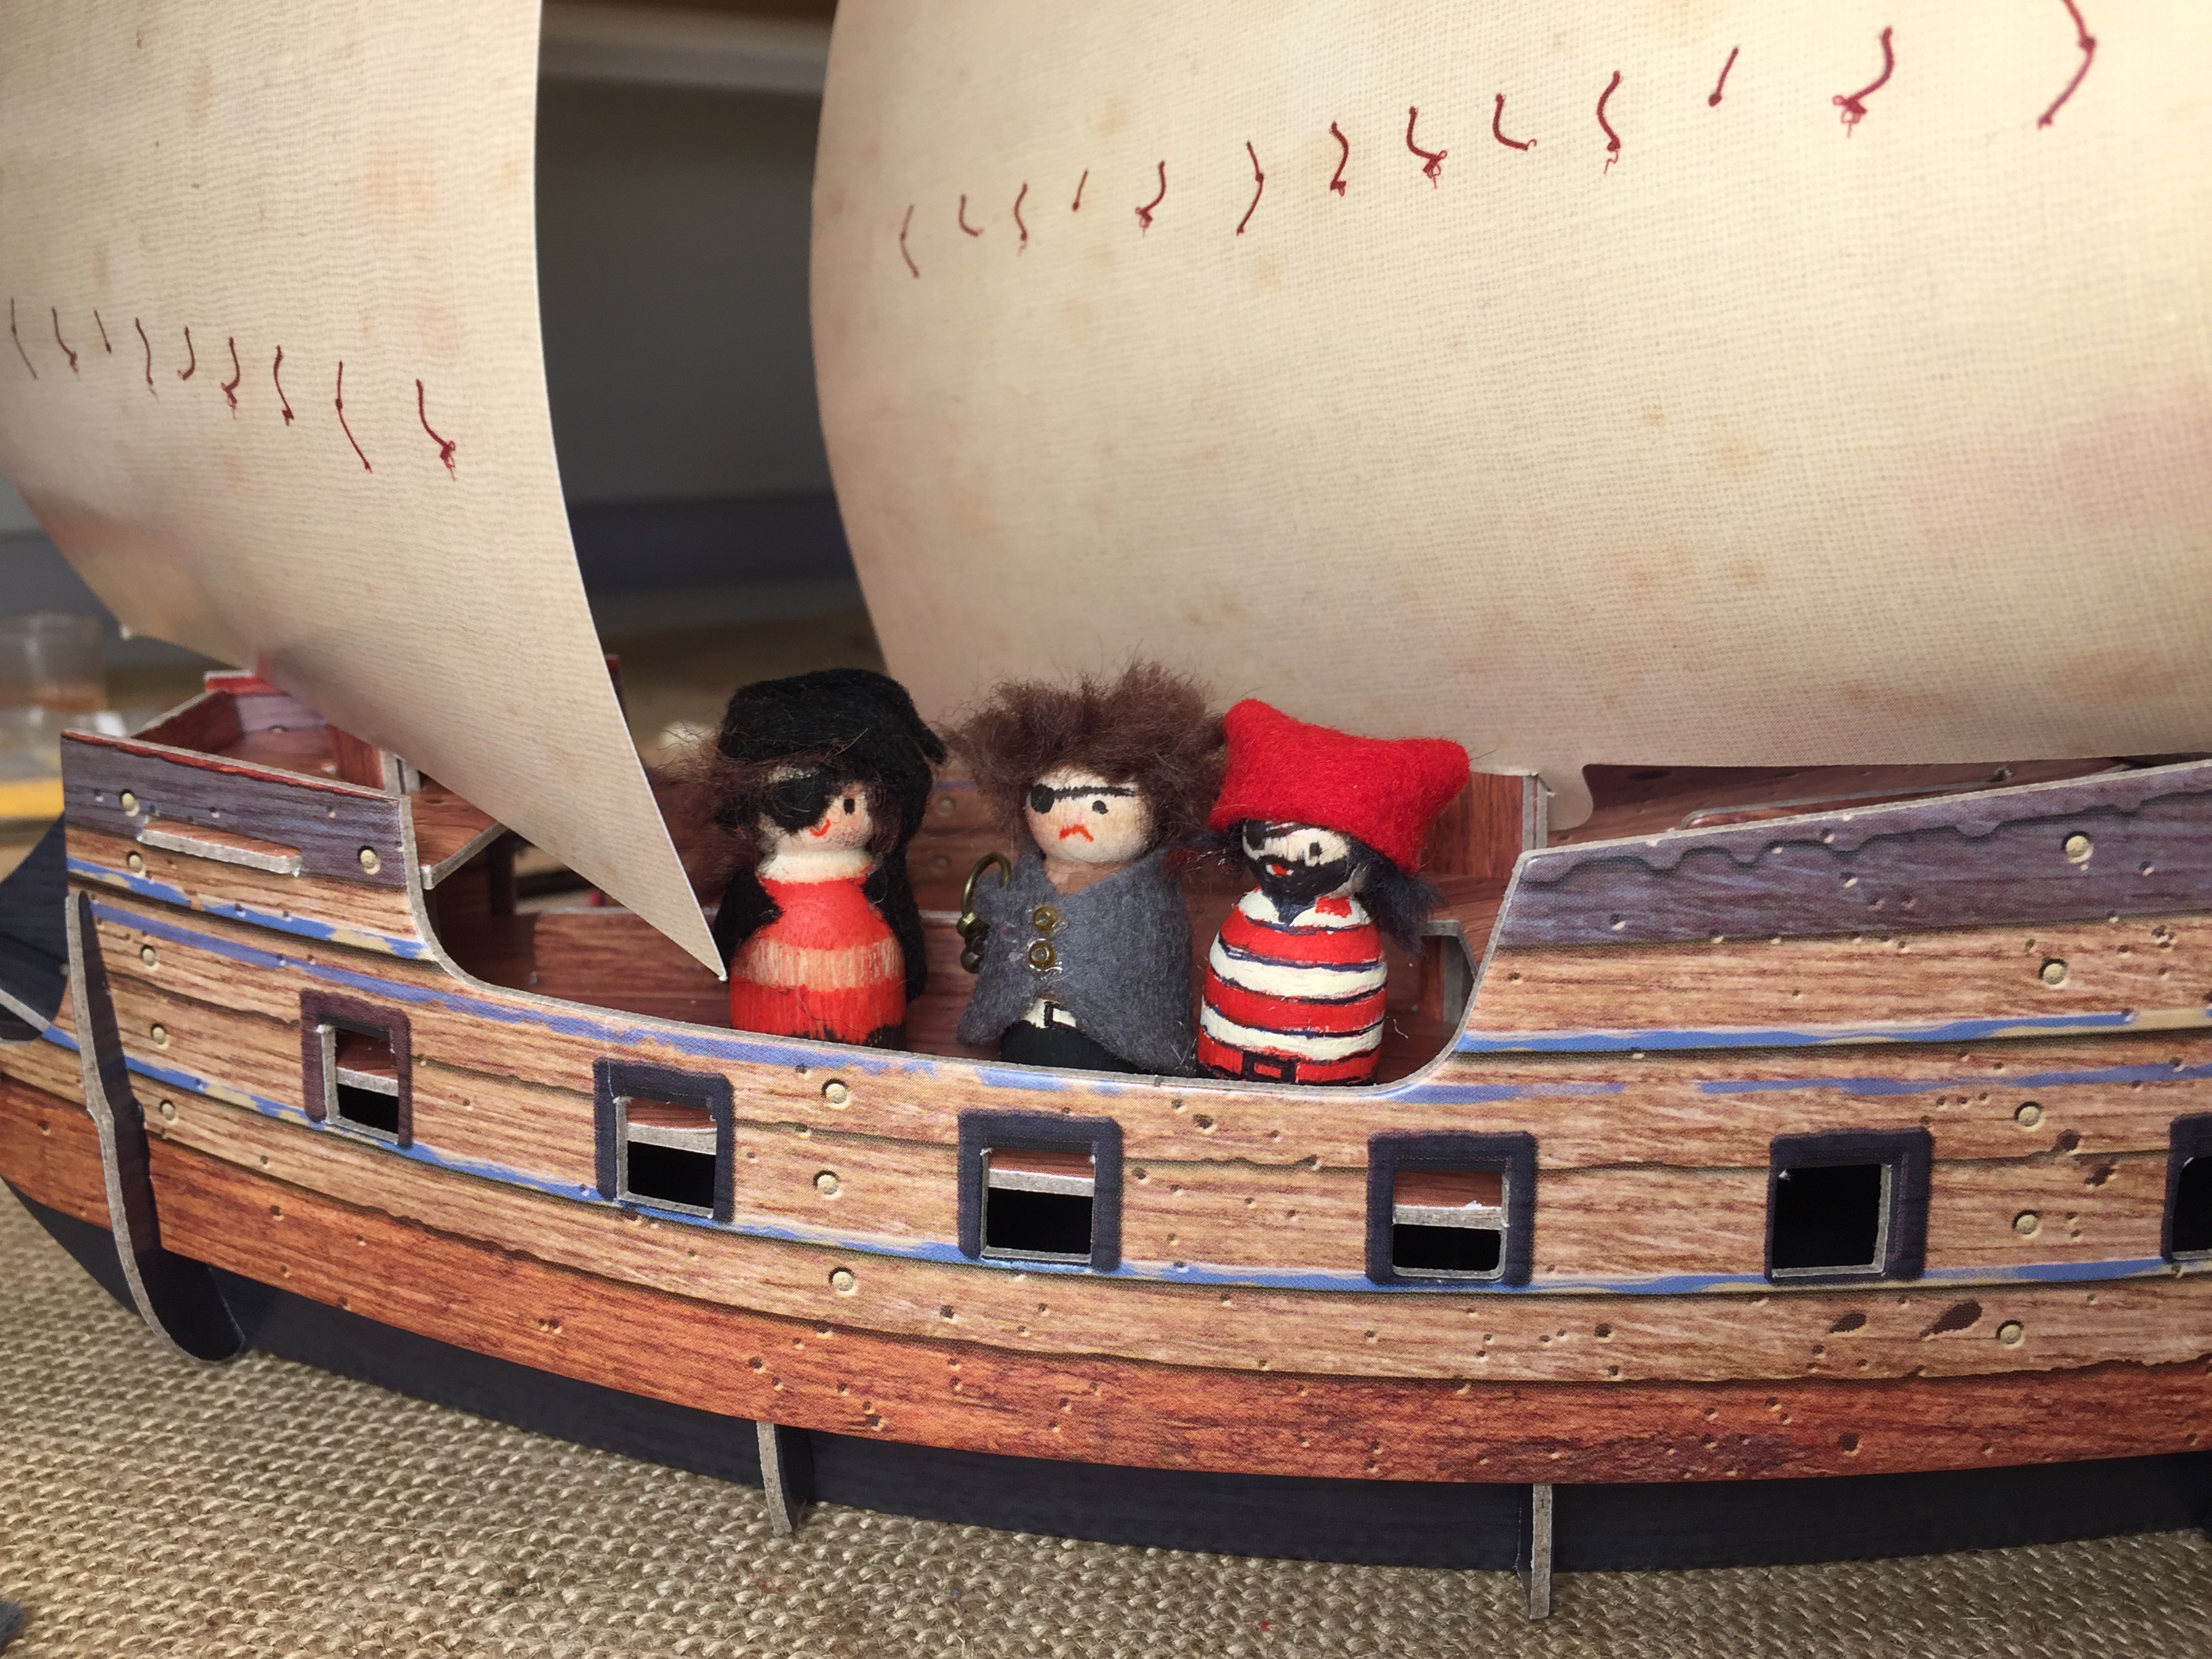
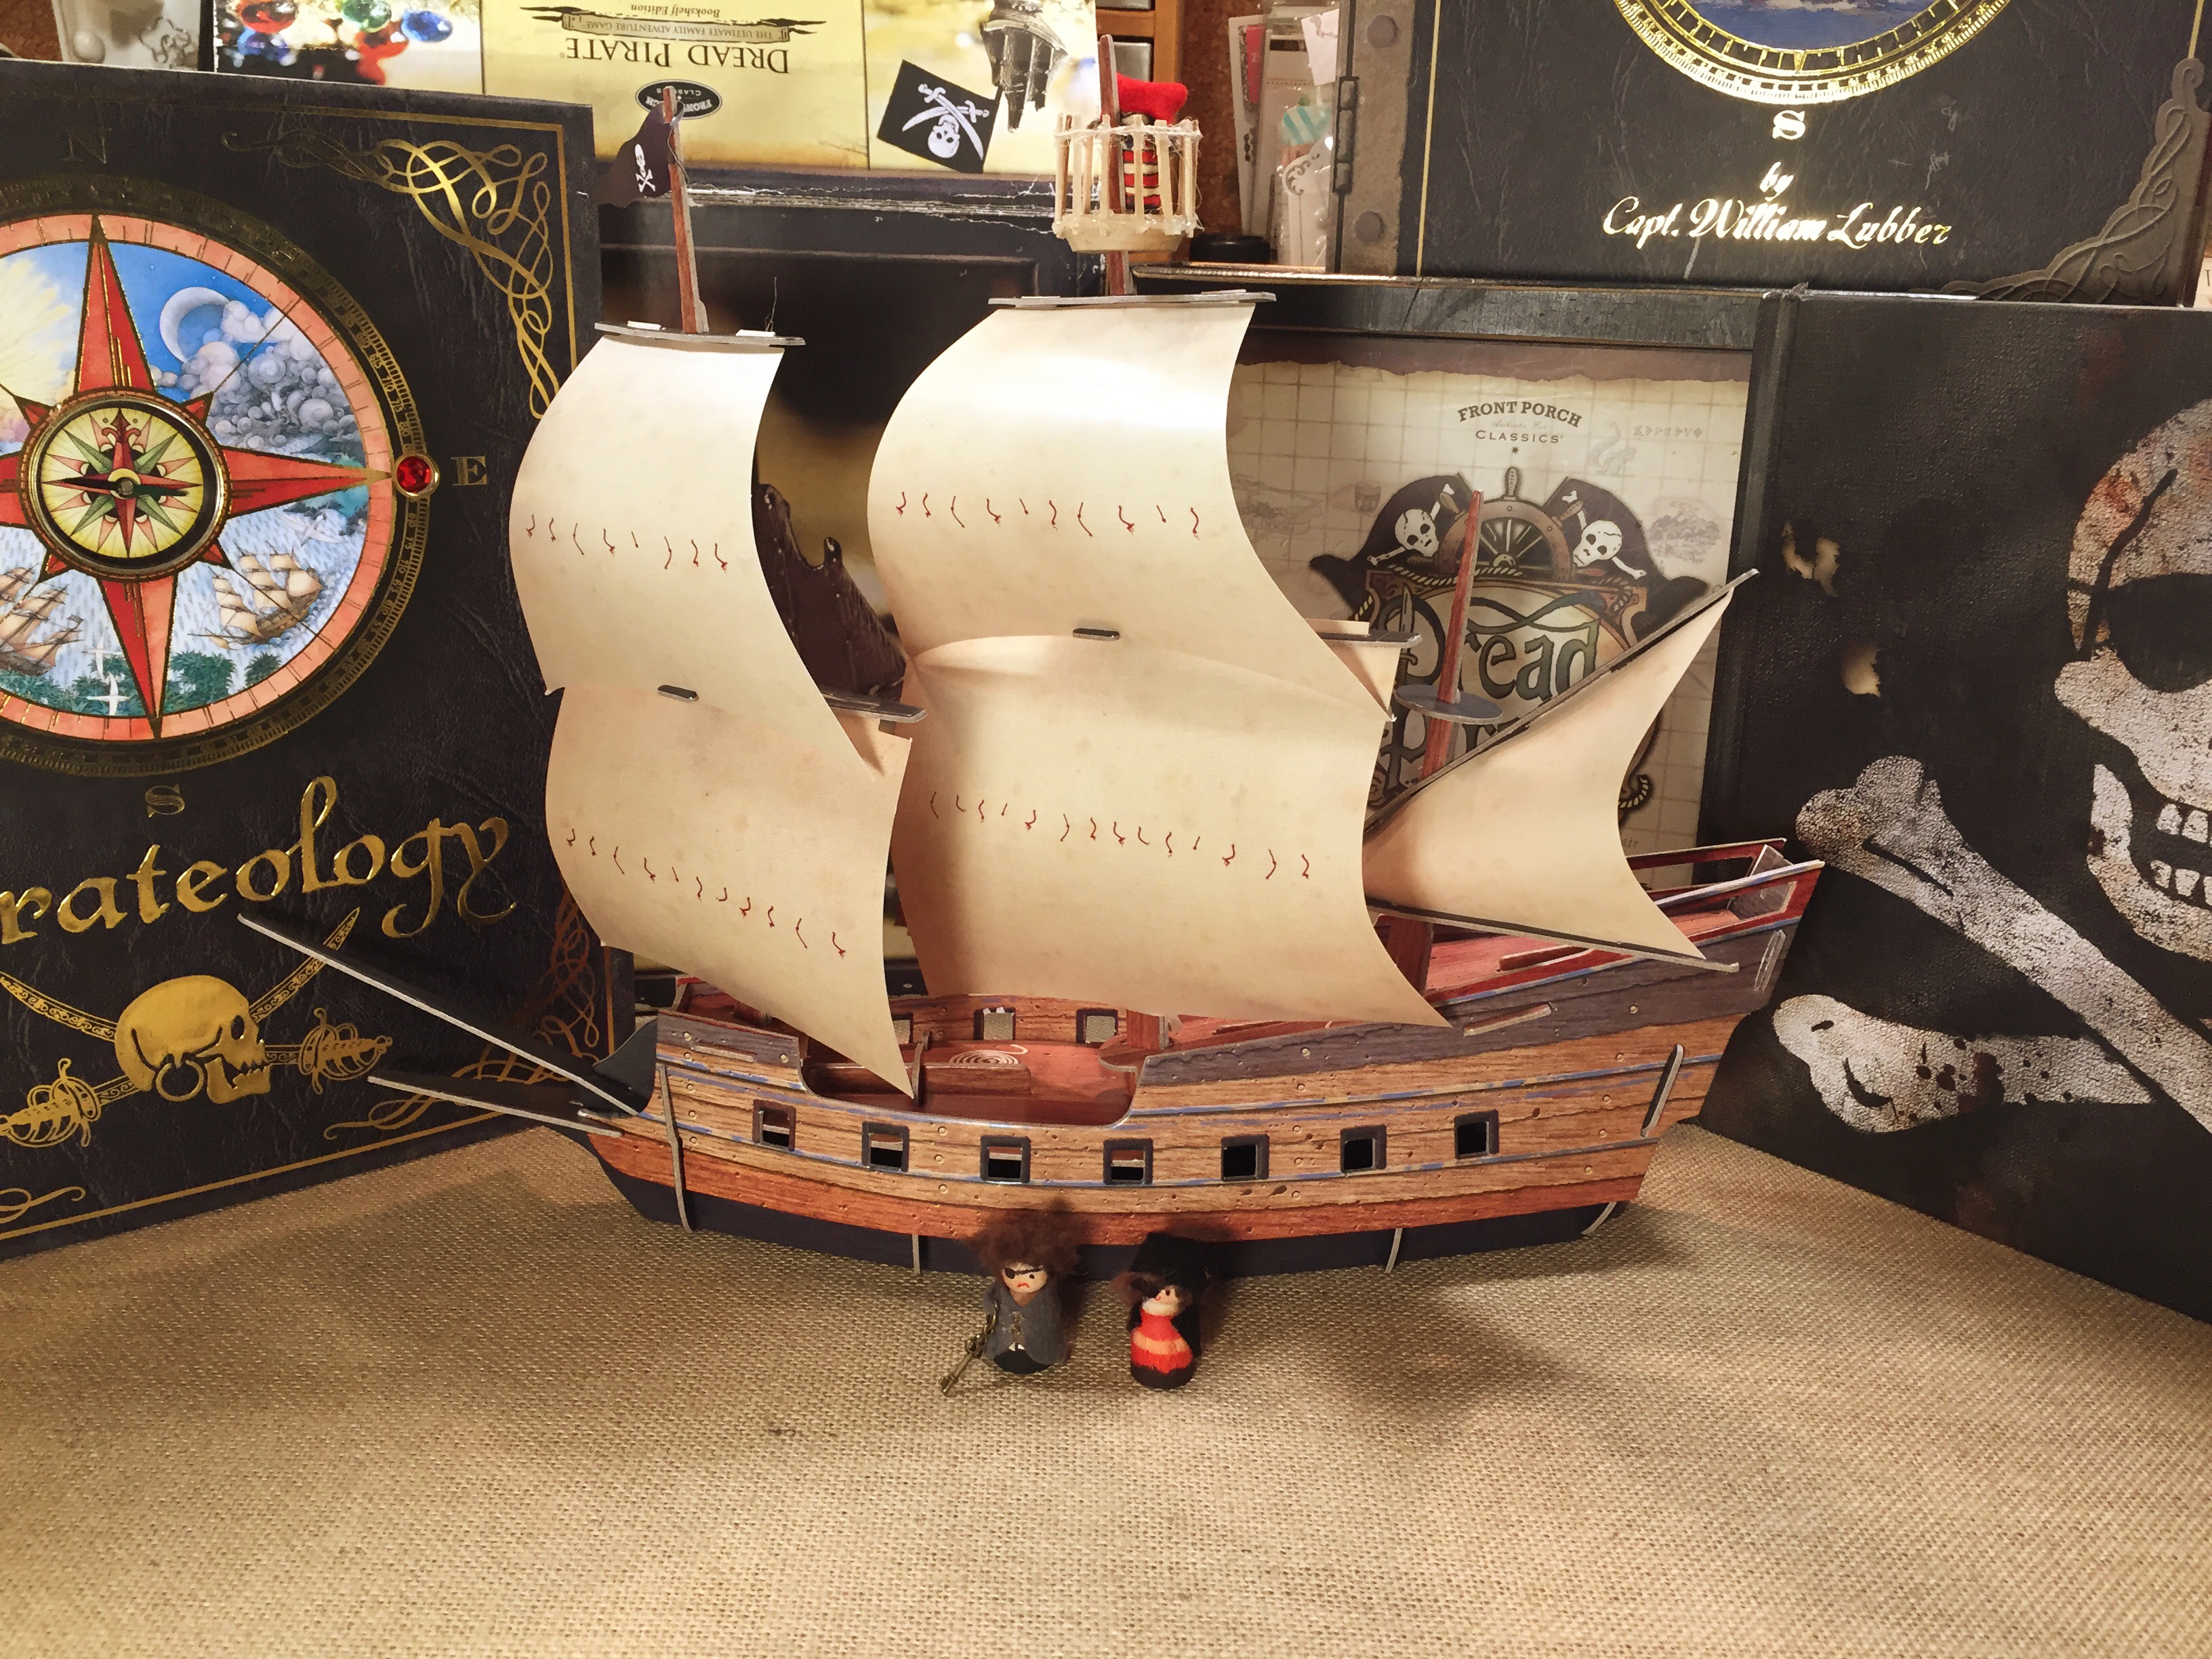
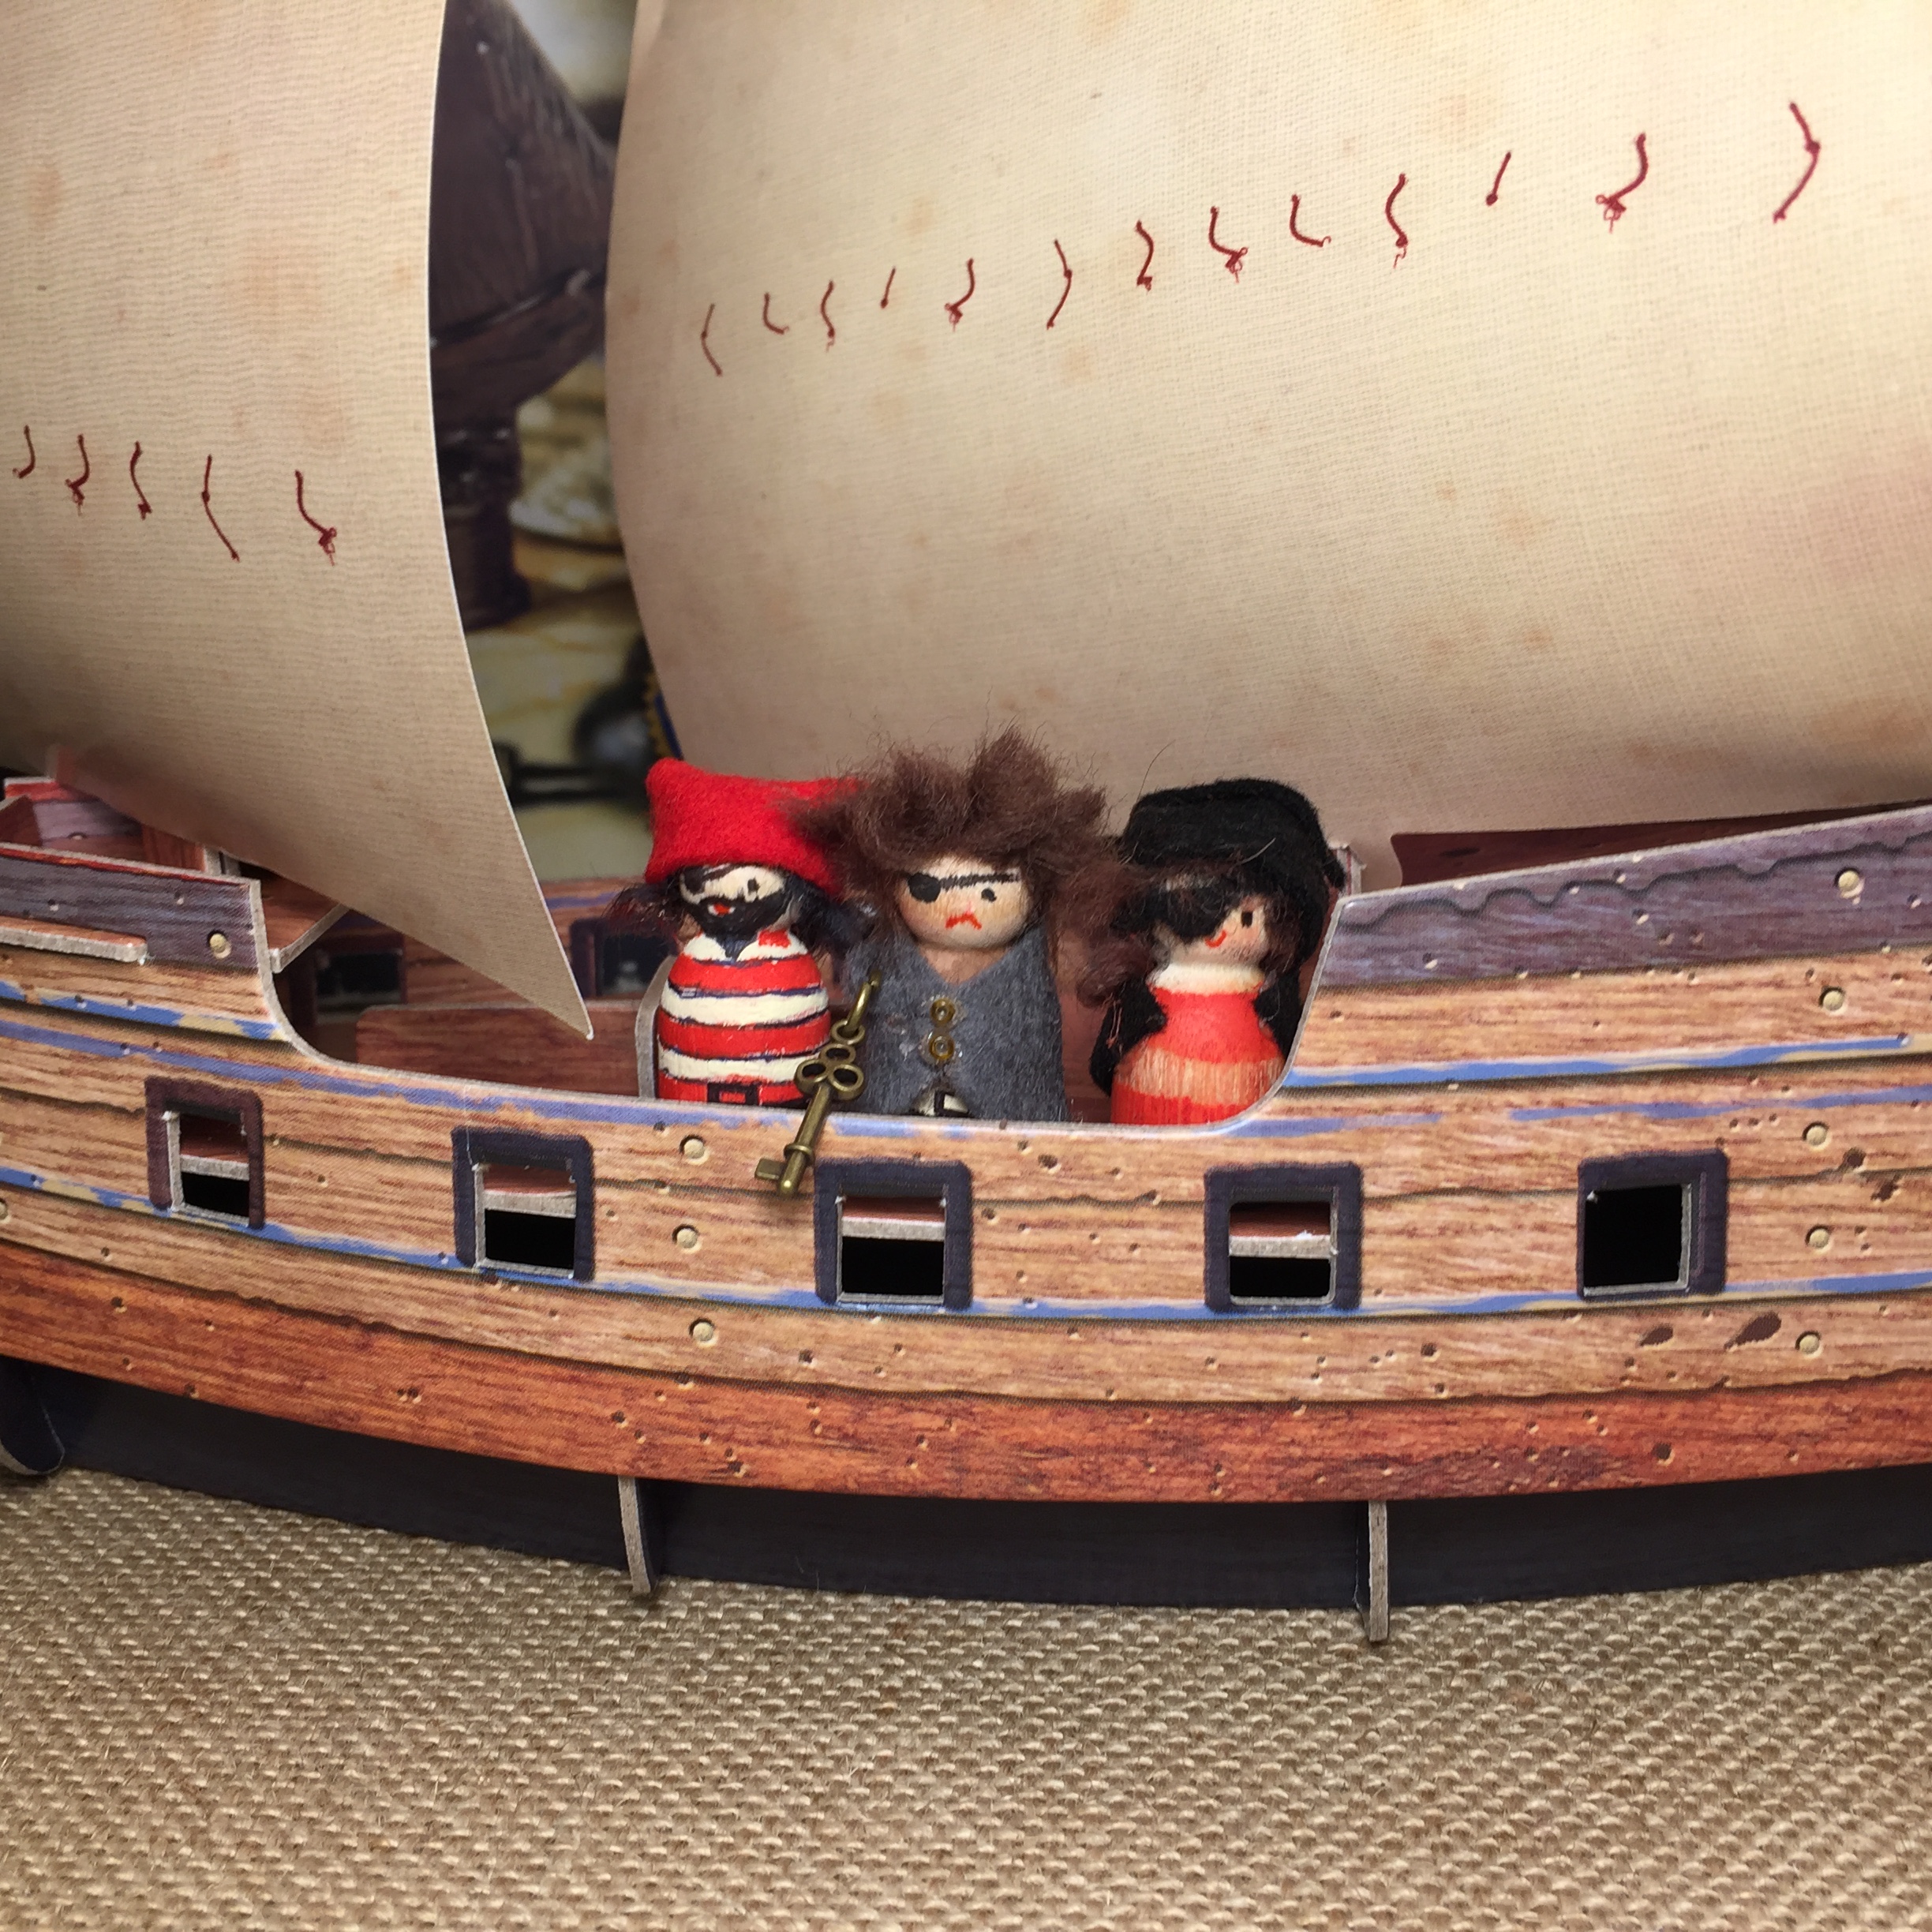
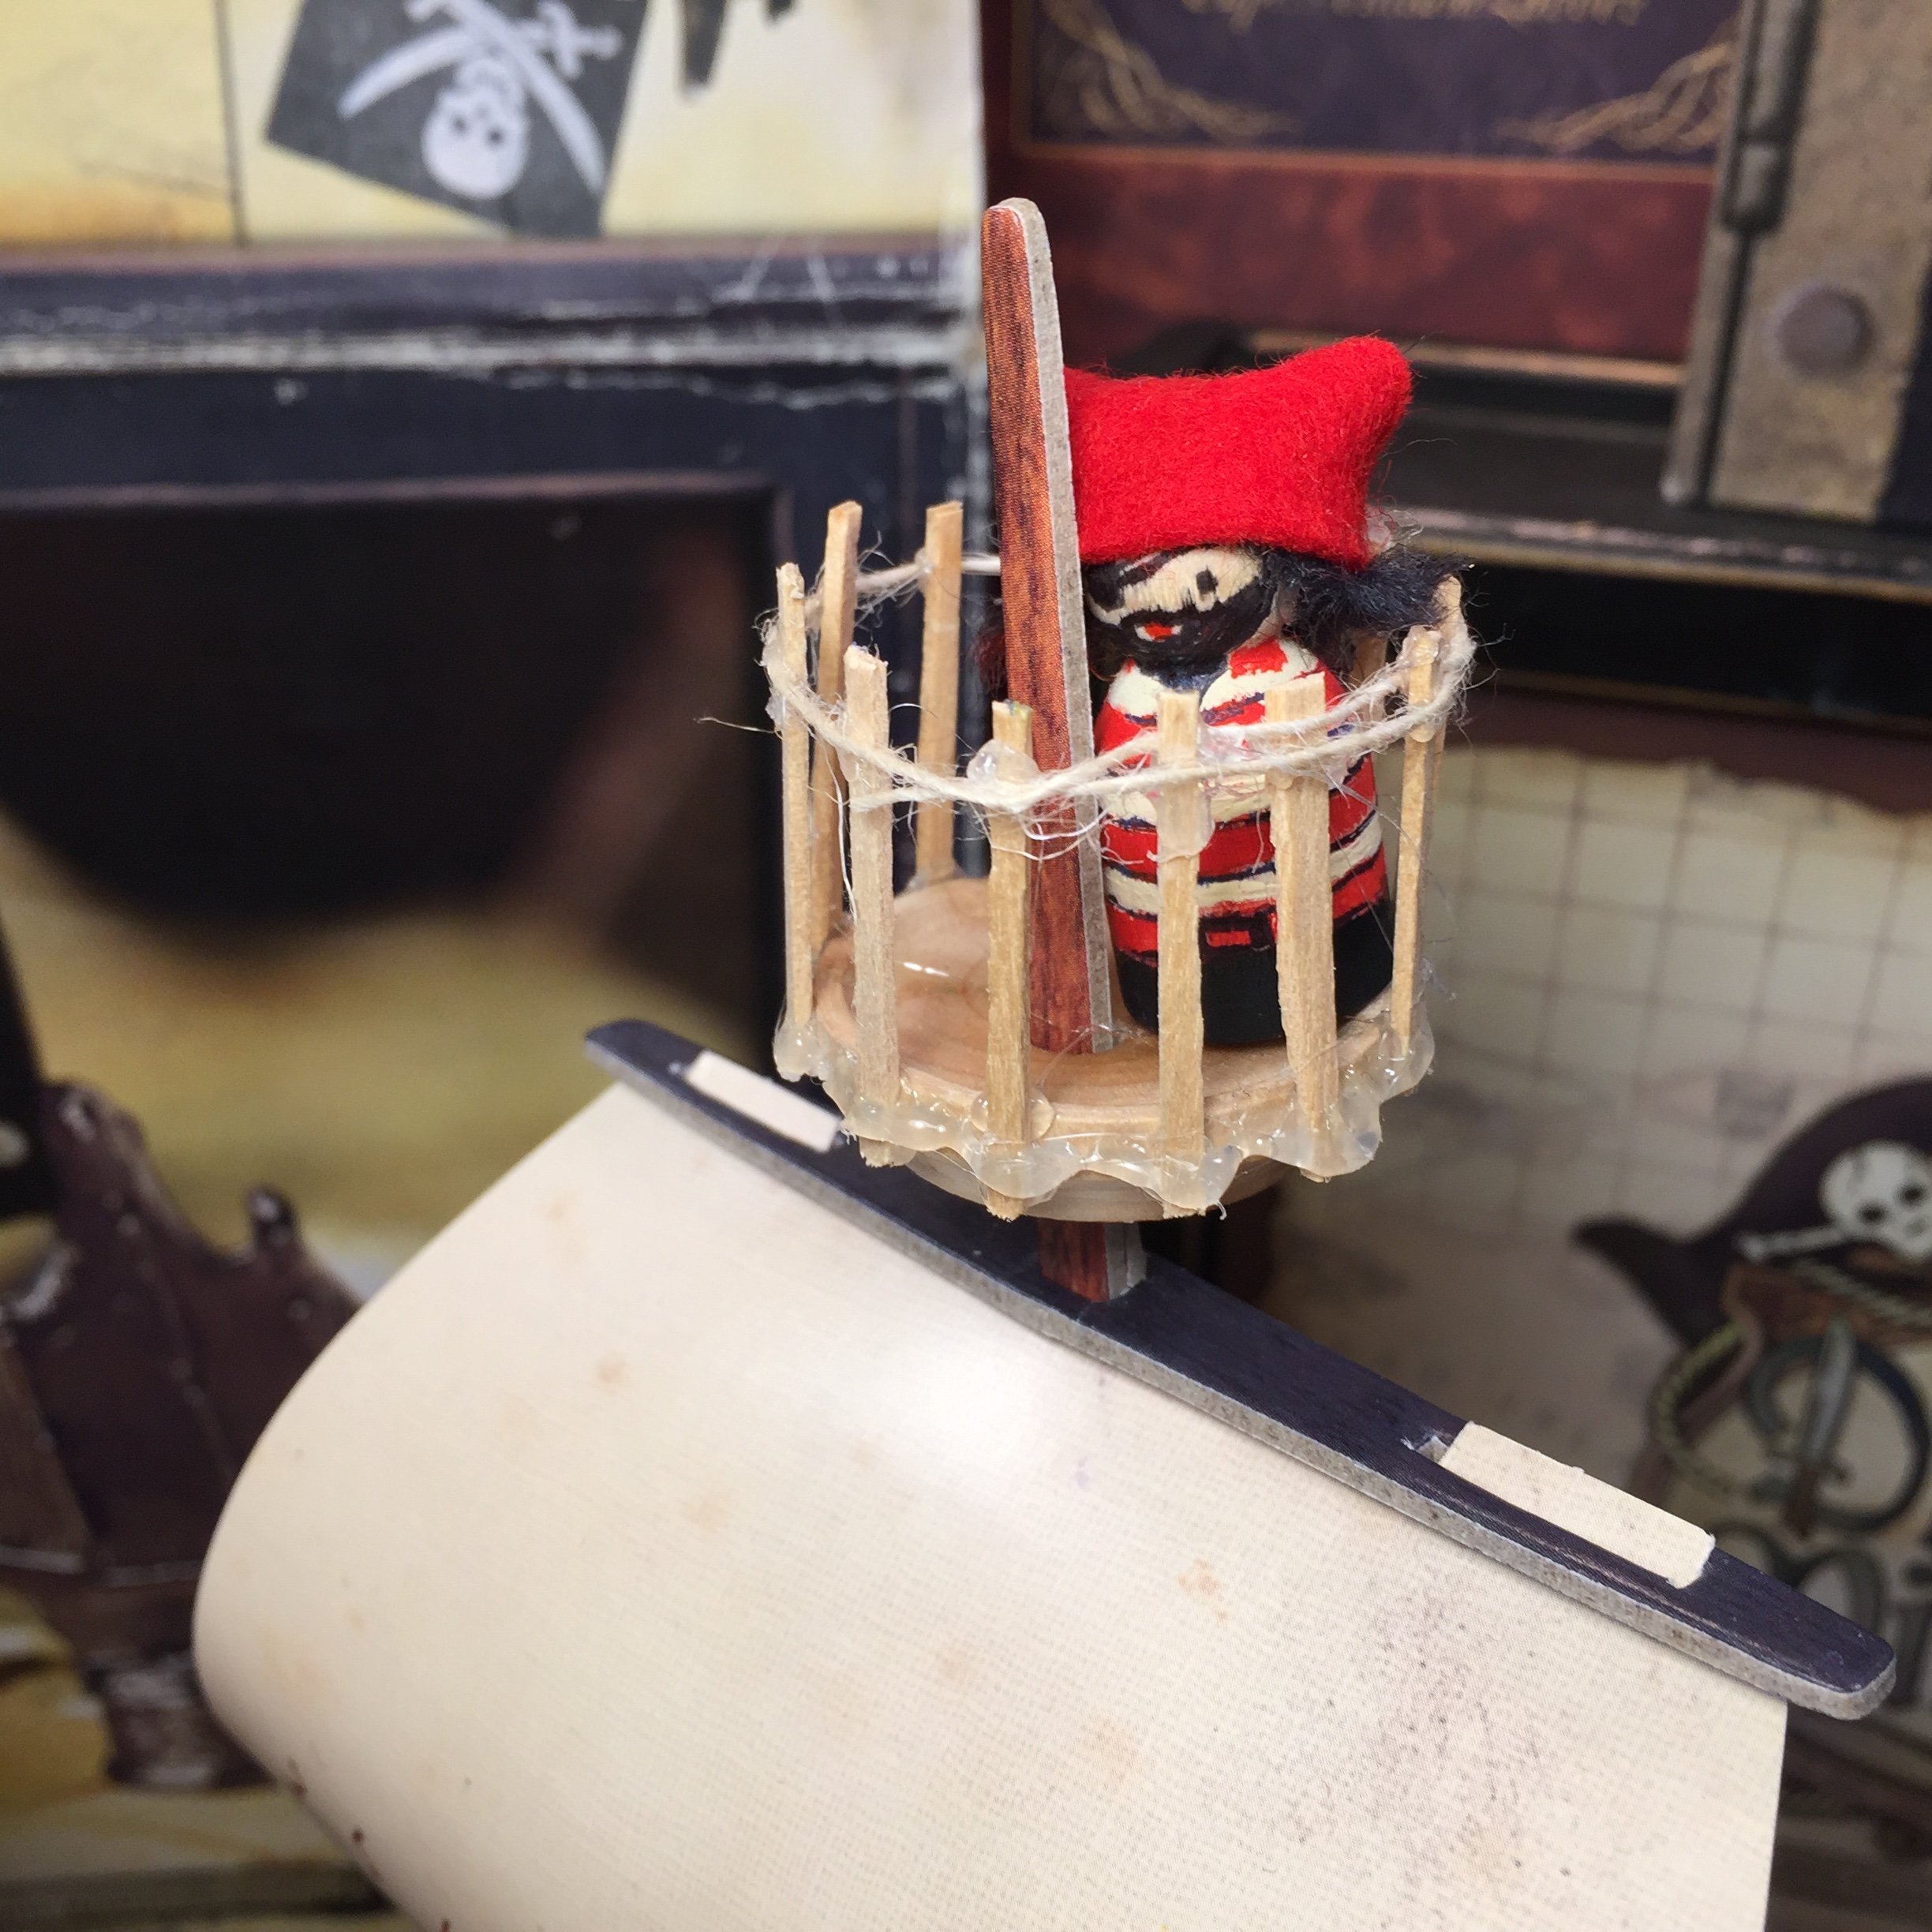
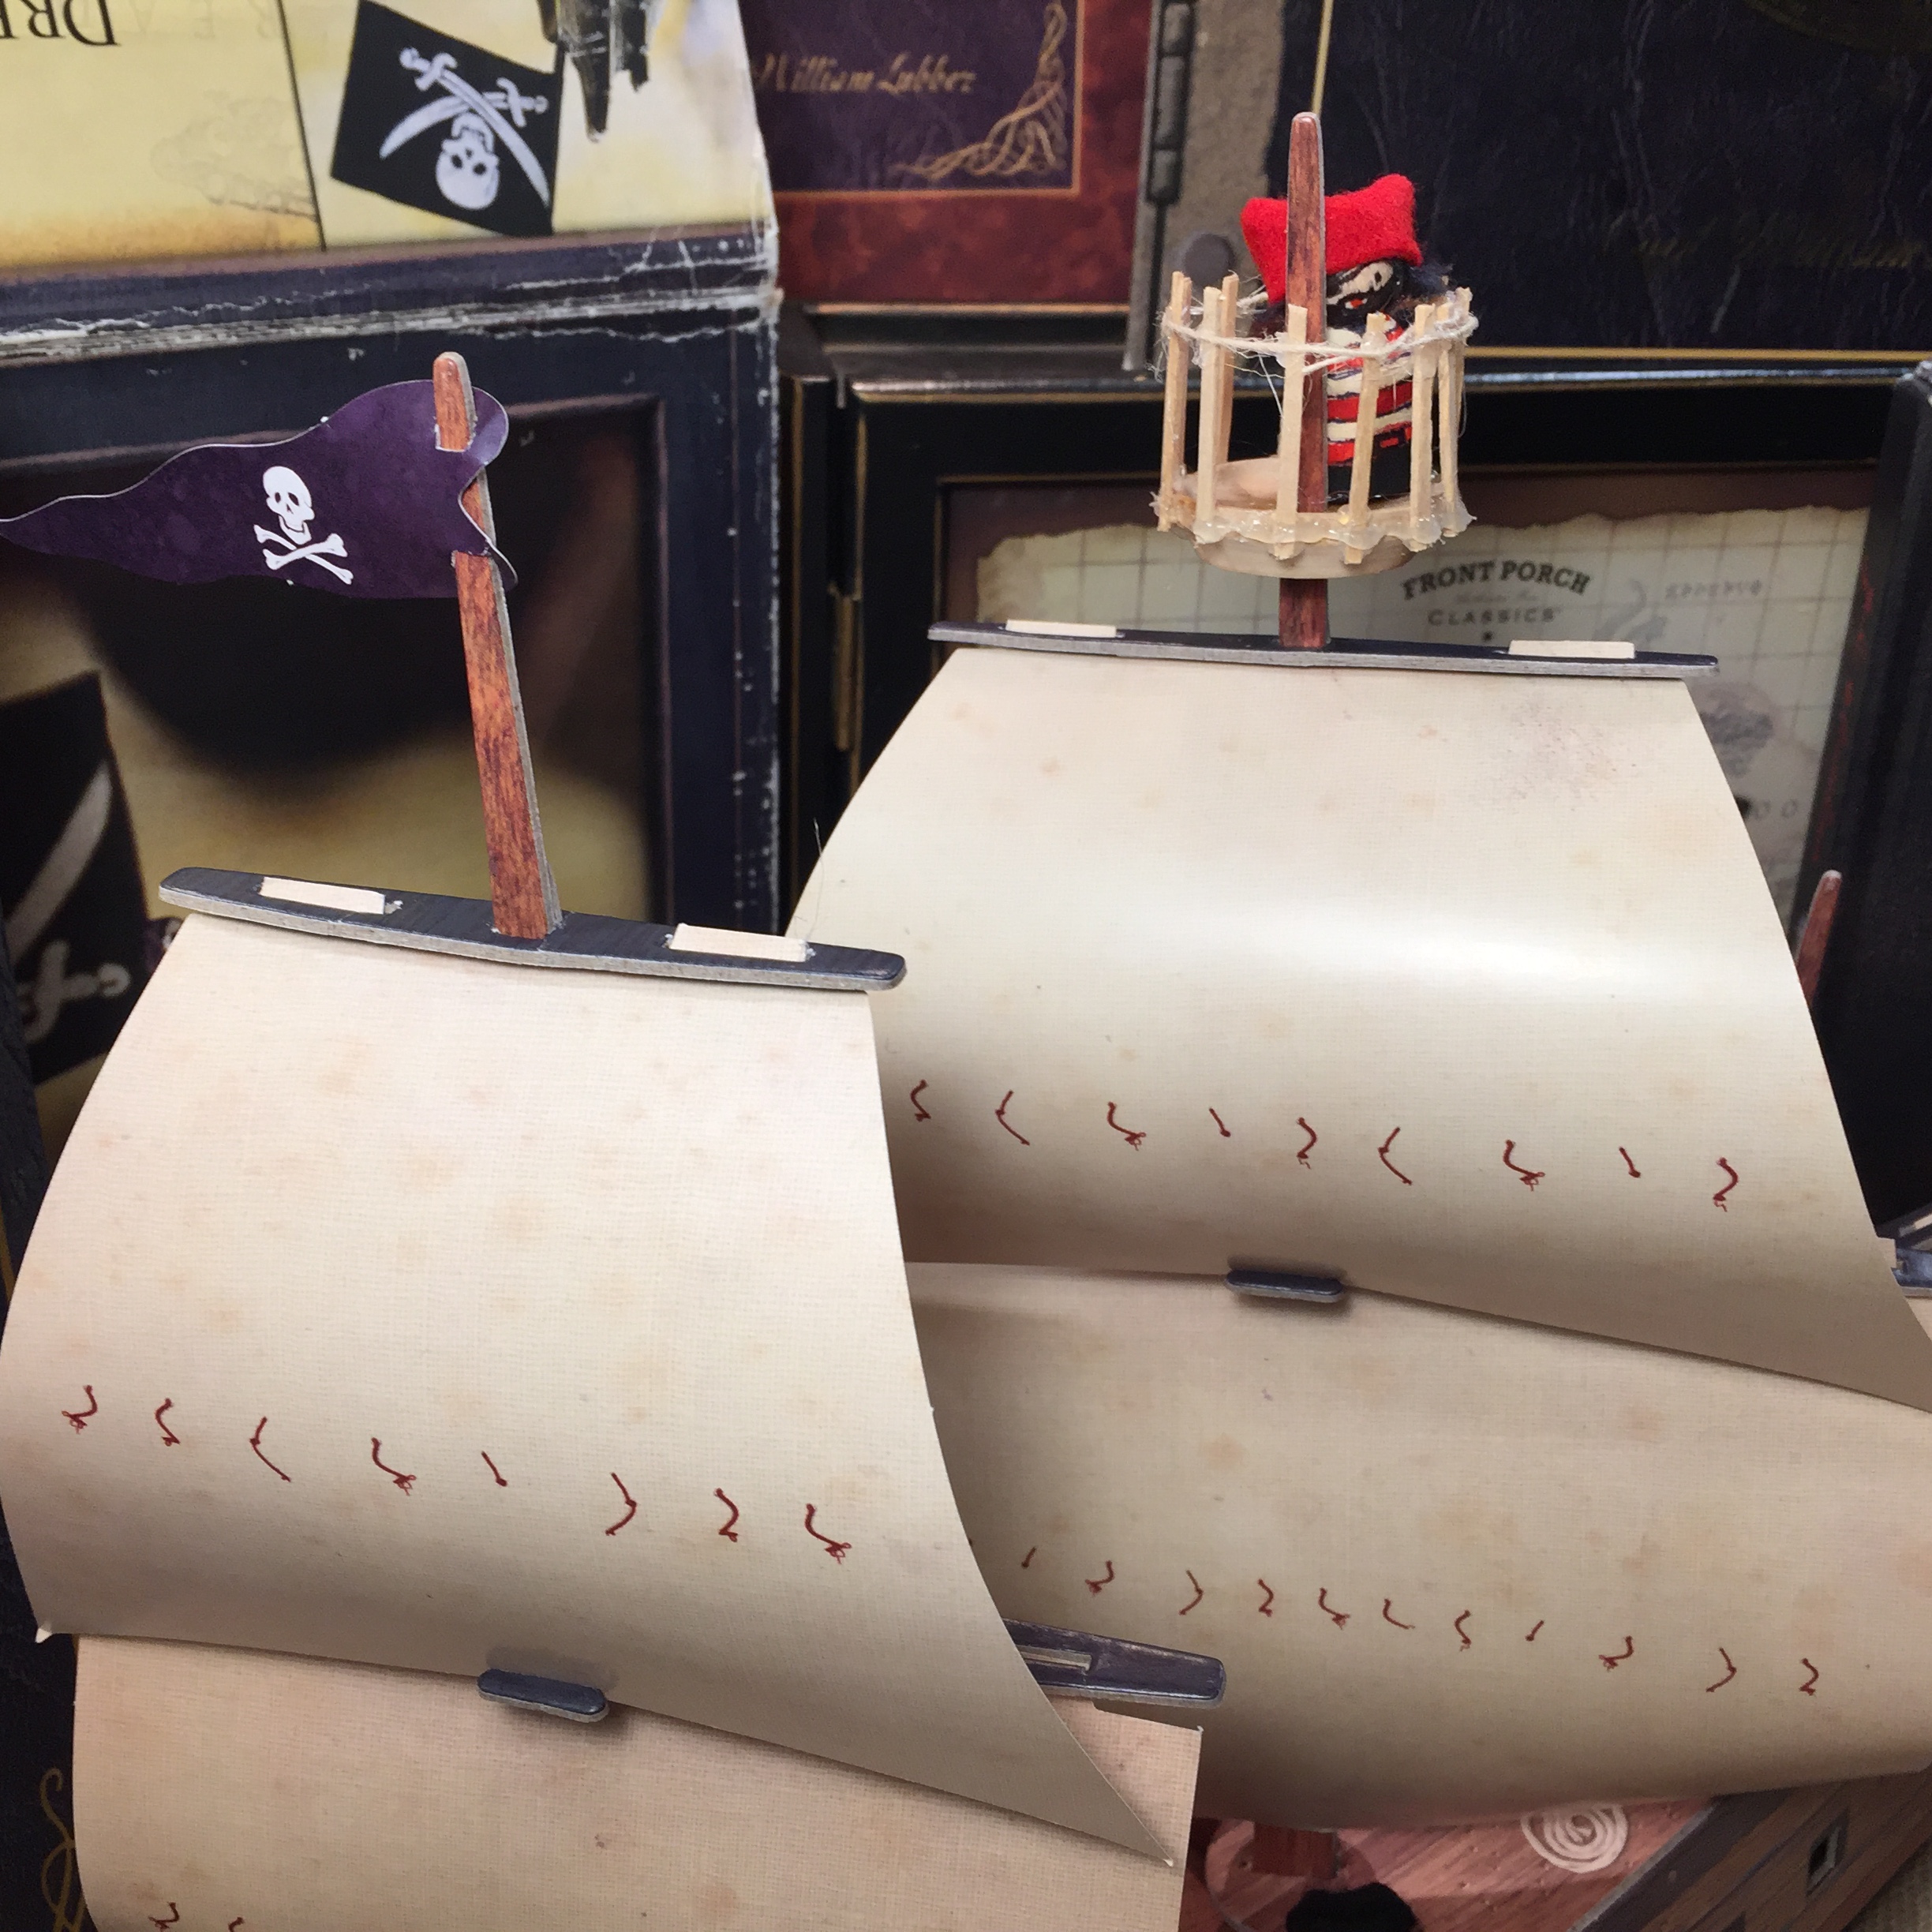
Pirate Peg Dolls
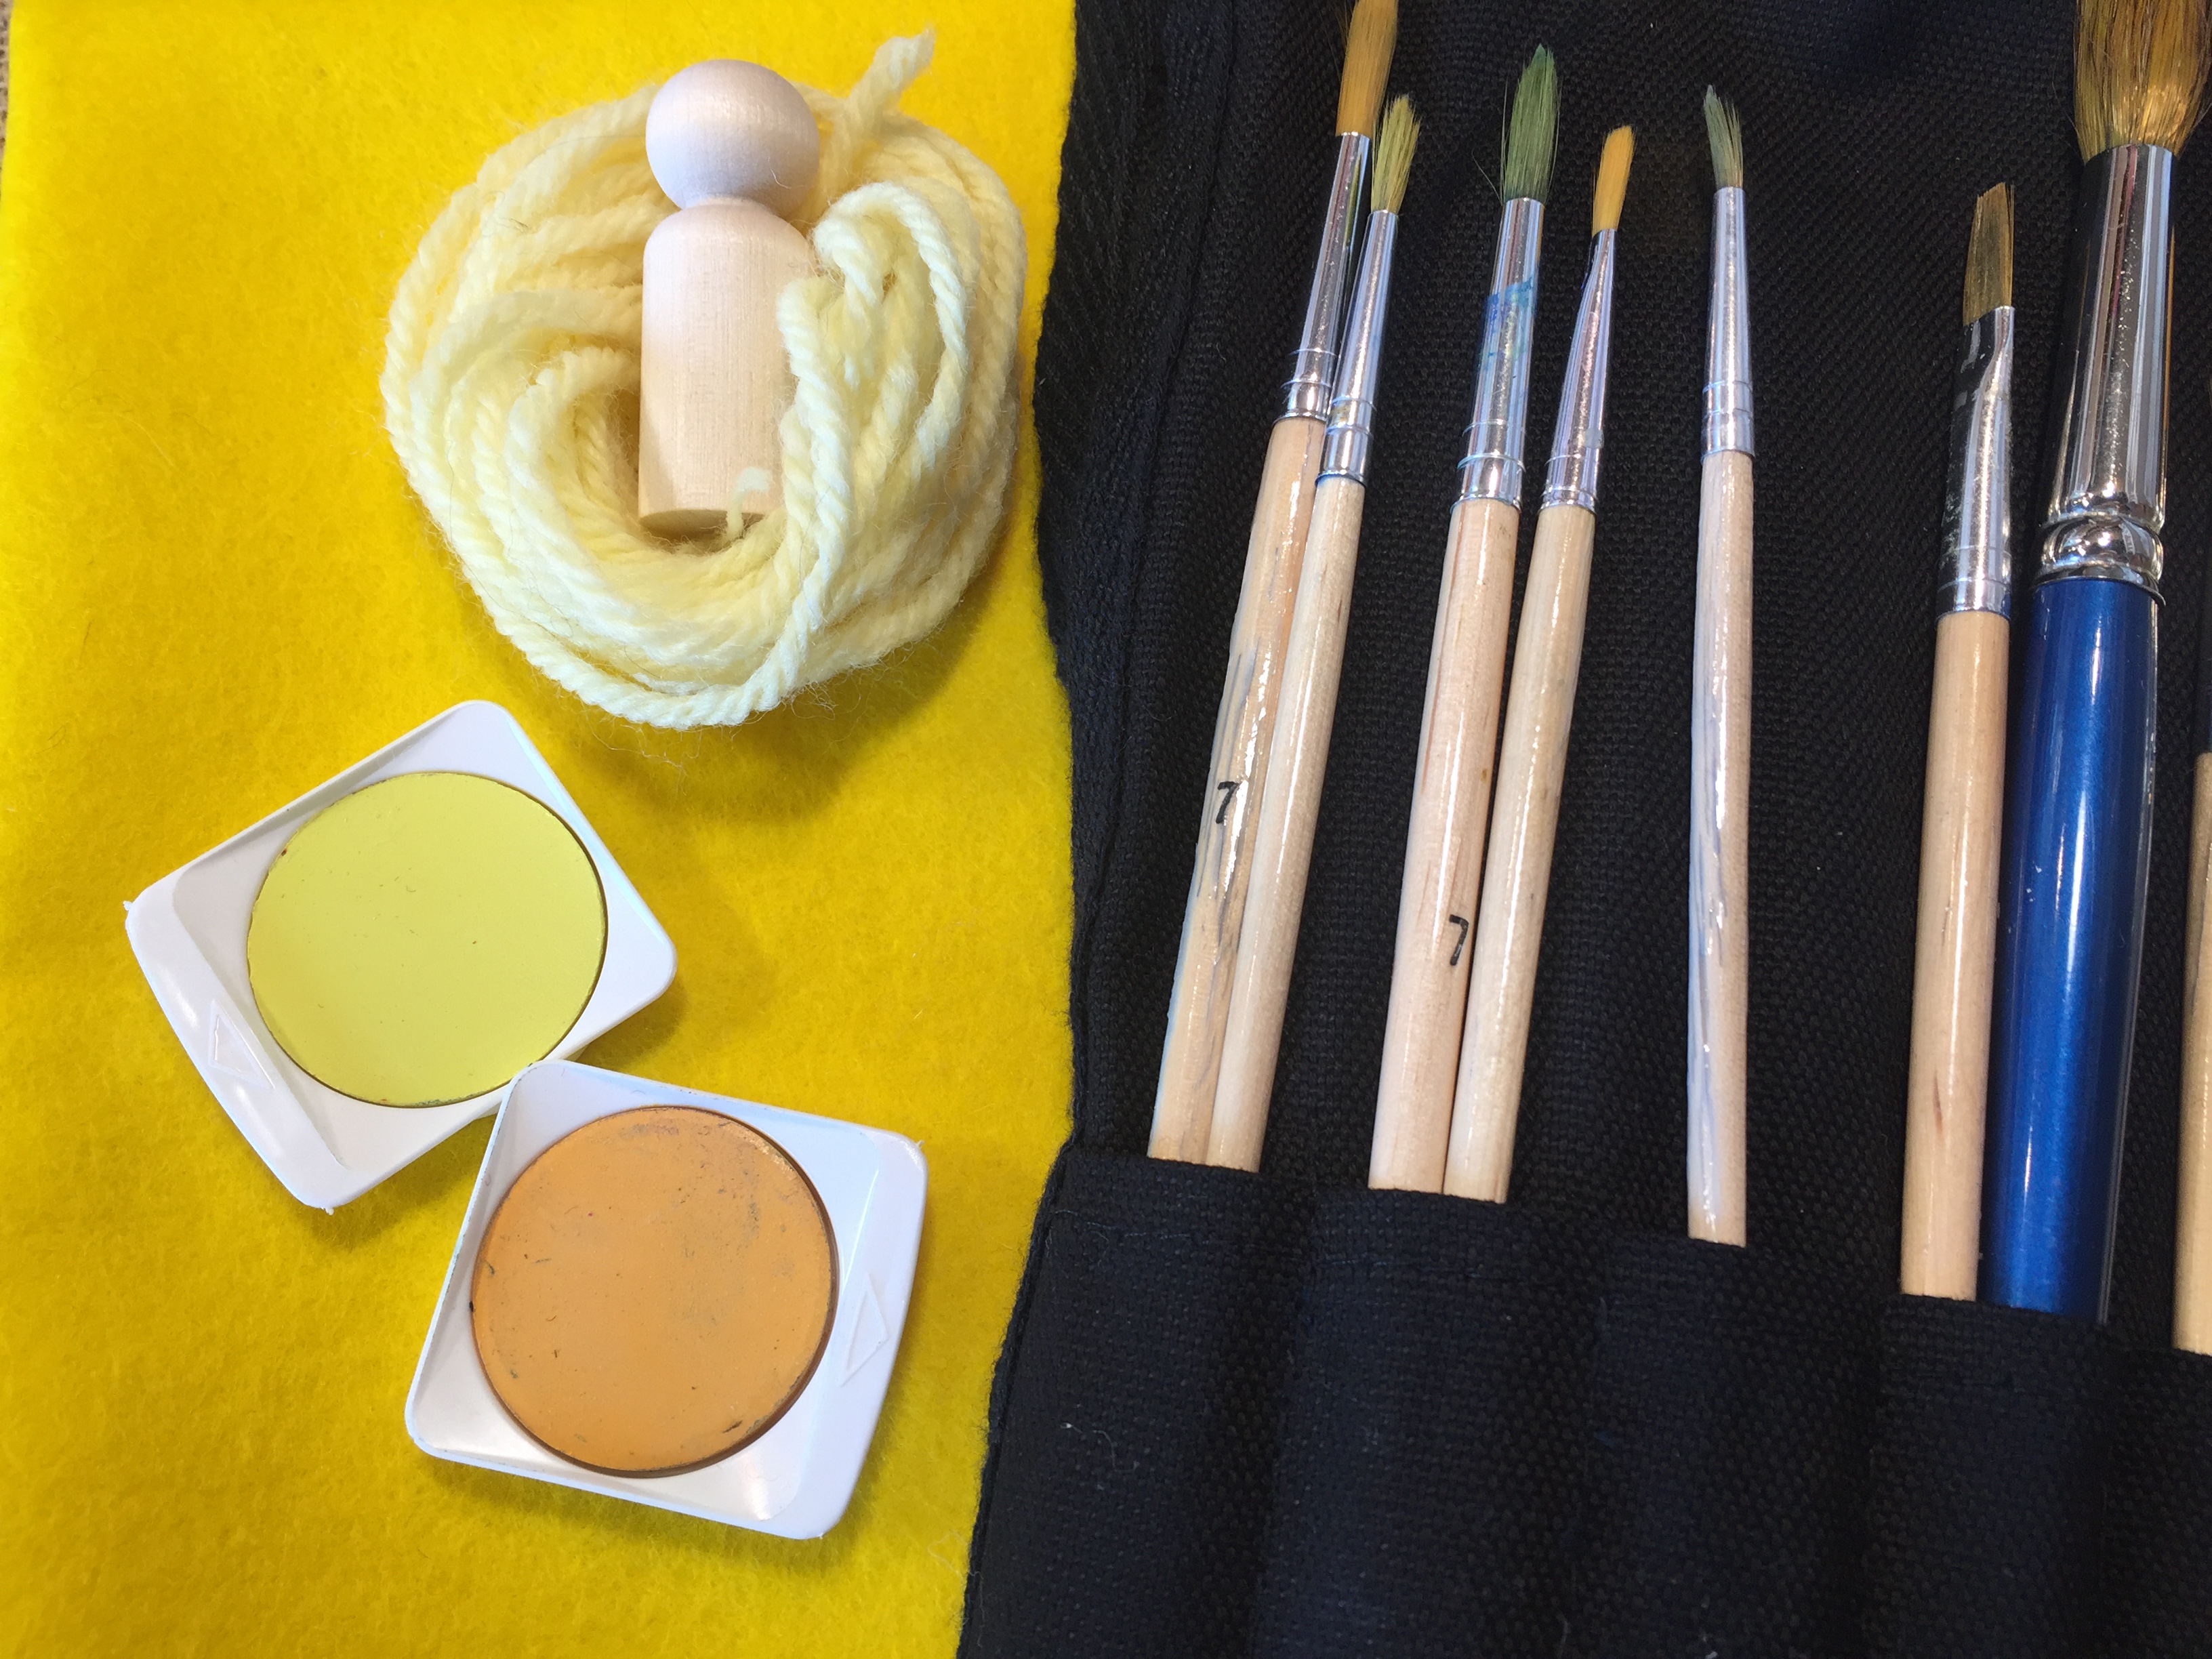
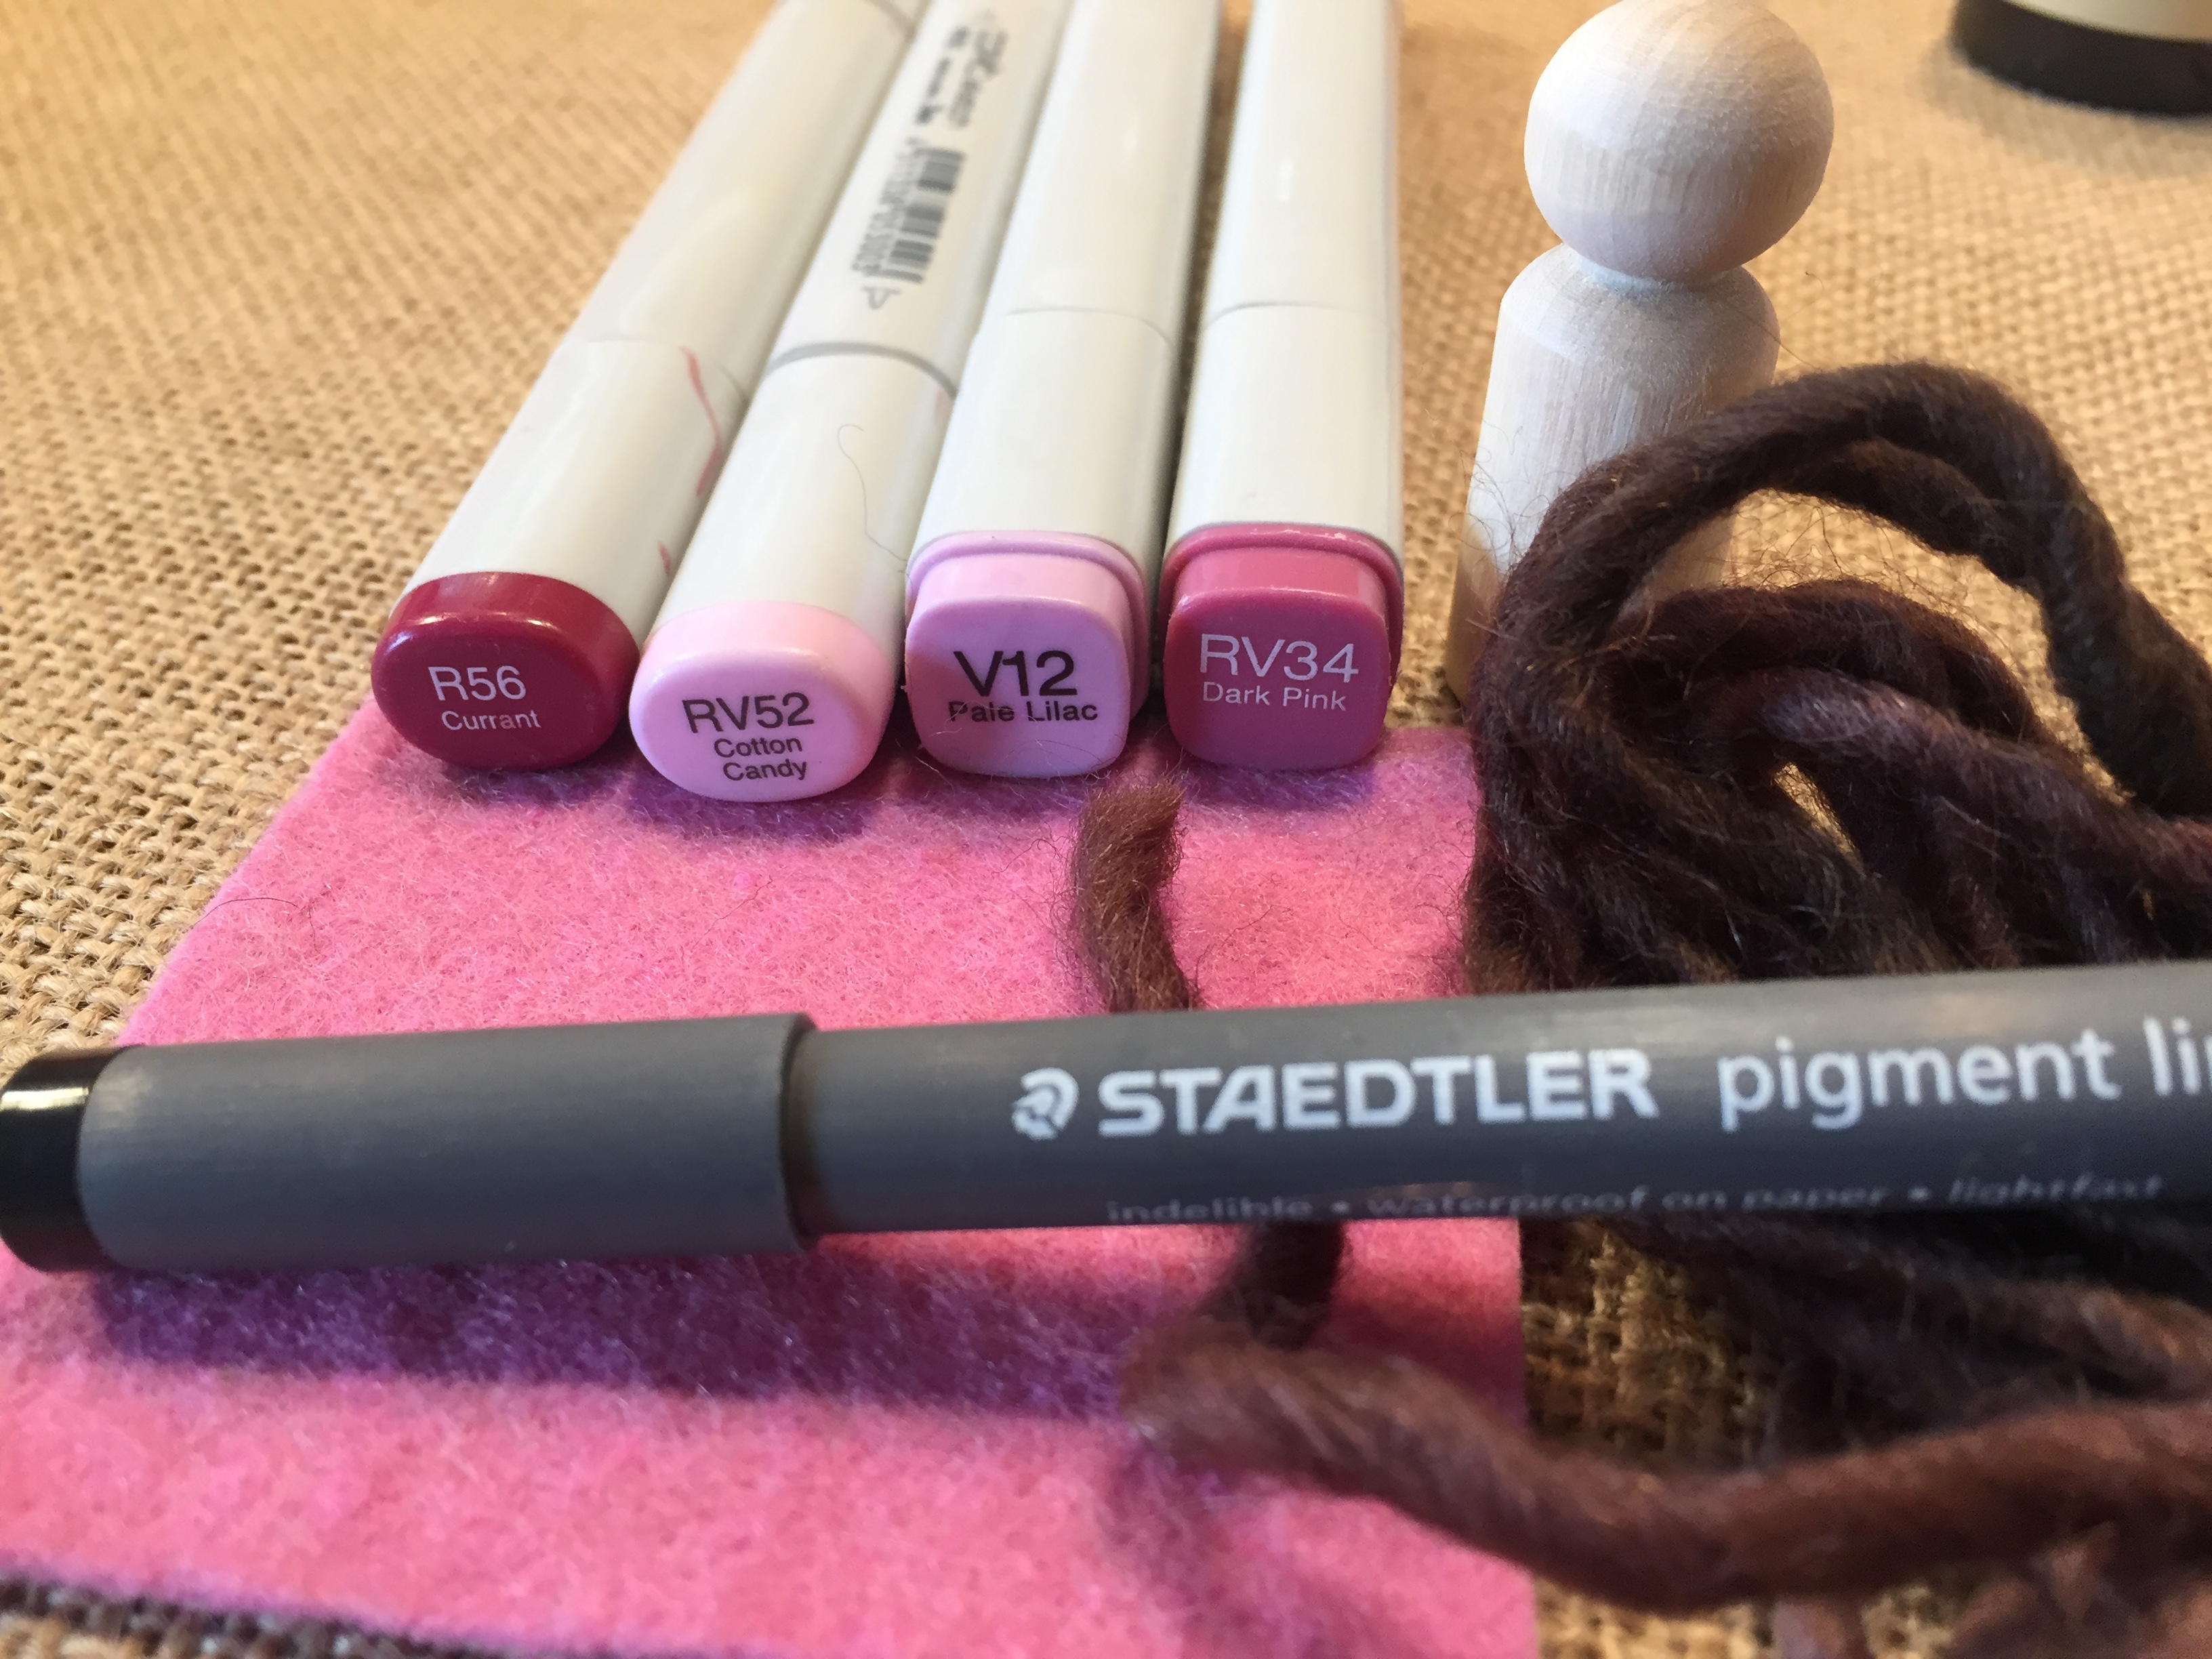
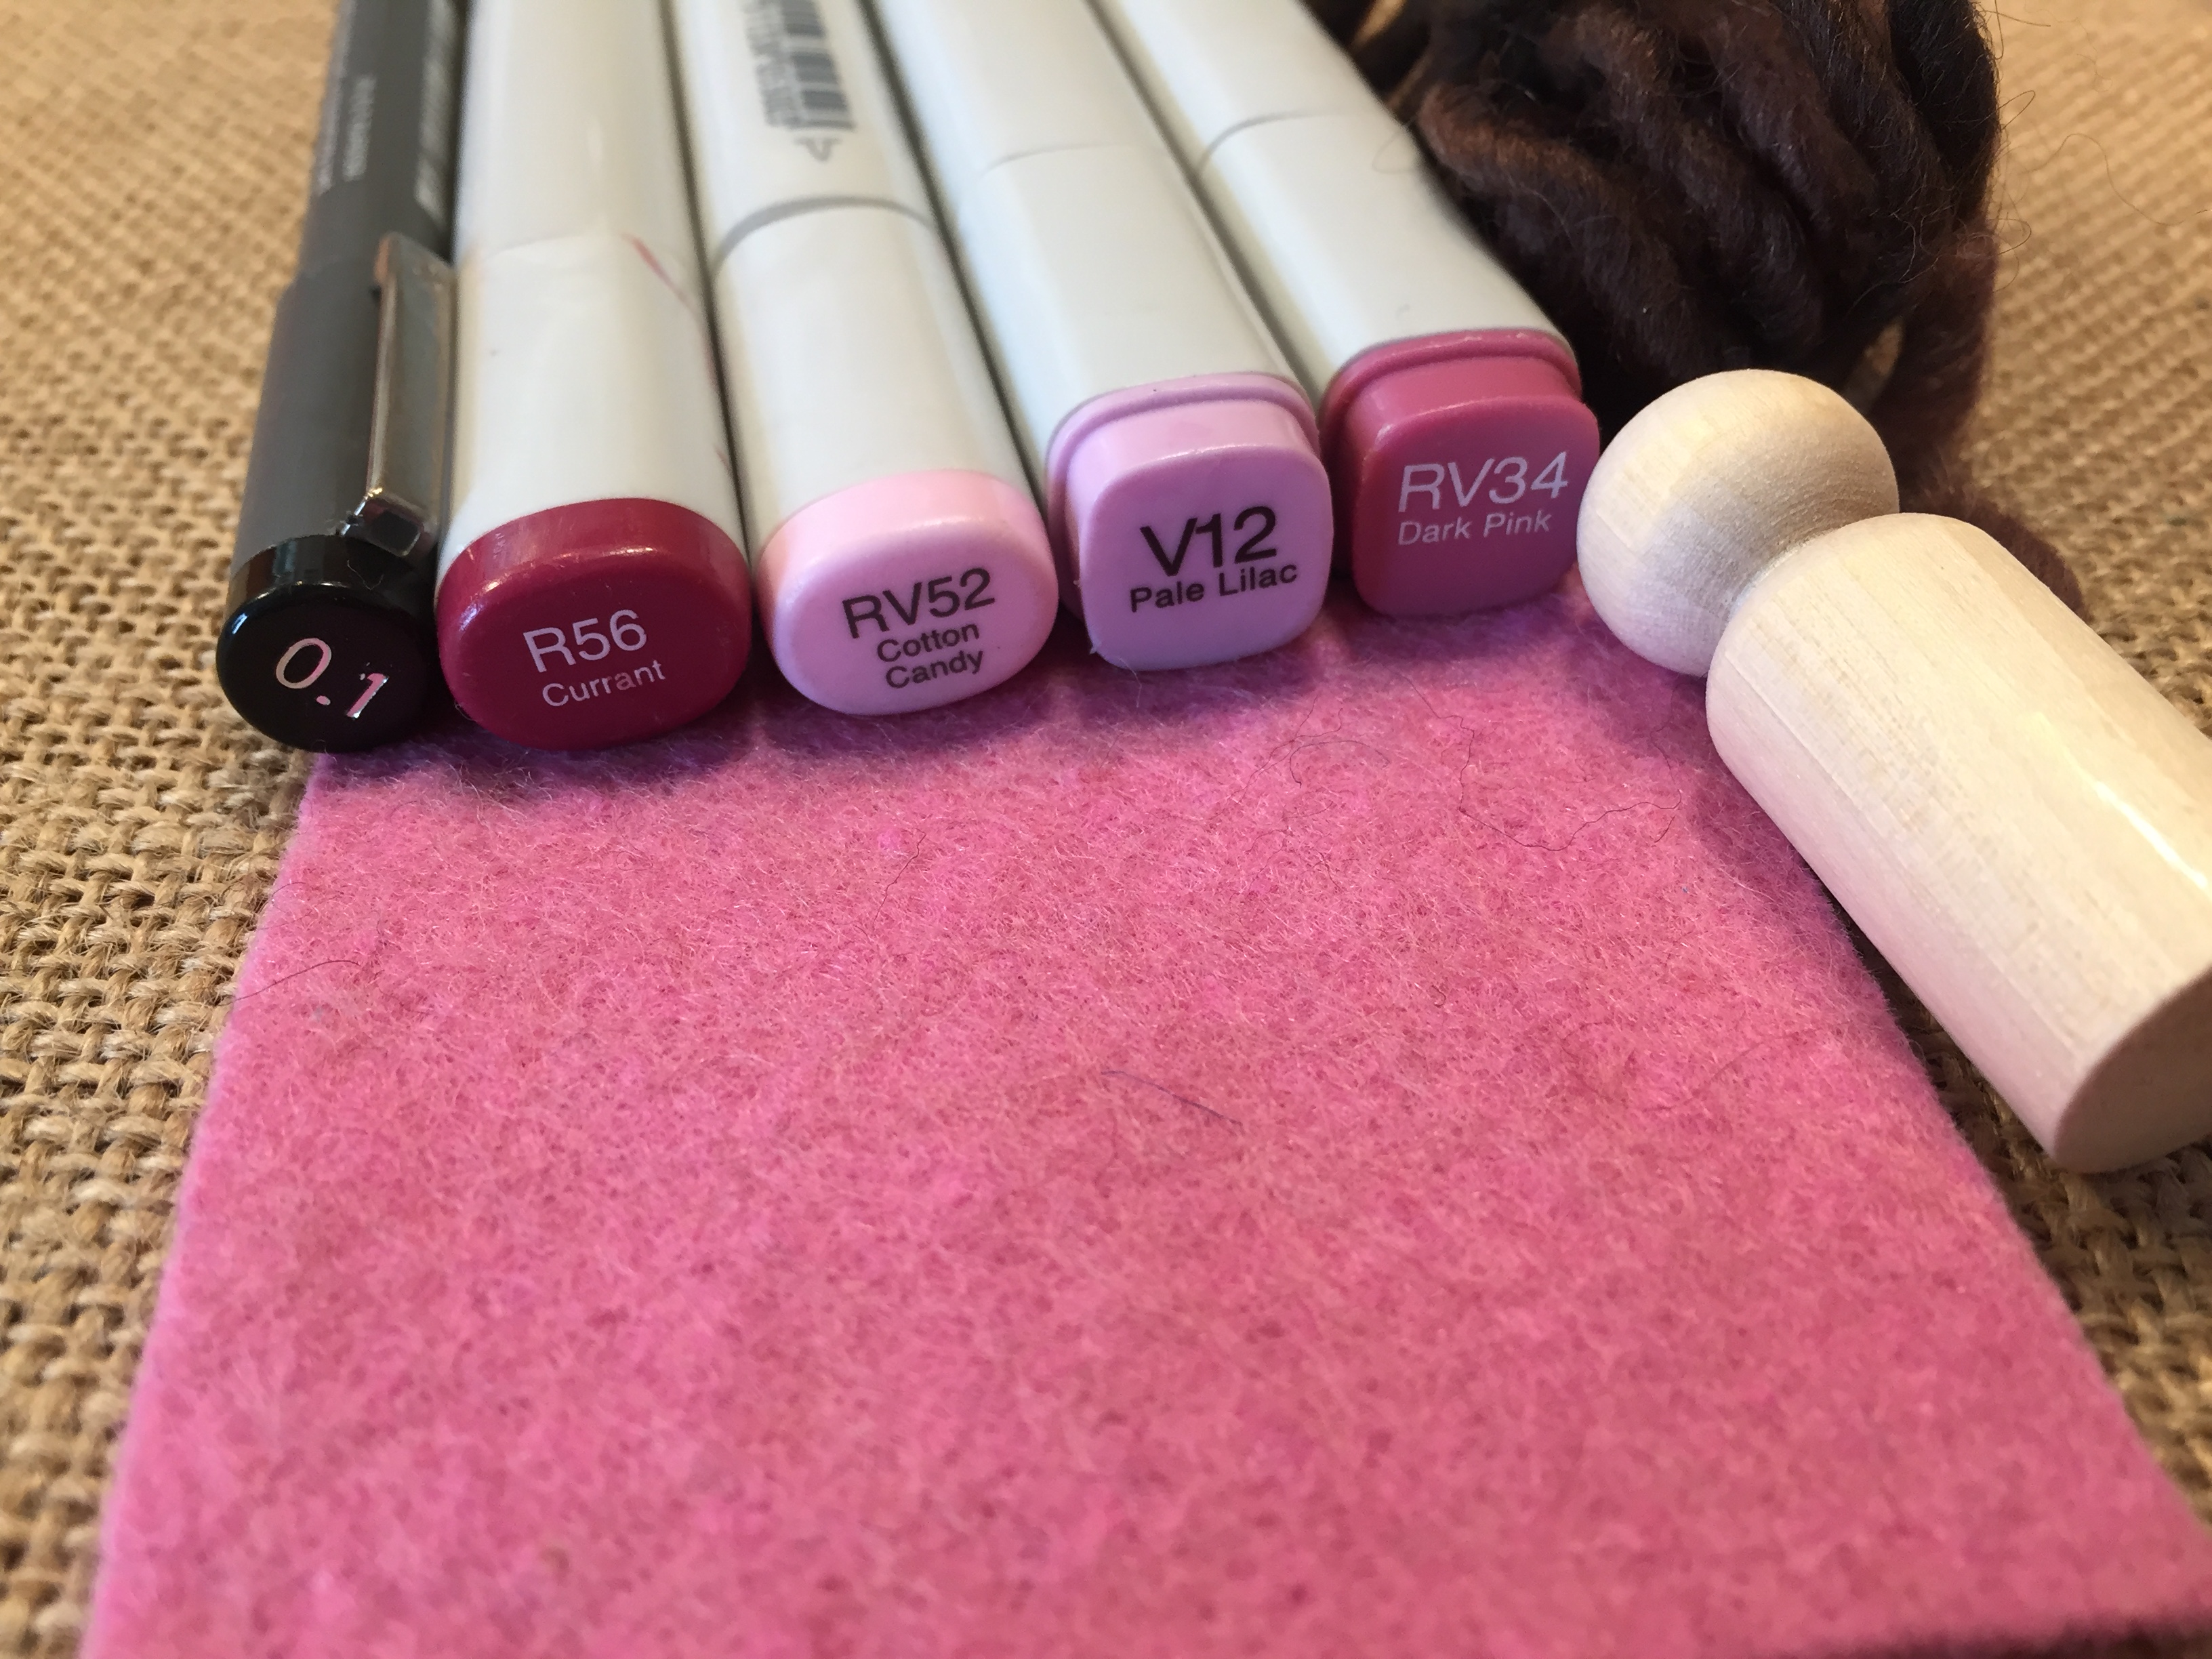
Sometimes a set of peg dolls we make inspires another set years later. That’s what happened here. We made pirate peg dolls years ago for a homeschool unit study. Now we made another set inspired by that first set. For this tutorial, I used the smallest peg dolls available from A Child’s Dream. I used bulky weight yarn for the hair, though you can also use mohair as well. Sometimes I use worsted weight. I used Lyra Opaque Watercolors for the body and used a pen to dark facial features. I love Holland felt for our crafting needs, and used scraps for this project. I dipped into our scrapbooking and beading supplies for the accessories. I also used a small amount of white acrylic paint for details and to make the watercolor paint more opaque. All these supplies can be found at A Child’s Dream. When working with small bits of felt, it’s best to use 100% wool felt as it is a more durable felt versus an acrylic felt.


How to Knit a Hat or Beanie for Beginners
In this slow tutorial, I walk you through the basics of knitting so you can knit a hat or beanie for a peg doll. I have three patterns to share with you inspired by the pattern in the book Making Peg Dolls by Margaret Bloom on the Martinmas peg doll tutorial. We have gotten so much inspiration from this book. It’s beautifully laid out with step by step instructions and simple patterns. Even if you are just getting into peg dolls and knitting, you’ll find this hat tutorial is easy enough for new knitters and it’s so satisfying to complete. I usually use hot glue to adhere the hat to our peg dolls, but you can keep them loose as well.
For this tutorial I used my size 7 needles with sport weight yarn using one of the three patterns. When knitting with sports weight, the suggested needle size is 5. For worsted weight, you can use a size 7 needle. There is some flexibility as to the size needle you use for the weight of yarn.
The way you knit will also affect the finished project. If you are a tight knitter, the hats will be smaller. If you are a loose knitter the hats will be bigger. If you use a worsted weight over a sports or sock weight, your hat will be bigger. If you use the larger of the three patterns (17 stitch cast on), your hat will be bigger. There are also several sizes of peg dolls and finger puppets. The mama/female peg doll has a small head, so use the smaller of the patterns with sock weight yarn to make a hat that will fit. If you are making hats for the finger puppet, use the larger pattern and a worsted weight yarn. The male/unisex peg doll is in the middle. Use a small pattern for a beanie, or the large pattern and worsted weight yarn for a hat that covers more of the head. I encourage you to make a few as the type of yarn, needle size, pattern and way you knit will all affect the final size of the hat.
Small pattern suitable for all yarns. This will make a small hat with sock/highland sport weight yarn and slightly larger hat when using worsted weight yarn:
- Cast on 15 stitches
- Knit 2 rows
- Knit 2 together, knit 1 for whole row
- Knit a row (you should be down to 10 stitches)
- Knit 1, knit 2 together
- Knit a row (you should be down to 7 stitches)
- Knit 1, knit 2 together
- Knit a row (you should be down to 5 stitches)
- Kit 2 together, knit 1, knit 2 together
- Now you should be down to 3 stitches
- Bind off
- Fold triangle and sew it together with a sewing knitting needle.
Medium pattern (slightly larger than the smaller pattern)
- Cast on 17 stitches
- Knit two rows
- Knit 2 together, knit 1
- Knit 1 row
- [Repeat: knit 2 together, knit 1 knit 1 row] Until you have 3 stitches left
- Bind off and sew hat together


Peg Dolls for our Africa Unit Study
For our West Africa main lesson block spanning the years 900-1400 and the empires of Mali, Ghana and Songhai, we did several projects, cooked regional recipes and read books. We are including our peg dolls in this series, though this is the first time we are making peg dolls to represent a specific people, location and time period. These are not accurate replicas, these are based on two resources: Bringing Water to Kapiti Plain and Children Just Like Me. These peg dolls, like the meals we cook for our unit studies, carry the essence and spirit of the project or meal, not the historical accuracy. When making these for our West Africa unit, I used sources that depicted clothing from different regions of Africa and most were modern or traditional. For this project, I used materials from A Child’s Dream. The peg dolls, paints, yarn and fabric can all be found in their shop. The accessories like beads and twigs, I got from my own supplies. I also tried out different art mediums for skin tones. Here are a few tips I learned from others and some I learned along the way: Sand peg dolls before staining (this isn’t necessary if you are painting with acrylic paint or opaque watercolor paints, though it will make your surface smoother). Use beeswax sealant to protect the finished peg doll (I usually leave my peg dolls unstained, so I’ve only started doing this more recently when I used opaque watercolors for my peg dolls for outfits). Use a weight to submerge the peg dolls when staining them in a bath. I found that some parts that were left exposed and when the water evaporated, it left stain rings on the peg doll. At first (and in the video I say) I prefer the walnut ink (which I used as a stain), but upon reflection, I think the peg dolls that were soaked in the bath had a more even tone. One important suggestion that was offered by my friend Kristy (at Ethnic Green Living), said to make skin tone varied, even within a family. You will see that in one peg doll family. While I’m only sharing two peg doll families here, we have others in our homeschool that we have added to these history units.


Owl Peg Doll
Finding hands-on projects for our unit studies and main lesson blocks brings me so much joy, especially when we can make adorable owl peg dolls like these. They were pretty simple to do, but had their challenges. Making the eyes were too hard for my 8-year-old daughter and 12-year-old son, so after they attempted, I helped them fix it up. The beaks were also really hard to do and while we found some solutions, I’m thinking they are eventually going to break off. While those small pieces are choking hazards for young children, these peg dolls babies are also very small and so I don’t recommend giving these to young children. Also, as we used a mix of Lyra Opaque watercolors (which I believe are safe for children), I don’t know about the acrylic paint we use to make the black around the eyes. For that reason, I advise you check the safety of your paints and keep these objects (whether painted or not), out of the hands of small children.
For the first time, I glued the peg doll base onto a small square of watercolor paper using a glue dot so the children and I would have an easier time painting them. I don’t know why it took me so long to figure that out! But oh did it make things easier.
I’m using peg doll babies and Lyra Opaque watercolors for this project. You can find these materials at A Child’s Dream. I used various materials for the beak.
Check out our complete Owl Unit Study with videos on how we put this unit together, the resources we used and the projects we did. You can also check out our larger Bird Unit Study which includes more projects and resources.
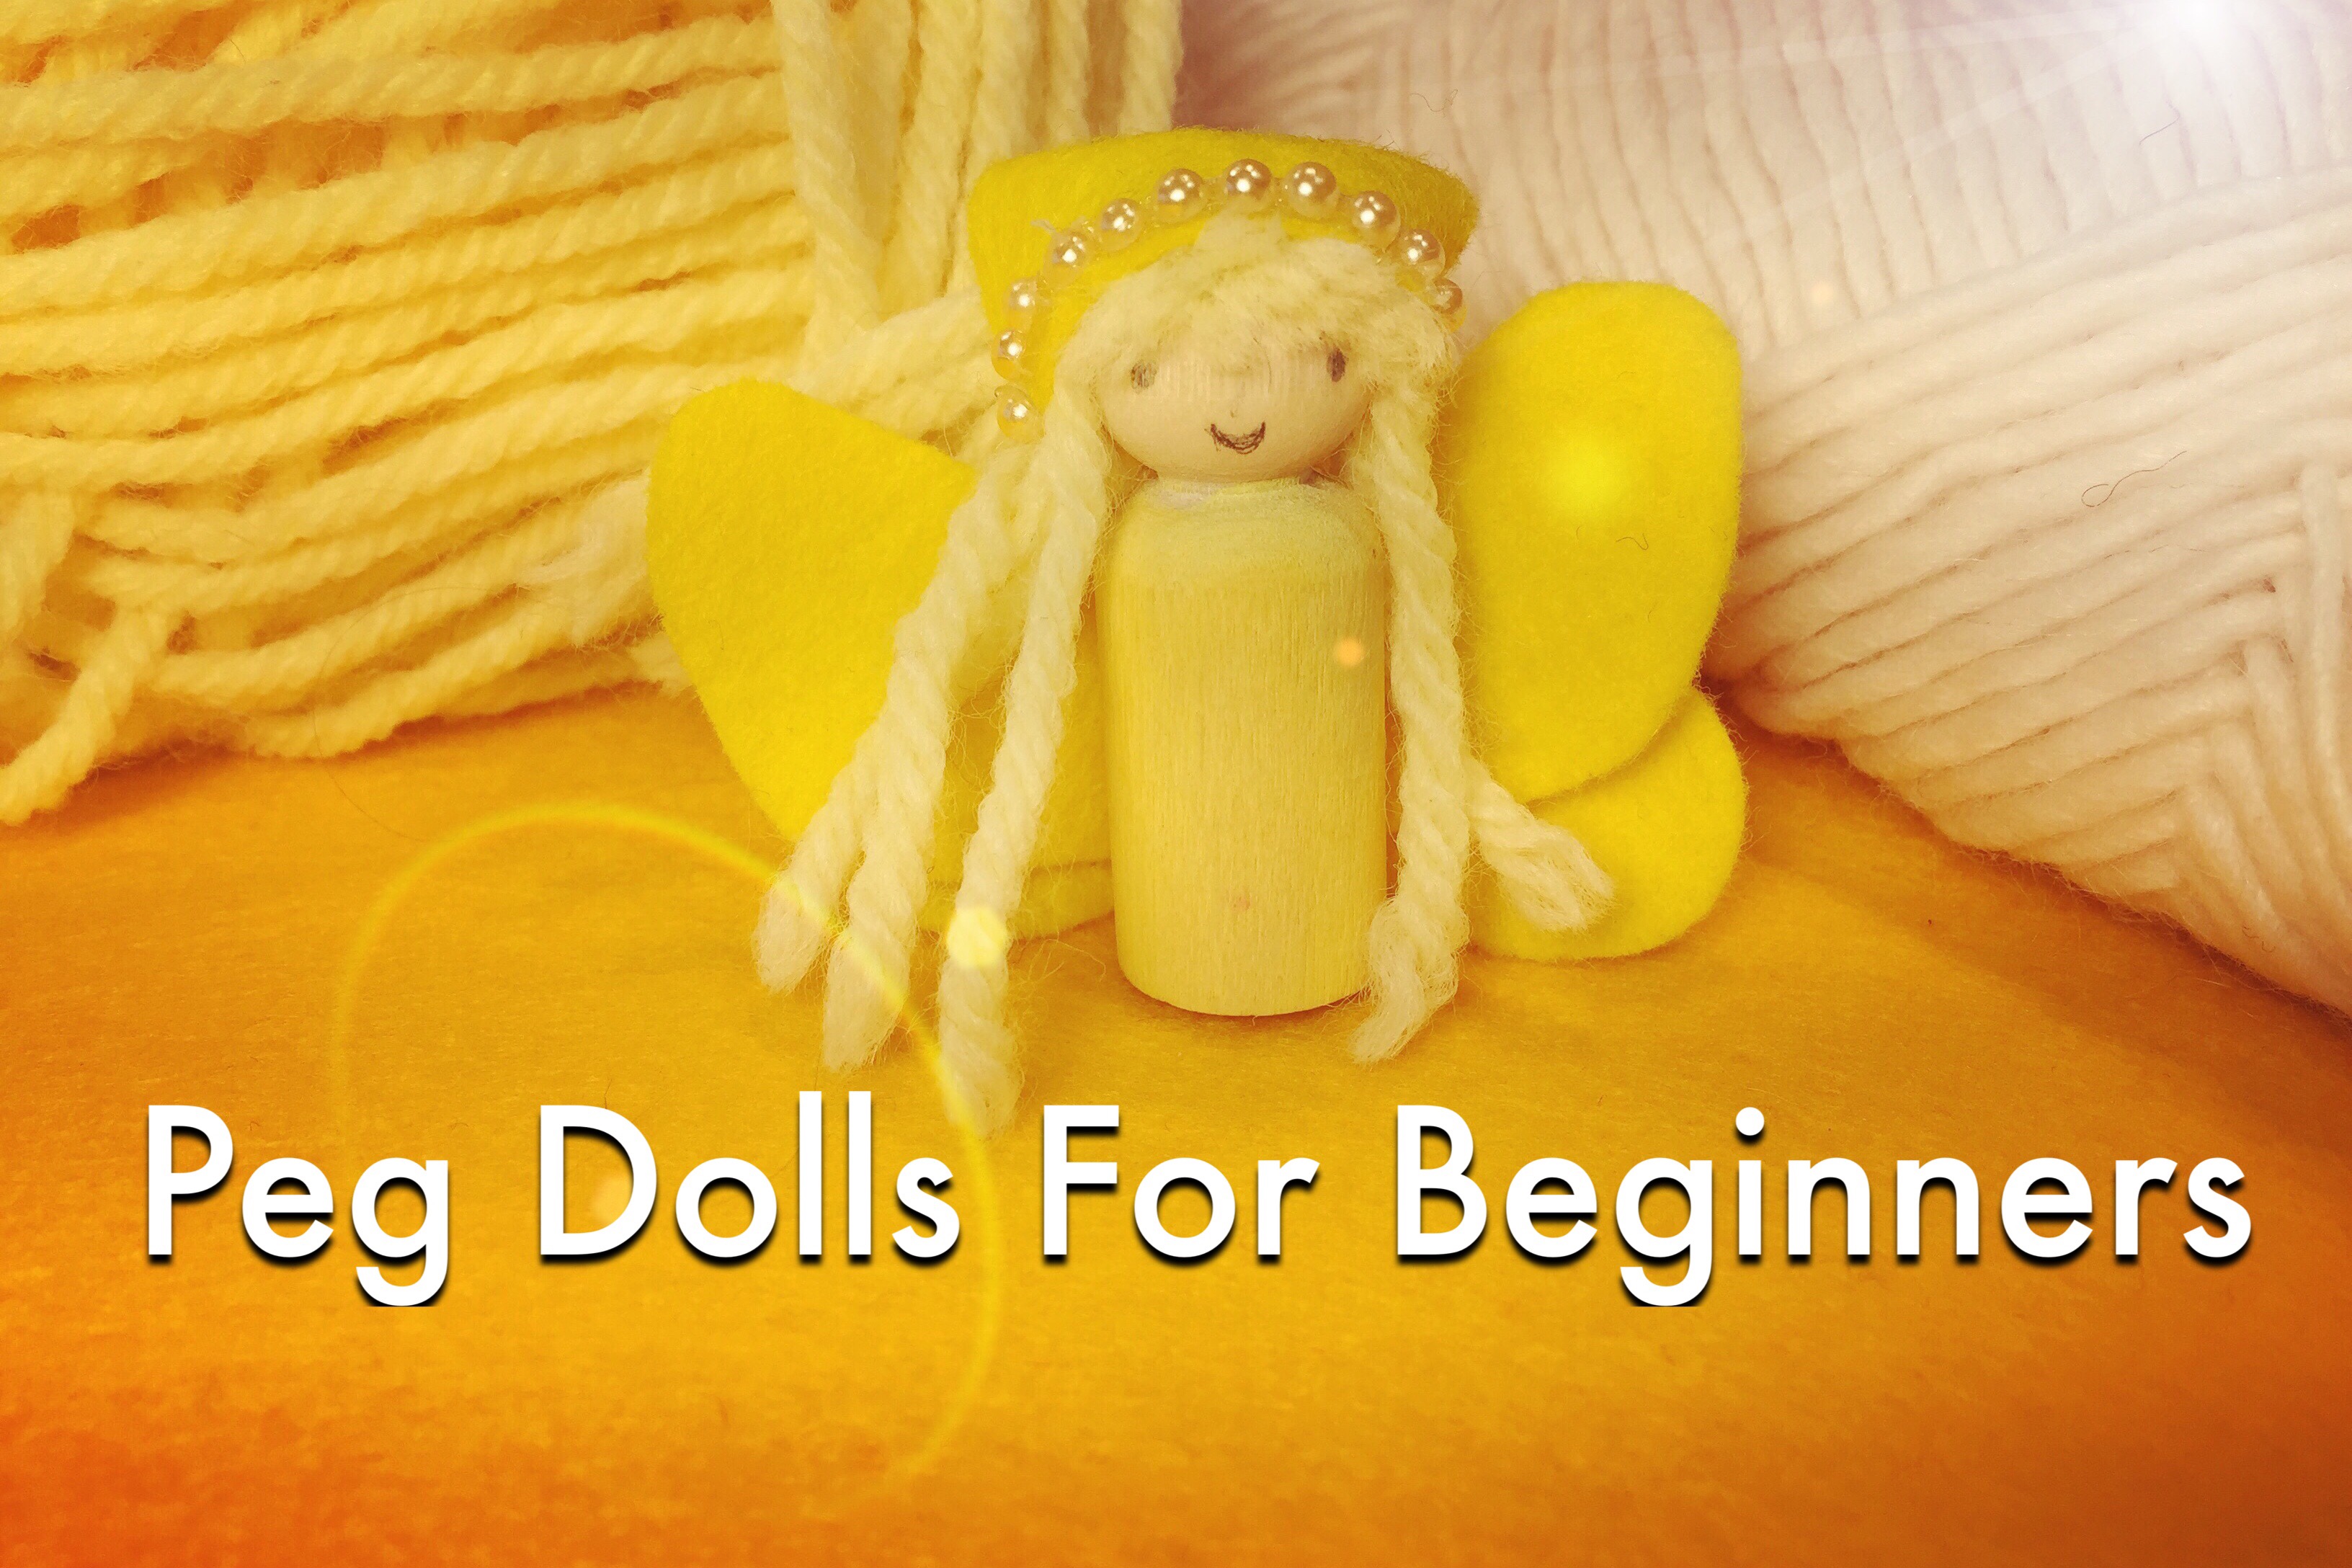
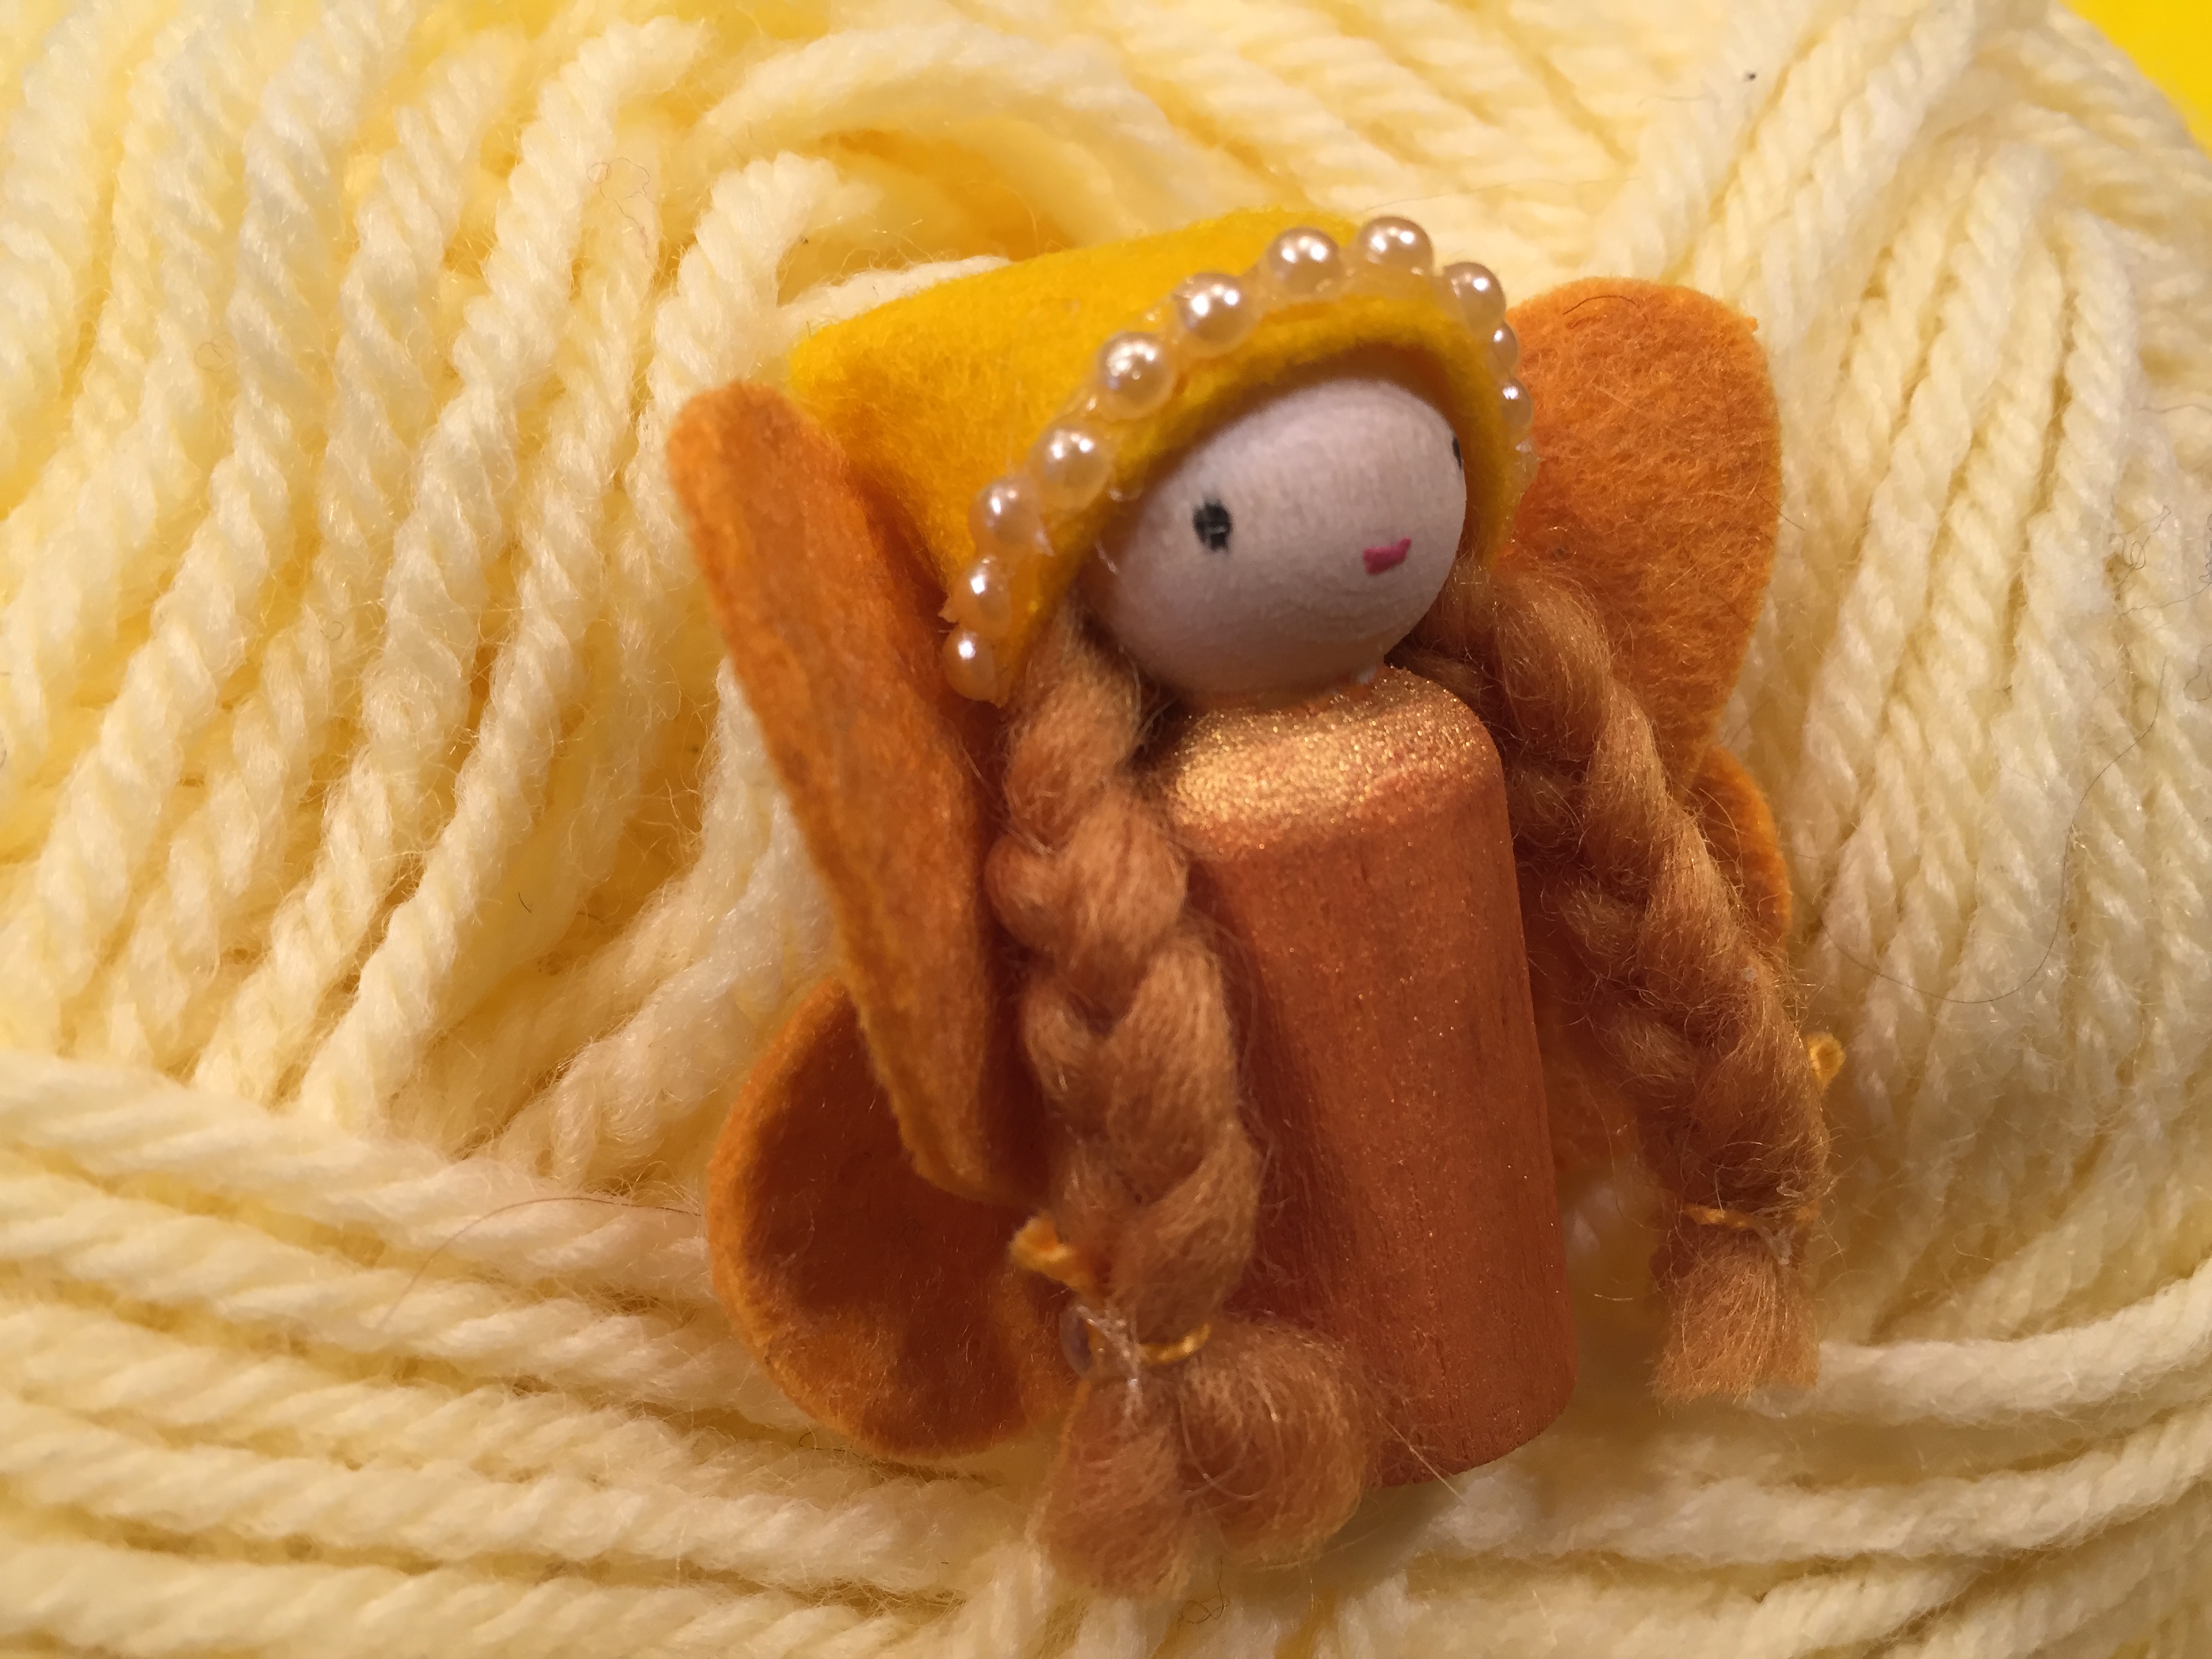
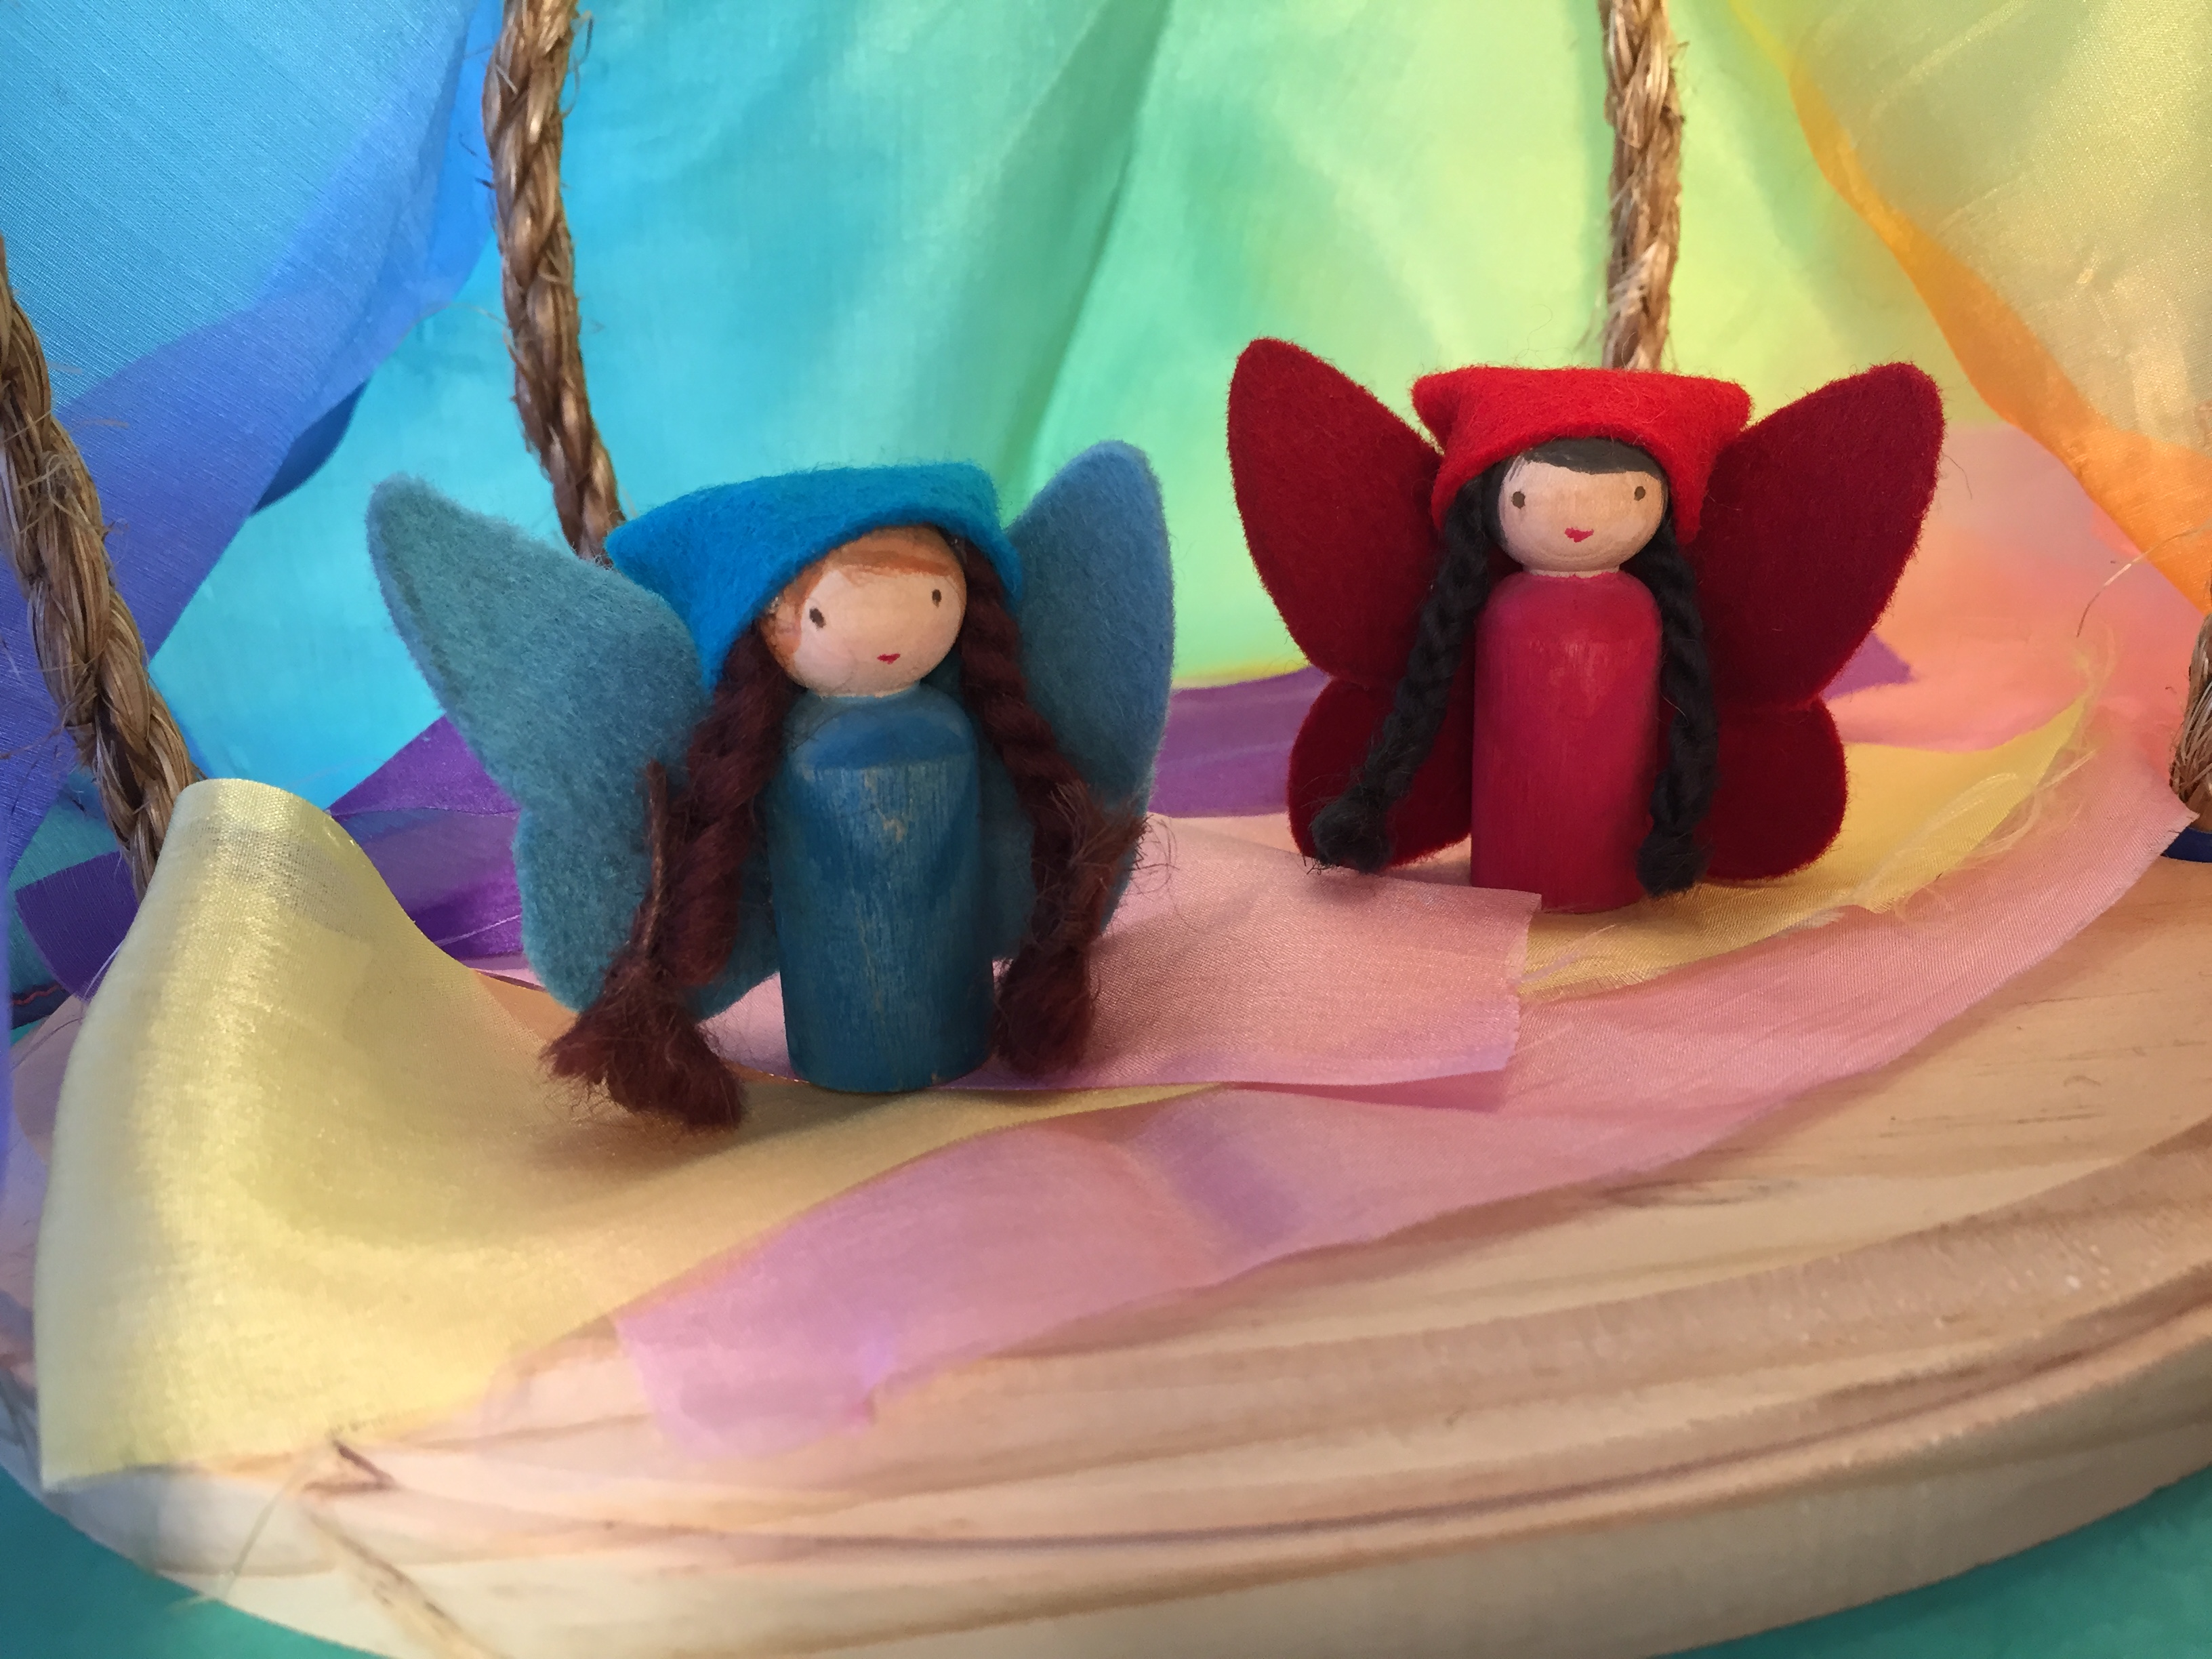
Fairy Peg Doll
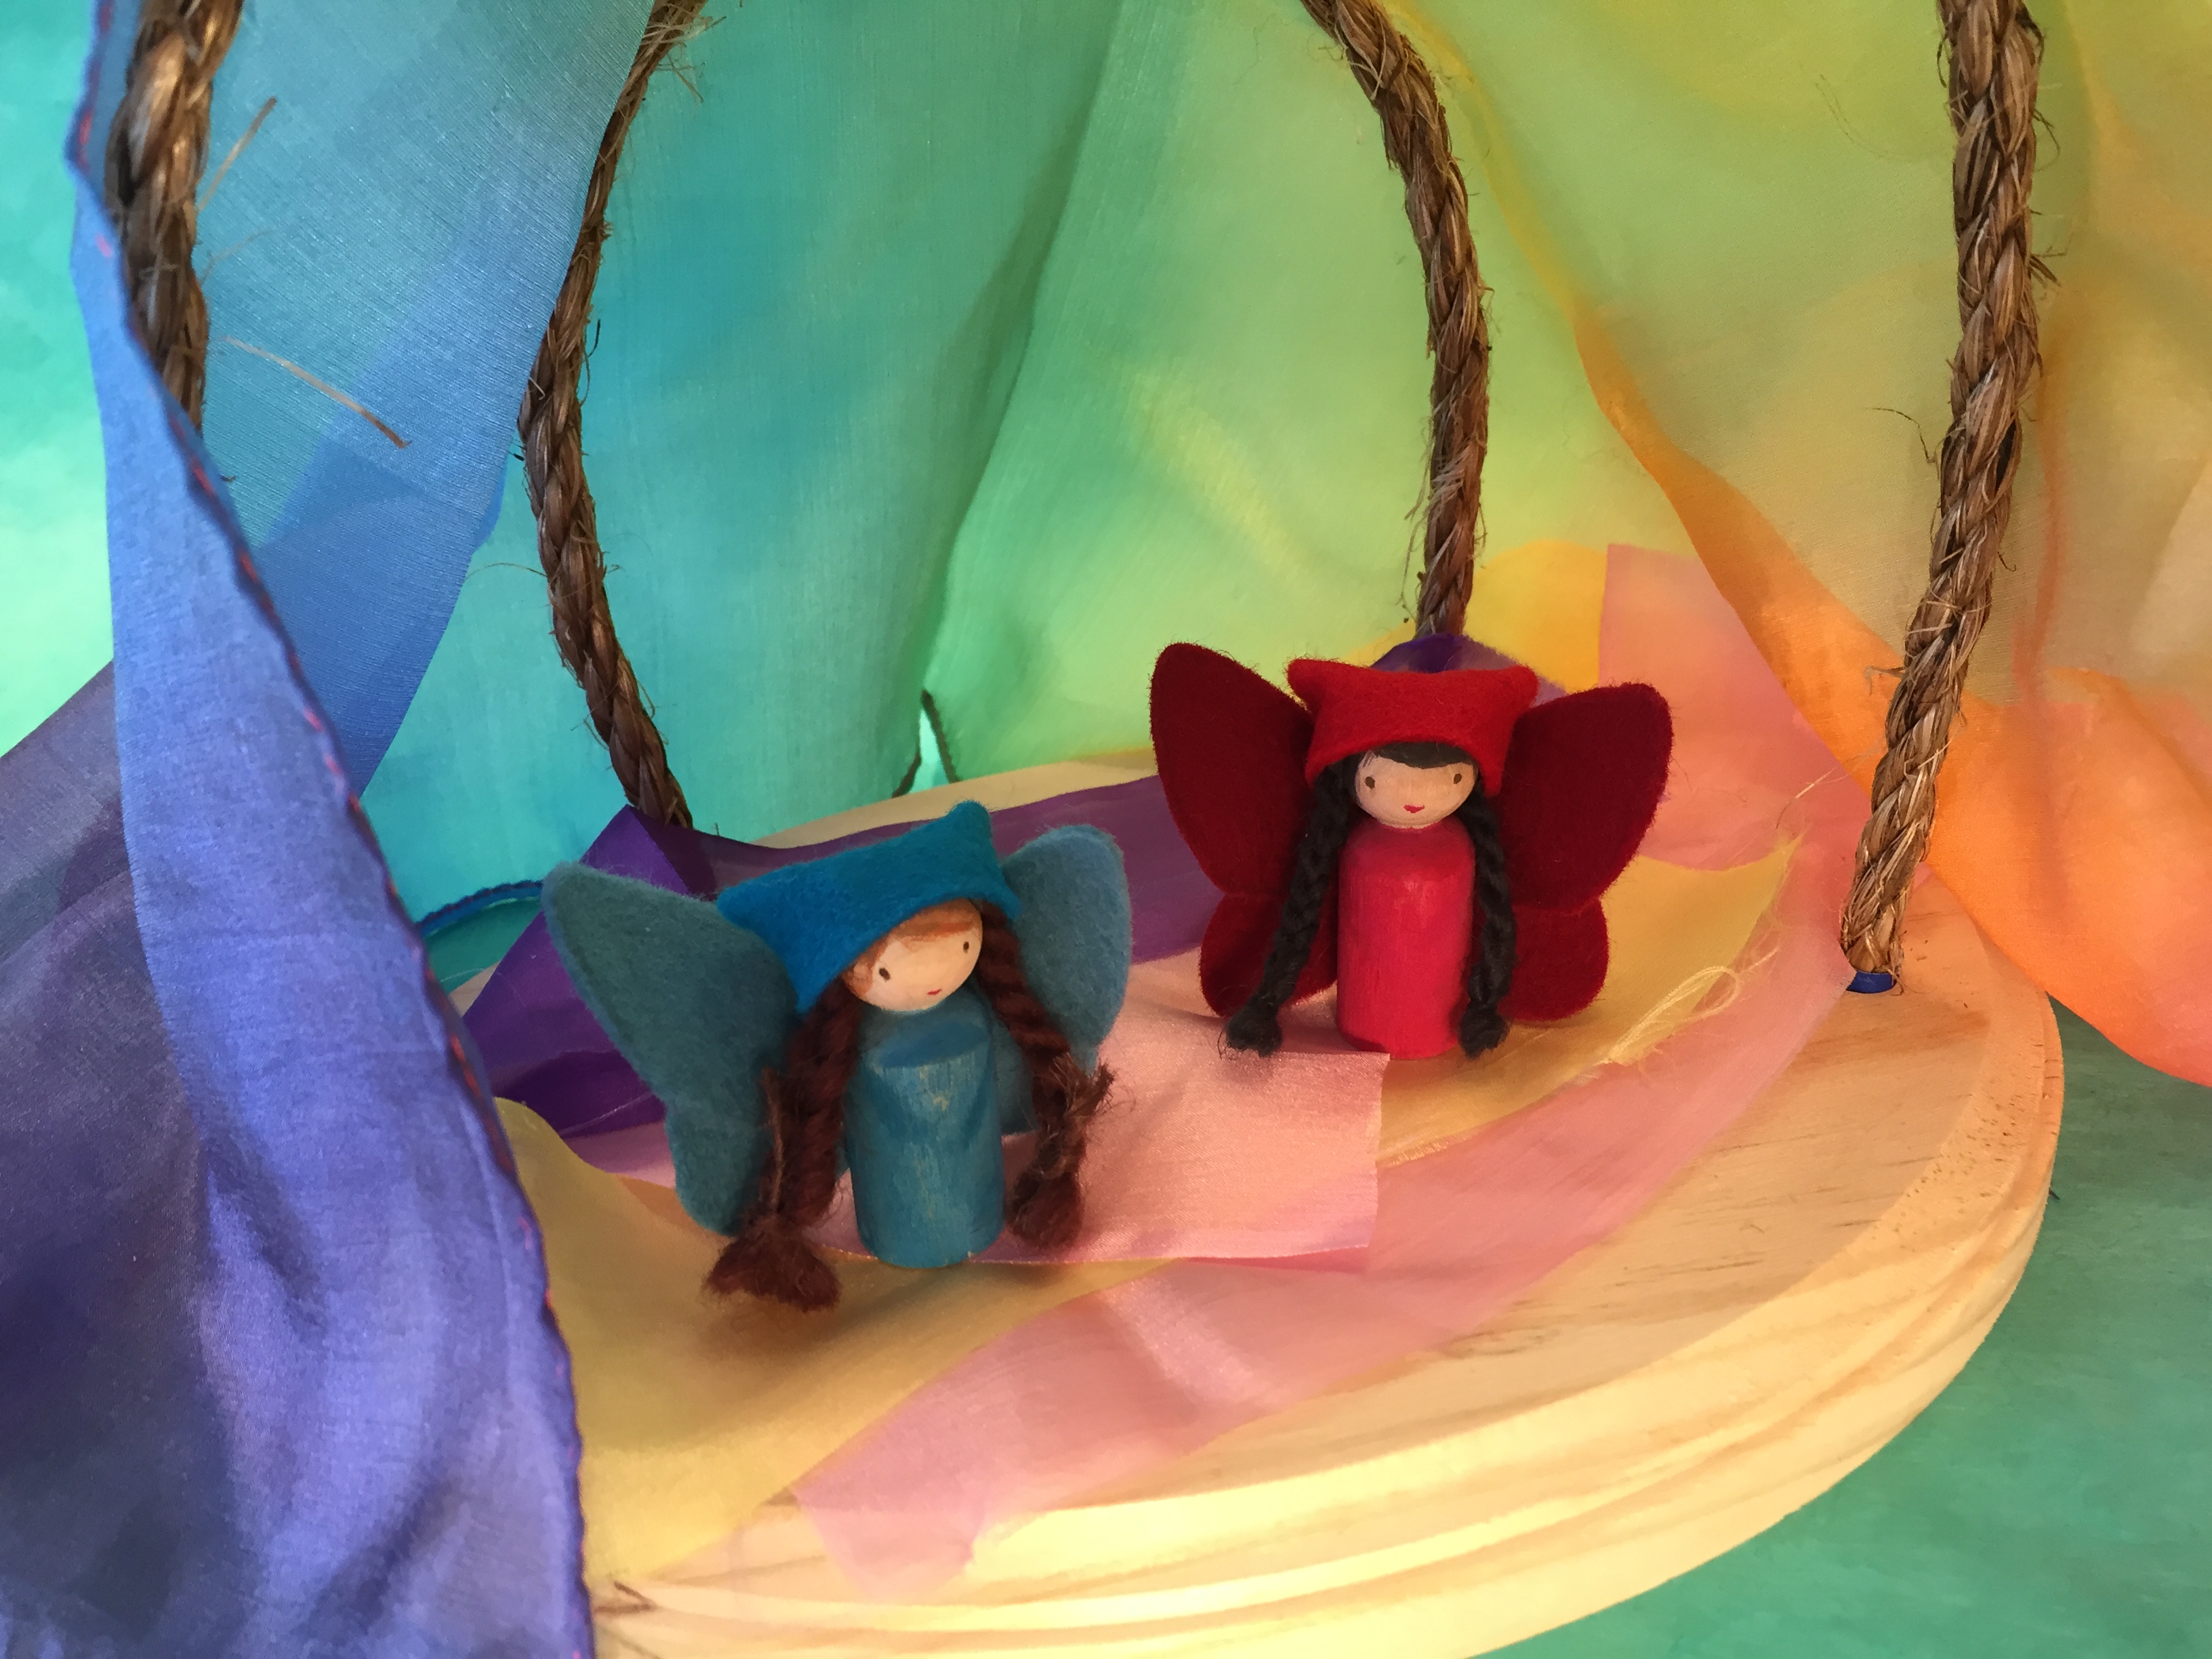
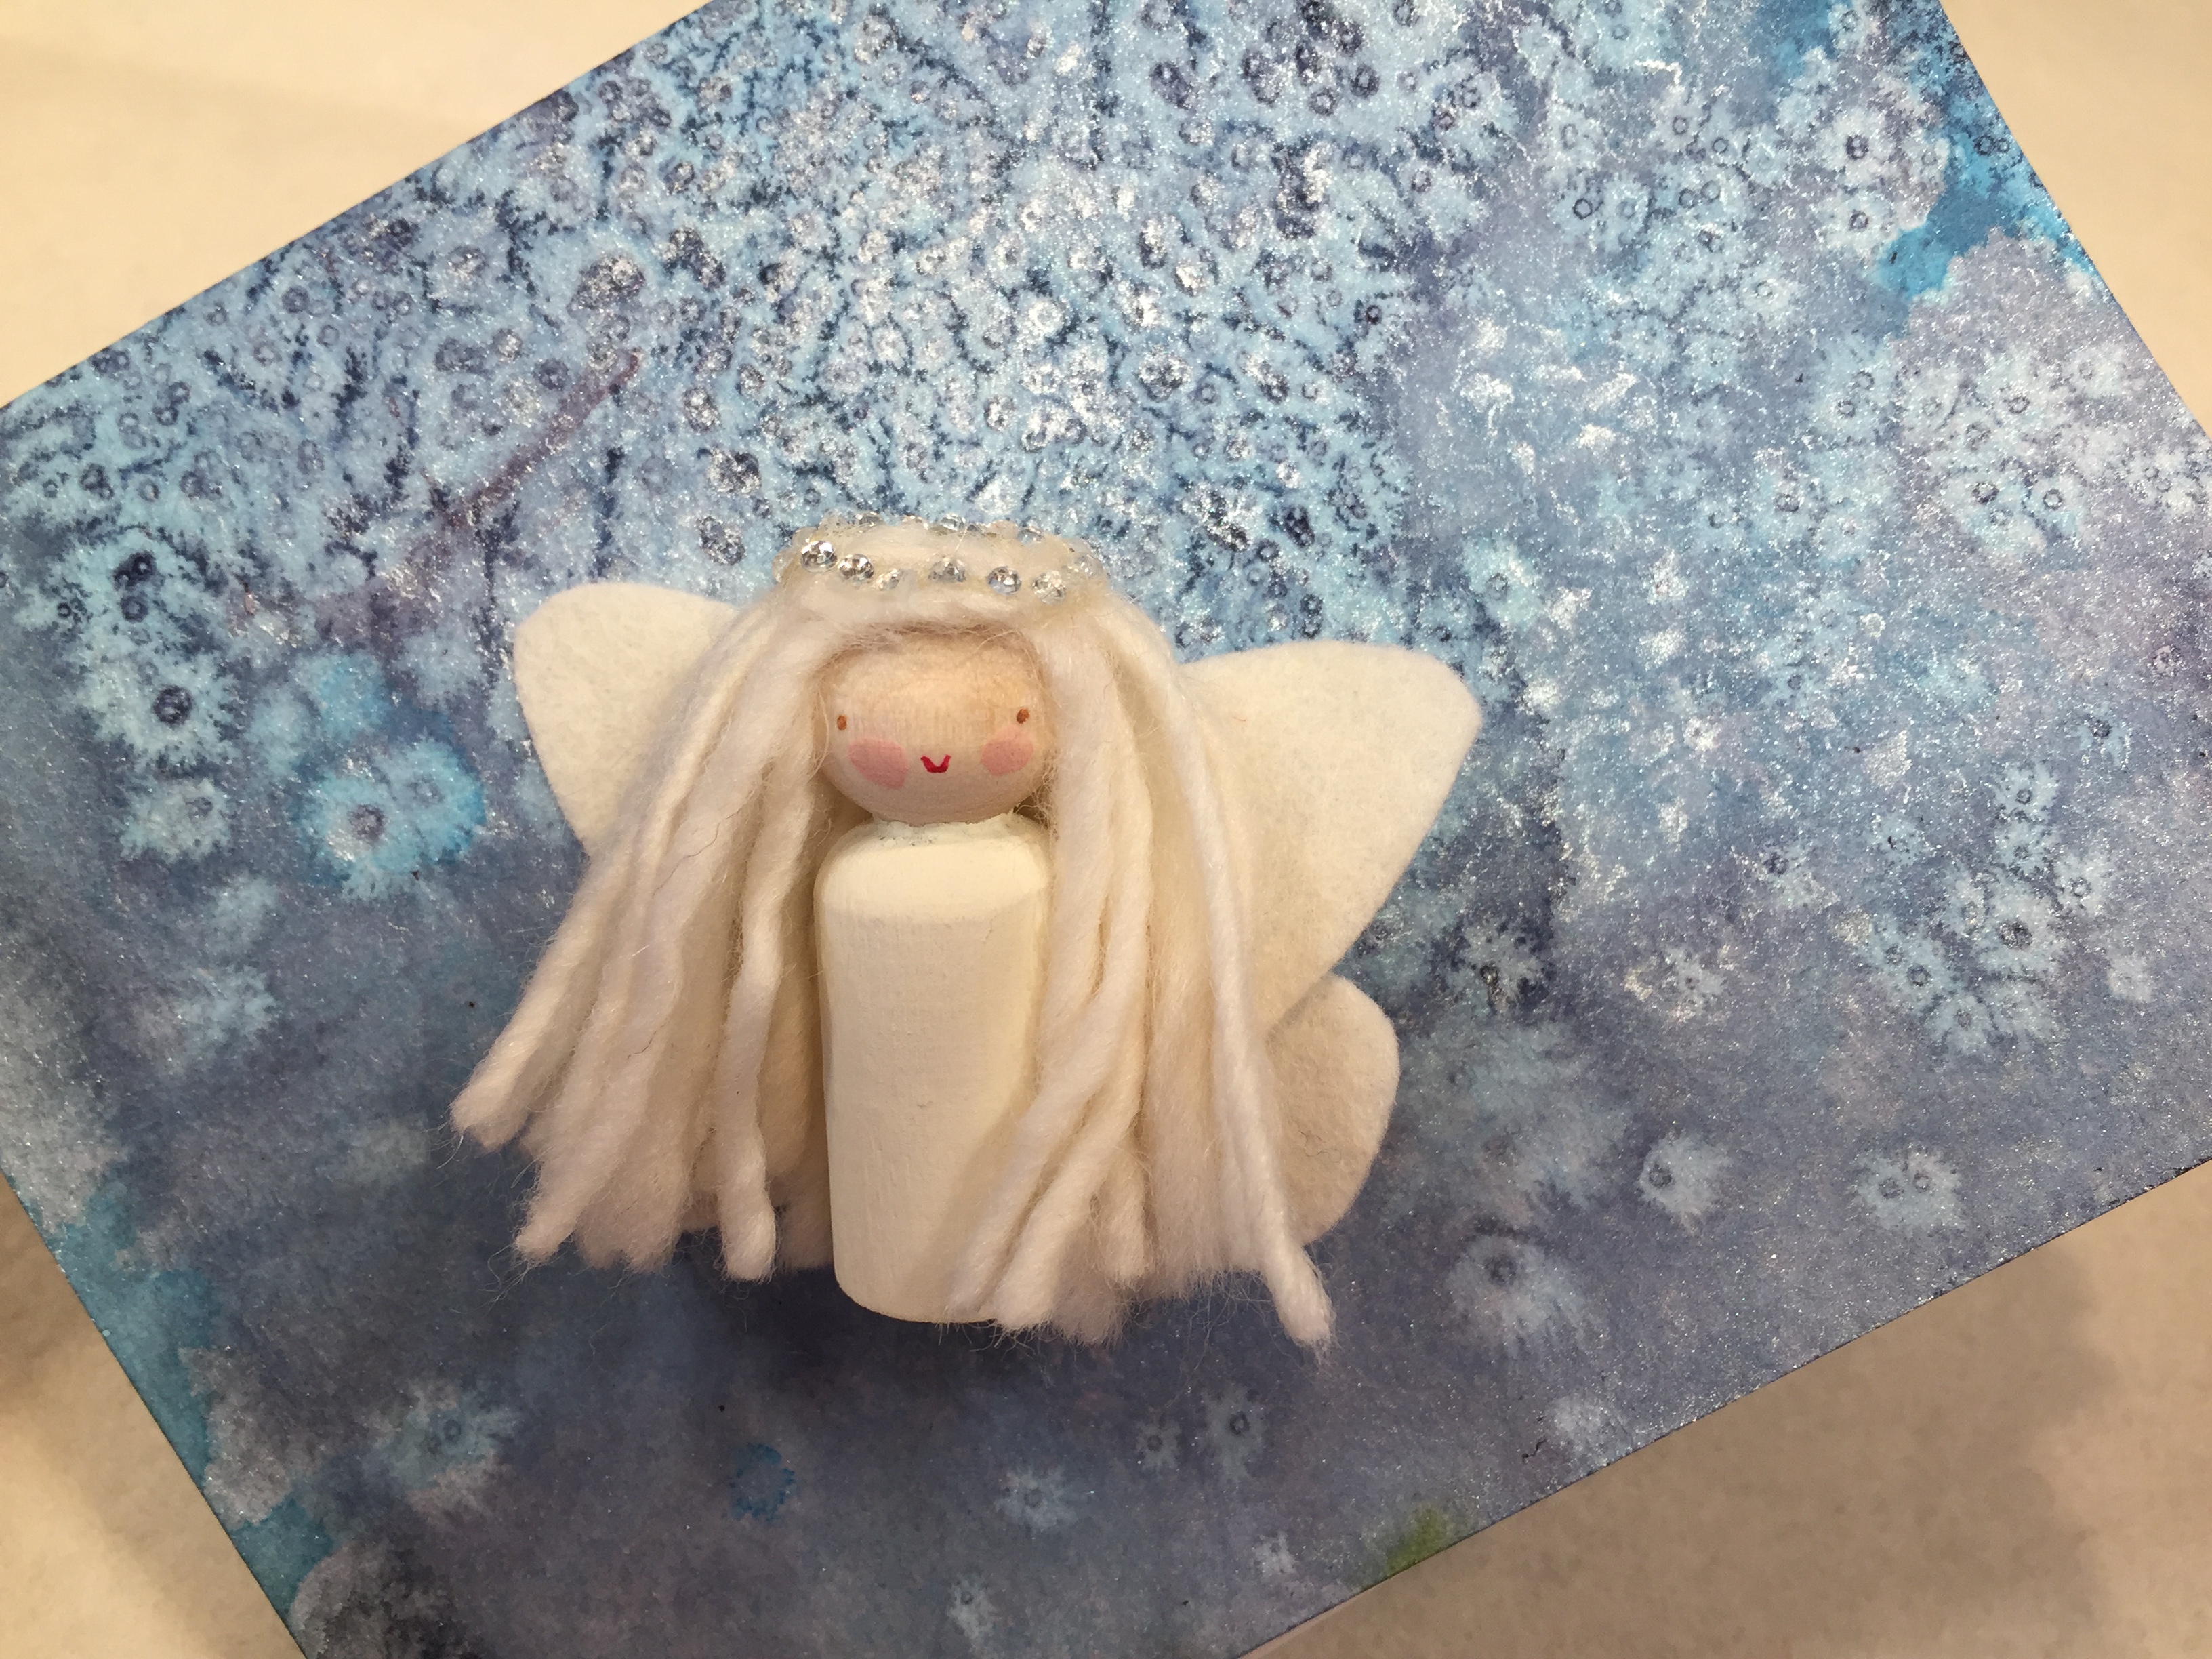
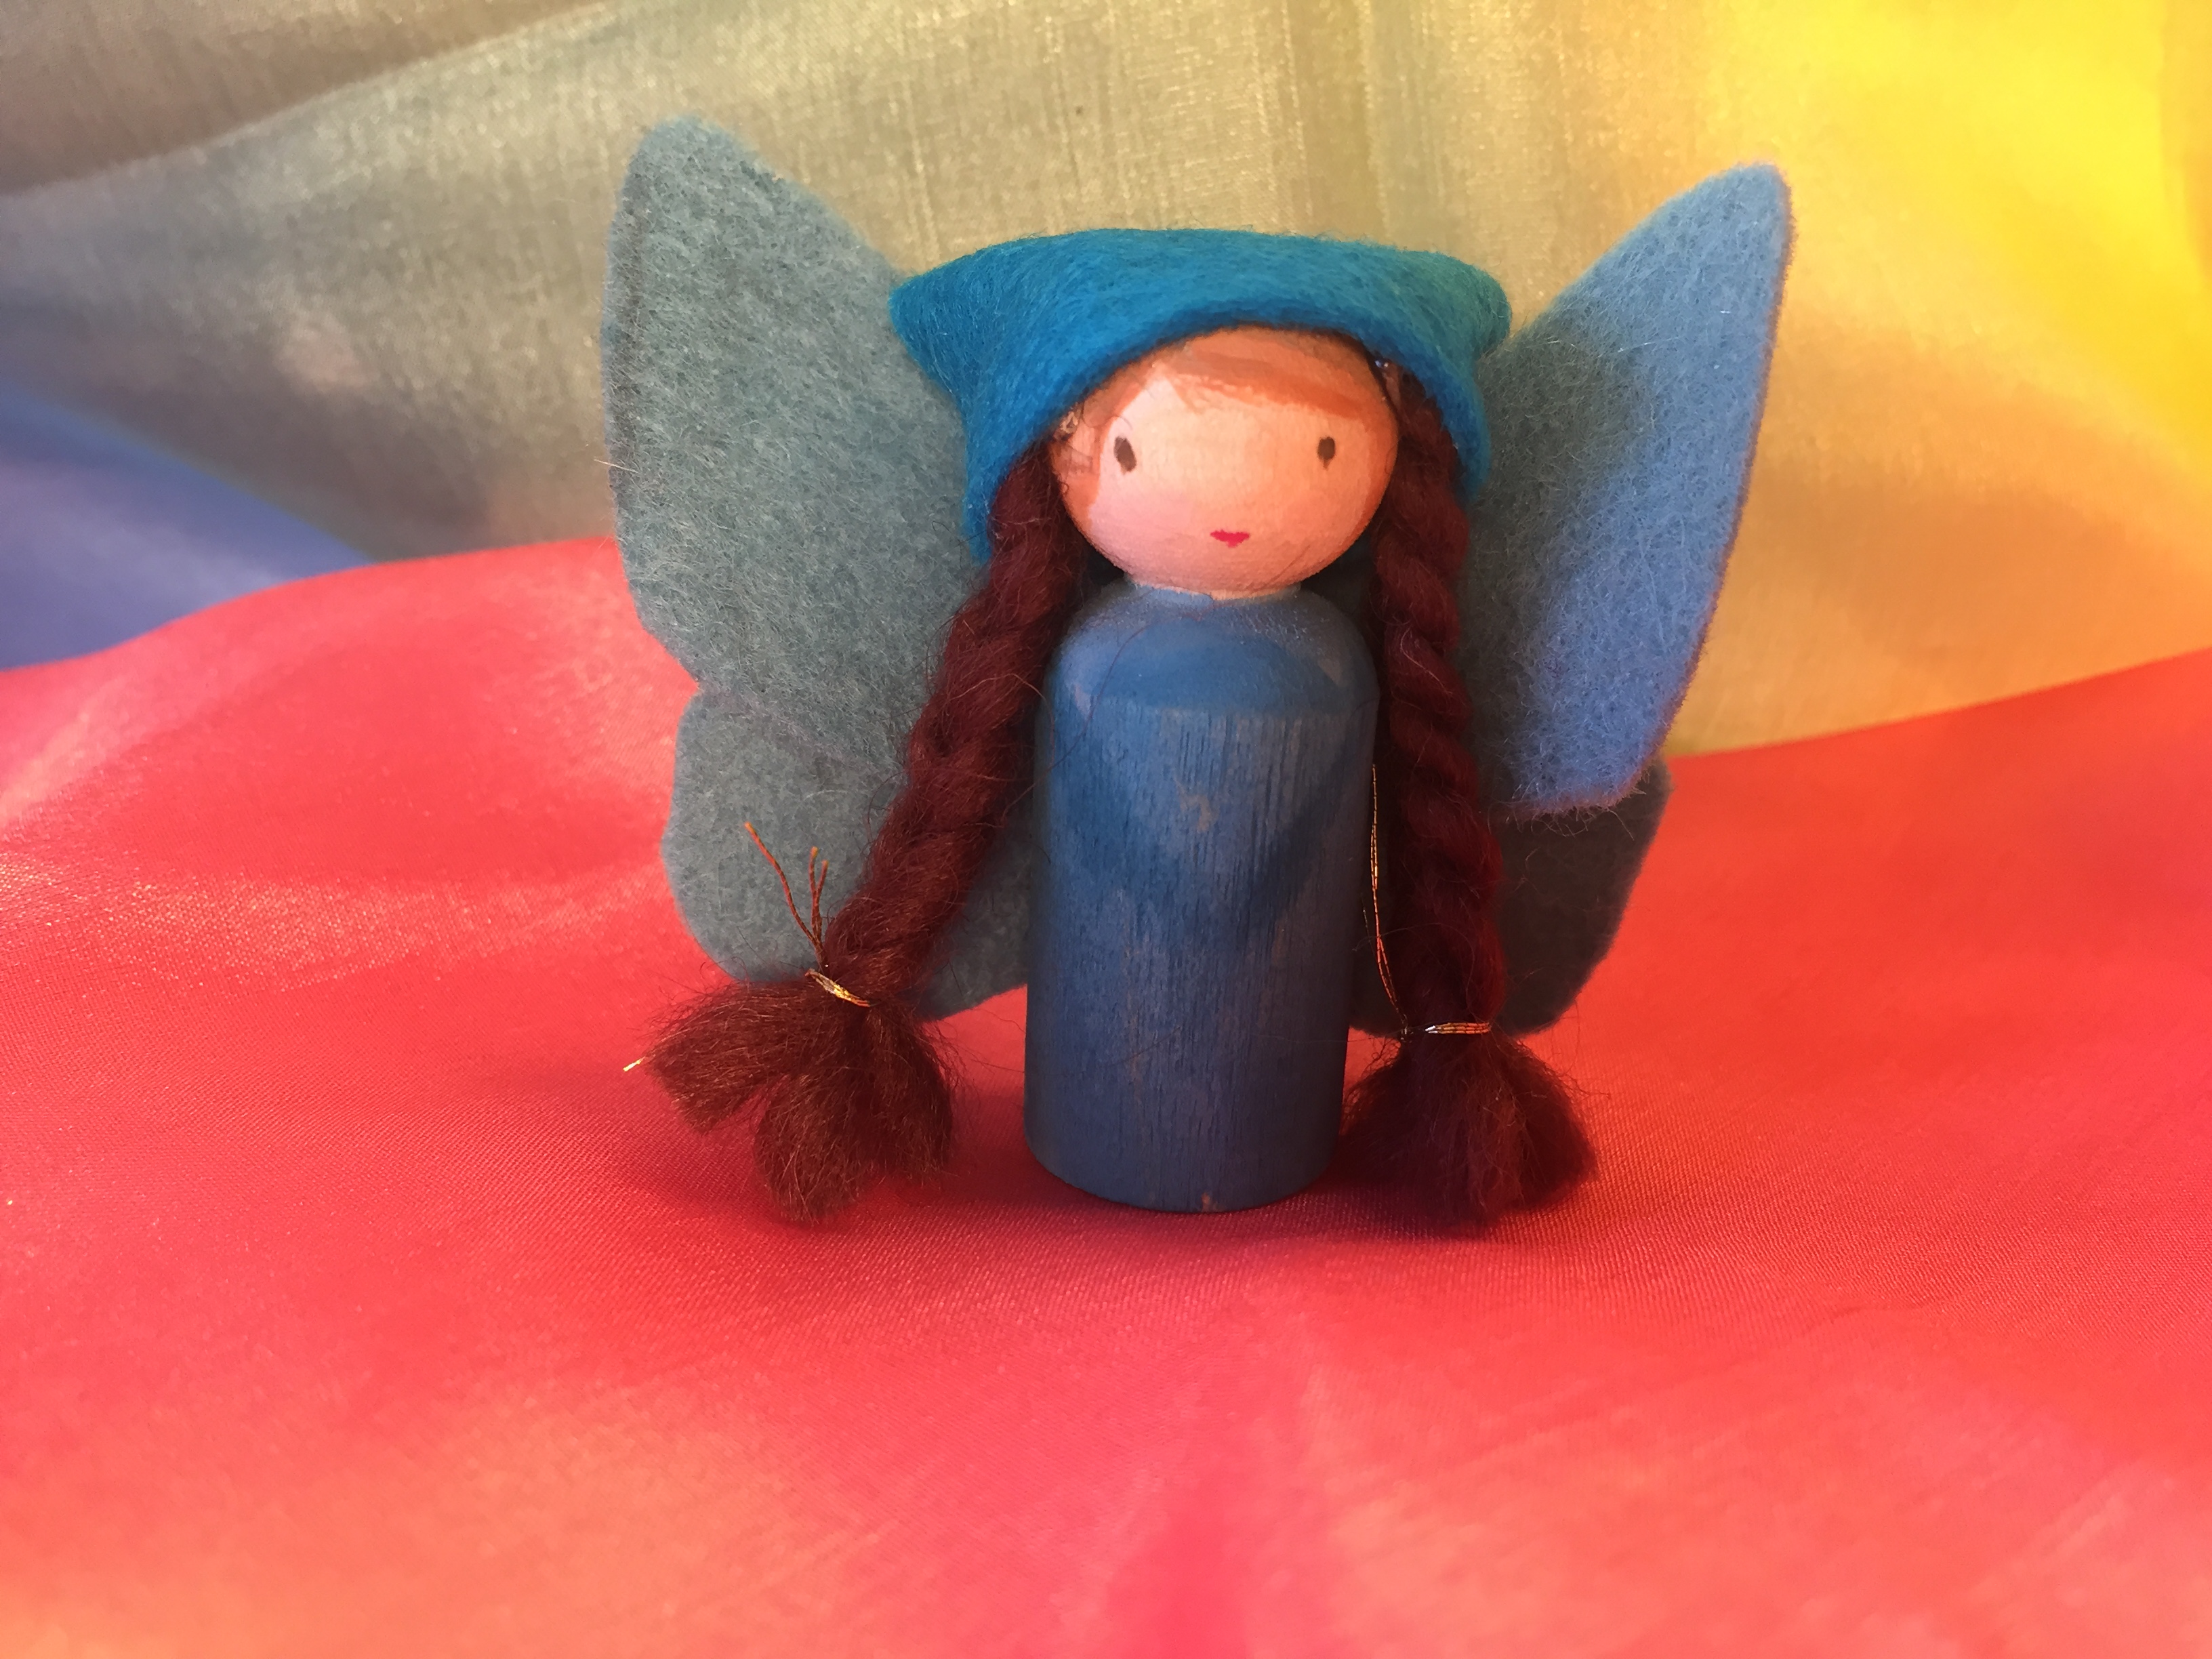
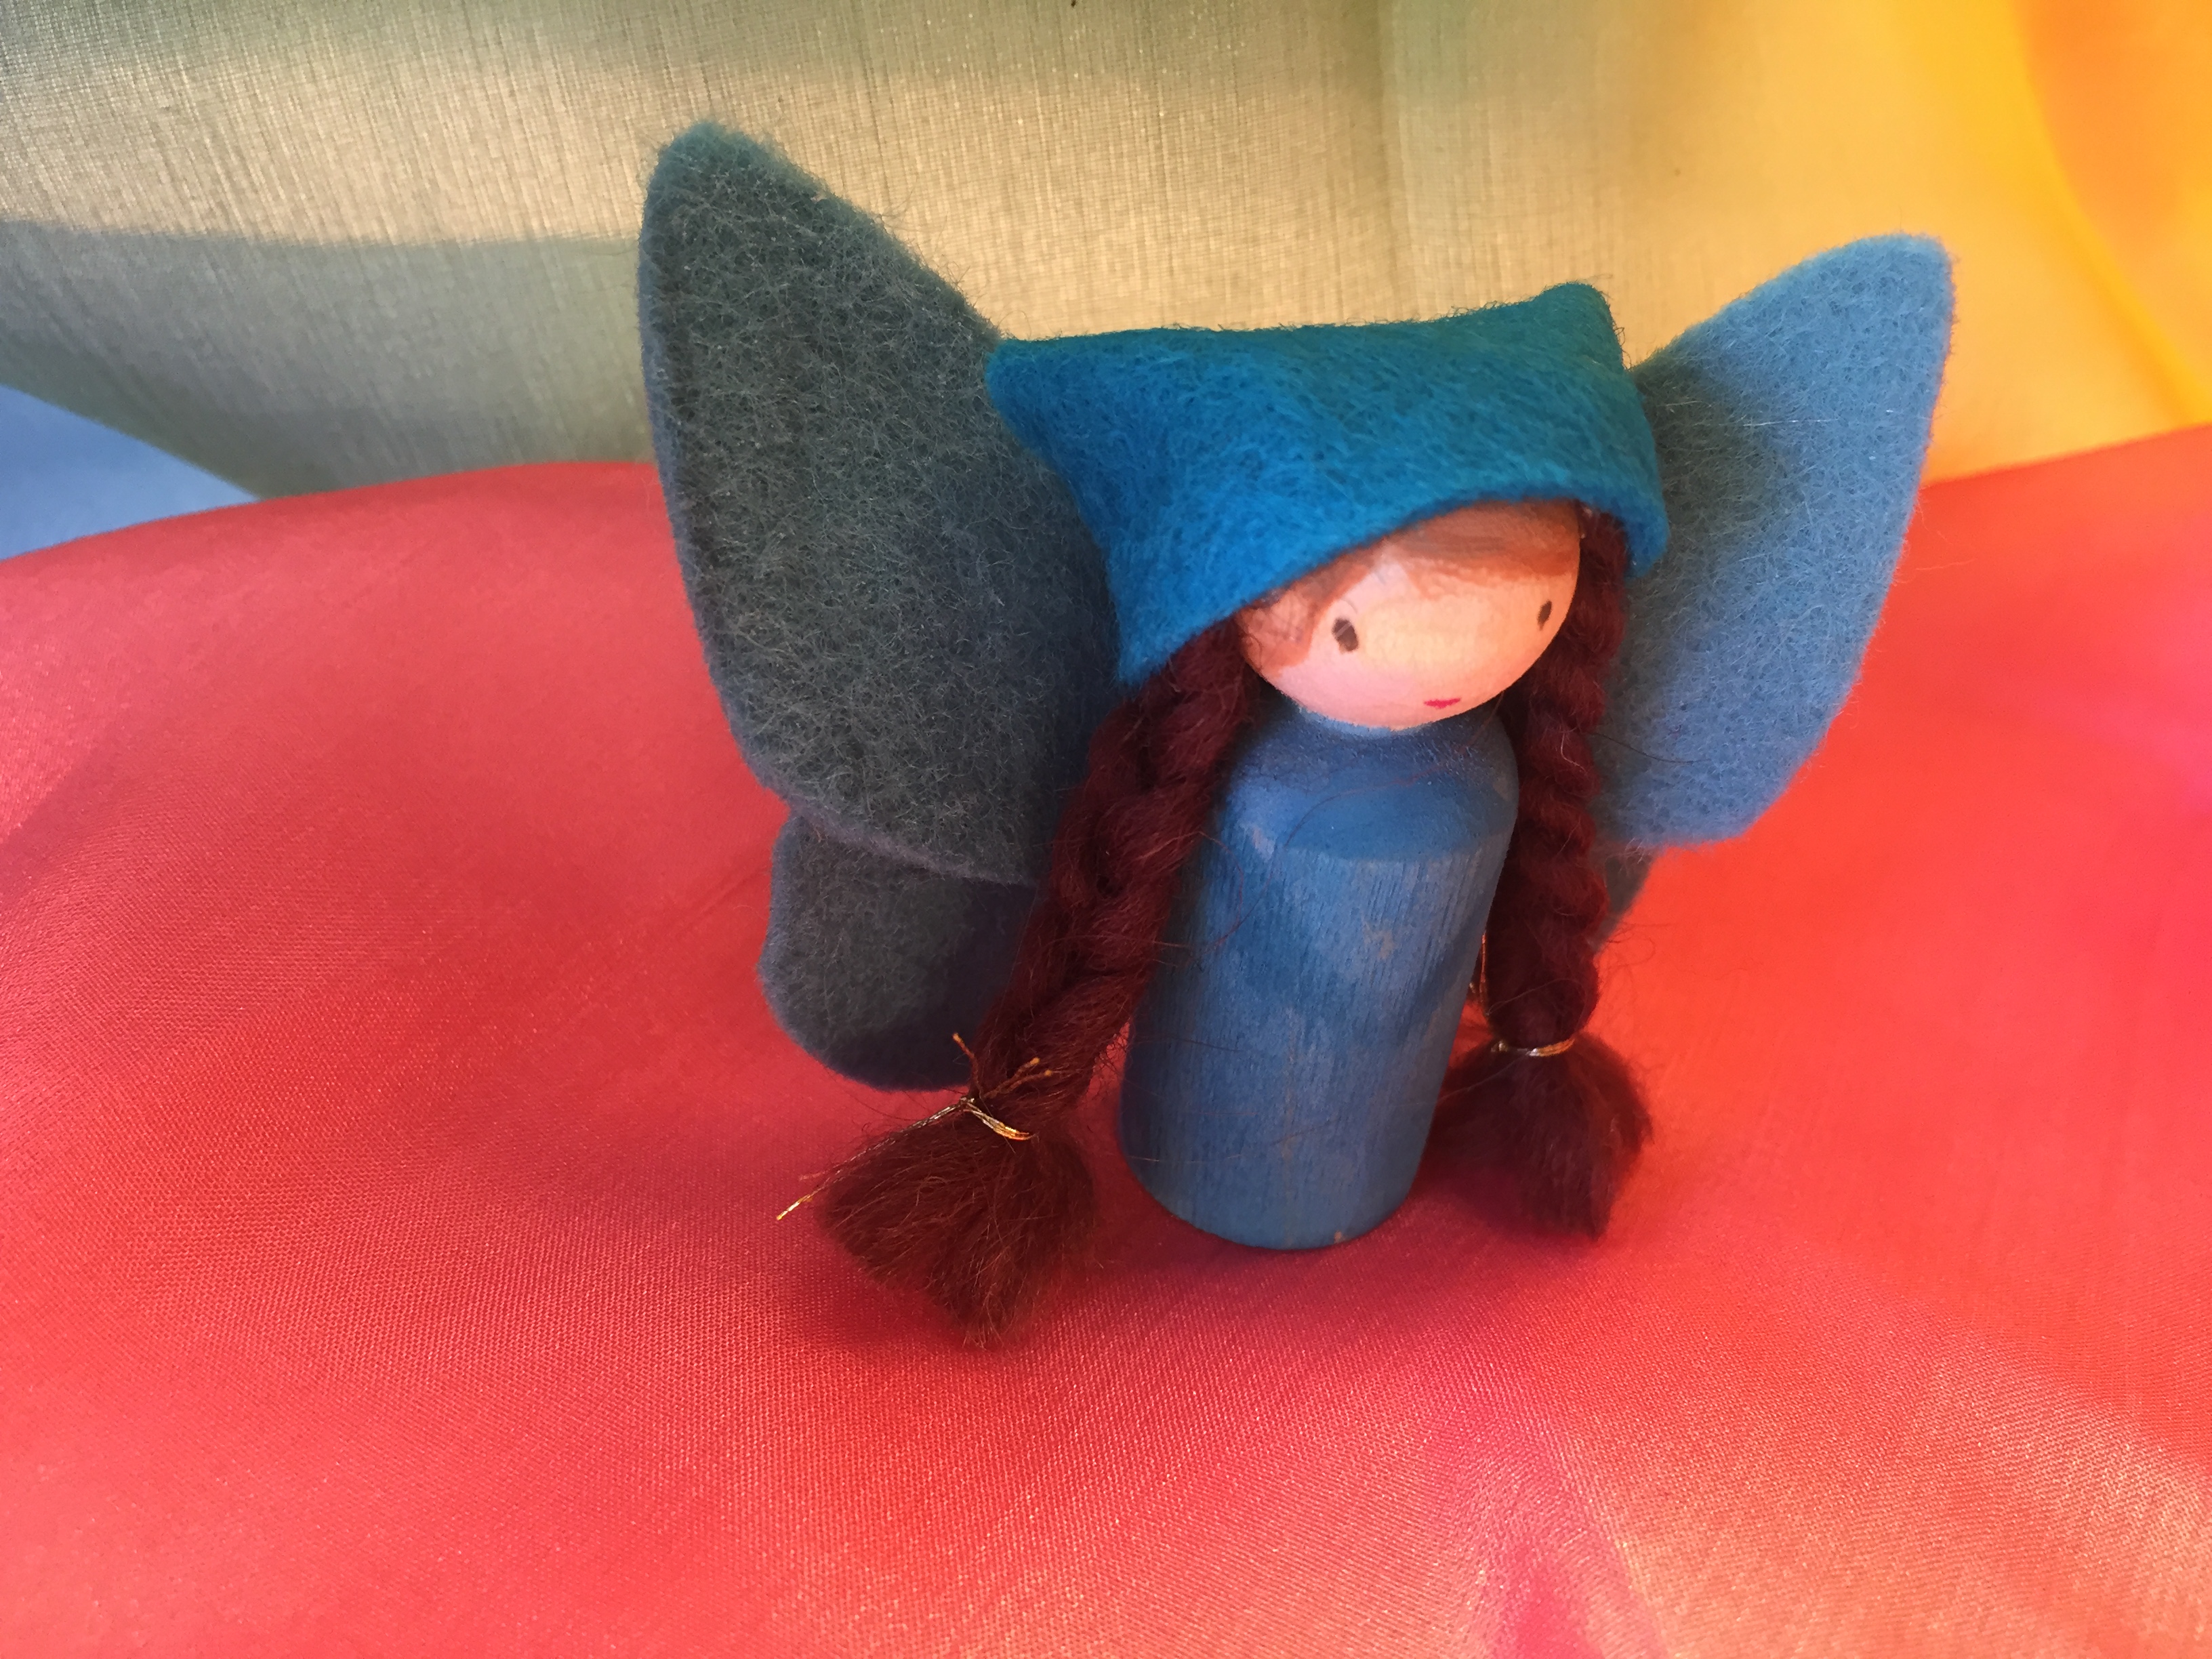
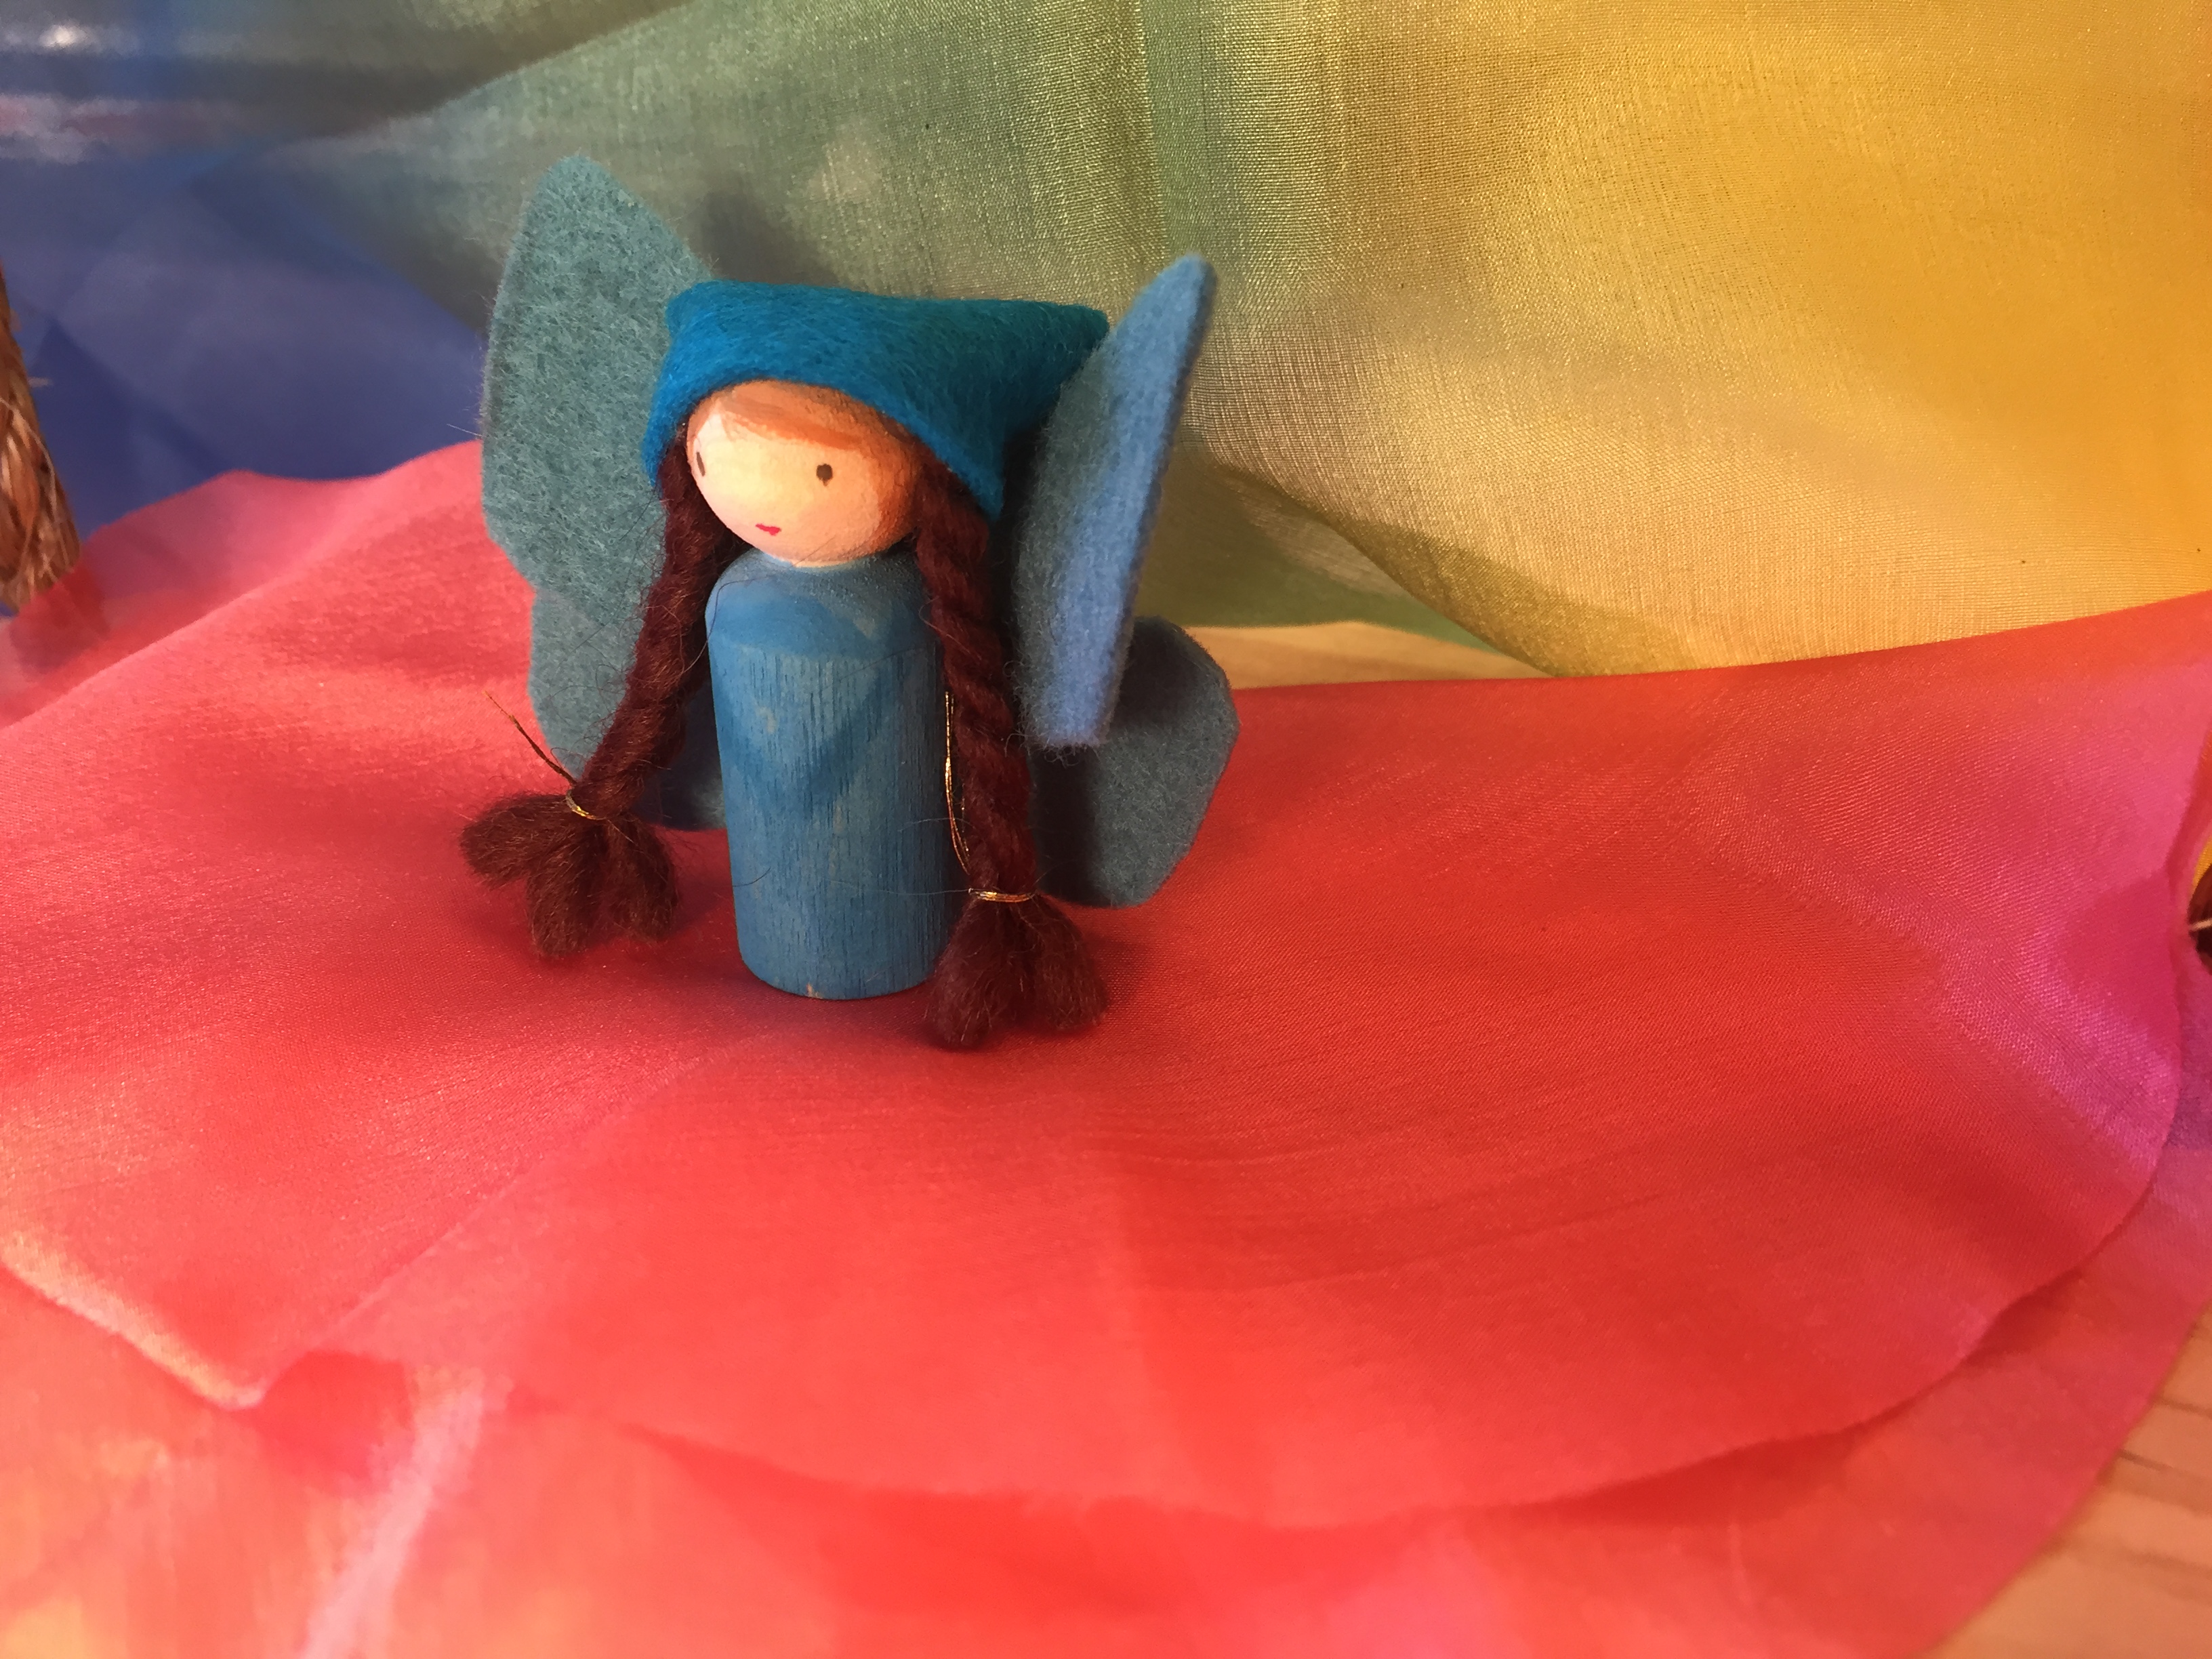
Fairy peg dolls are some of our favorite peg dolls, but there’s one major challenge when doing these. Because the wings are so prominent and take up so much room, they usually compete with the hair. For that reason, painting on hair is an option. While I do like the ones with painted hair, I do like the hair better, but the hair gets in the way of the wings! It’s a circular problem. Maybe I need to learn how to make fairy buns.
All the supplies for this project except the glue, glitter and bling can be found at A Child’s Dream. I used the Spring Blossom Holland felt in yellow, purple and blue, Lyra Opaque watercolors, flared peg dolls and Lamb’s Pride wool yarn in white, black and brown.
If you liked this tutorial, you can check out more peg doll tutorials and finger puppet tutorials. And the paper butterfly was made for a life cycle of a butterfly project, but it’s come in handy for this project, although free-handing a butterfly isn’t hard to do.
Find me on Twitter, Instagram and Facebook
Monarch Butterfly Peg Doll
Some peg dolls and fingers puppets end up looking super cute and charming while others look like a nice try. This peg doll is one such project in which all the extra time it took to make something I envisioned turned out pretty mediocre. When it comes to how long I invested in the monarch butterfly bunting baby peg doll, it comes in at rather lengthy taking about half an hour to complete. For all that time, you’d think the results would be stellar! Alas they weren’t. You may be wondering, “why show a tutorial in which you don’t like the end result?” Good question. I have a couple of answers. First, I went to Instagram and posted a poll on whether I should turn this into a tutorial. I had already recorded the process, so I didn’t have to do it again if you all were in favor if a tutorial. A large majority, 92%, said yes. So I went ahead and polished this video up for you. Second reason is because what I think is a fail is subjective. You may actually like the way this peg doll turned out, and indeed, the finger Puppet wasn’t so bad at all. And the third reason was because there are some techniques that I haven’t shown before like coloring a cotton pipe cleaner, “drilling holes” in a peg doll and adding a blanket stitch to butterfly wings.
I’m sure you can improve on this design and I can’t wait to see what you do. I’ve already been extremely impressed with all of your projects thus far. Share your work in Instagram using the hashtag pepperandpine. Don’t forget to tag me too!! When possible, I’ll repost your work or share it in my story.
This peg doll and finger Puppet were inspired by our Butterflies and Caterpillars unit. This was a unit that had almost all the work as hands-on projects and activities. While the concept was just in line with the kind of things we do in our homeschool, the results were disappointing.
You can see more peg doll tutorials and finger puppets tutorials. There are a lot of videos with a broad range of ideas and techniques.
For today’s project, I used bunting babies peg dolls, Lyra opaque watercolor paint, 100% Holland wool and cotton pipe cleaners. All these supplies can be found at my favorite Waldorf vendor: A Child’s Dream.
This blog post is not sponsored by A Child’s Dream nor do I receive free products.
Find me on Twitter, Instagram and Facebook
Spring Peg Doll with Magnets
In a last minute moment of inspiration, I turned these darling spring bunting baby peg dolls into magnets. I used super strong magnets, and it worked! I love the versatility of these mini peg dolls. Since the fall, I’ve had a set of three seasonal peg dolls grace our nature table. Each set has been unique. This time, I knew I wanted a green set, but I wasn’t sure what else I wanted to do with these. At first I thought I’d paint little flowers on them, but I didn’t feel inspired in that direction. For ideas, I opened up my scrapbook drawer houses my wood veneers and other small embellishments. I found the perfect accessory: paper flowers. I happened to have bought this set in variegated green and I happened to have made three bunting baby peg dolls. I matched up the color of the flower to each felt hat and glued them on. I added a couple of leaves in a contrasting green and to finish off this project, I sealed each one with some beeswax polish. The piece de resistance was the mini super strong magnet glued to the back. All materials can be found at A Child’s Dream, except the flowers.


Warning: While these mini peg dolls are choking hazard to begin with, they are especially dangerous in the hands of little children with a magnet. If the magnet falls off and is swallowed by the child, it can cause severe complications and in some cases, if multiple magnets are swallowed, it can tangle up the intestine and case death. Be cautious with young children.
Find me on Twitter, Instagram and Facebook
Ladybug Peg Doll
This is my first attempt at making animal peg dolls, and I can tell you, I love it!! These adorable ladybugs were inspired by both a similar design in Margaret Bloom’s Peg Doll book as well as a mini glass ladybug my sister gave me. To get the shiny gloss, I polished them with all natural beeswax polish. I had only intended to make to make one, but I messed up on the face of the first one, so I quickly made another one, and on this one, I left it without a face which actually looks a bit cuter. I did struggle with the little hat which I made myself based on examples in Bloom’s book. The hat is basically two crescent pieces sewn together. I used embroidery floss in black with an embroidery needle and didn’t bother with a fancy decorative stitch because it wasn’t going to show against the black felt. All the supplies were from A Child’s Dream. I used the super cute tiny bunting babies for the ladybugs. The rounded bellies are perfect and mimic the shape of the ladybugs. I used 100% black Holland wool felt, Lyra watercolors and Beeswax polish.
These peg dolls are for our Spring Nature and Seasonal Table. To see how we put together the table and seasonal unit as well as our other Spring projects and activities, you can click here to see the playlist
Level of project: Beginner
Duration: 20 minutes
Skip the hat and use paint and this project can take less than 10 minutes.
Cost: Less than $1 for 2
Find me on Twitter, Instagram and Facebook
Seasonal Peg Dolls
Looking for a fast handmade project you can do with your kids? This set is quick, adorable and easy. Make these as party favors, Valentine gifts or as a project with your children. You can omit the wooden heart and put a felt heart instead. Or better yet, simply paint a white heart on the front and letter a child’s name across each peg doll. Children are sure to delight in these and cherish them.
For this project, I used Lyra watercolor paints, 100% Holland wool felt in Spring colors, embroidery floss in pink, embroidery needles and small peg dolls. I used the book Making Peg Dolls by Margaret Bloom. All items available at A Child’s Dream.
I used wooden hearts from my scrapbook stash by Studio Calico.
See my tweets on twitter, check out pics on Instagram, check out posts on facebook, find more tutorials on YouTube.
Winter Peg Doll Tutorial | Waldorf Winter Nature Table
I made this set for my daughter for our Winter Nature Table. You might be surprised to learn that she didn’t end up really liking these as much as I’d hope. They’re nice, but not a hit. She may come around and like them a lot at some point, but I happen to really like them, so until she wants to play with them, they’ll decorate our Winter Nature Table.
You may not have noticed, but these are the extra large peg dolls. When I saw them at A Child’s Dream, I wasn’t interested in them. They were too big for my liking. My kids saw them and asked if we could try them out. I said, “okay.” They are 3.5 inches tall compared to the 2 inches of the typical peg dolls. When we received them, I wasn’t thrilled with them. While working with them, I found them too big, but when I was finished with this project, I absolutely loved them! Who knew! I certainly didn’t. I’m happy we tried these out. I have two more sets, and I’m thinking of making a mama and papa spring and summer…we’ll see.
There’s a first for everything 🙂
Check out our other finger puppet tutorials.
Check out the peg dolls playlist!
All materials except for beads are from A Child’s Dream:
Large Peg Doll -Man, Large Peg Doll -Woman, Felt in Winter and Autumn colors, Finger Puppet, Peg Doll Book
See my tweets on twitter, check out pics on Instagram, check out posts on facebook, find more tutorials on YouTube.
Four Seasons Mini Peg Dolls Tutorial
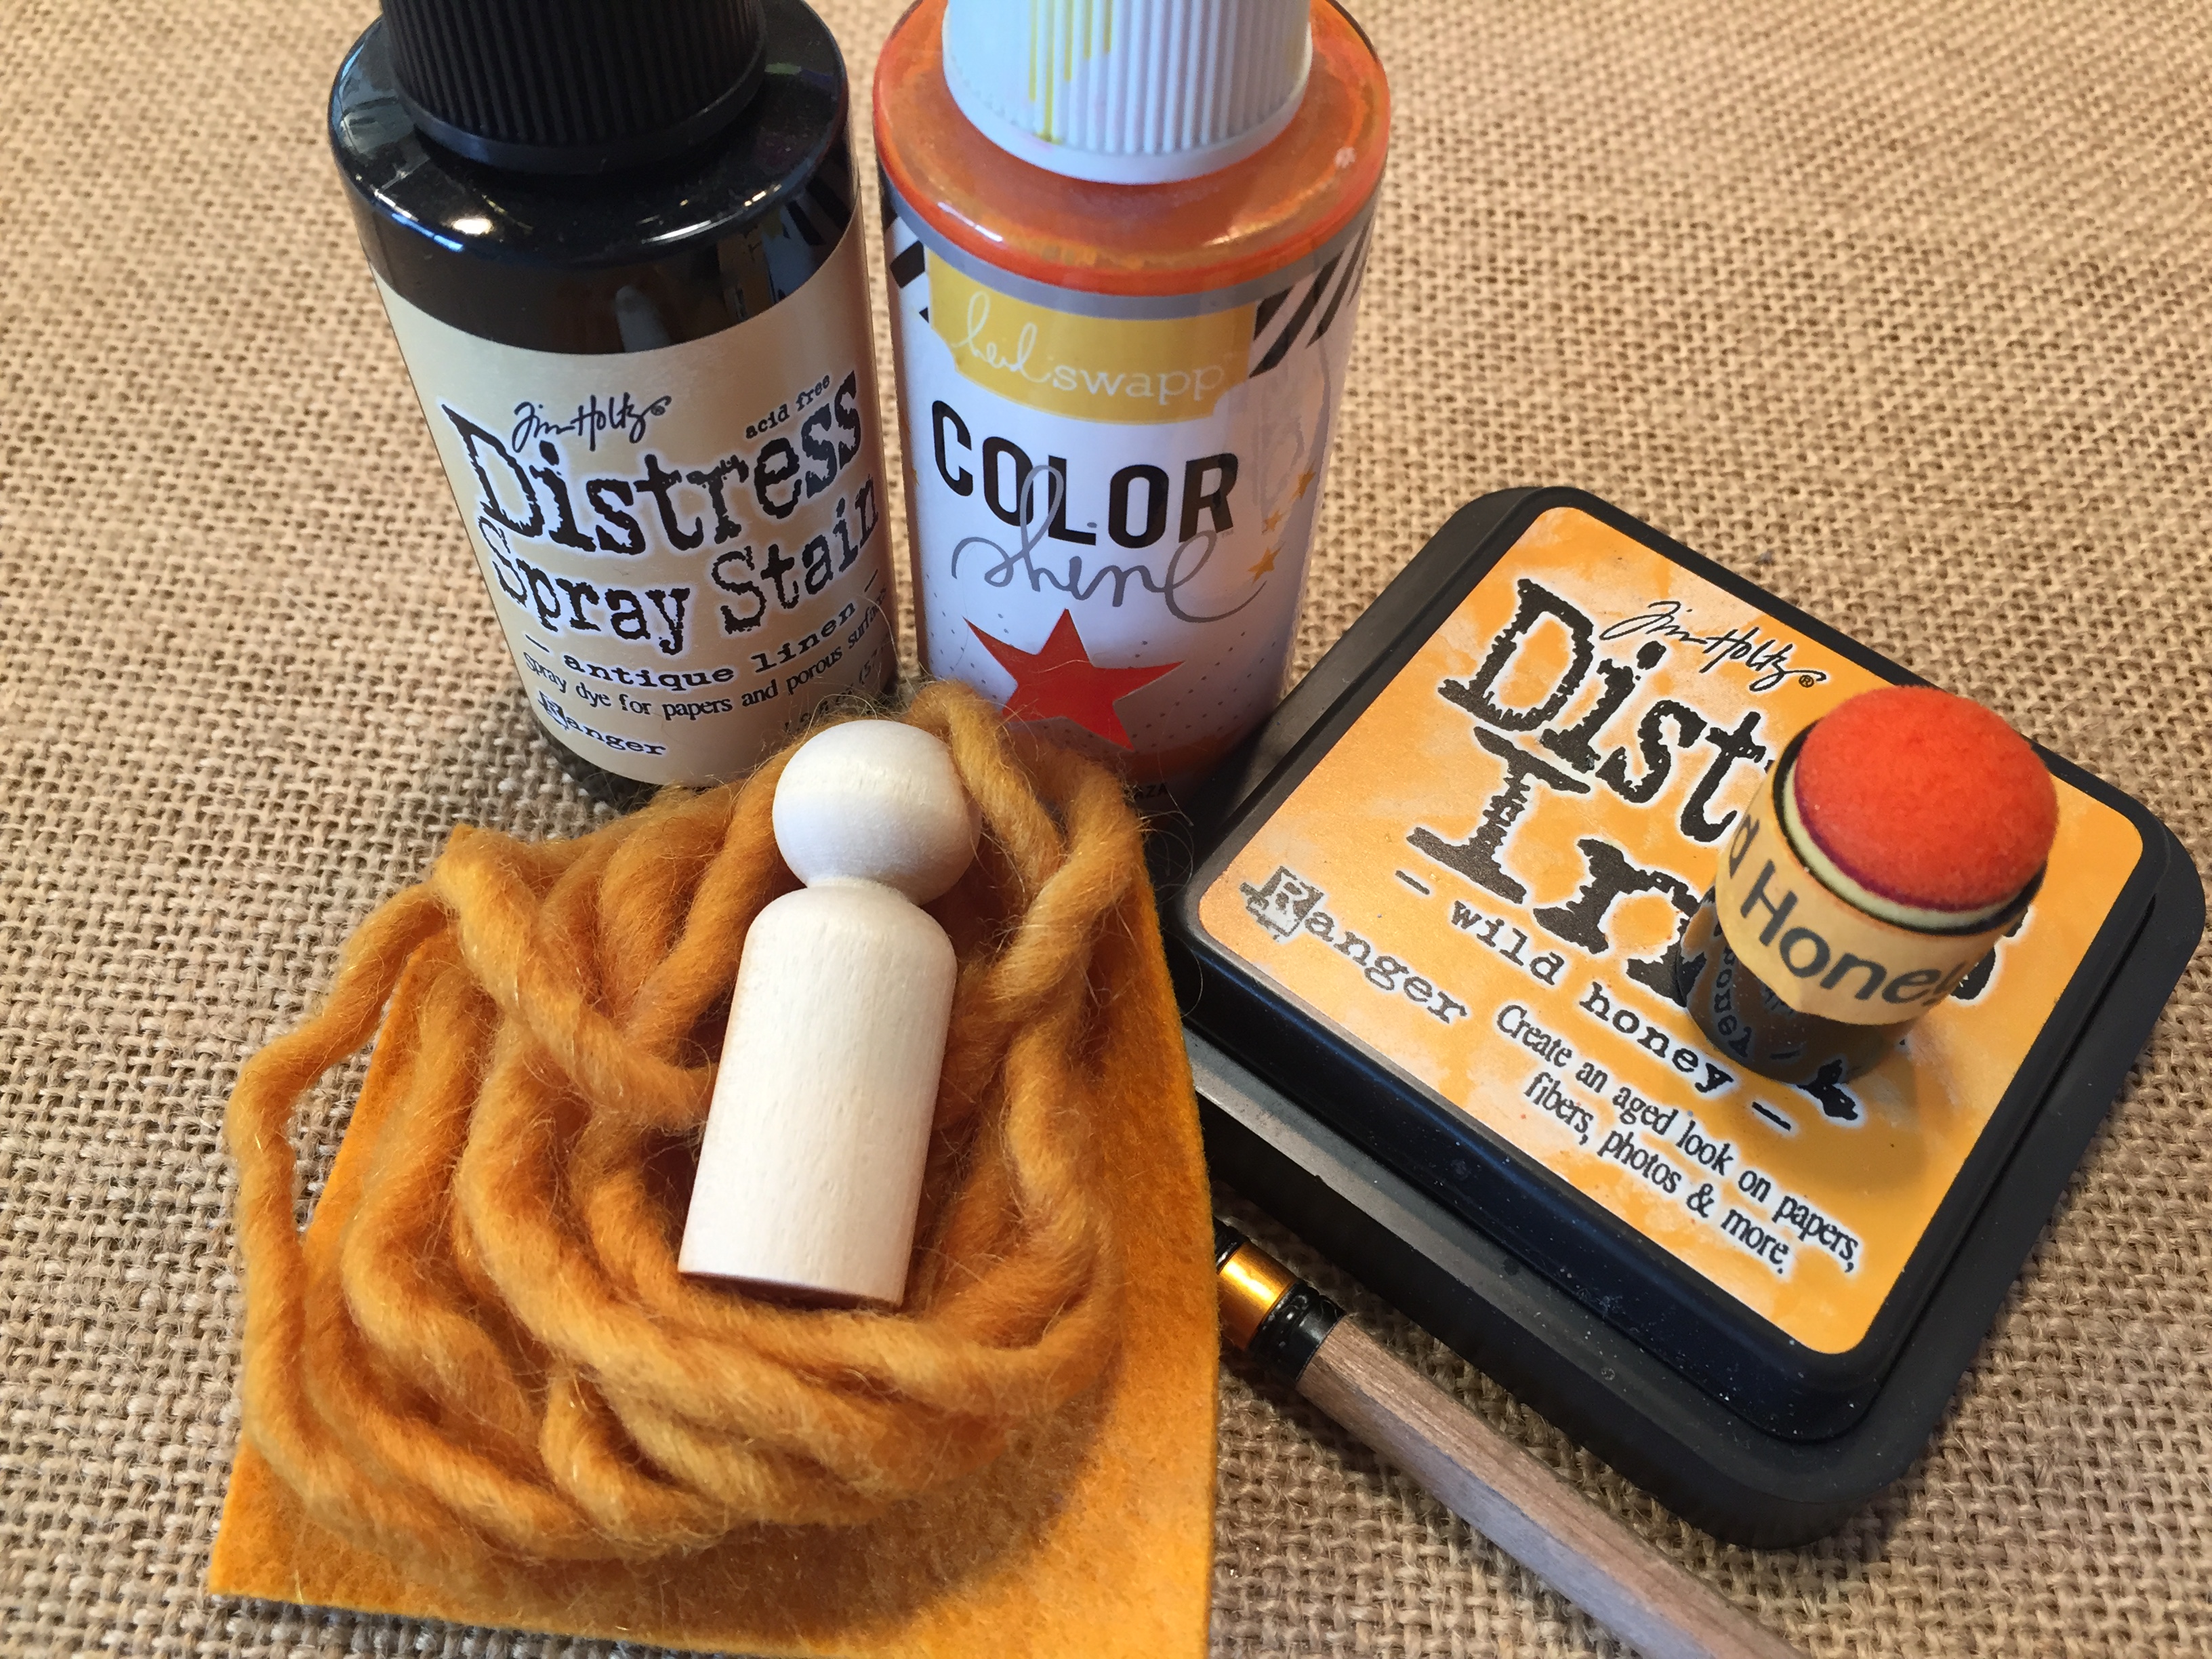
These adorable peg dolls represent the seasons. We use them with our calendar peg dolls. Each day, the kids replace the day of the week and day of the month peg dolls. And each month and each season they replace another one. It’s a fun way to keep track of the days, months and seasons. Each morning the kids look forward to changing the day. They can also use these with our weather gnomes we made last year. I used Distress Inks and Mr. Huey’s white opaque spray.
Winter Peg Doll Tutorial
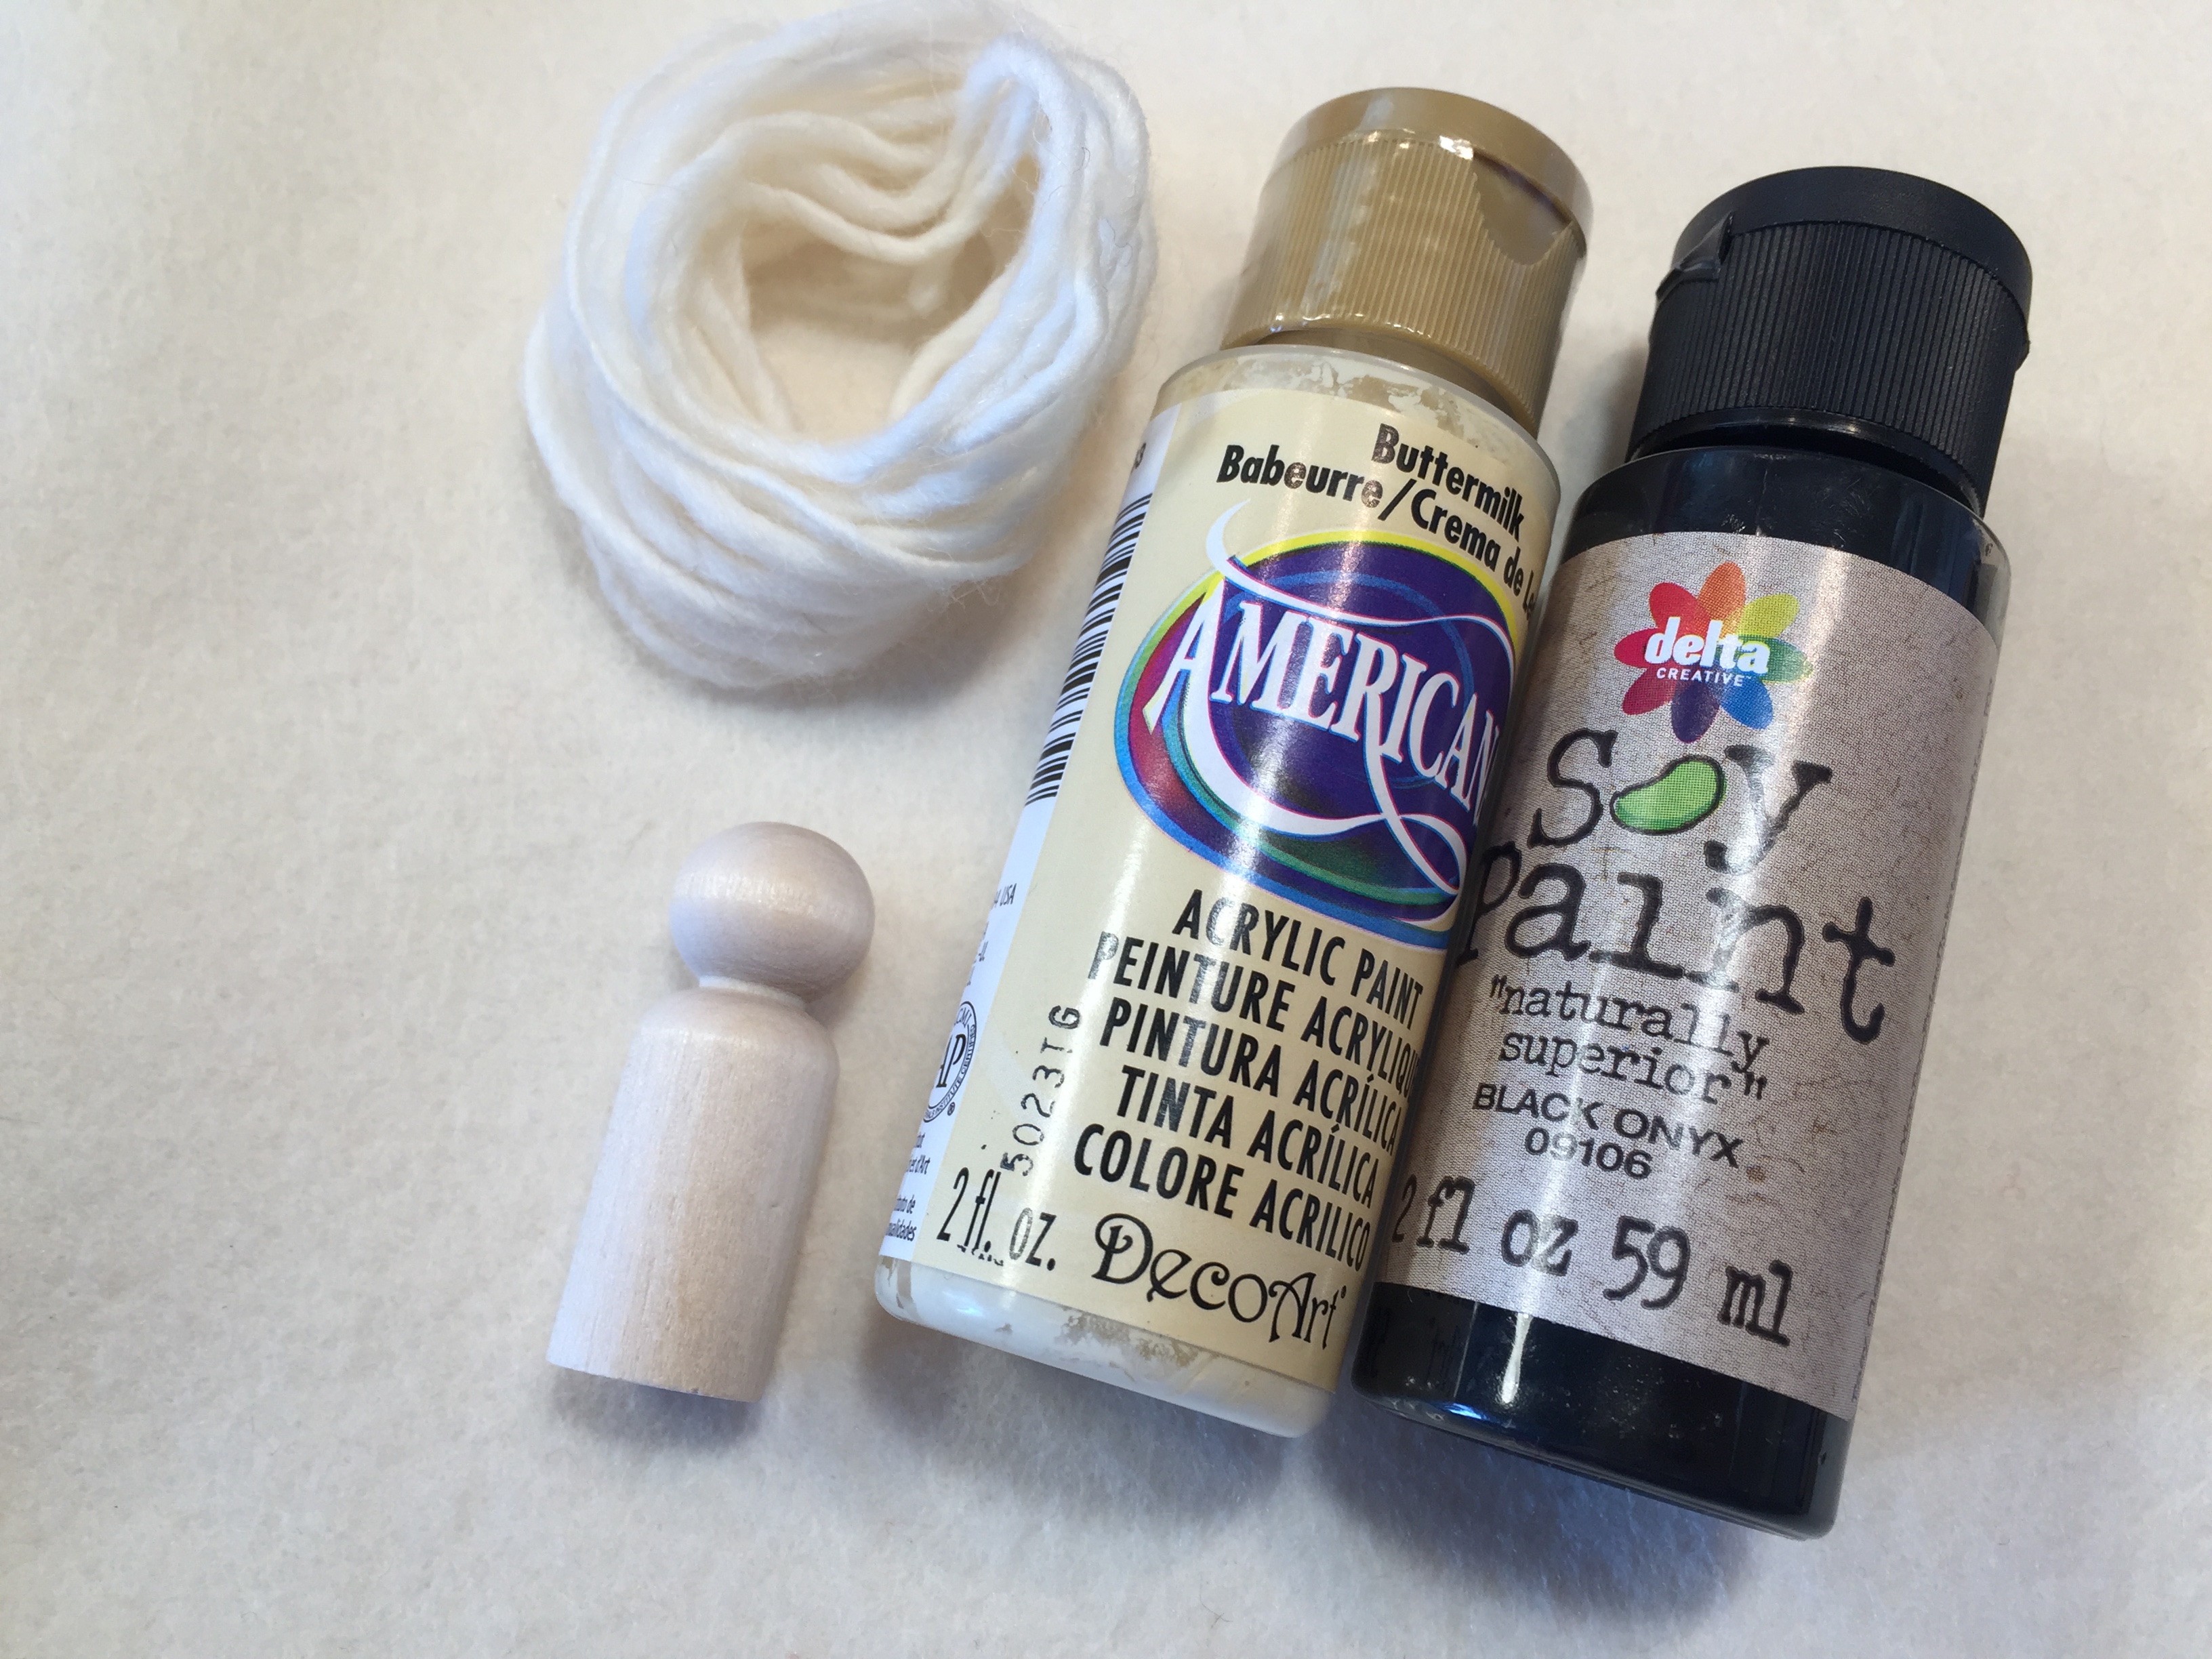
If you’re looking for a simple winter inspired peg doll tutorial, this is it! These bunting babies with white painted snowflakes and petite bonnets are fast, easy and super adorable. I made this trio of snowflake babies to accompany our other peg dolls and finger puppets on our winter themed nature table. My six-year-old loves playing here and adding a few new peg dolls to the mix enlivens her pretend play. This project uses just a few products, all of which can be found at A Child’s Dream: Bunting babies, Lyra Watercolors, and Winter’s Cape felt. You can see our winter nature table and how we put together our winter themed unit here.
Grandfather Peg Doll Tutorial
This is my third attempt at making these peg dolls with arms. I’ve had these peg dolls in our collection for almost a year before using them. I admit they were a little intimidating at first, but I absolutely love the way this one turned out! Though I had intended her to be the grandmother for our Giant Turnip story, she ended up being a bit more stylish and looked more like the mom.
The following supplies were used for this project and are available from A Child’s Dream: Peg dolls with arms, Lamb’s Pride wool yarn, Wool Felt (Silver, Gray and Charcoal for grandparents), Wool Felt (Willow, Olive and Clover for the greens), and Wool Felt (Hazelnut, Brown and Coffee for the browns). Little accessories and glue were from my crafting stash.
Grandma Peg Doll Tutorial
This grandma rocks! And she’s all stylish too. This peg doll is part of the set we made for our Giant Turnip story. They were my first attempt at making peg dolls with arms, and while it took longer and was more challenging, my kids and I love the way they turned out.
The following supplies were used for this project and are available from A Child’s Dream: Peg dolls with arms, Lamb’s Pride wool yarn, Wool Felt (Silver, Gray and Charcoal for grandparents), Wool Felt (Willow, Olive and Clover for the greens), and Wool Felt (Hazelnut, Brown and Coffee for the browns). Little accessories and glue were from my crafting stash.
Mother Peg Doll Tutorial | Intermediate Level
This is my second attempt at making these peg dolls with arms. I’ve had these peg dolls in our collection for almost a year before using them. I admit they were a little intimidating at first, but I absolutely love the way this one turned out! Though I had intended her to be the grandmother for our Giant Turnip story, she ended up being a bit more stylish and looked more like the mom.
The following supplies were used for this project and are available from A Child’s Dream: Peg dolls with arms, Lamb’s Pride wool yarn, Wool Felt (Silver, Gray and Charcoal for grandparents), Wool Felt (Willow, Olive and Clover for the greens), and Wool Felt (Hazelnut, Brown and Coffee for the browns). Little accessories and glue were from my crafting stash.
Peg Doll Tutorial
This is my first attempt at making these peg dolls with arms. I’ve had these peg dolls in our collection for almost a year before using them. I admit they were a little intimidating at first, but I absolutely love the way this one turned out! Though I had intended him for our Giant Turnip story, he ended up being replaced with another one. This one now belongs solely to my 11-year-old son who loves him!
The following supplies were used for this project and are available from A Child’s Dream: Peg dolls with arms, Lamb’s Pride wool yarn, Wool Felt (Silver, Gray and Charcoal for grandparents), Wool Felt (Willow, Olive and Clover for the greens), and Wool Felt (Hazelnut, Brown and Coffee for the browns). Little accessories and glue were from my crafting stash.
Mini Baby Peg Doll Tutorial | Fall & Autumn Themed
If peg dolls weren’t cute enough, they go and make these tiny bunting babies! They are adorable no matter how you make them. This set if for our nature table in our homeschool room. They were easy to make and are perfect for using up scraps. You can find the bunting baby peg dolls at A Child’s Dream. For this project, I used Lyra watercolor paints, and the gorgeous fall Holland Felt pack.
You can check out our other fall activities here.
Fall Inspired Peg Dolls | Nature Table
It’s official, it’s no longer pumpkin season, it’s peg doll season! We’ve made more peg dolls in the past month than all the peg dolls we’ve ever made combined. We’re on a roll. And now we are adding themed ones to our nature table and having a blast doing it. All the materials are from A Child’s Dream. I used the large peg dolls, Lyra paint, Lamb’s Pride wool yarn, and Holland Felt. The shimmer was not from A Child’s Dream. It’s called Perfect Pearls.
Pirate Peg Doll Tutorial
How much fun am I having in our homeschool!?! When my son assembled a pirate ship from one of our pirate book/kit, he asked me to make some peg doll pirates for it. I most willingly obliged, and it turned into one awesome homeschool day!
We did find much needed inspiration from Making Peg Dolls and More by Margaret Bloom. The books is a magical resource for anyone wishing to make peg dolls but doesn’t know where to start.
I think these pirate peg dolls turned out pretty cool, but my first peg doll ever wasn’t so pretty!
These pirate peg dolls are for our Pirate Unit Study.

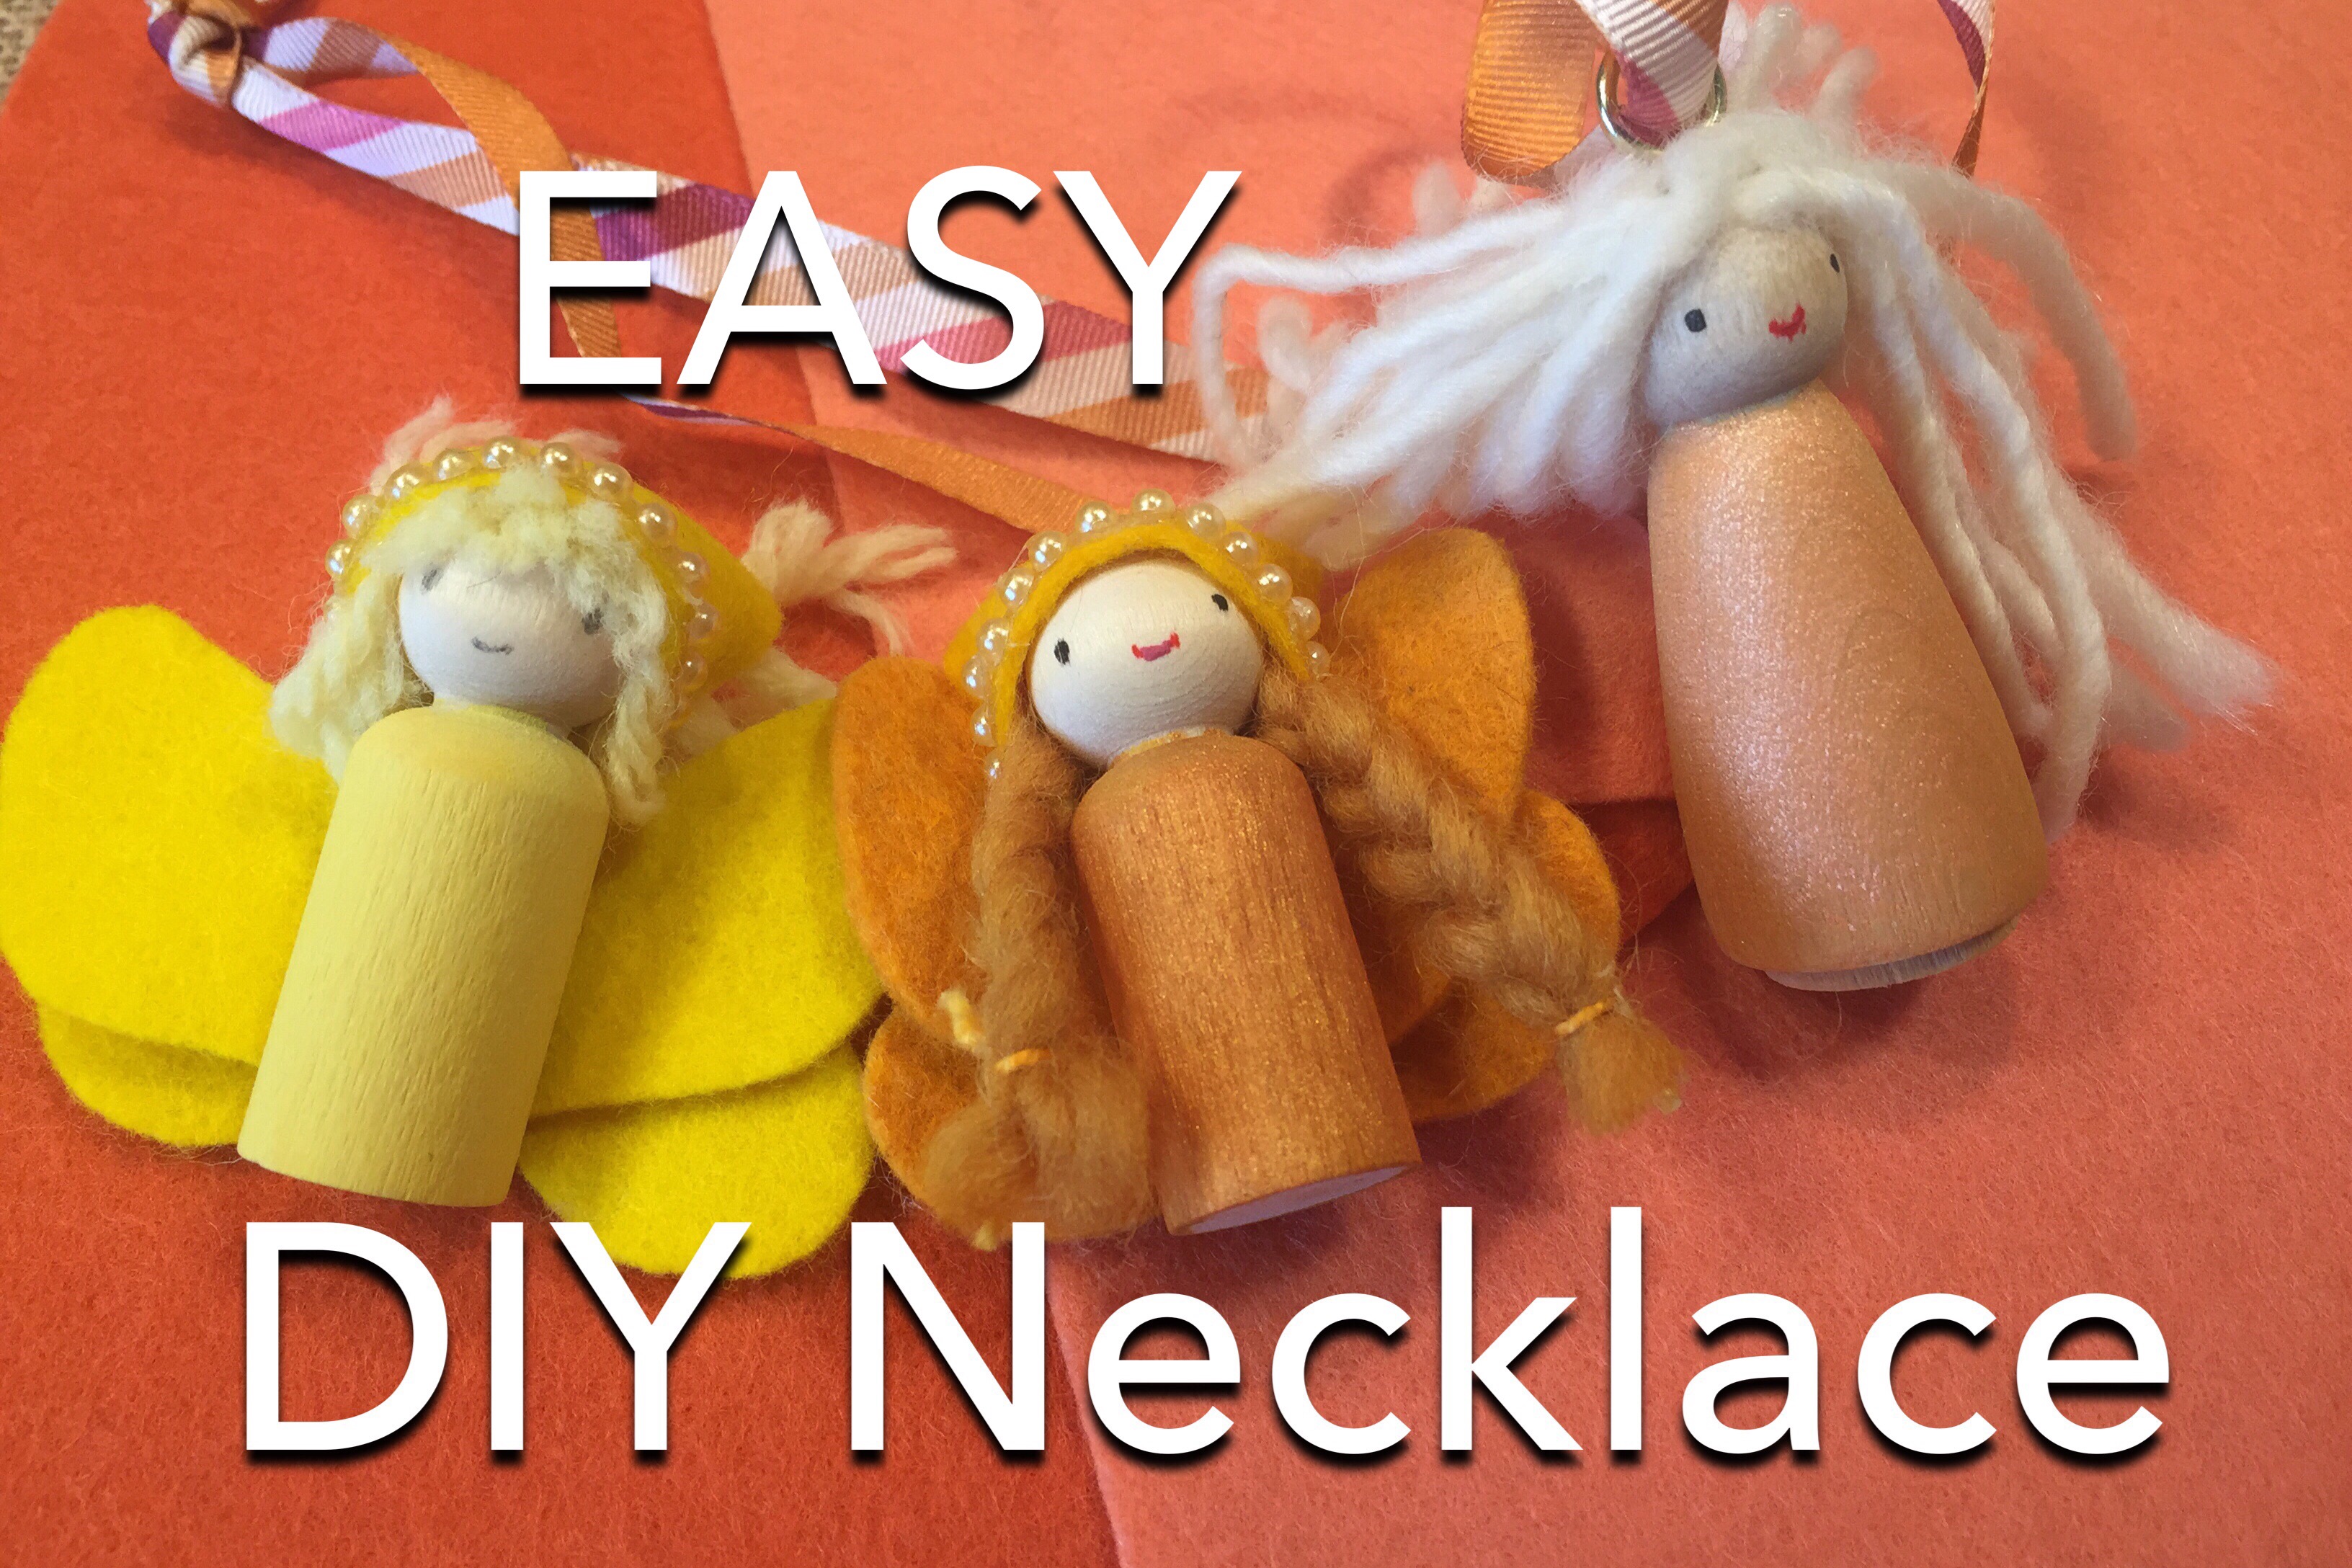
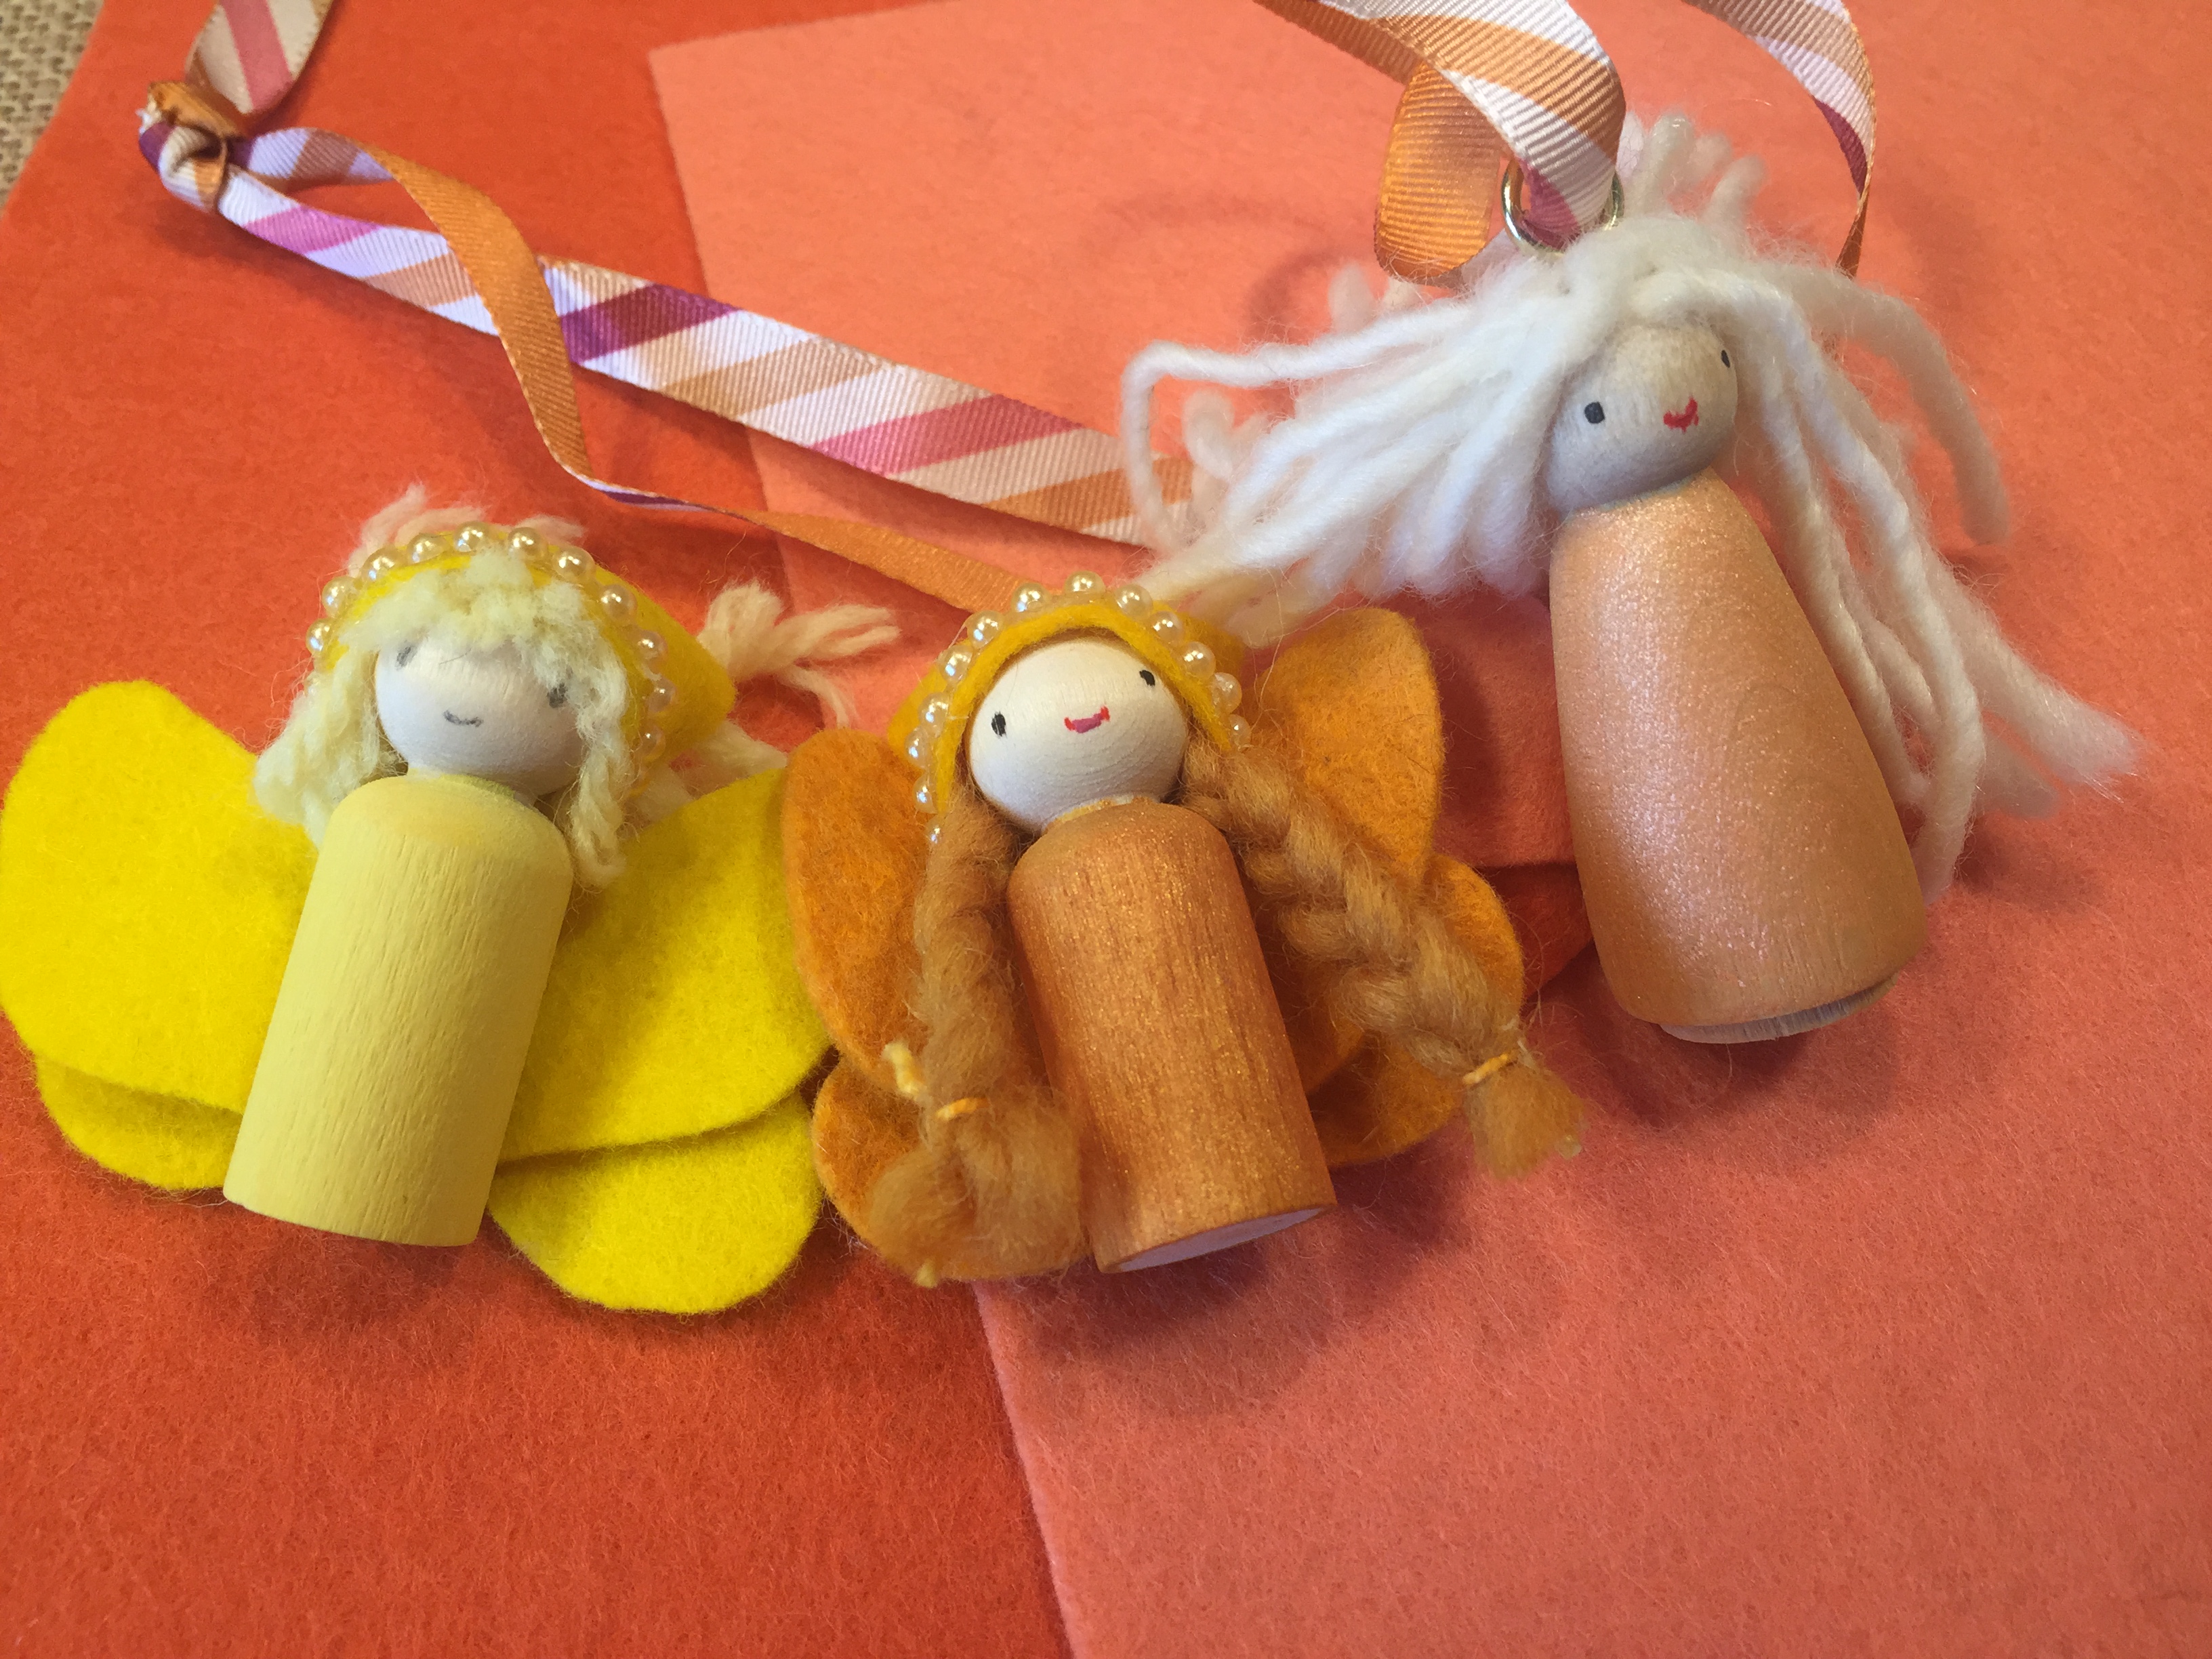
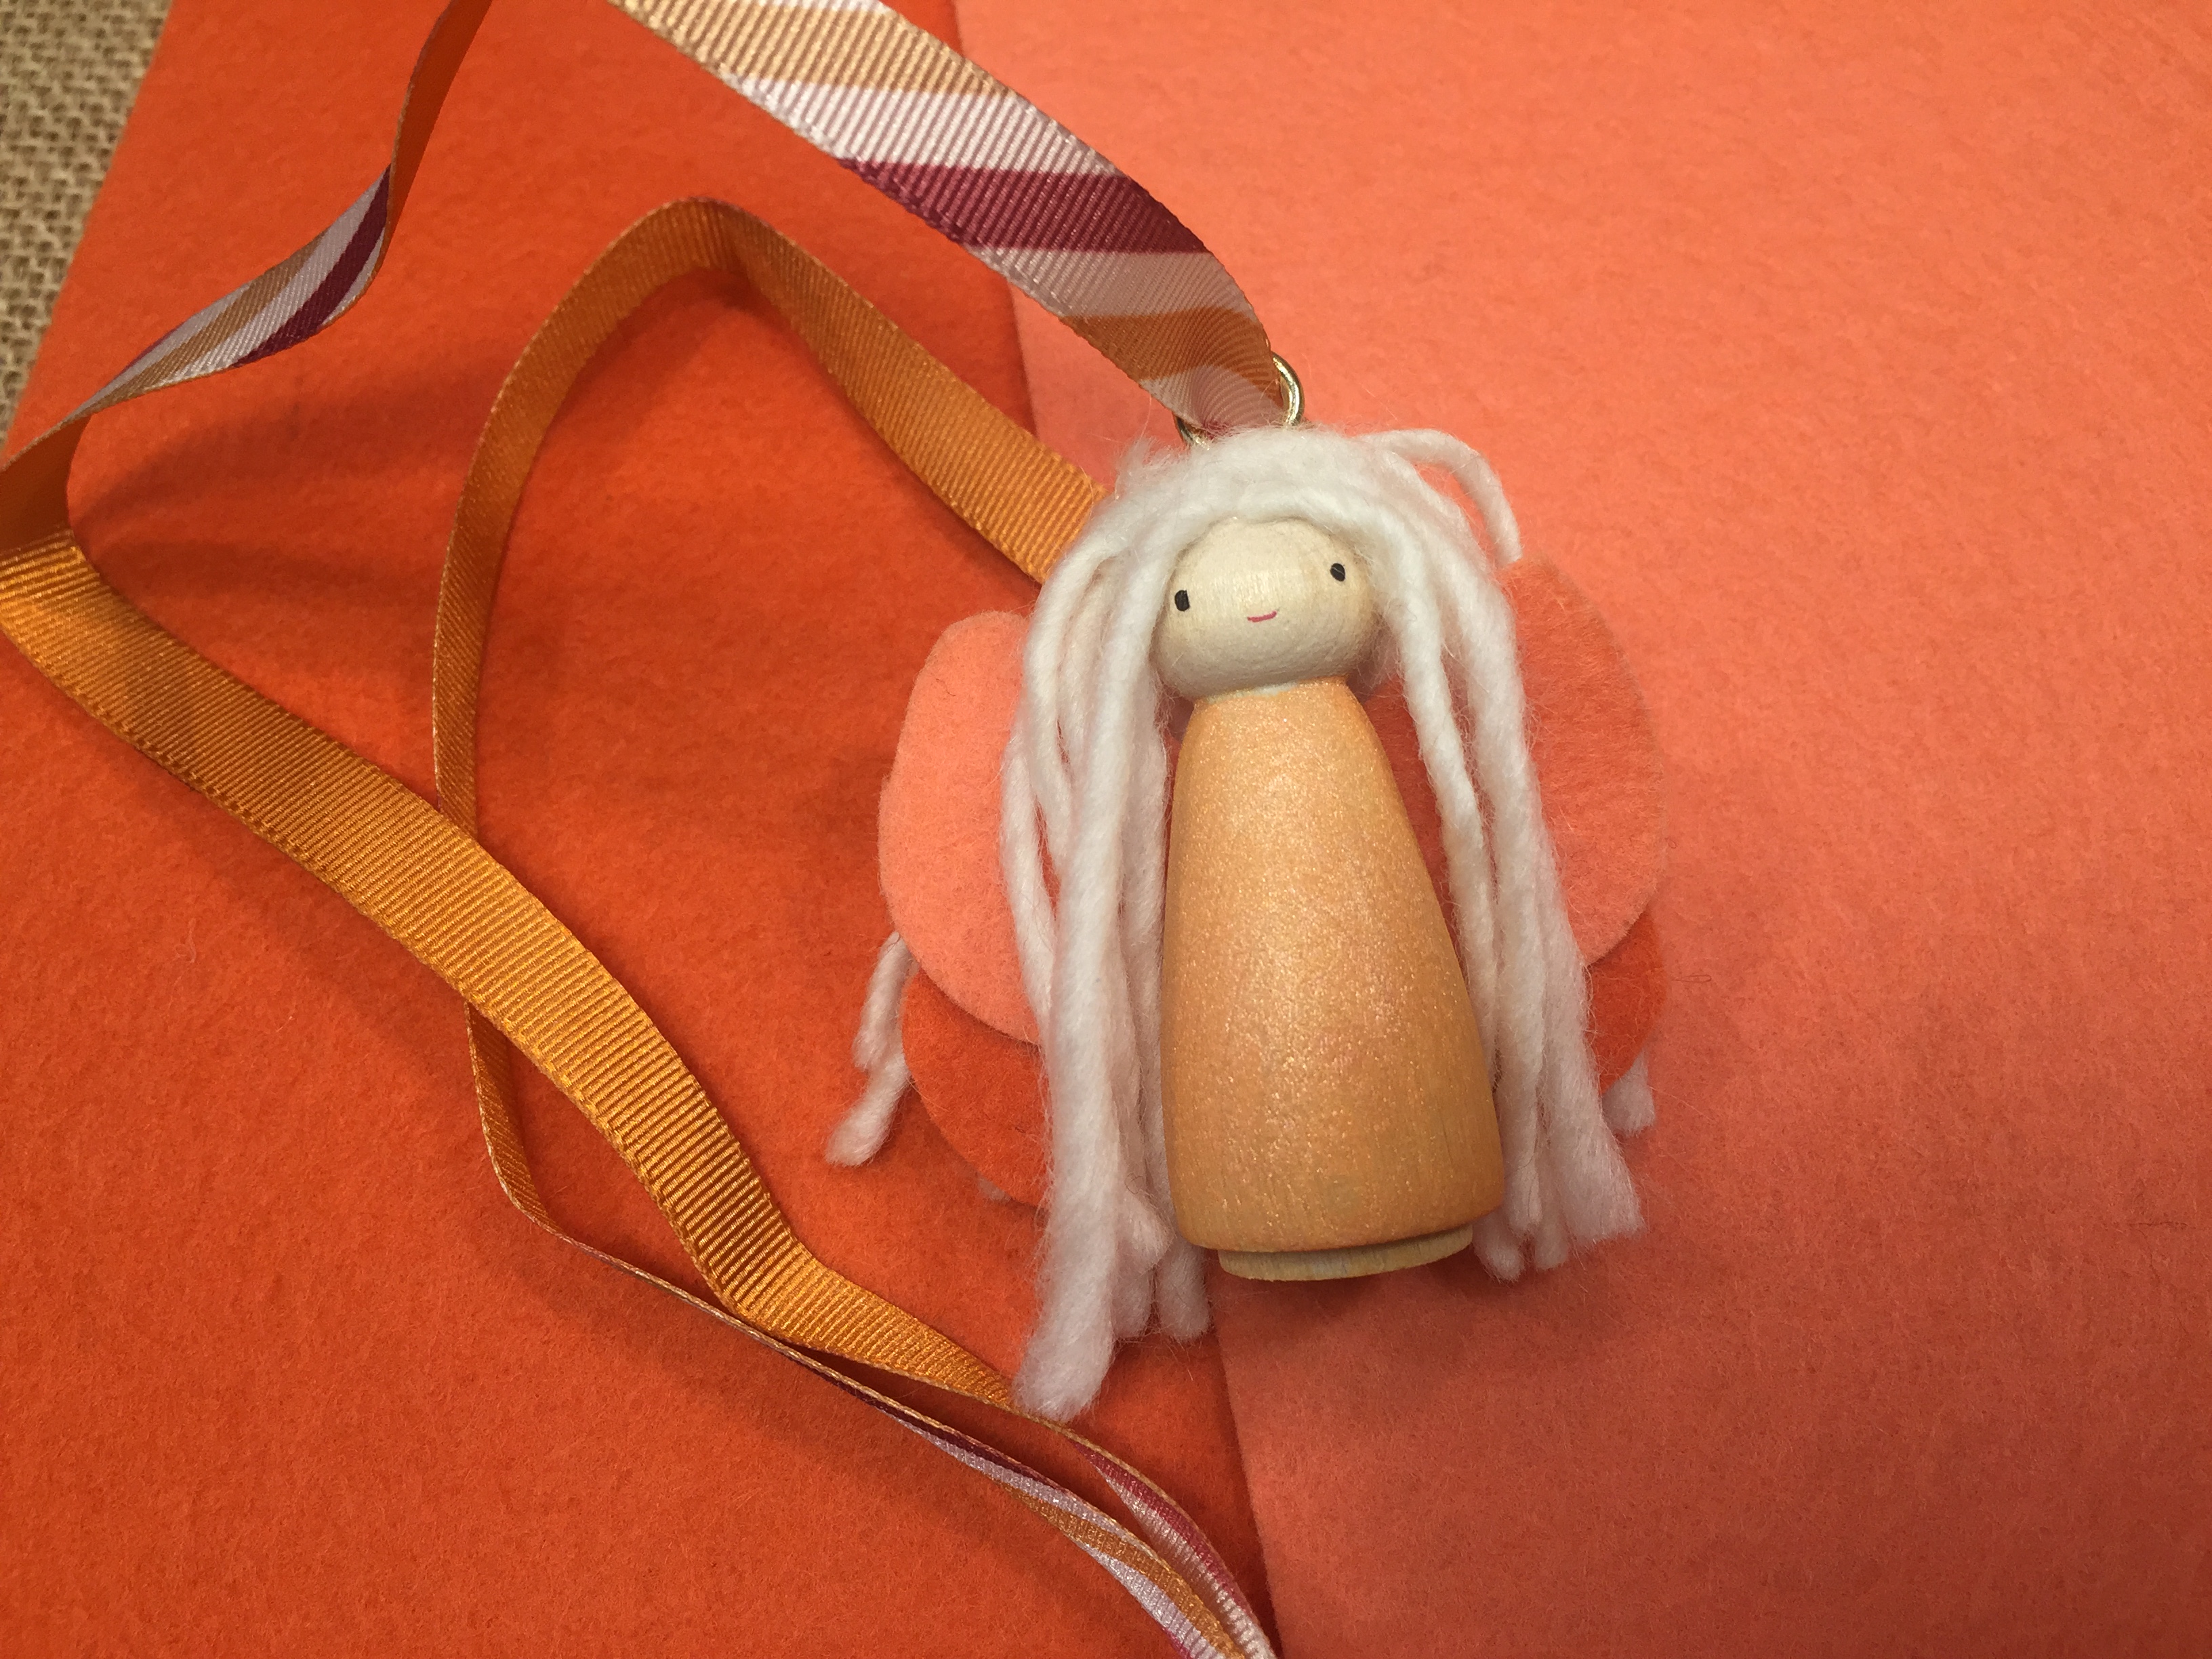
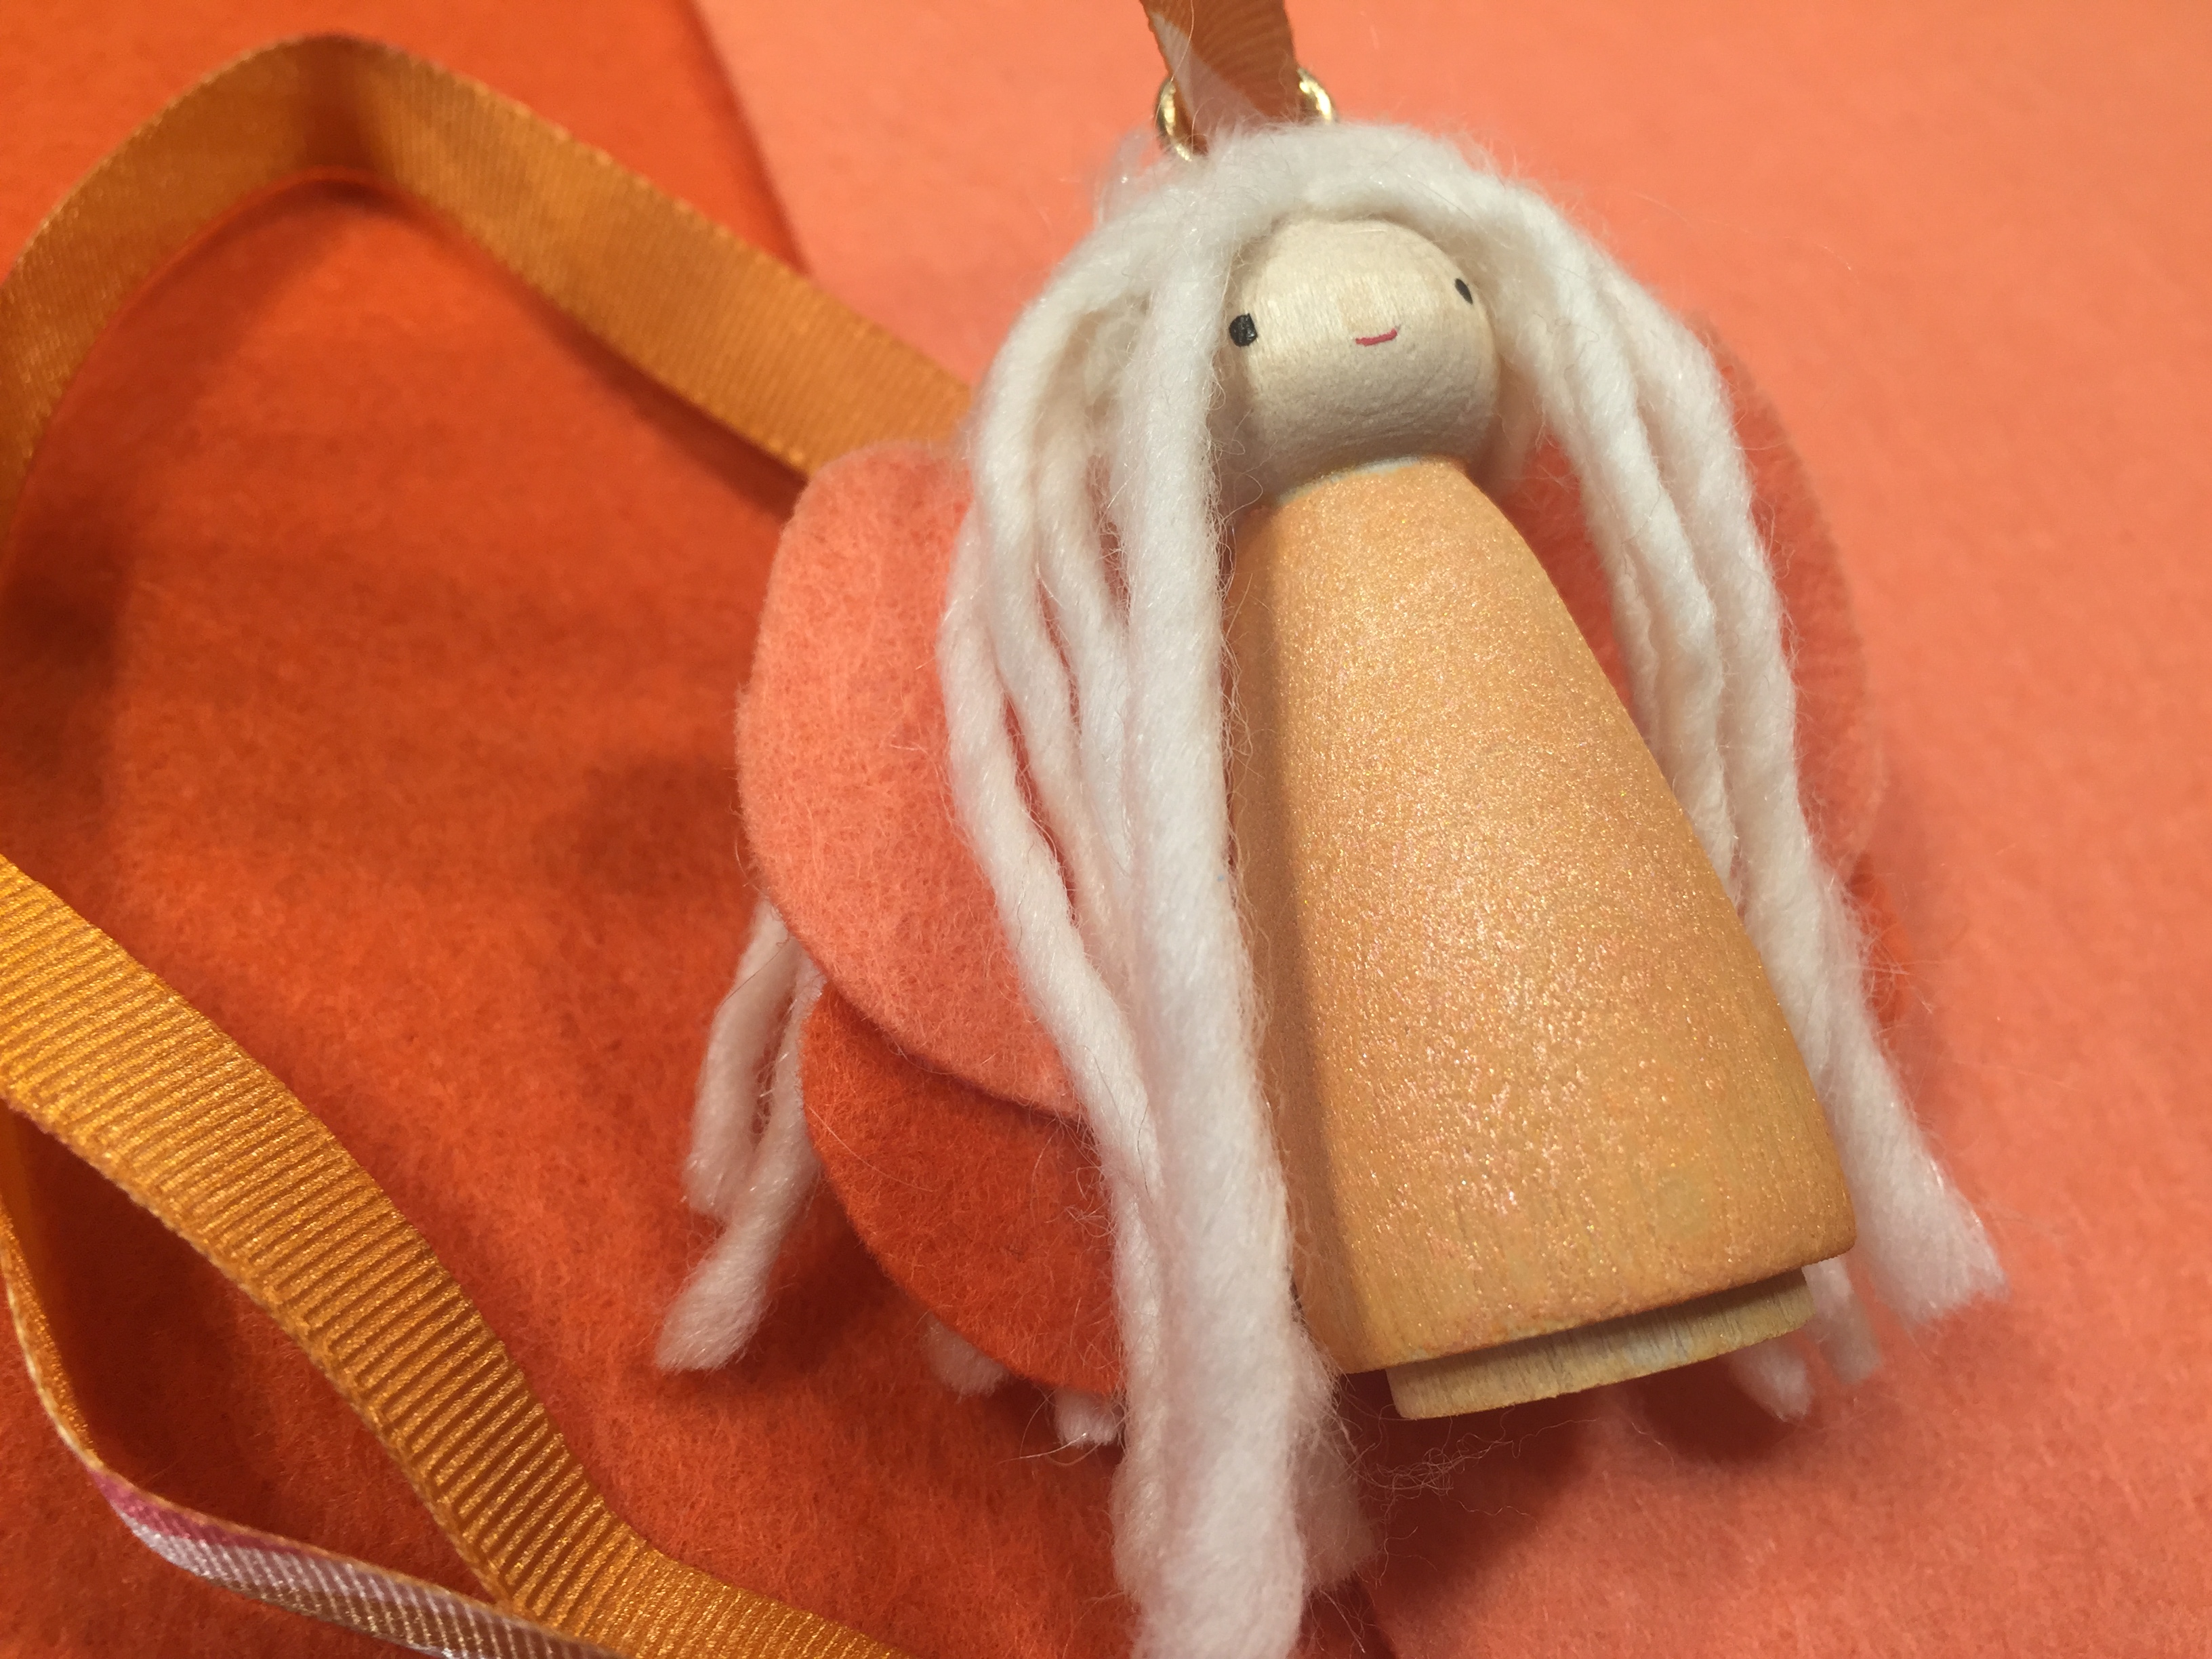
How to Make a Peg Doll Necklace
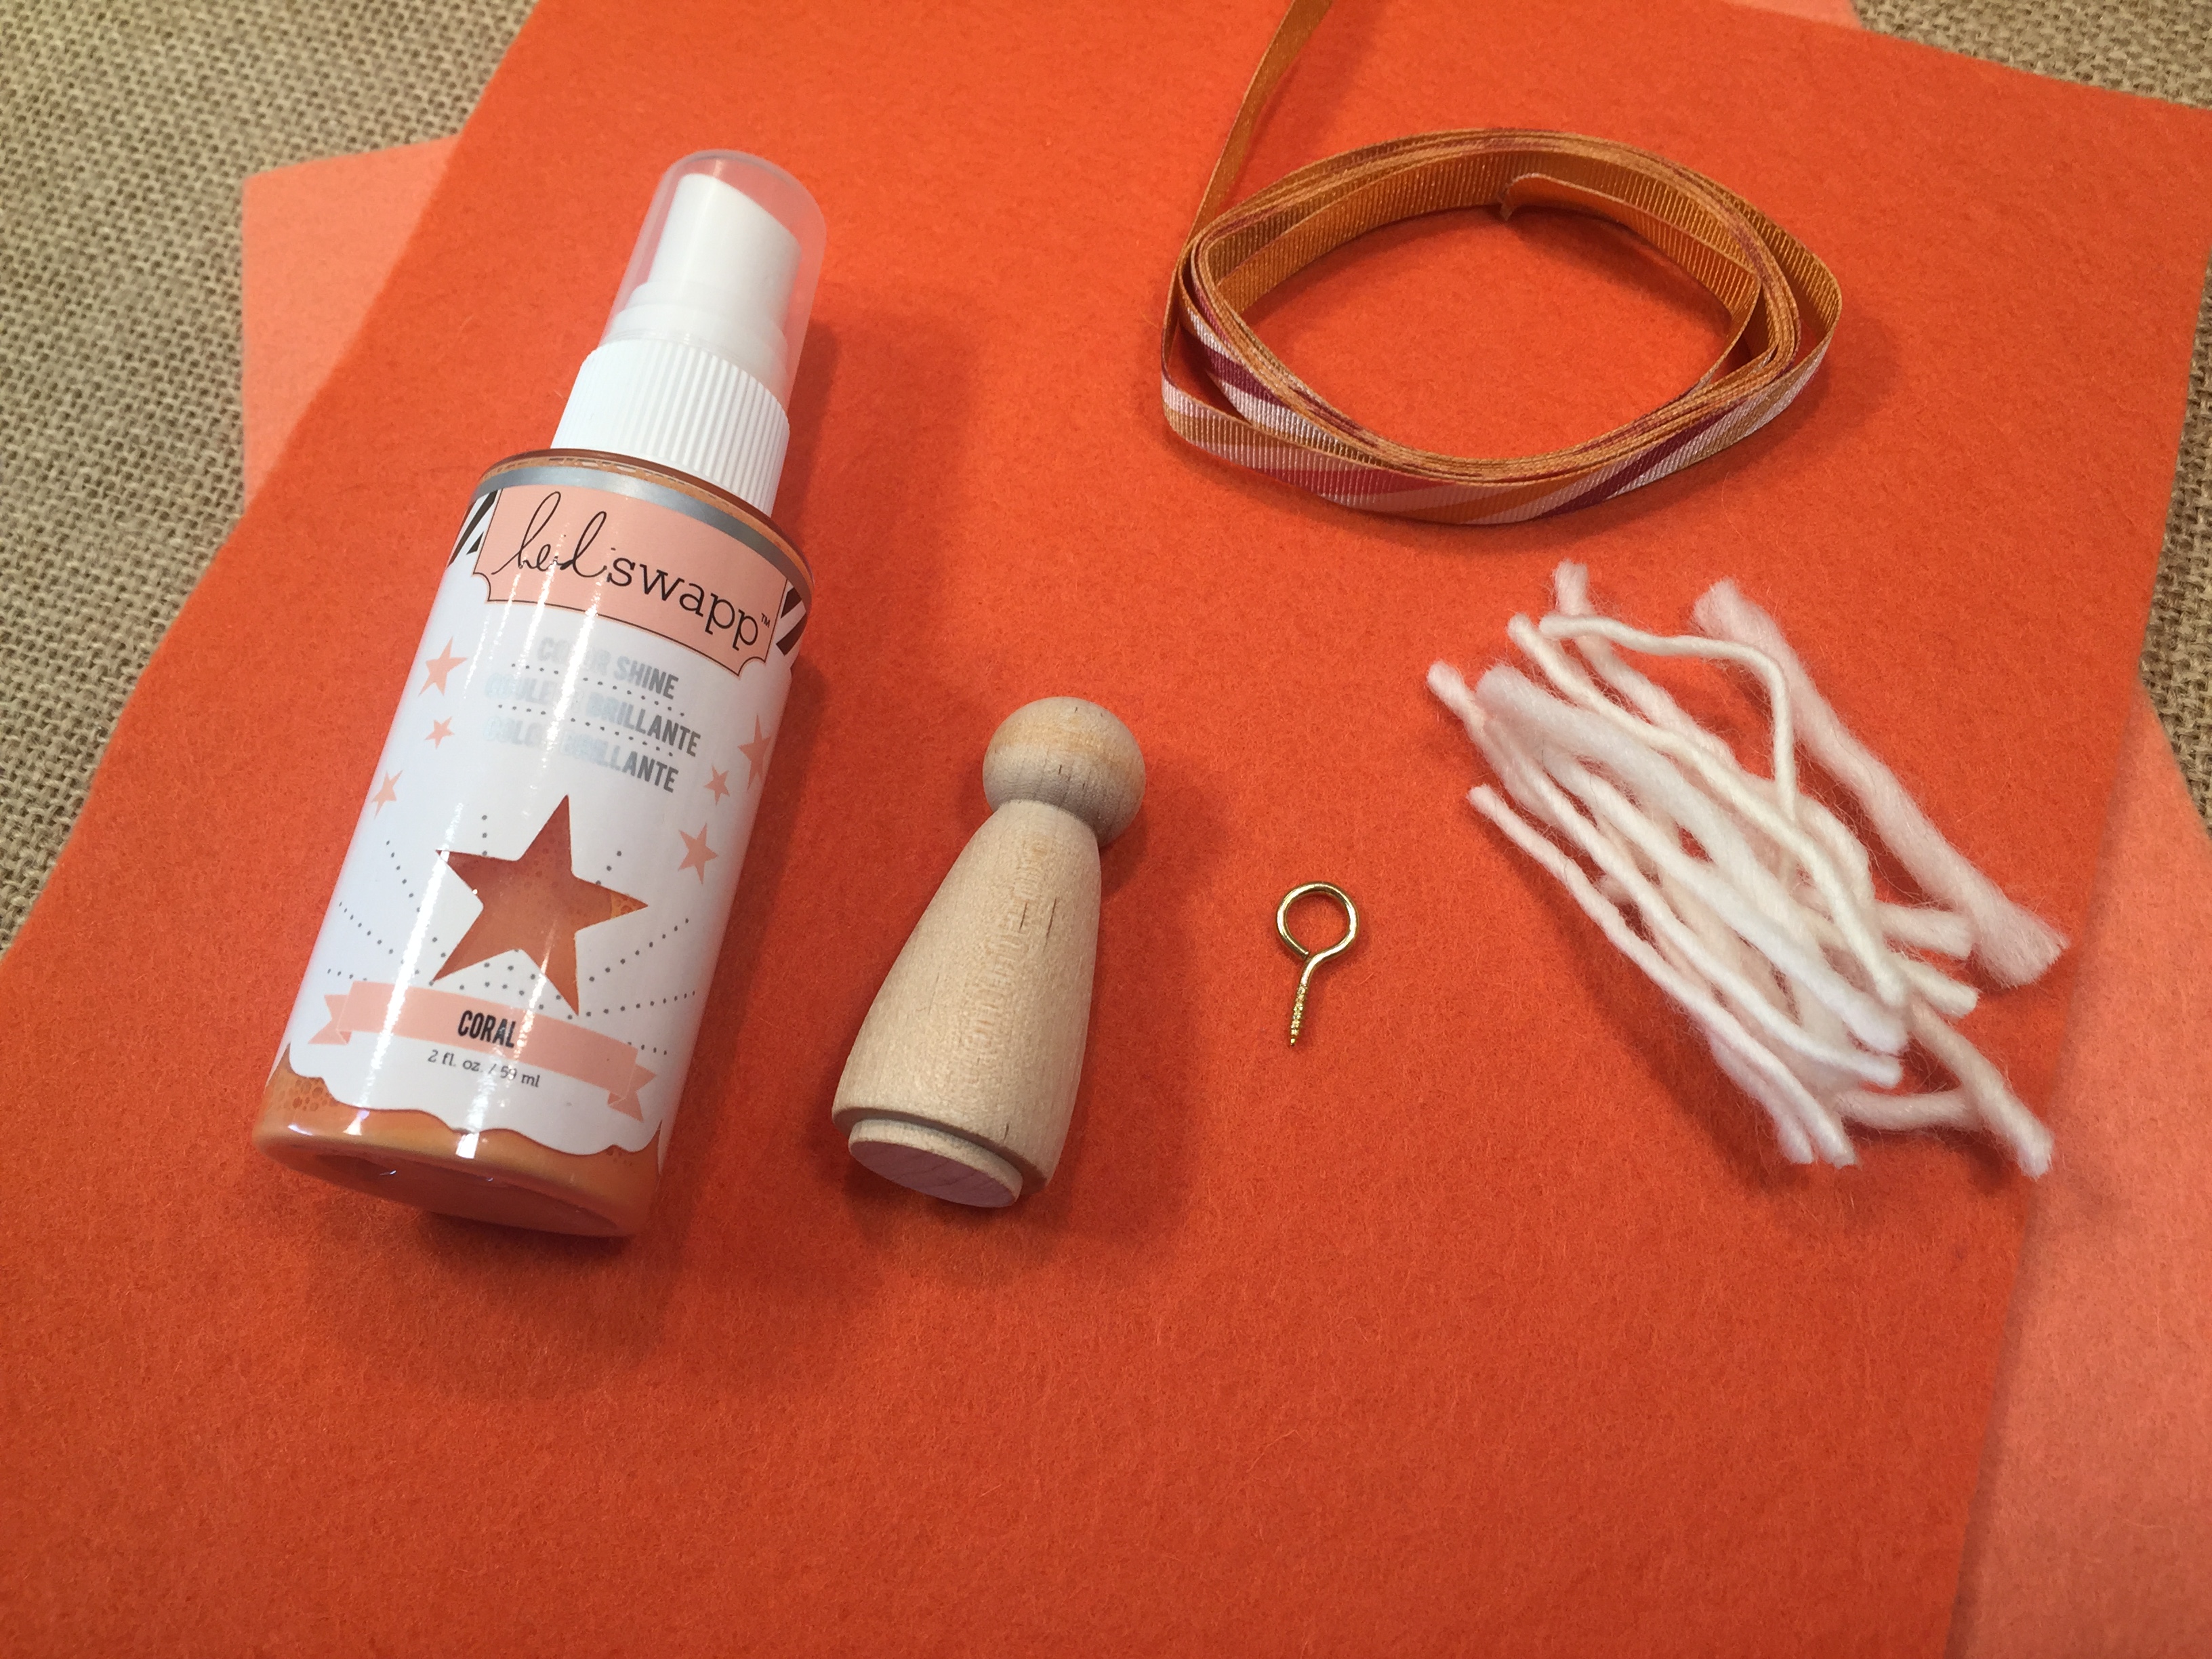
Aren’t these peg doll necklaces adorable? They would make darling party favors, prizes or little gifts for a special child. They are surprisingly easy to make. All supplies (except ribbon and screw eye) can be found at A Child’s Dream or local craft stores.
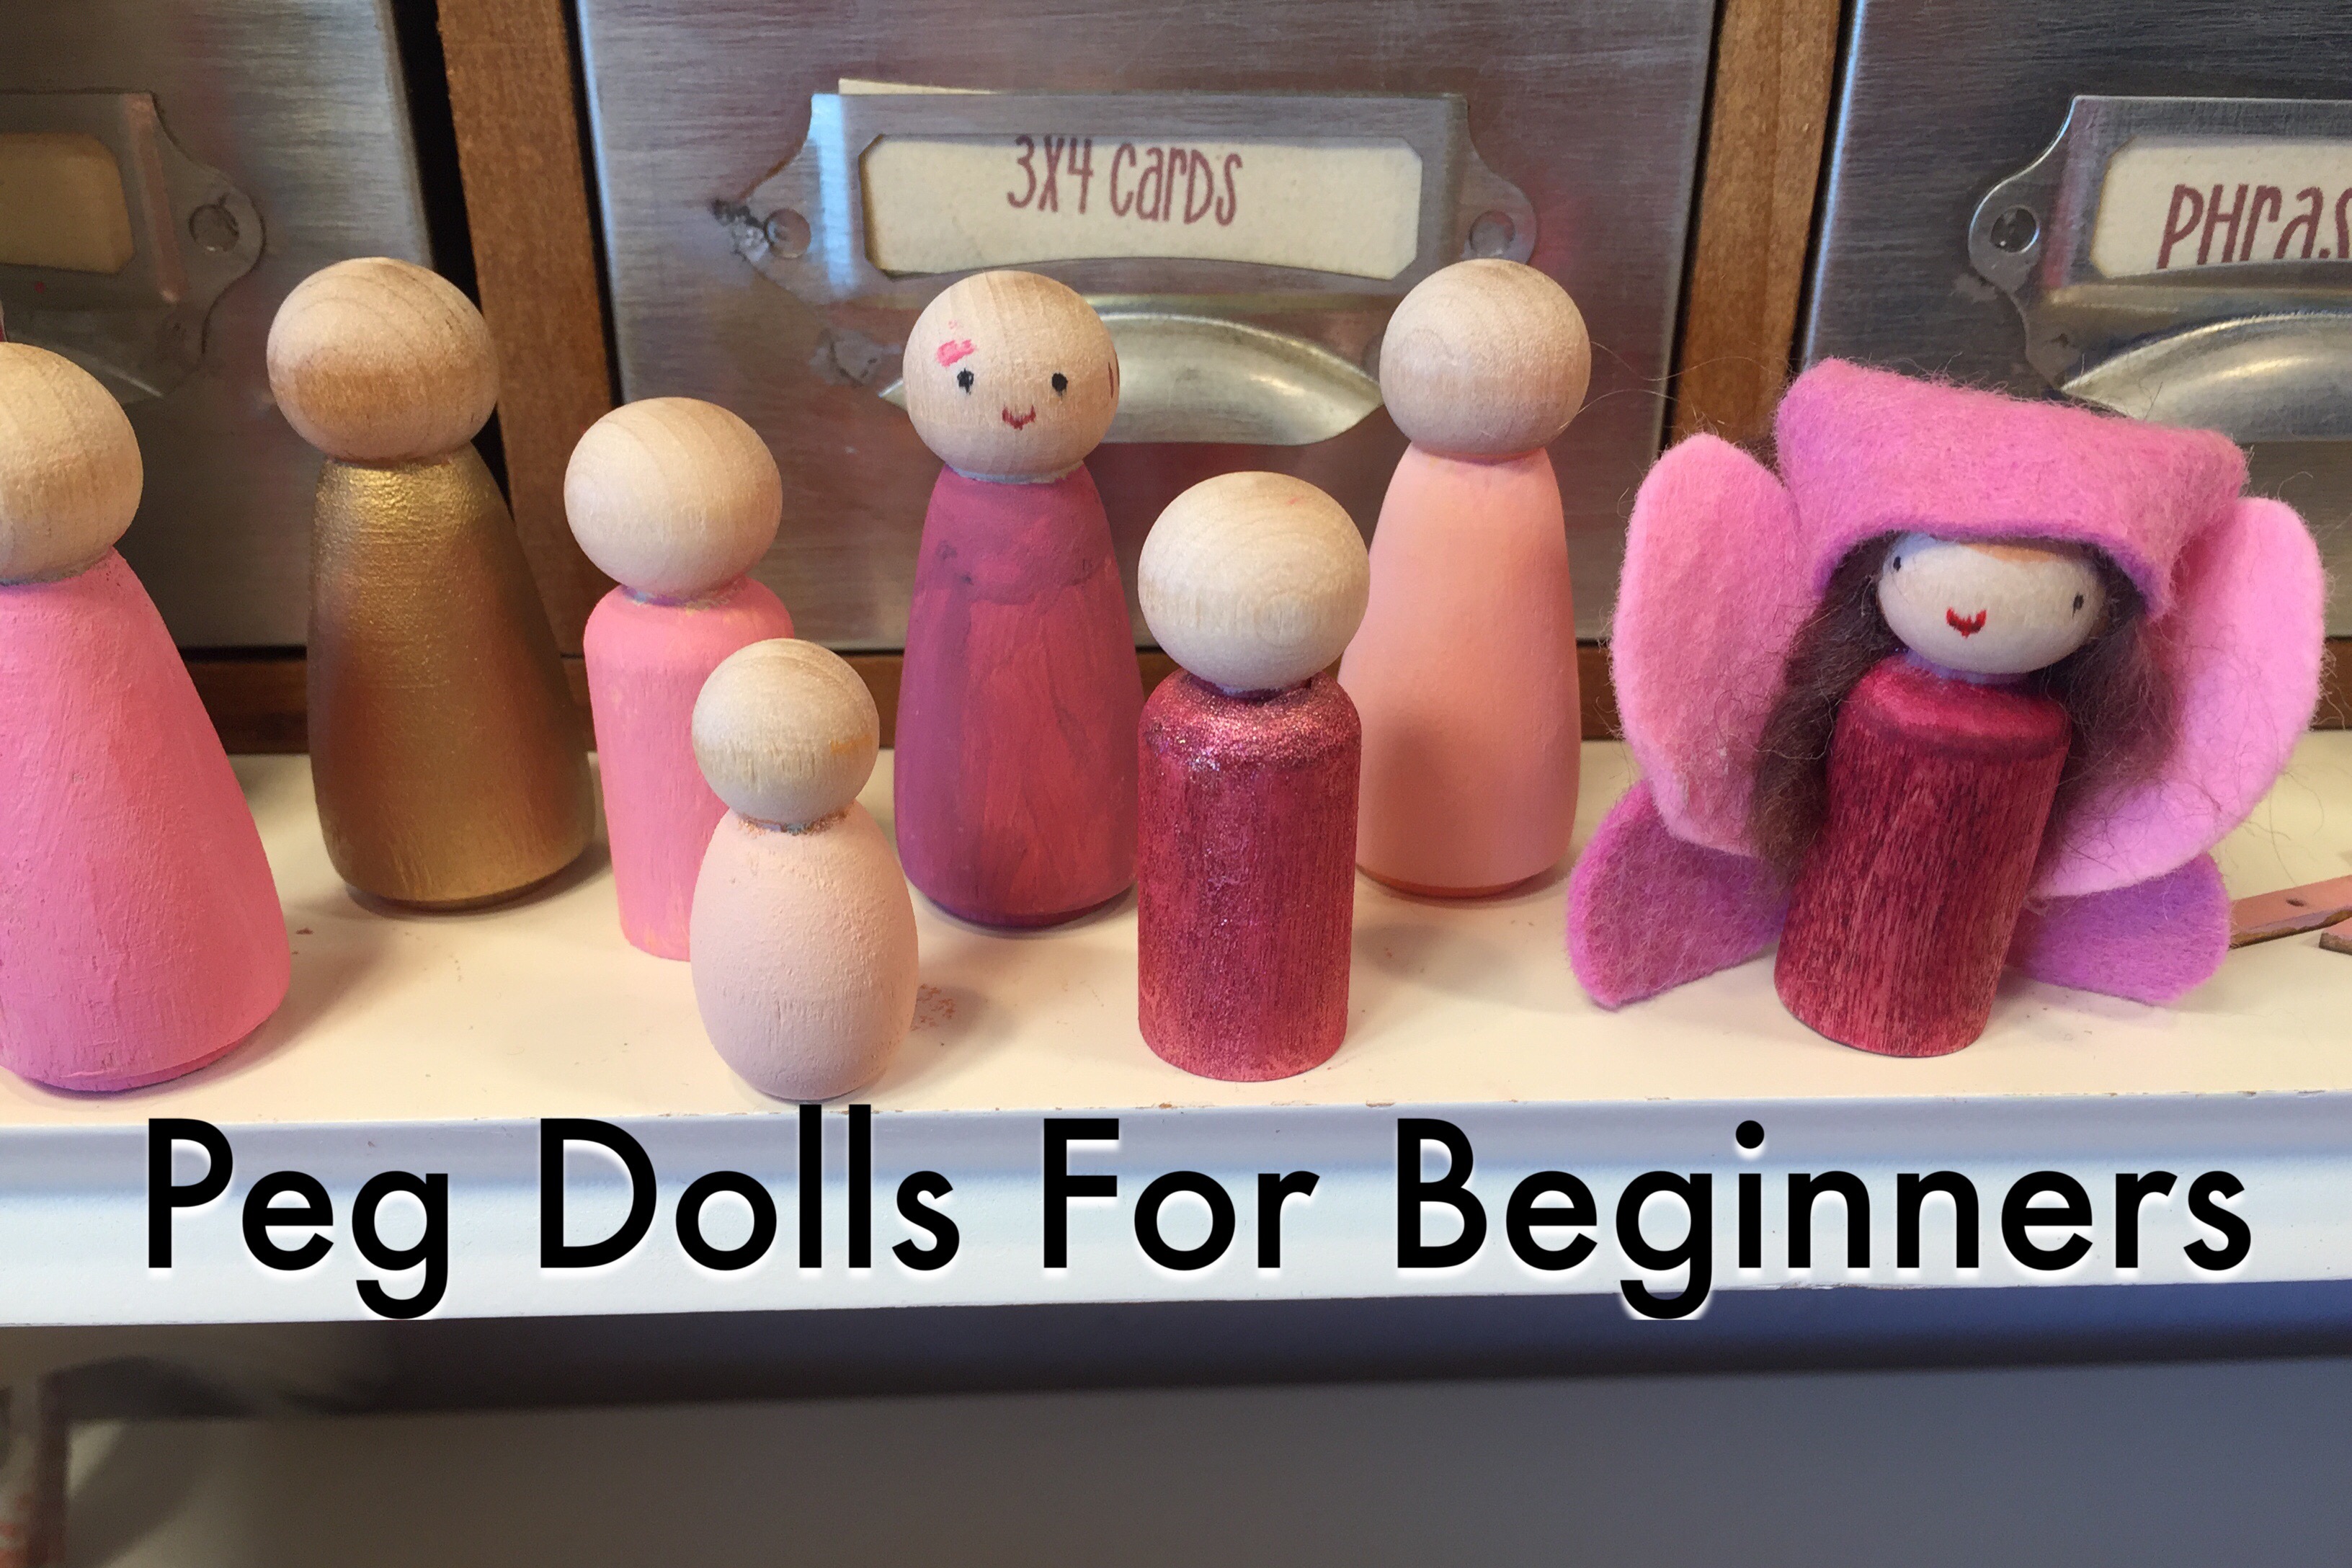
Peg Dolls for Beginners | Hair
The hair you choose for your peg doll is going to help define its look. While all my finger puppets had wool yarn for hair, when it comes to peg dolls, you can skip the yarn and paint on the hair. While that is one technique, there are a few more you can try when working with peg dolls. In this tutorial, I’ll show you four different ways to do hair for your peg dolls, then I’ll complete one peg doll. If you want to see the other peg dolls in this series, you can watch the other tutorials for more techniques and ideas. Materials for these projects can be found at A Child’s Dream.
Get the wing patterns here.
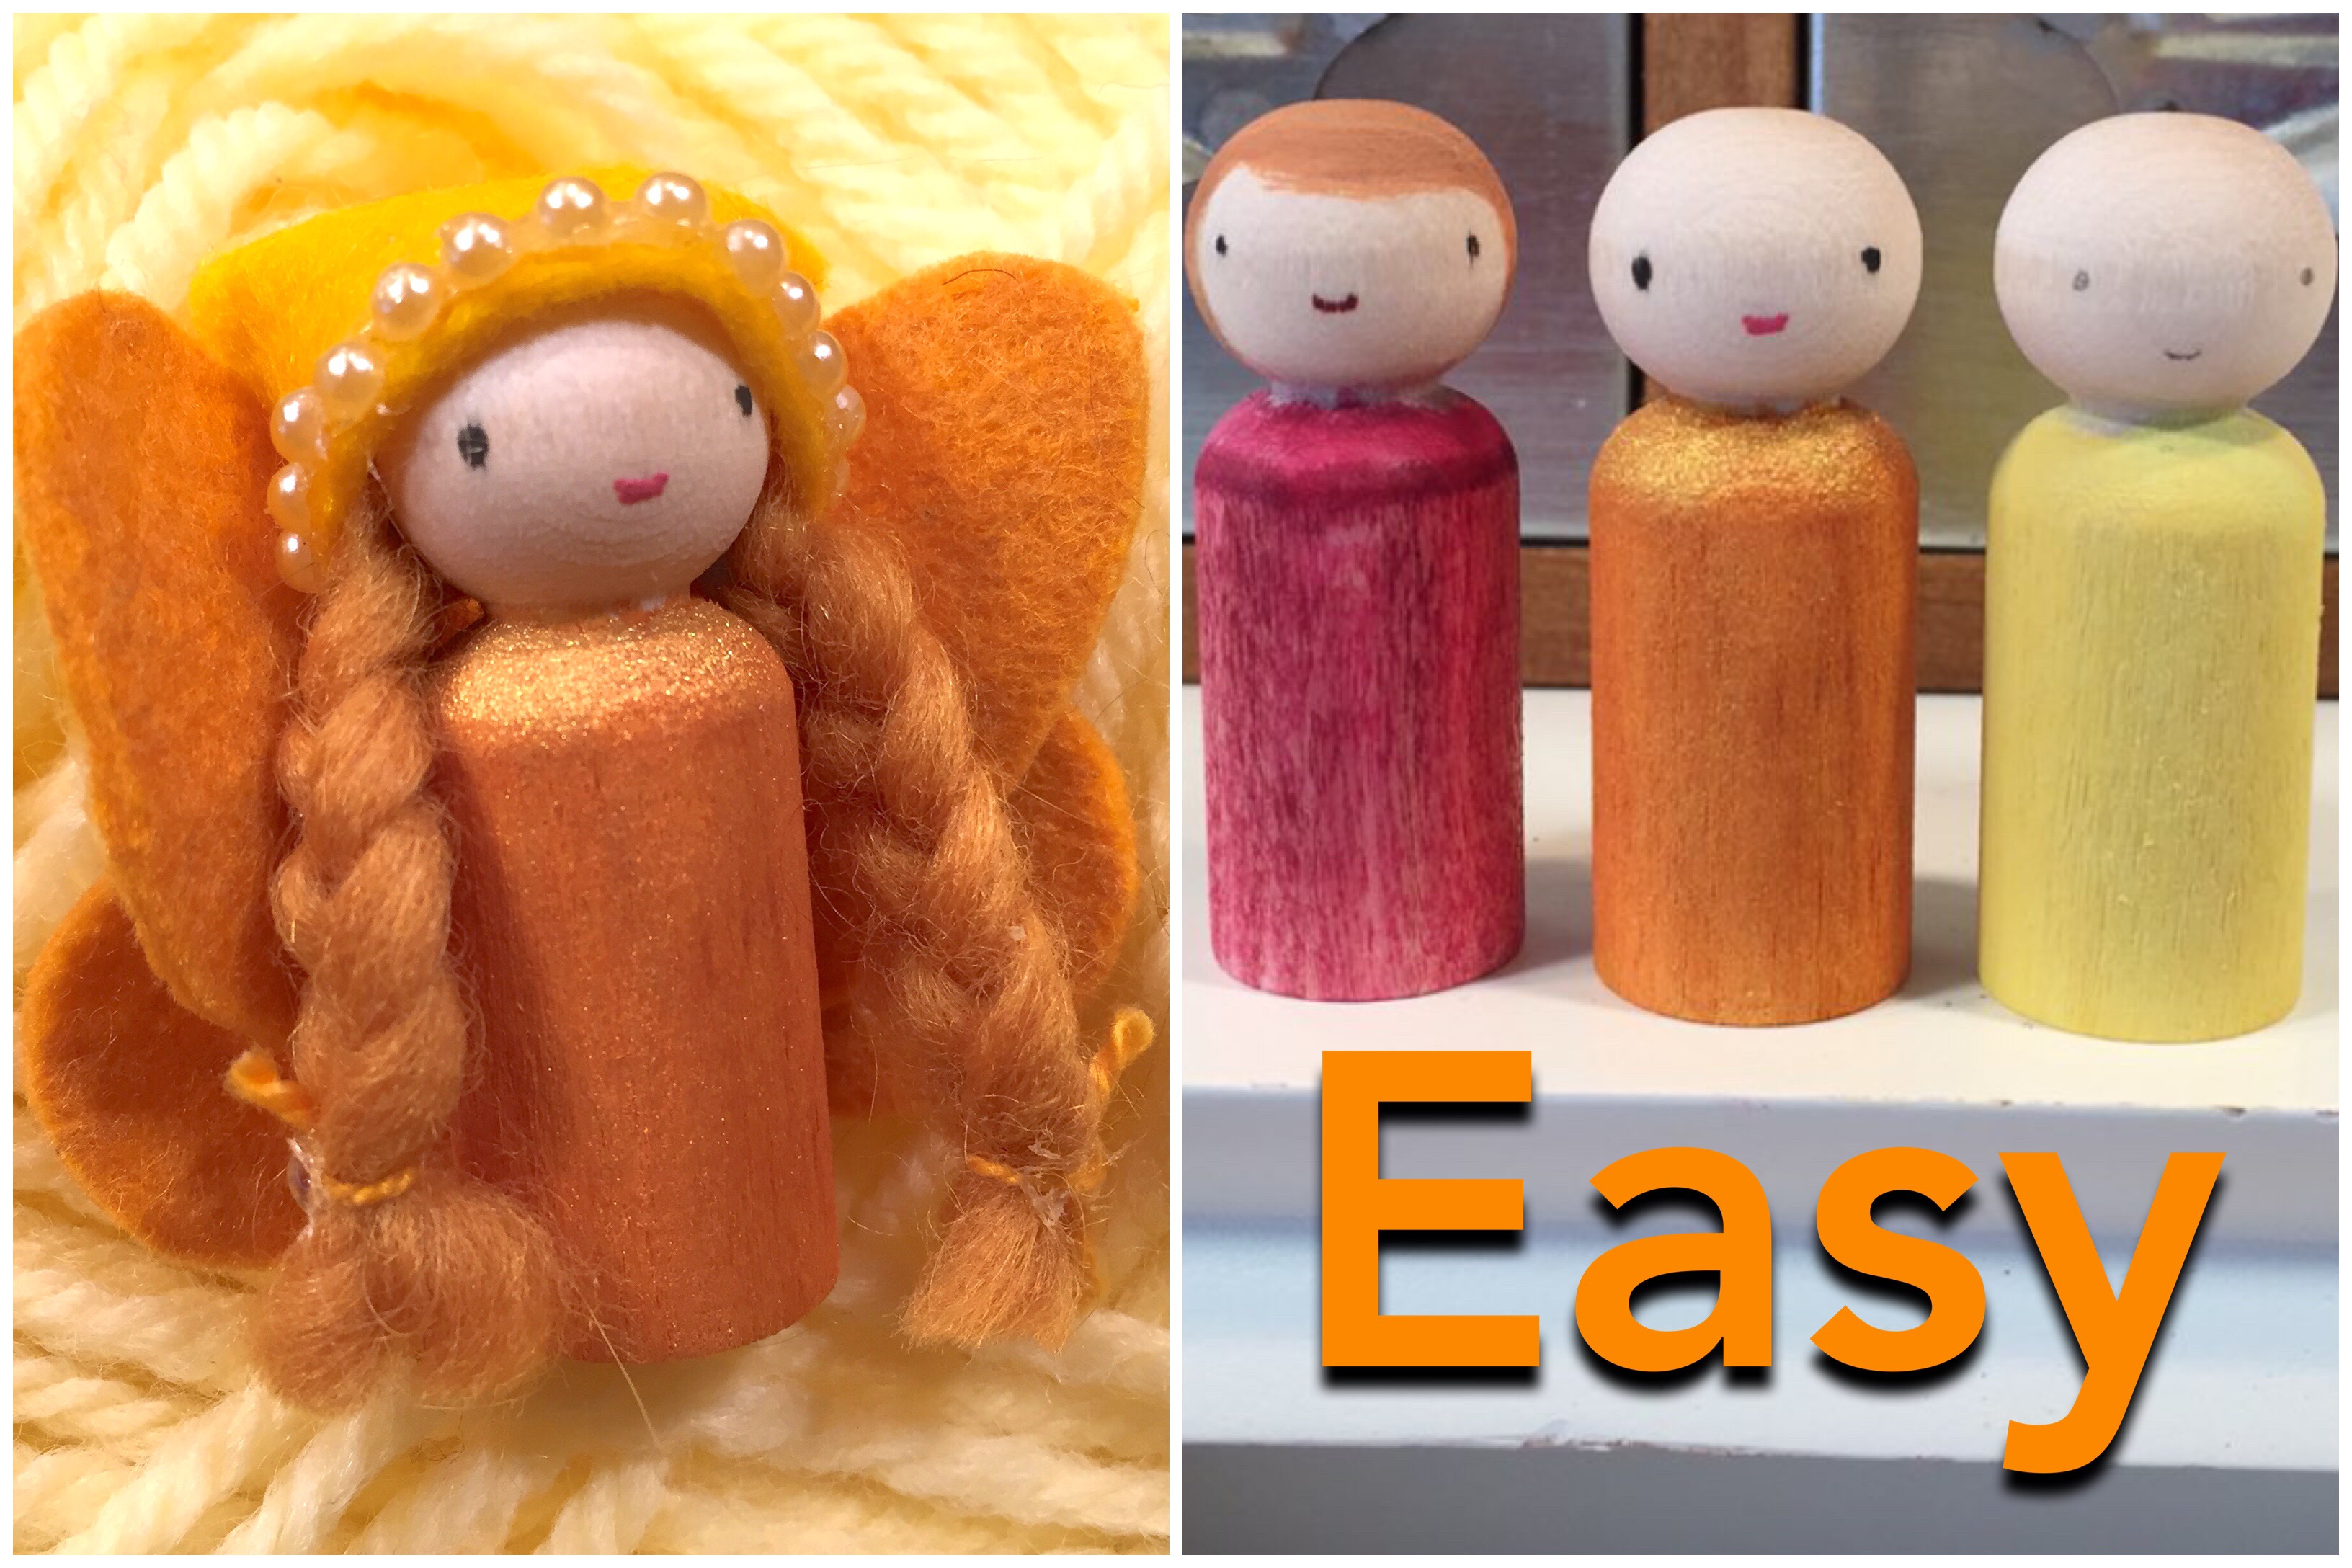
Peg Dolls for Beginners | Paint
When it comes to painting the body of your peg doll, you have many choices. Even if you don’t have any paint, you can use markers! In this video, I’ll show you several ways to paint a peg doll from acrylic paint to watercolor paint. My favorite is Color Shine spray by Heidi Swapp. It was a shimmer quality to it that makes the peg doll sparkle.
See the other tutorials in this series.Find more inspiration on Instagram. And don’t forget to use the tag #pepperandpine when you make your peg dolls!
Peg Doll Faces for Beginners
Drawing faces on peg dolls can be a little tricky. I share four techniques for making faces on peg dolls. Of course you can always skip drawing a face and leave it blank. You can draw on a face with pencil or a fine liner or paint it on with Lyra paints or acrylics. Anyway you make it, you’ll want to go slow and steady. Change the expression of your doll by curling up the mouth or widening the eyes. If you make a mistake, that’s okay! Just turn your face around and paint over the mistake or add hair. You can also practice with pencil before using paint.
See the other tutorials in this series for more techniques.
Fairy Peg Doll | Tutorial
I’m getting better at this tiny little peg dolls, and my girl is loving it! Here are a couple tips: if you are painting in eyes and a mouth, use a thin but slightly firm paint brush, don’t use too much water or the paint will spread in the wood grain, and if you make a mistake or you don’t like it, just stop, trying to fix it usually makes it worse. If you really don’t like it, flip the doll around and make her a new face on the back and cover up the mess-up with hair or a hat.
You can just paint the peg dolls, you don’t have to add felt, but if you want to, you can download the pattern for the fairy peg doll here.
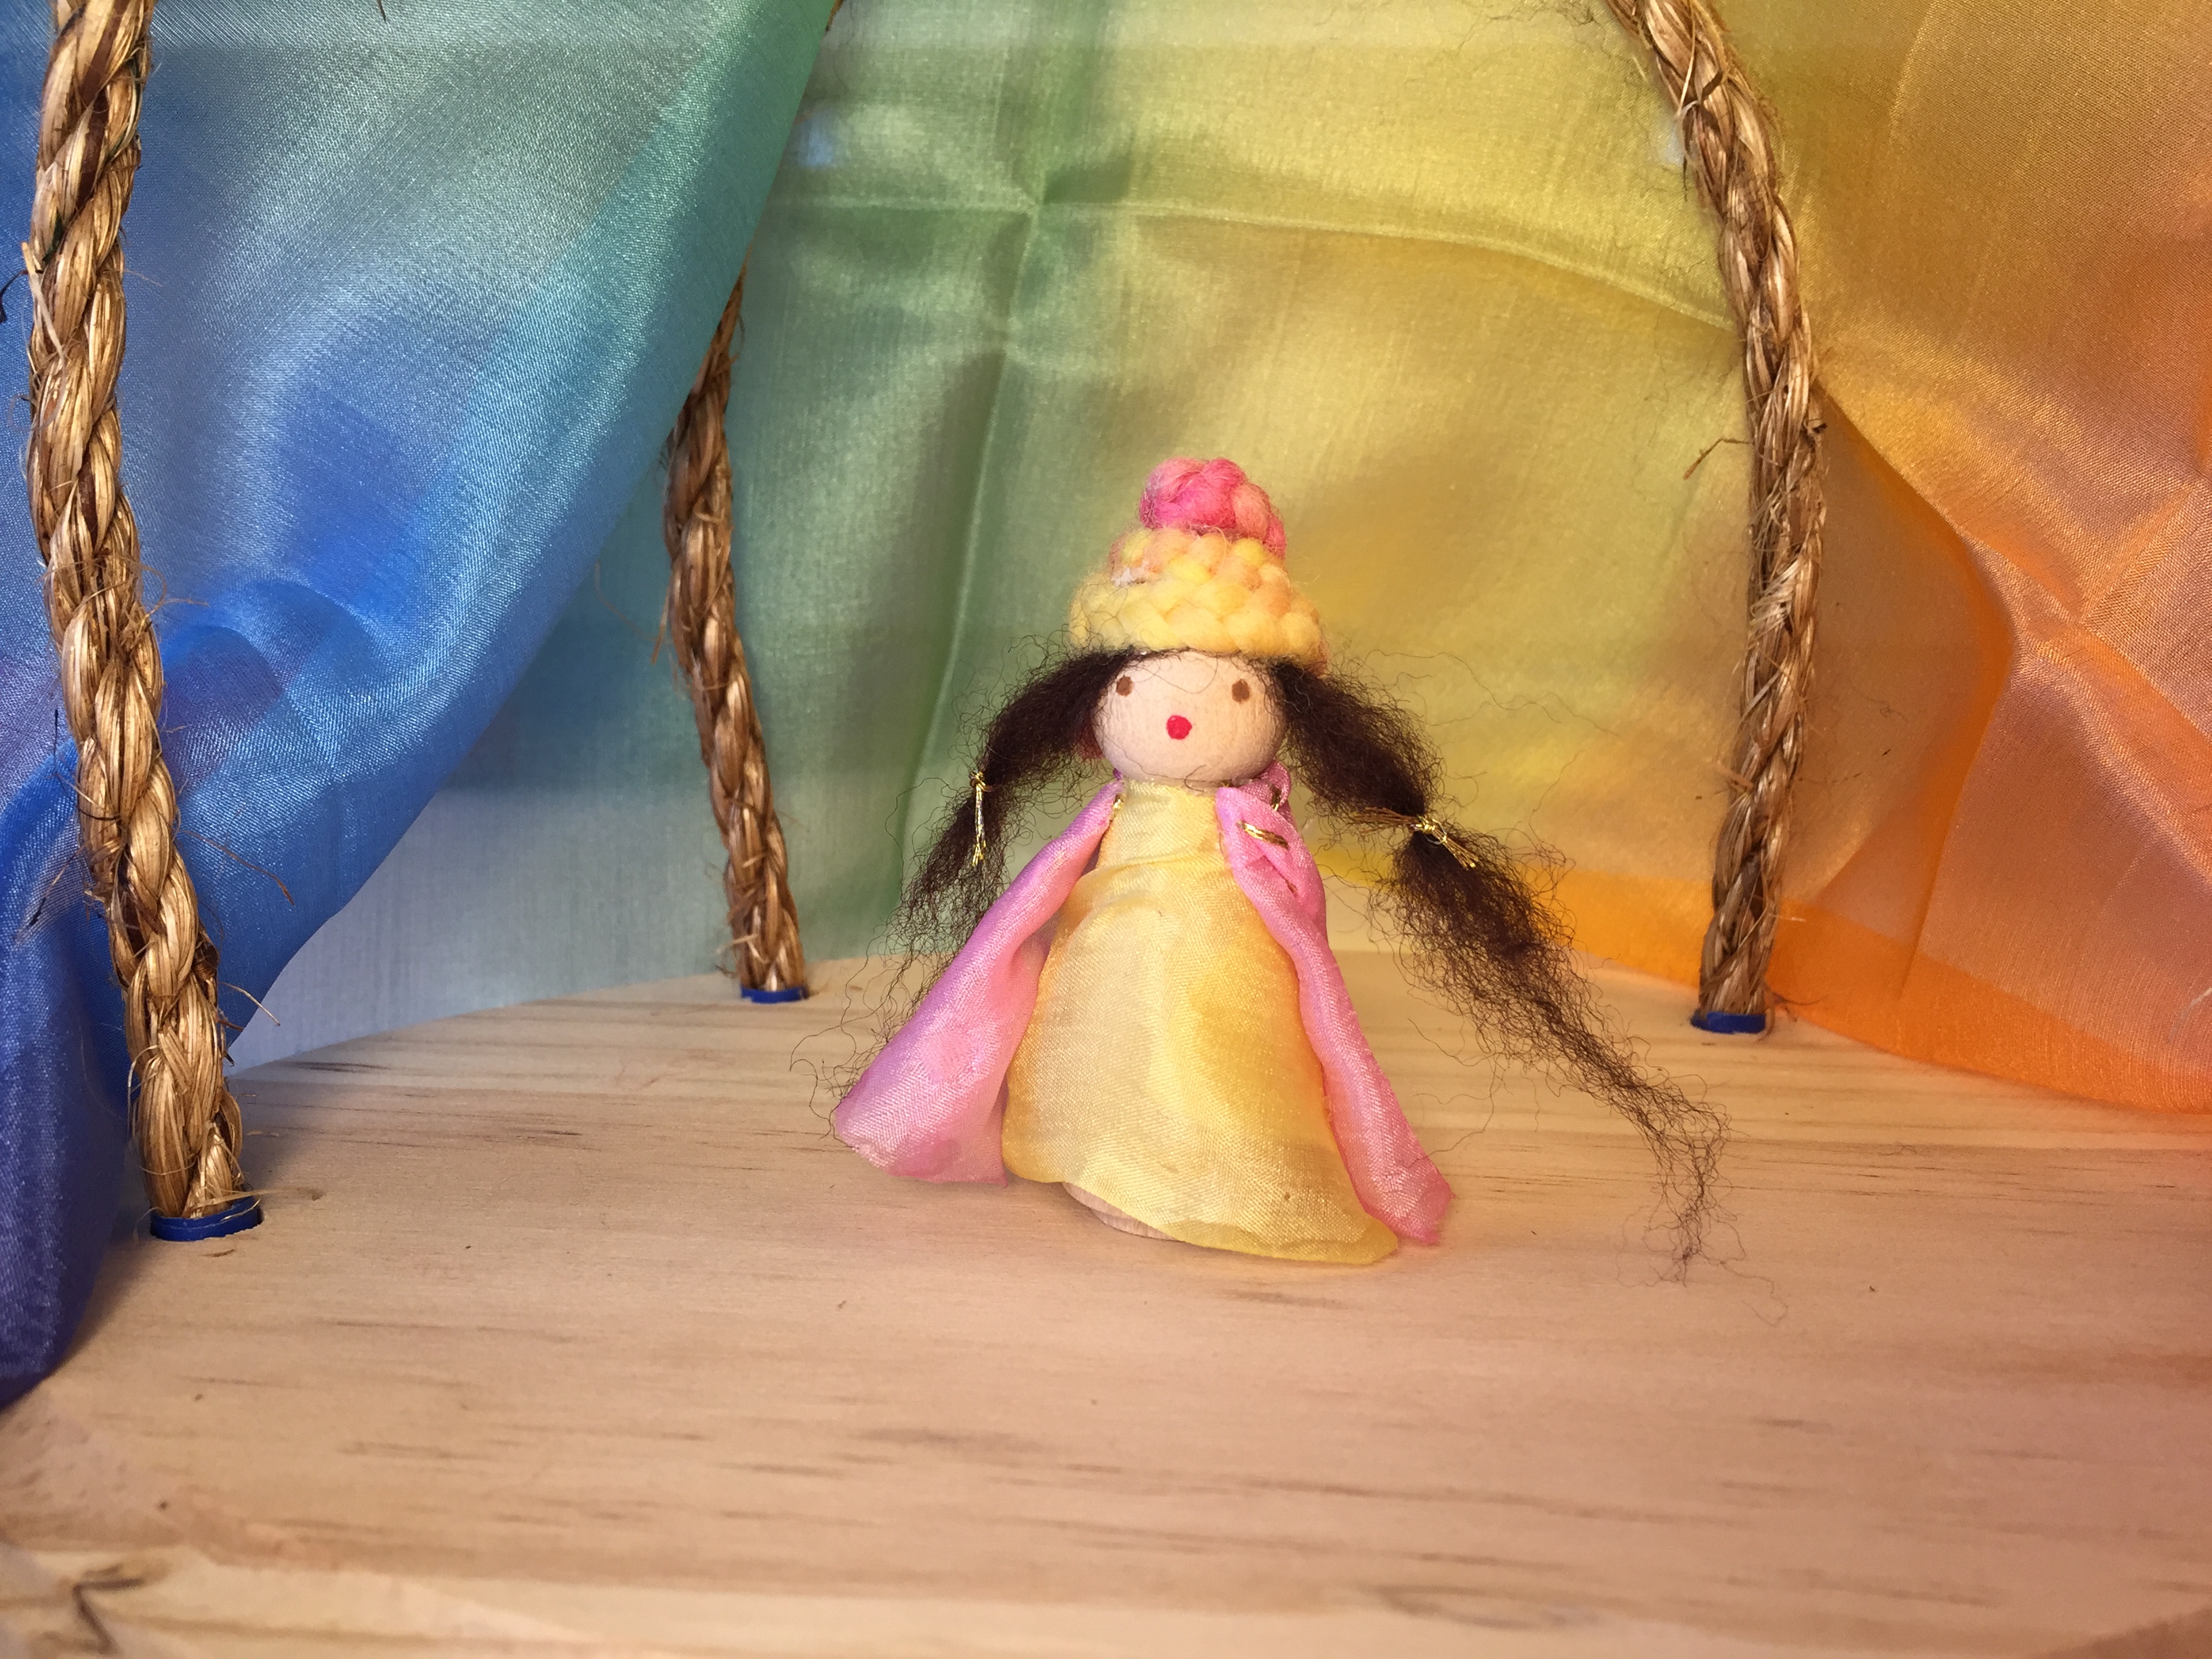
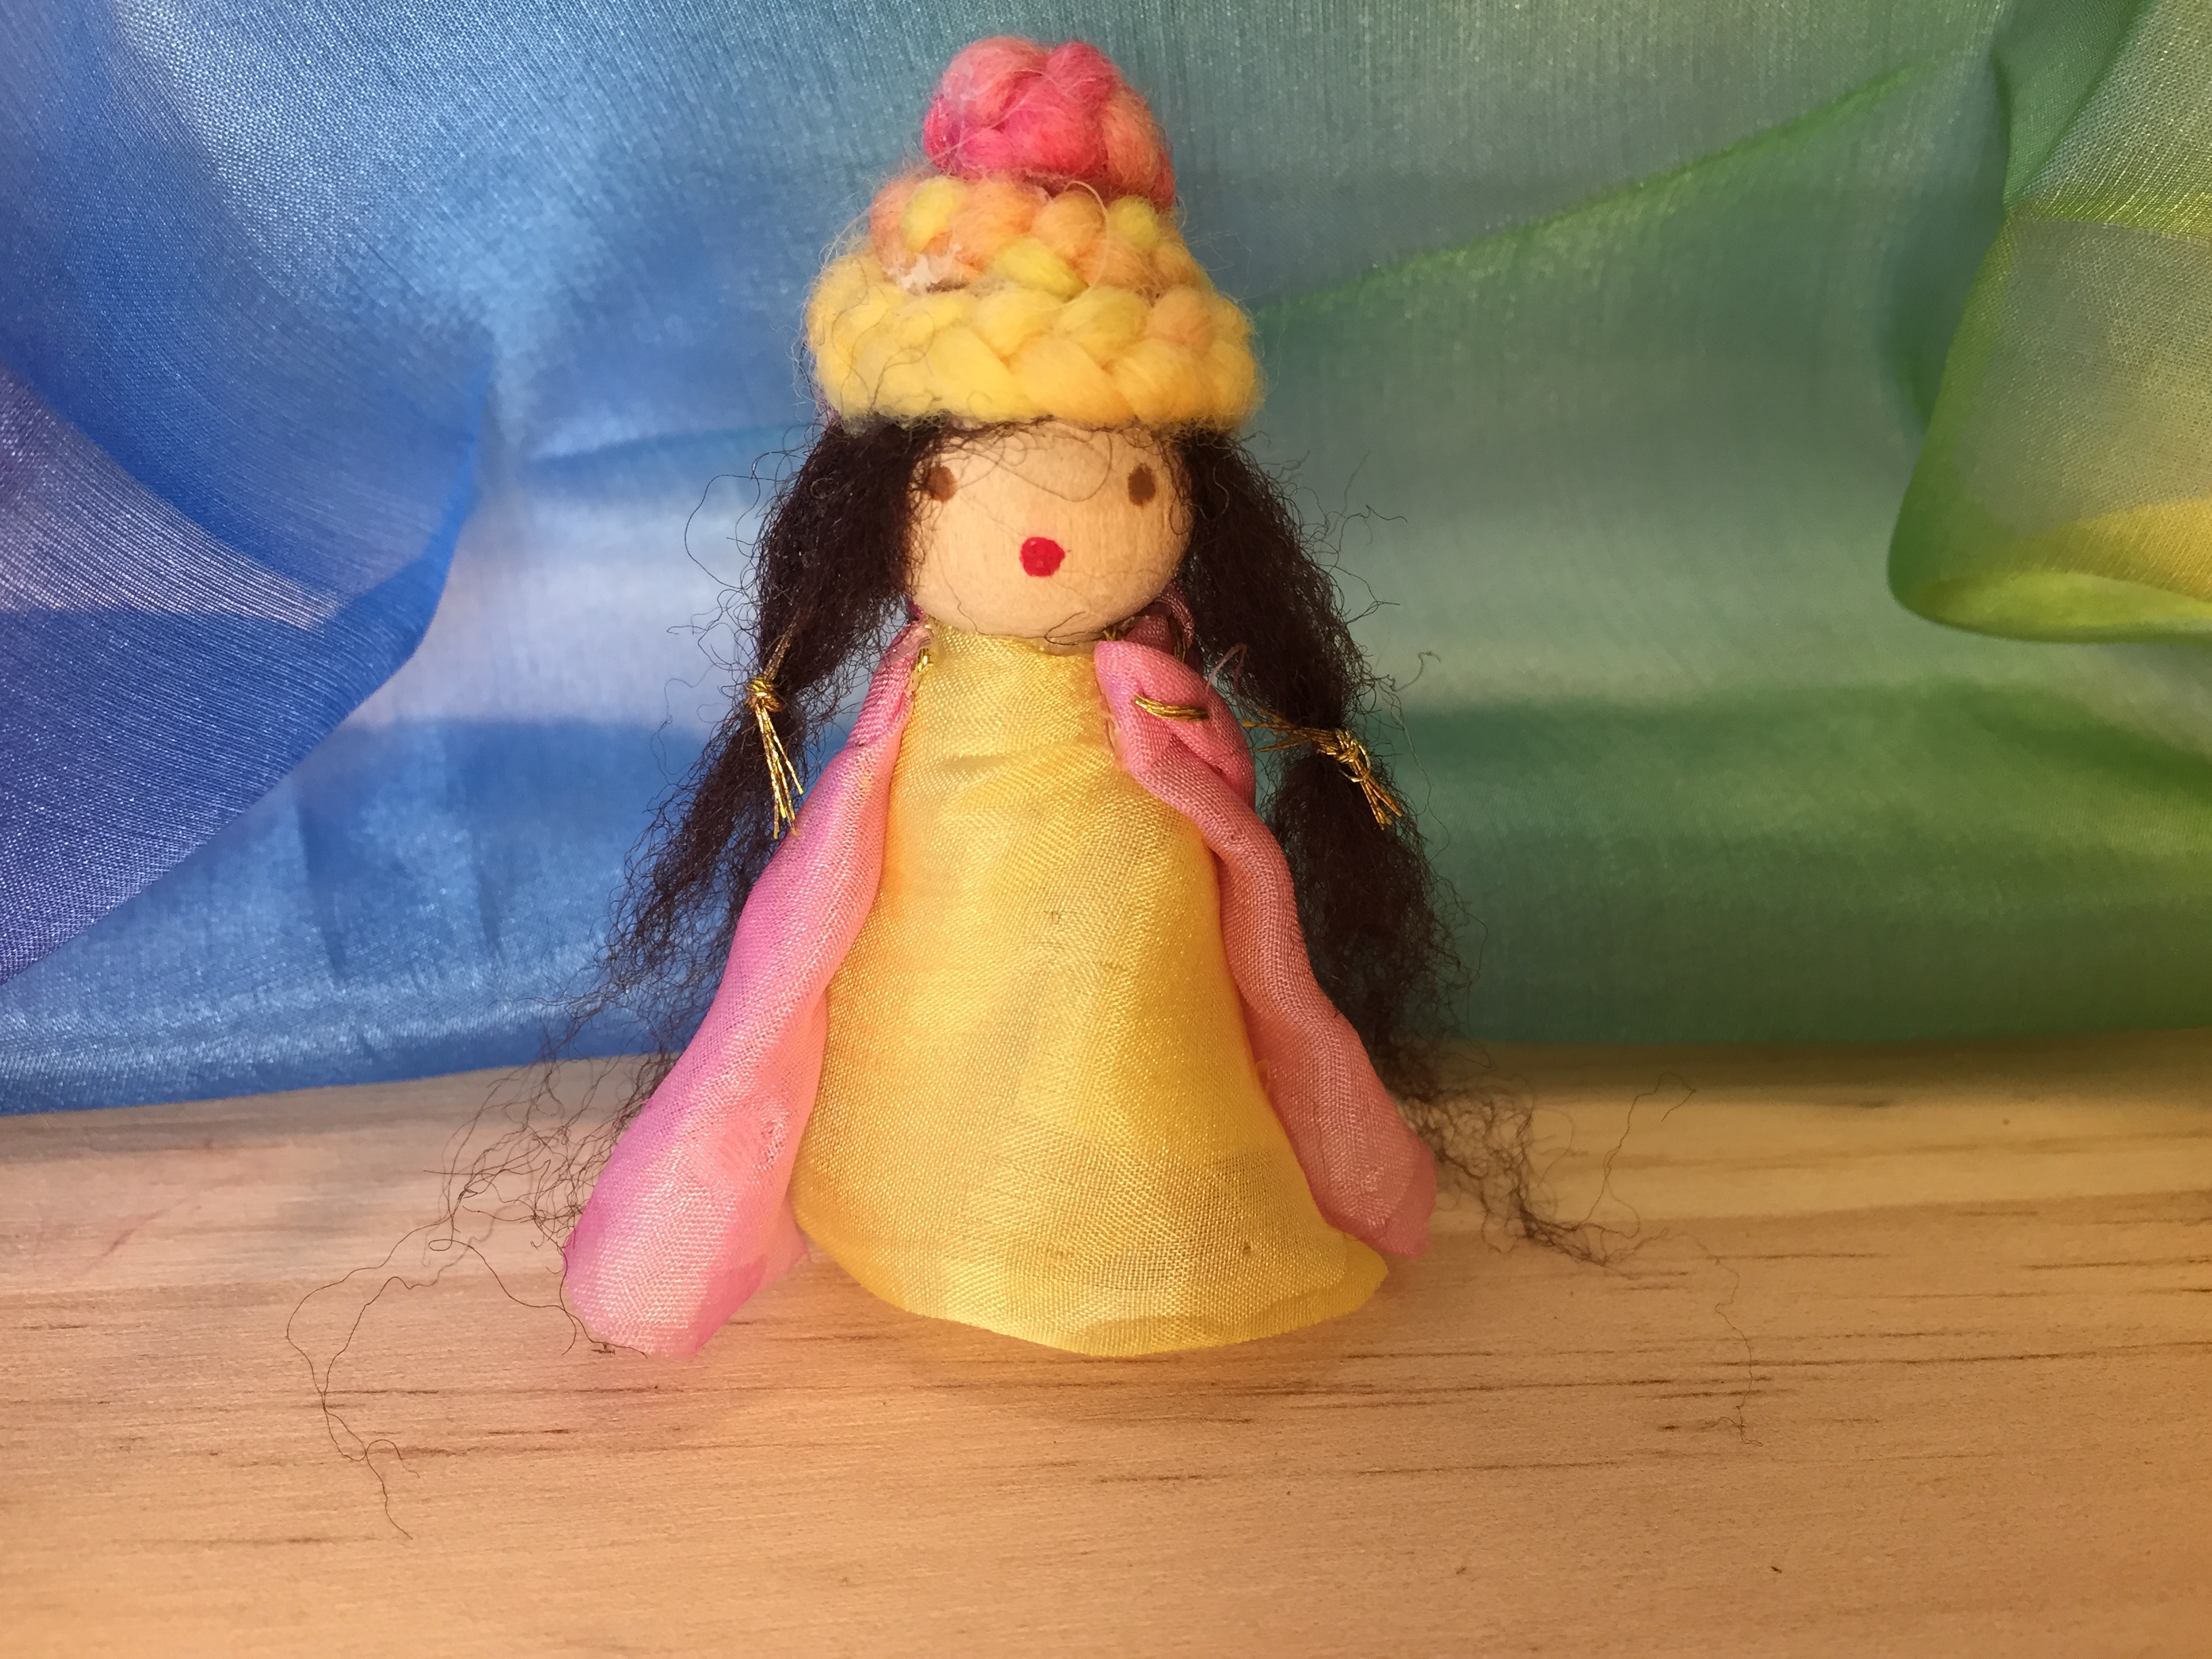
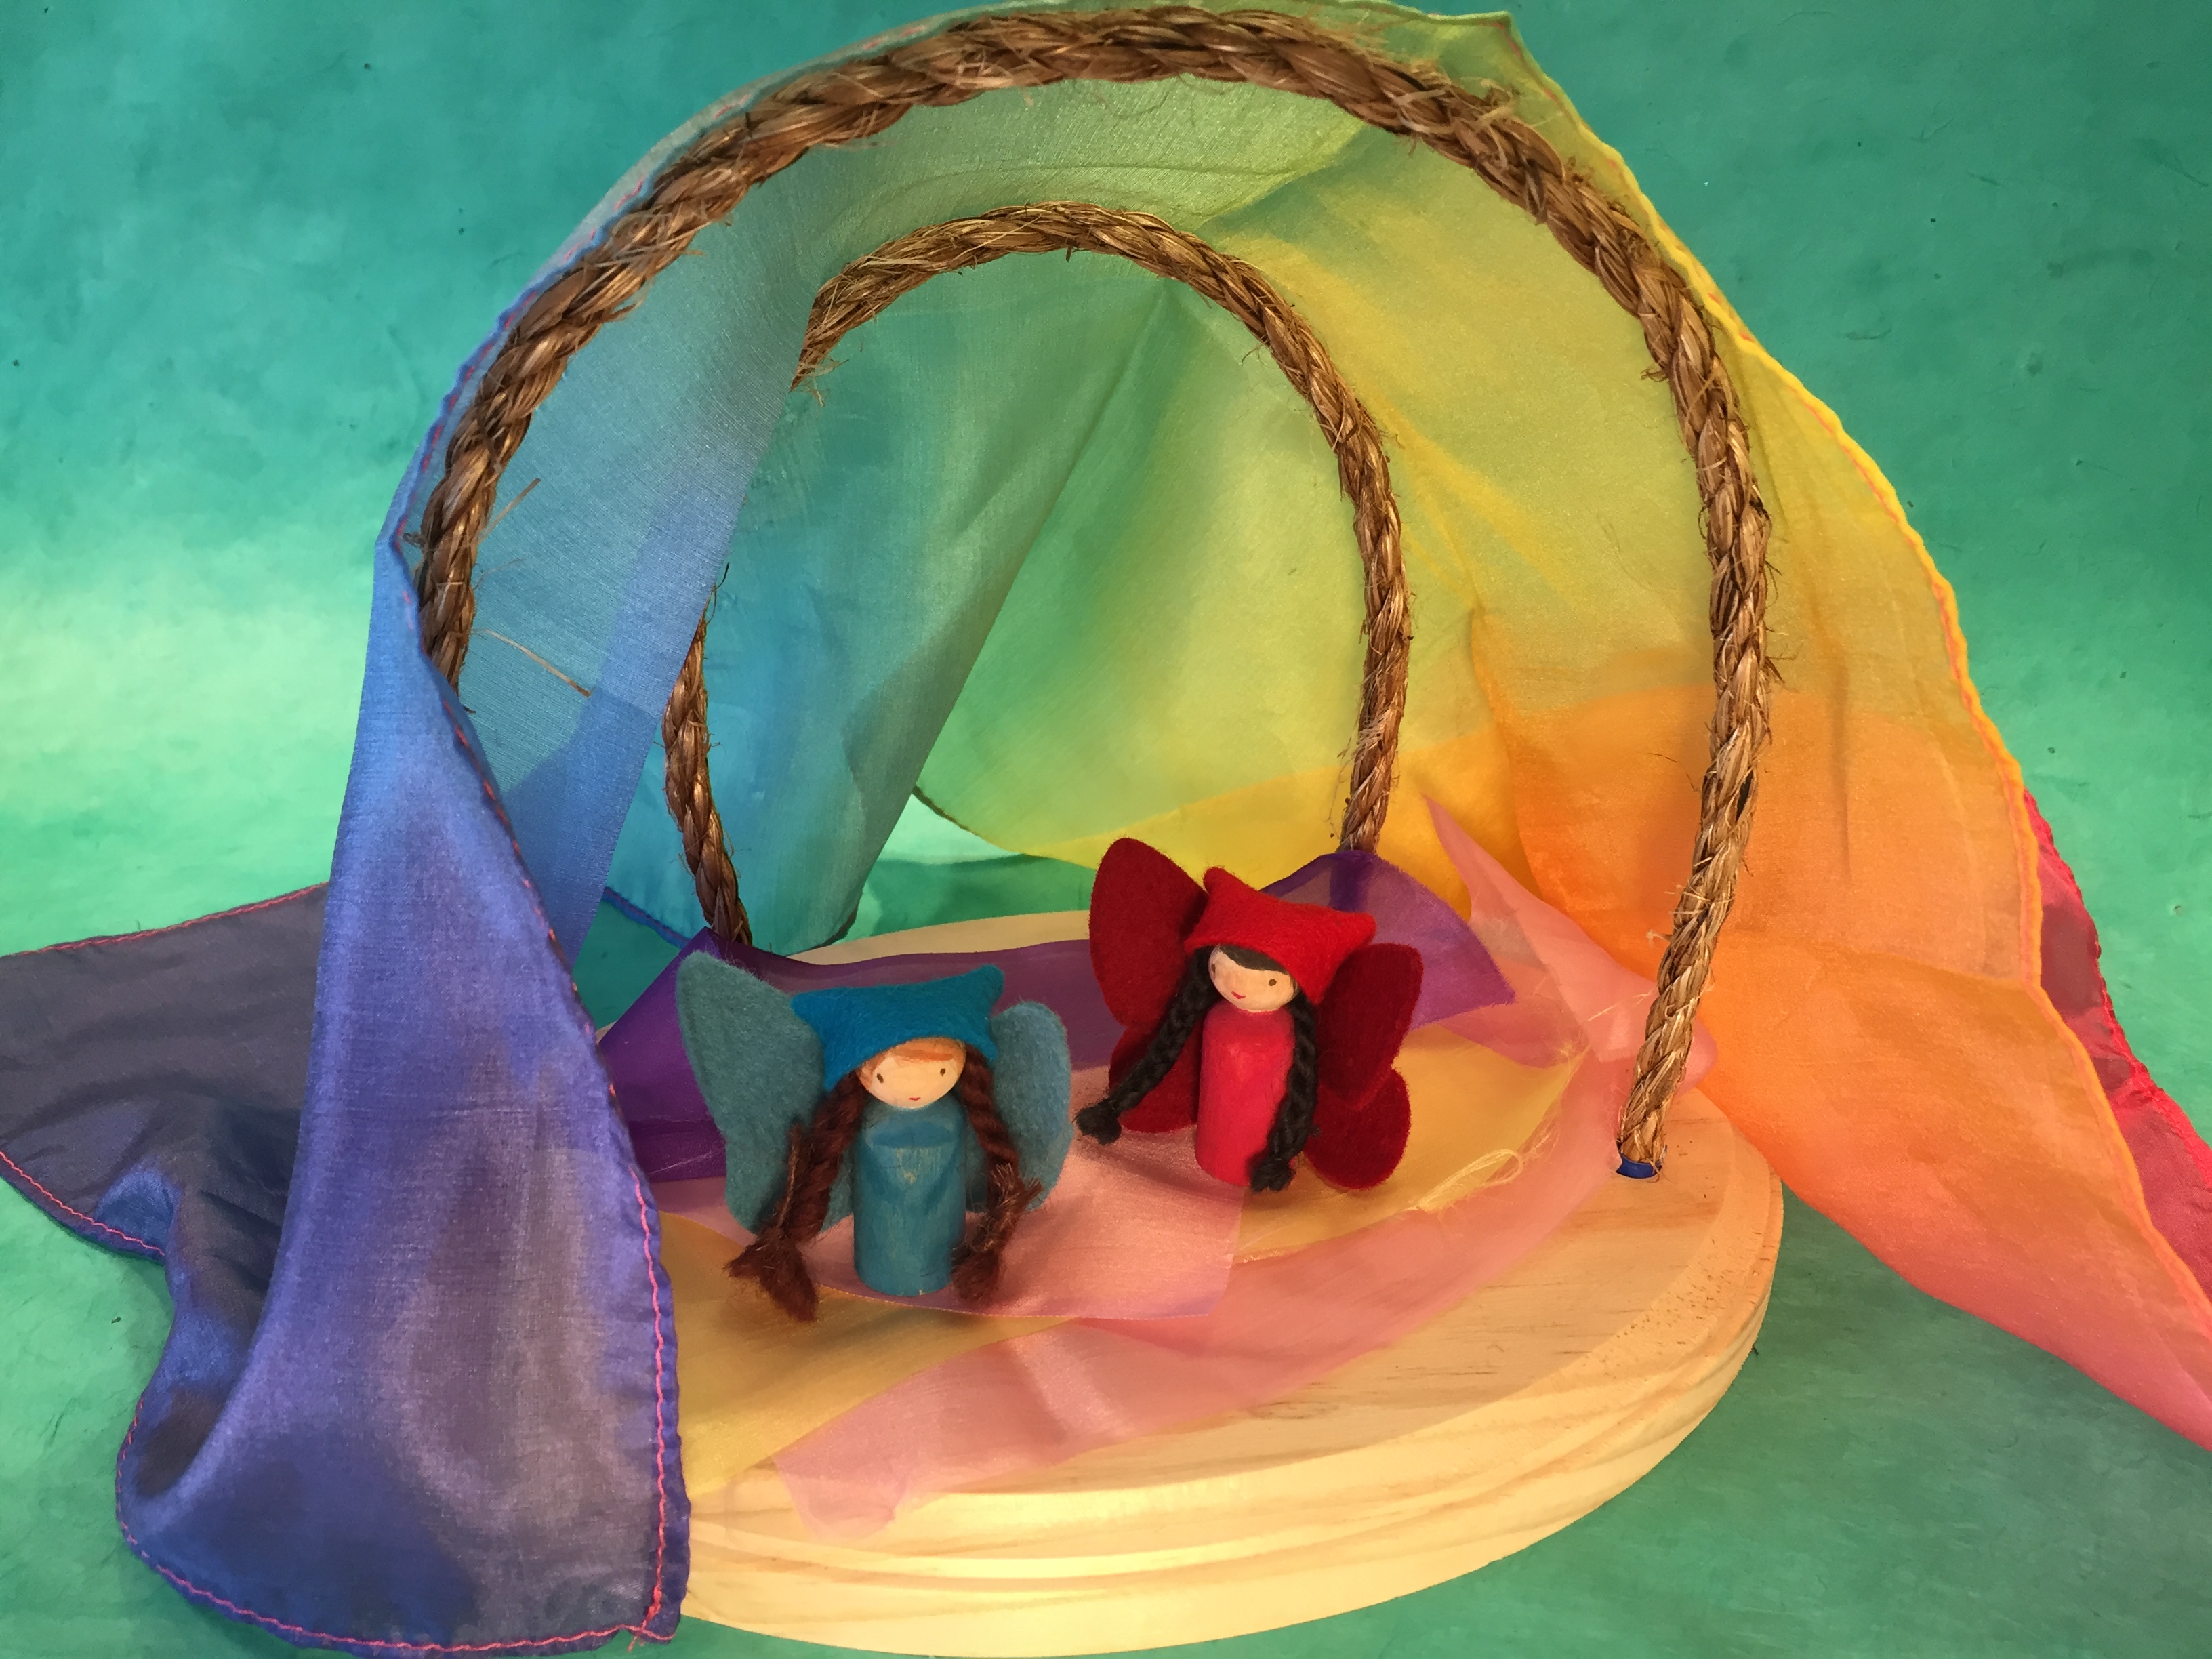
This peg doll goes with Sarah’s Silks Mini Playhouse Kit available at A Child’s Dream. She was suppose to be the boy peg doll shown in the instructions, but I decided to make her a girl doll after I felt her face looked feminine. My recent kindergarten haul shows Sarah’s Silks Mini Playhouse Kits as well as other peg dolls and the Lyra paints I used to paint her face and clothes.
You can see our first two peg dolls now, but soon you’ll be able to see more of my Waldorf inspired crafts in a very special place to be announced soon!
Don’t forget to visit me on Instagram for exclusive links to videos that have yet to be released on YouTube or for special ‘unlisted’ videos! And when you do a project inspired by one of my projects, don’t forget to tell me about it by tagging me and using the hashtag #pepperandpine and #pepperandpinemademedoit (thanks for the hashtag idea Miki!!)
How To Make A Peg Doll
Now you can get the templates for this fairy peg doll by visiting my website. The pattern and design are easy. There was a small learning curve for making them. All the supplies can be found at A Child’s Dream. Here are some supplies you might find helpful on your peg doll journey peg doll basket set. We used the small peg dolls for this project and felt from A Child’s Dream.
You can just paint the peg dolls, you don’t have to add felt, but if you want to, you can download the pattern for the fairy peg doll here.
Peg Doll | Tutorial
This is my first peg doll, and I wondered if I should share it because I don’t think it turned out all that great. But, I’ll keep practicing until I can do them quickly and easily because I know my daughter is eagerly waiting for them!
This peg doll goes with Sarah’s Silks Mini Playhouse Kit available at A Child’s Dream. My recent kindergarten haul shows these kits as well as other peg dolls and the Lyra paints we are using.
You can see our first two peg dolls now, but soon you’ll be able to see more of my Waldorf inspired crafts in a very special place to be announced soon! You can download the pattern for the fairy peg doll here.
Don’t forget to visit me on Instagram for exclusive links to videos that have yet to be released on YouTube or for special ‘unlisted’ videos! And when you do a project inspired by one of my projects, don’t forget to tell me about it by tagging me and using the hashtag #pepperandpine and #pepperandpinemademedoit (thanks for the hashtag idea Miki!!)