Are you looking for a small unit study on owls? I’ve got you covered! I know my unit studies tend to be long, involved and contain a lot of books, but this one is small, with a few beautiful books, a couple projects and a game to start off the lessons. I didn’t create a lesson plan for this unit, rather, I did more of a unit study ‘to do’ list. But first, let me show you how I purchased materials for this unit as well as other units in my homeschool haul video. These videos show you the materials I purchase for our homeschool as well as the materials that will become our unit studies and main lesson blocks.
When putting together unit studies, I generally start with a topic, in this case, owls. Next, I go to one (or several) of my favorite homeschool vendors and begin to build our unit by seeing what materials are available. One of my long standing favorite vendors is Rainbow Resource. I love that their material is carefully selected for the homeschooling family. I generally just search for the topic I’m creating the unit study for. In this case: Owls. I simply type that in. I don’t sort for type of material or grade level. I look at everything! I don’t create units according to grade level. Our units work for all grade levels KG-8th grade and in some cases even 9th or 10th grade. I also like sourcing science material from Acorn Naturalists and Nature Watch. Both vendors cater to out-of-the-box learning and homeschoolers. I love their selection as well and honestly get more excited about these units than my children! Lastly, I check Barnes and Noble and Amazon for books. And lately, I’ve been purchasing a lot of material from Amazon even though it’s not my first choice.
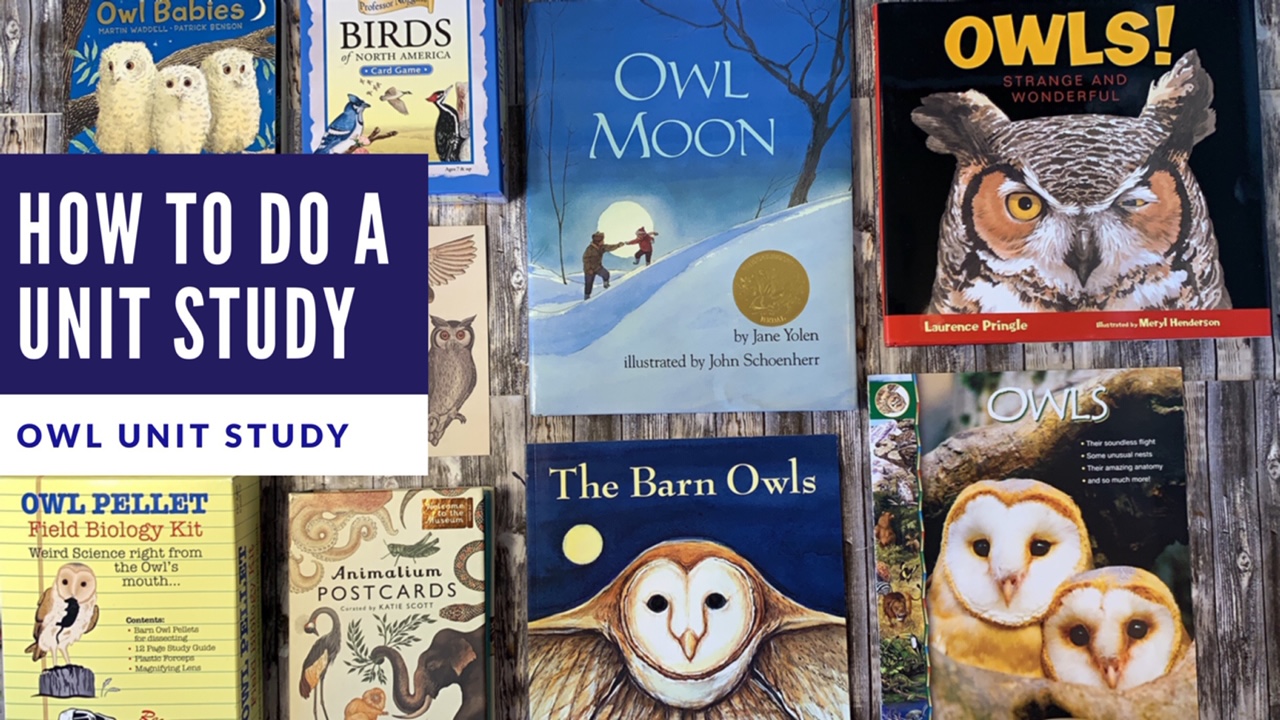
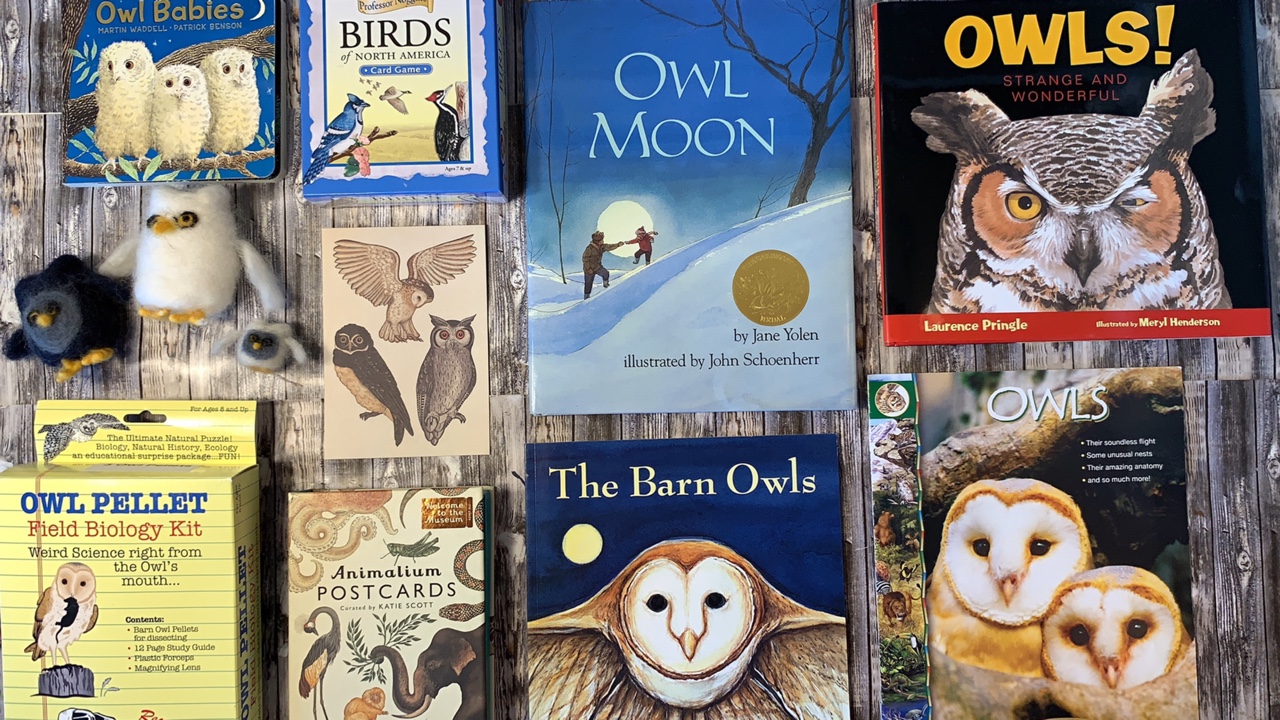
Here's what we bought for this unit:
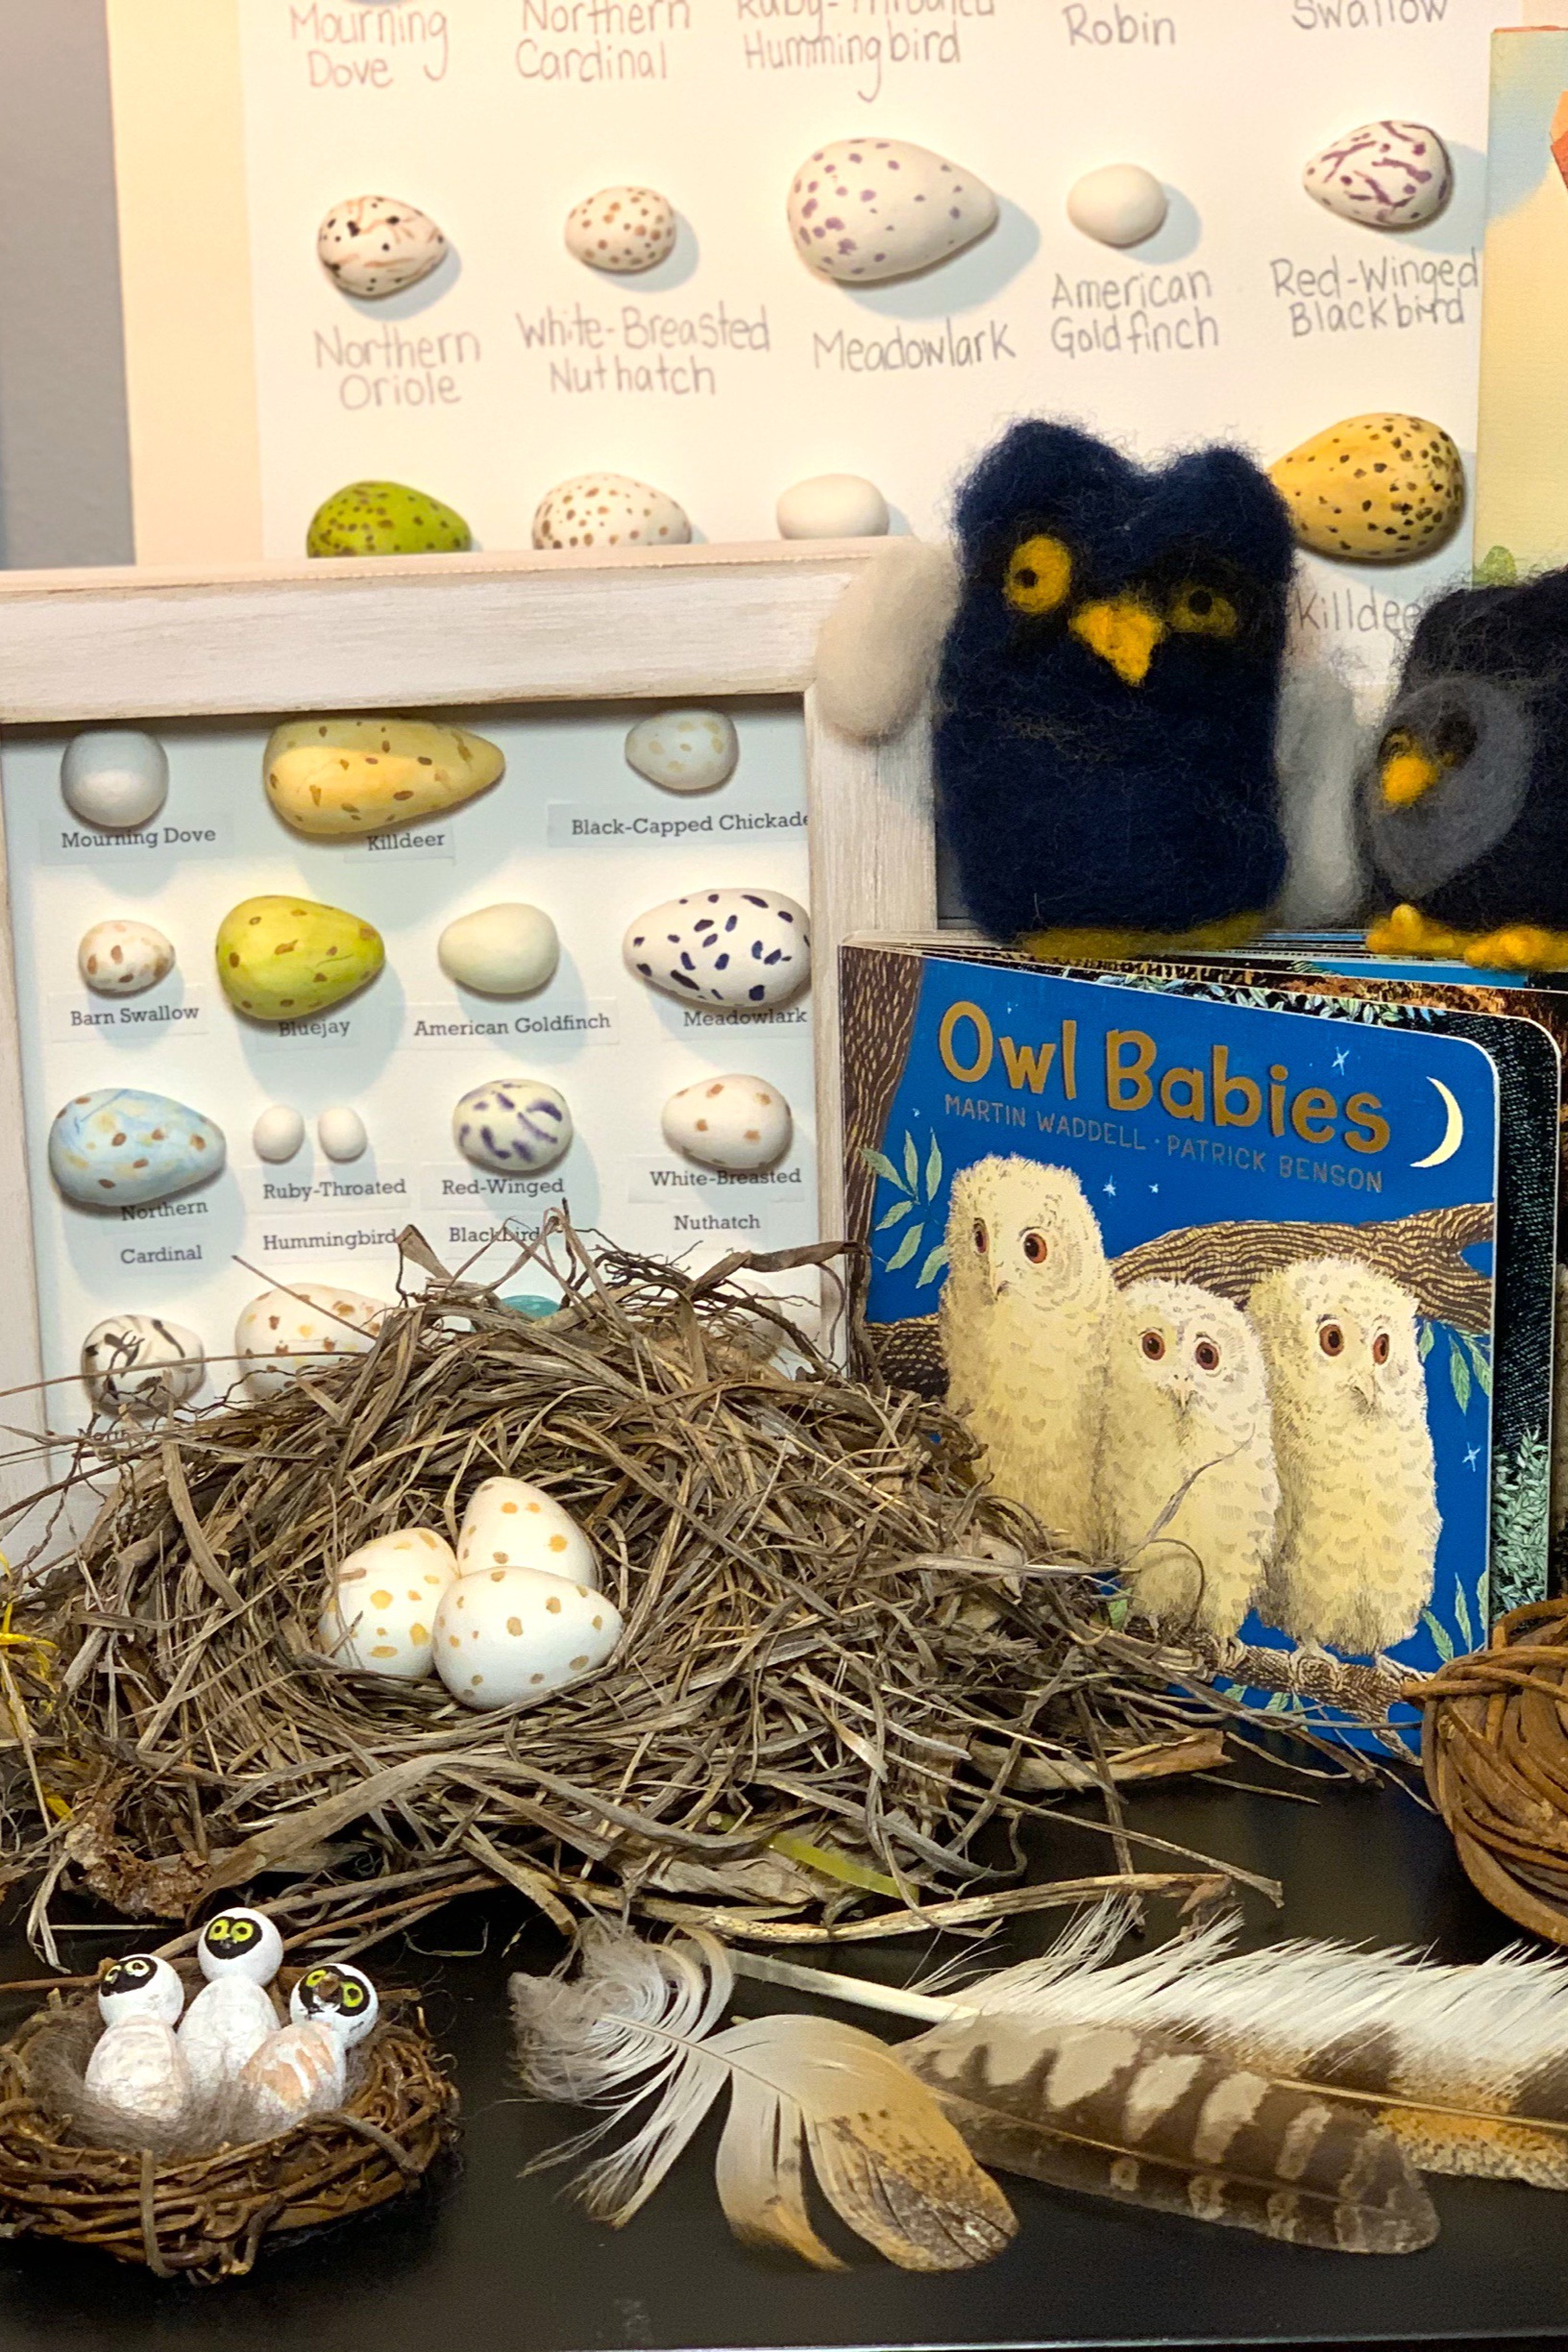
Owl Babies by Martin Waddell
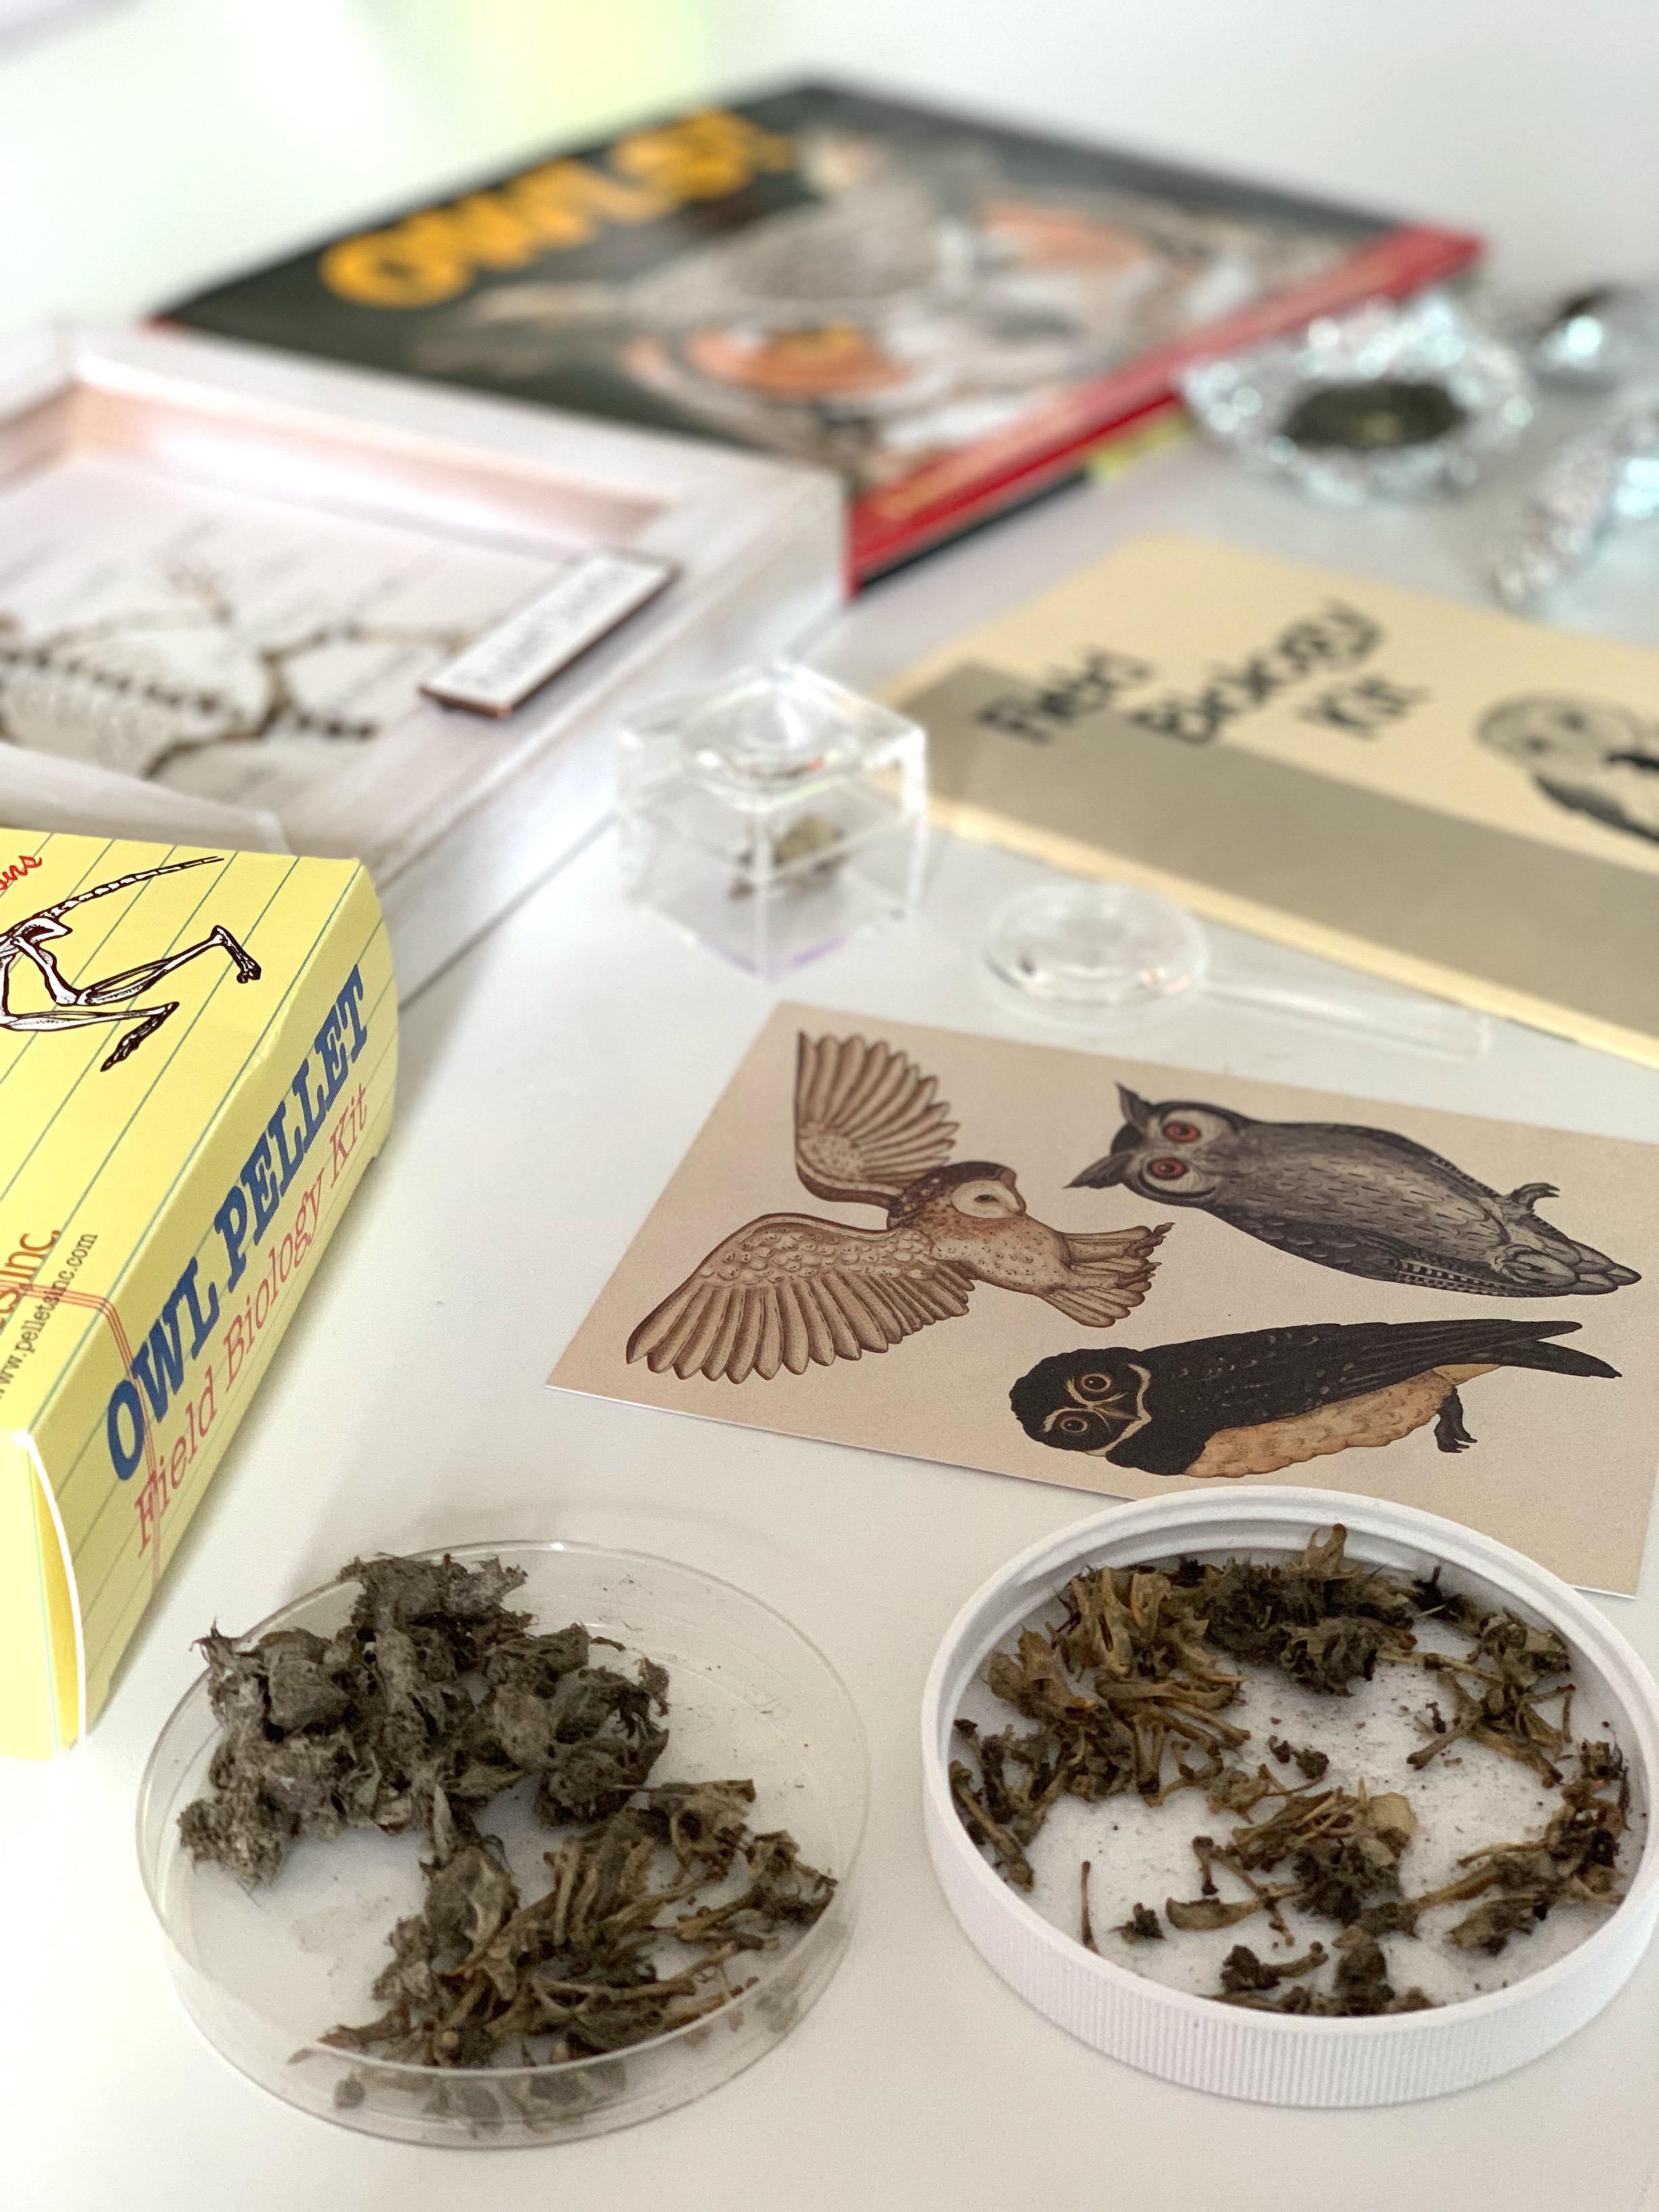
Owl Pellets Field Biology Kit
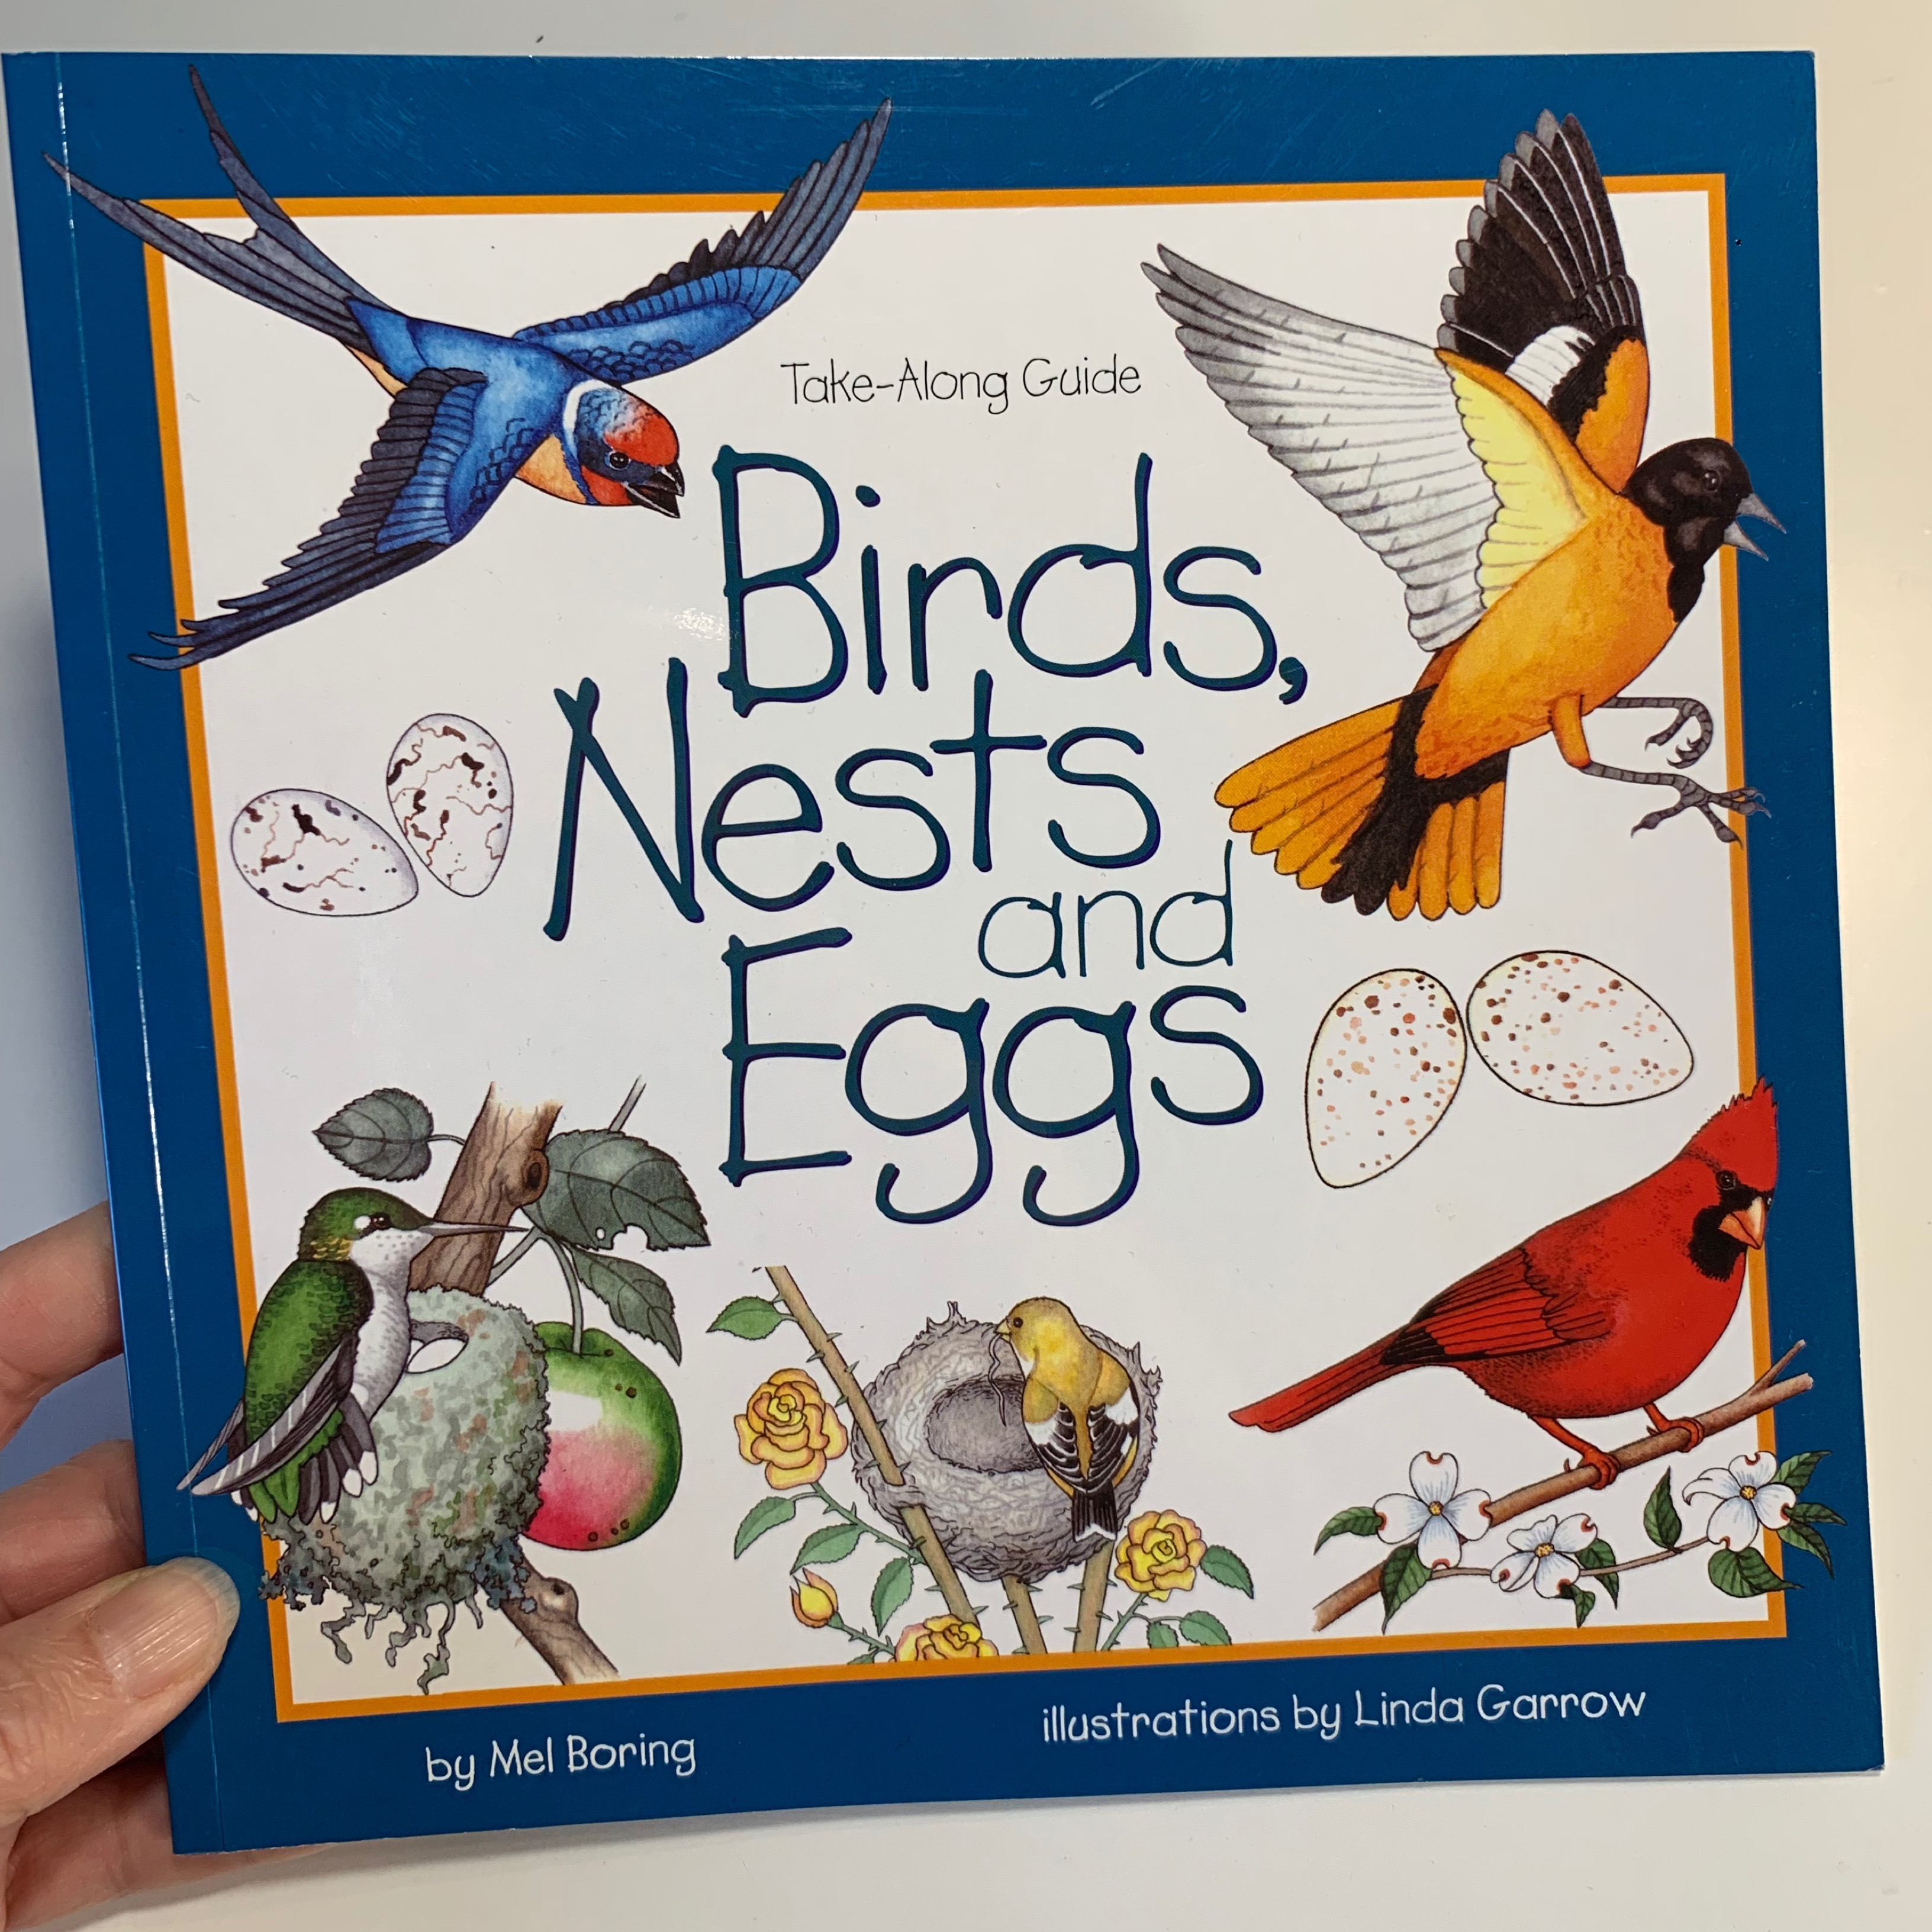
Birds of North America by Professor Noggin's
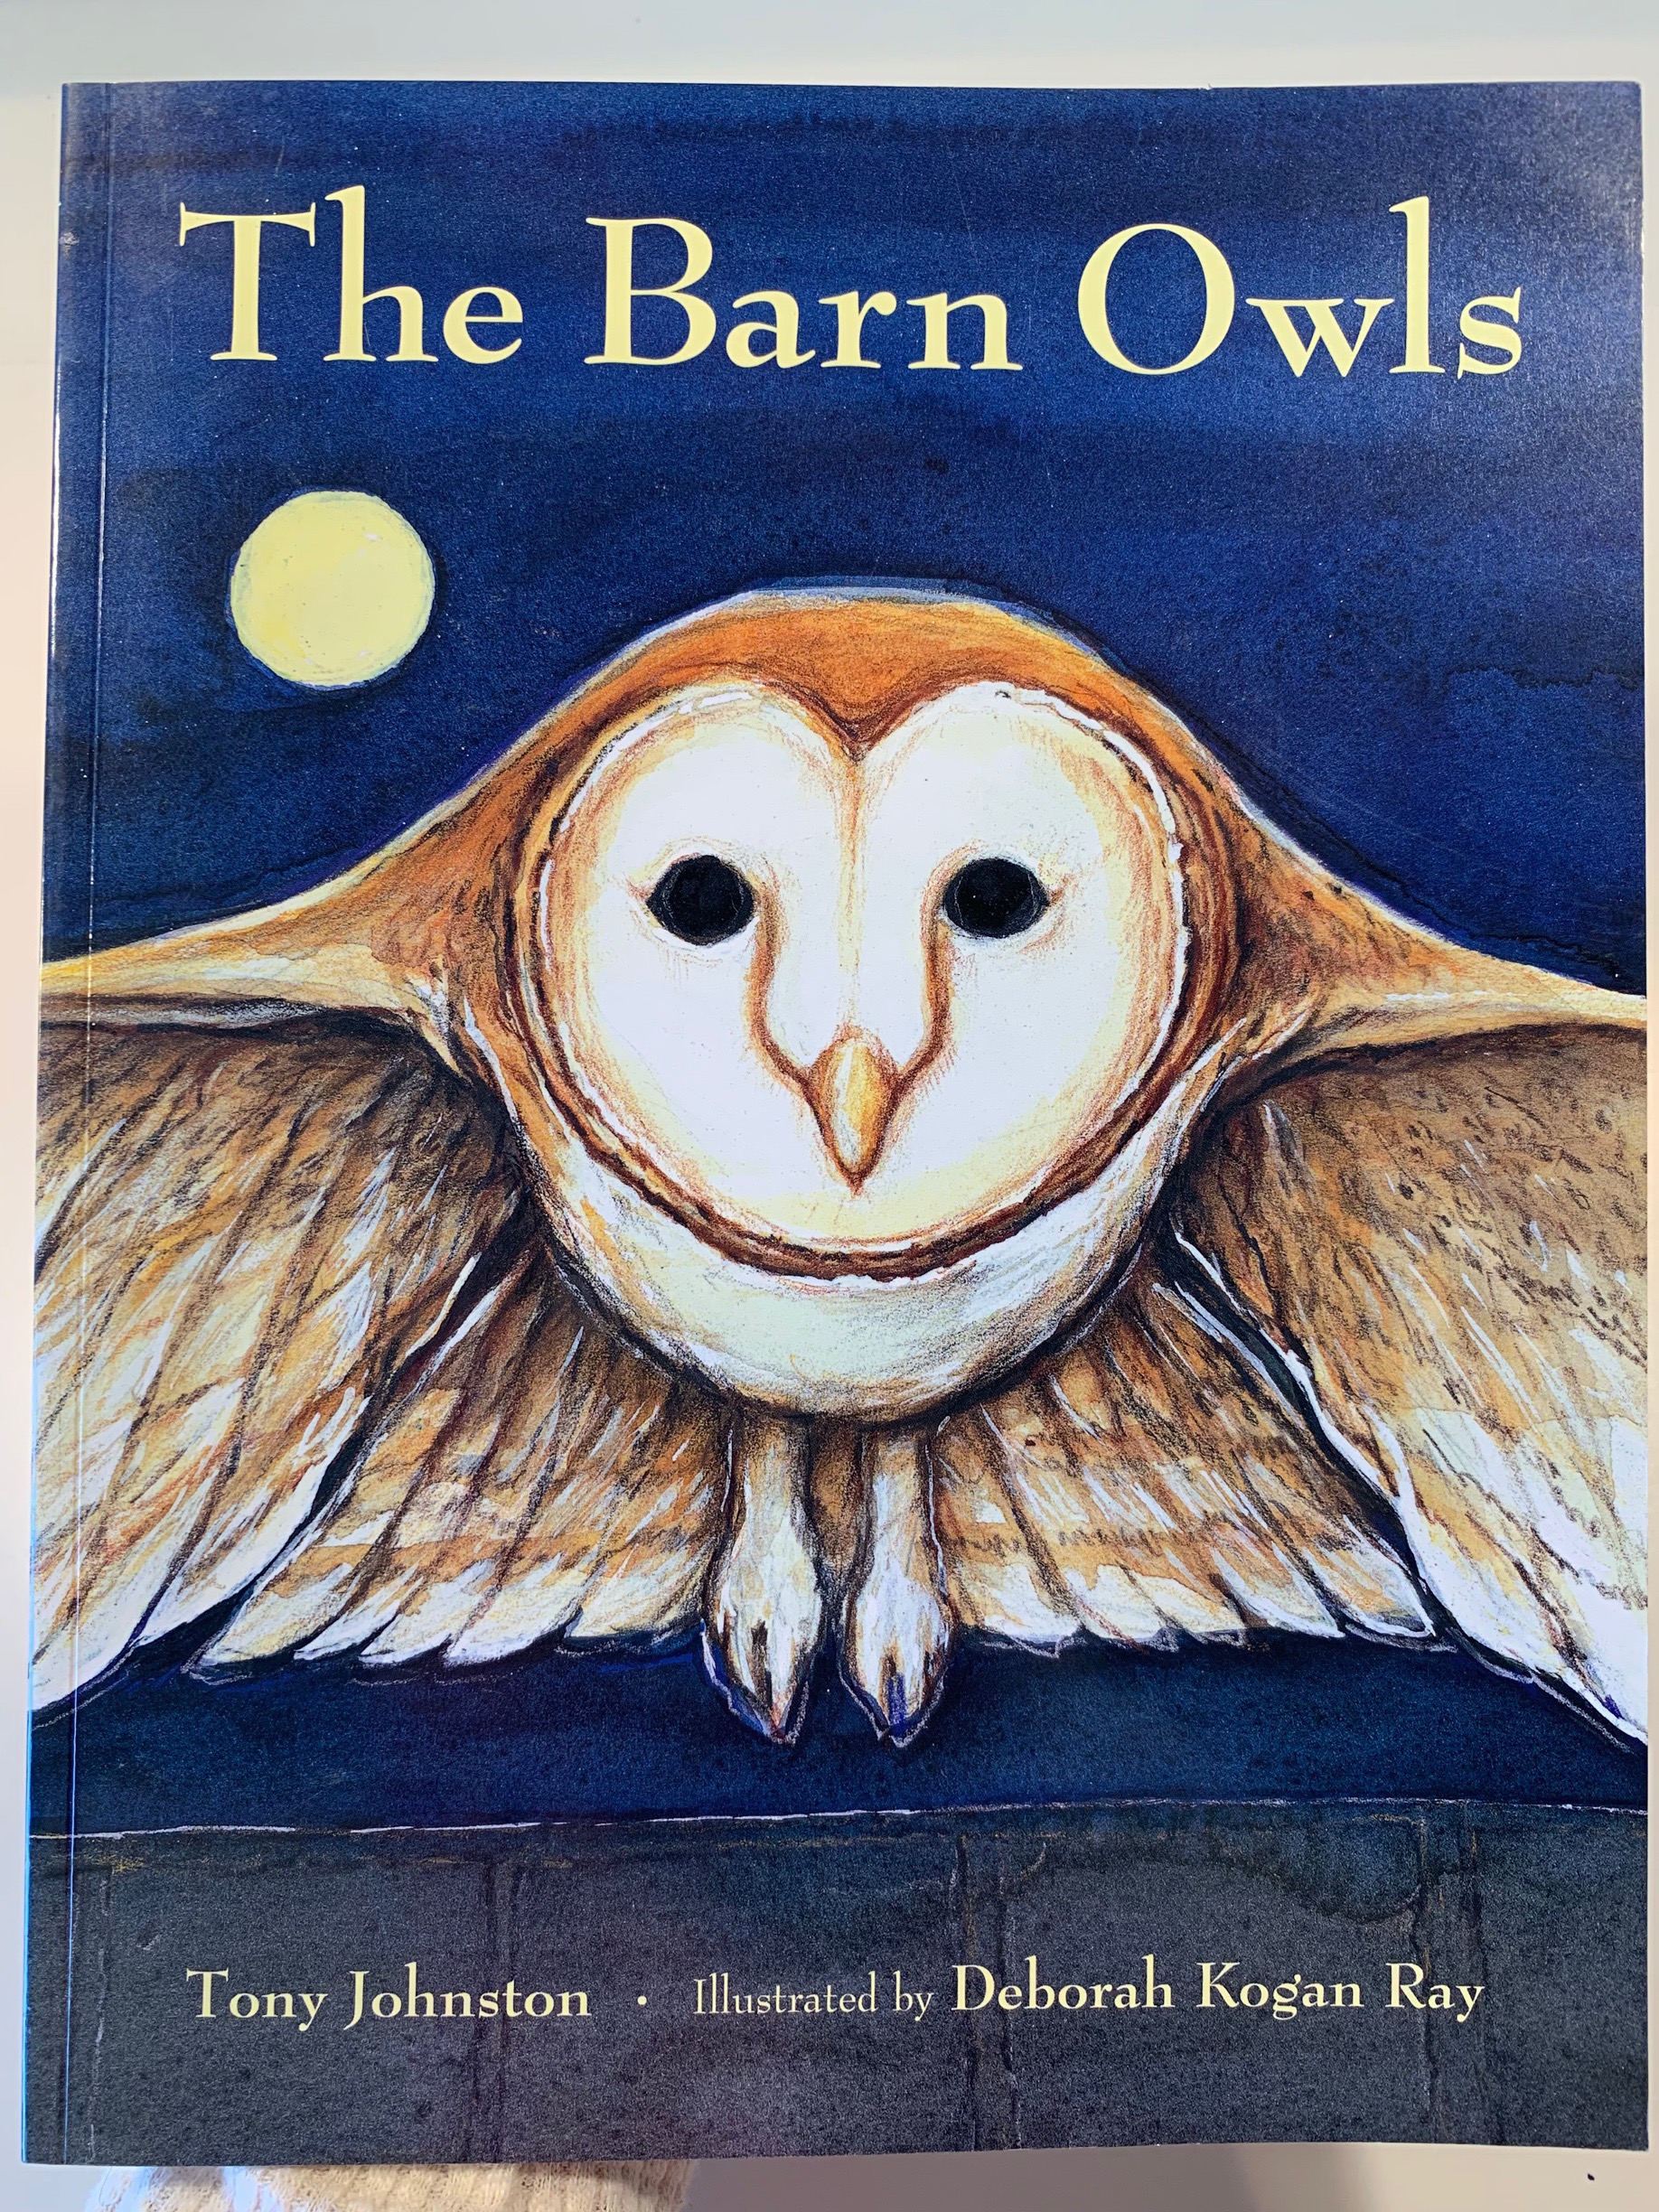
The Barn Owls by Tony Johnston
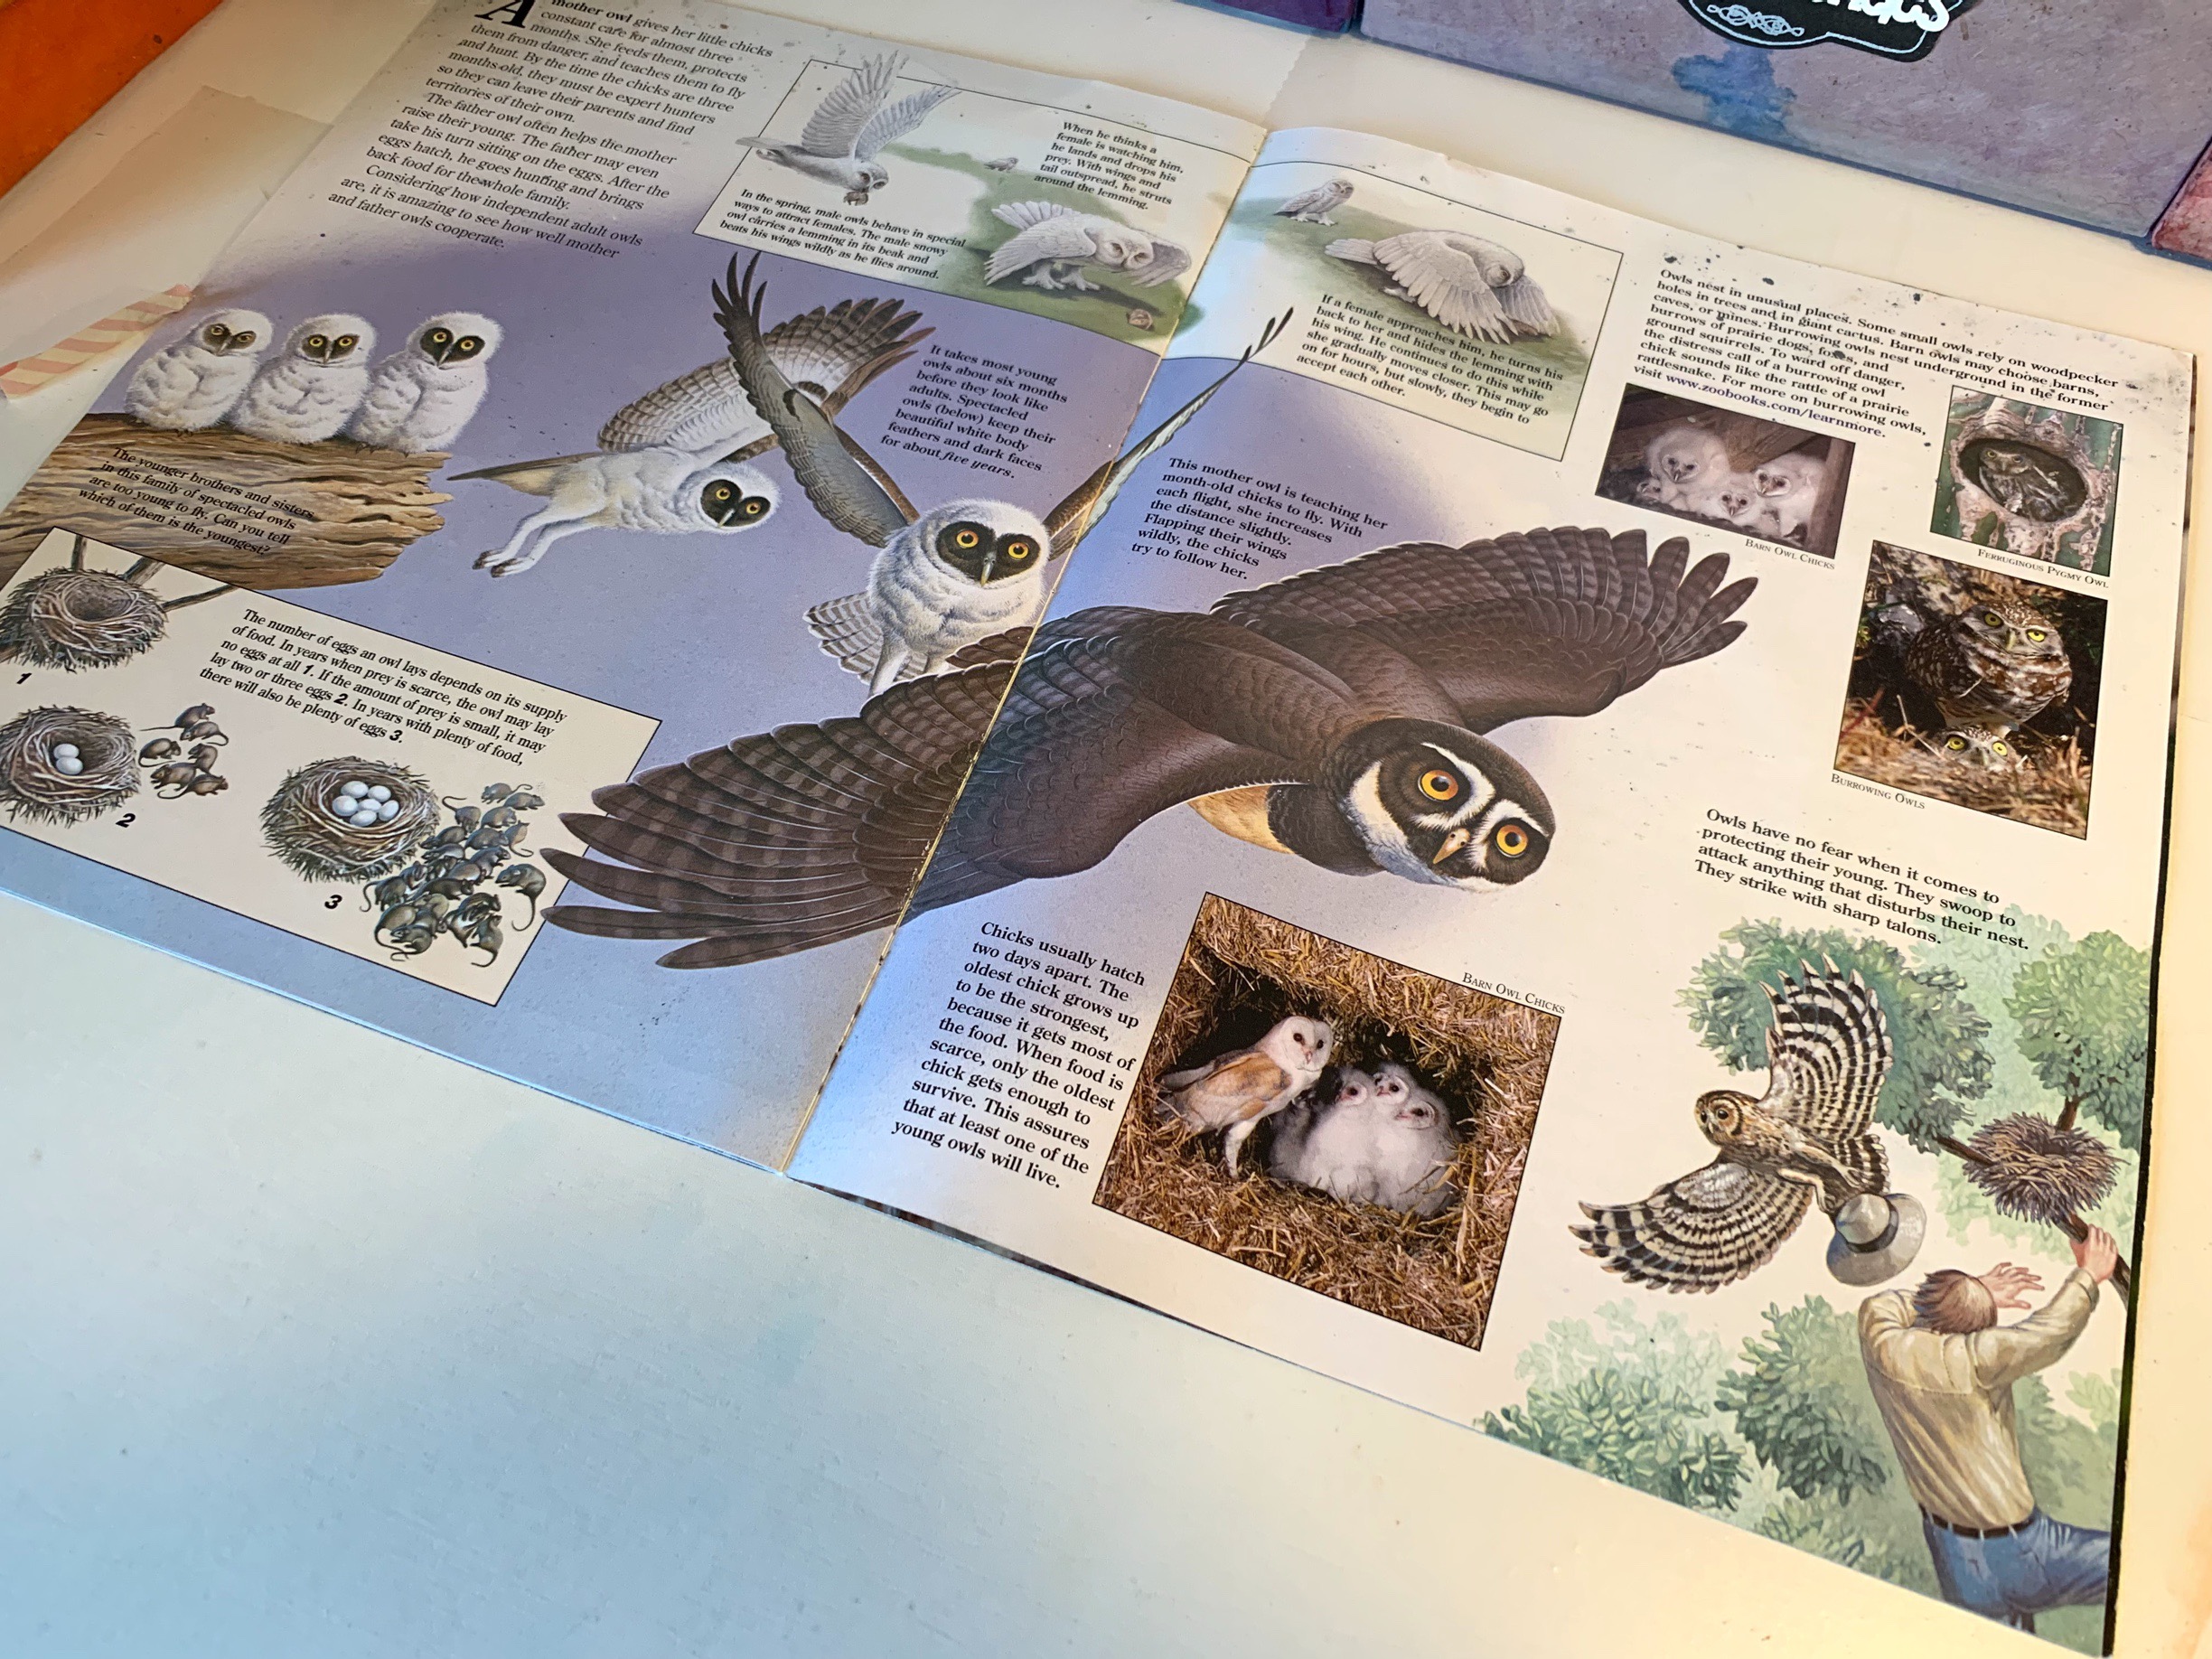
Owls by Zoobooks
Owls Strange and Wonderful by Laurence Pringle
Owl Moon by Jane Yolen
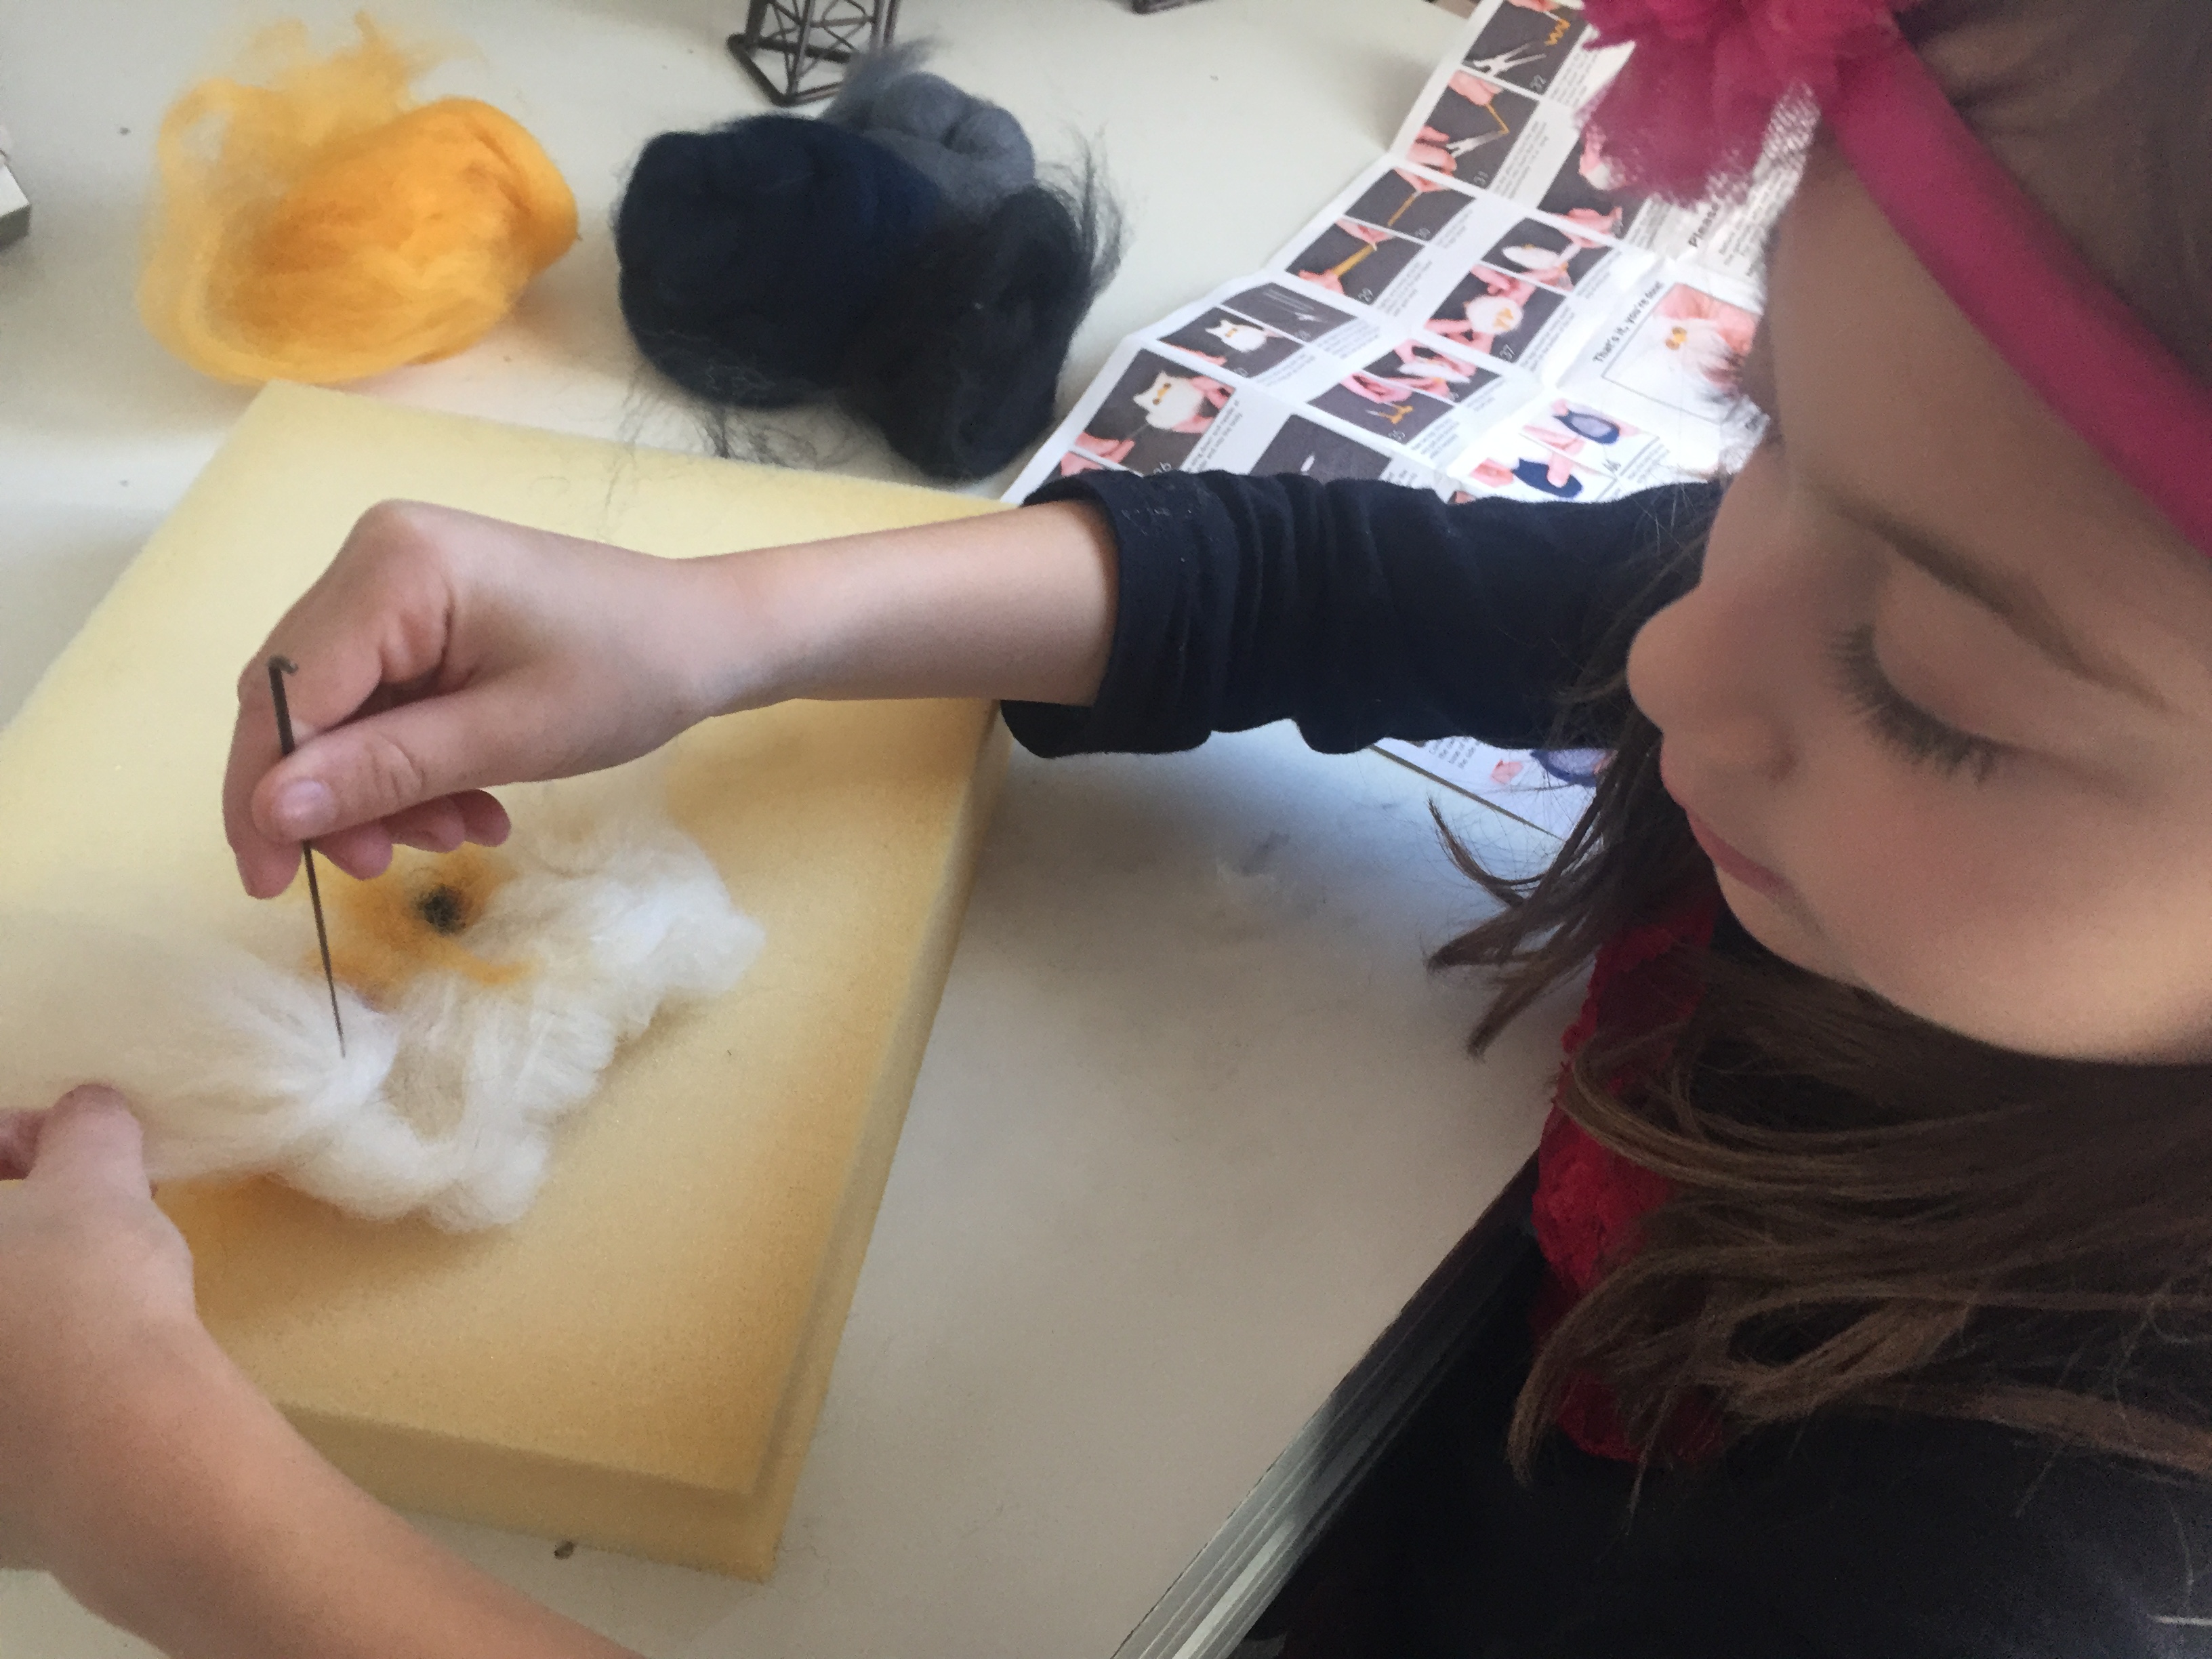
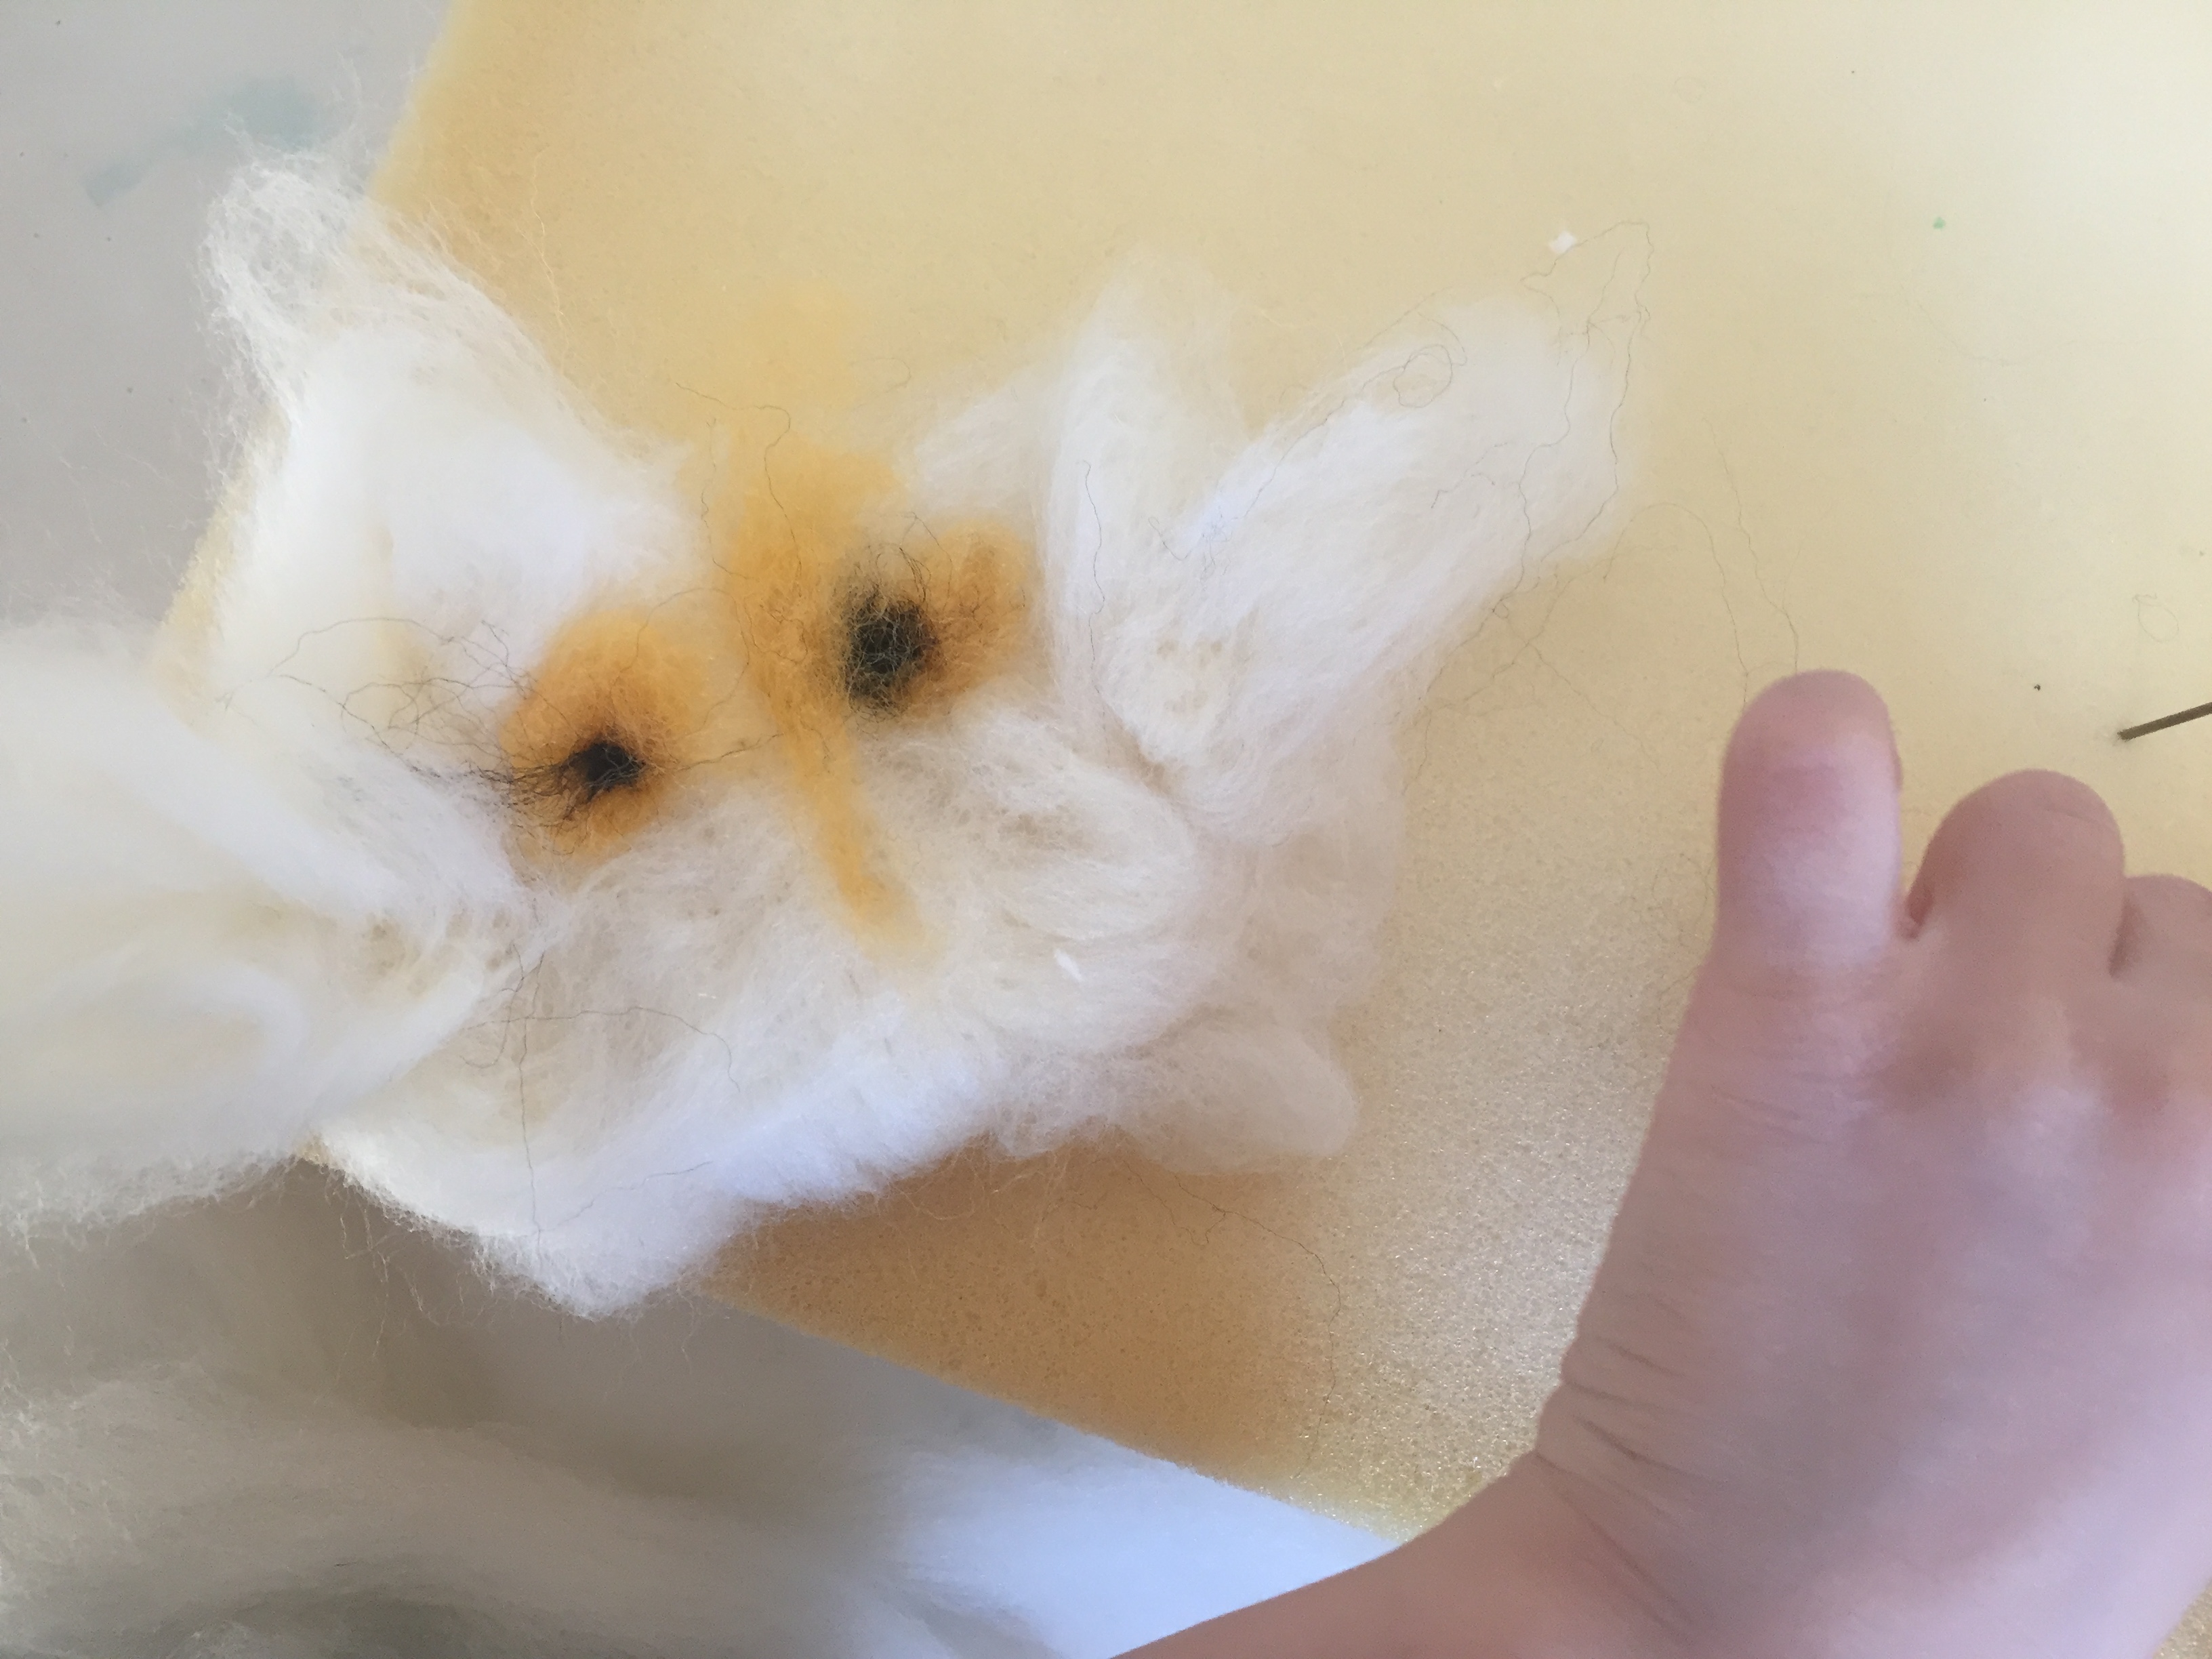
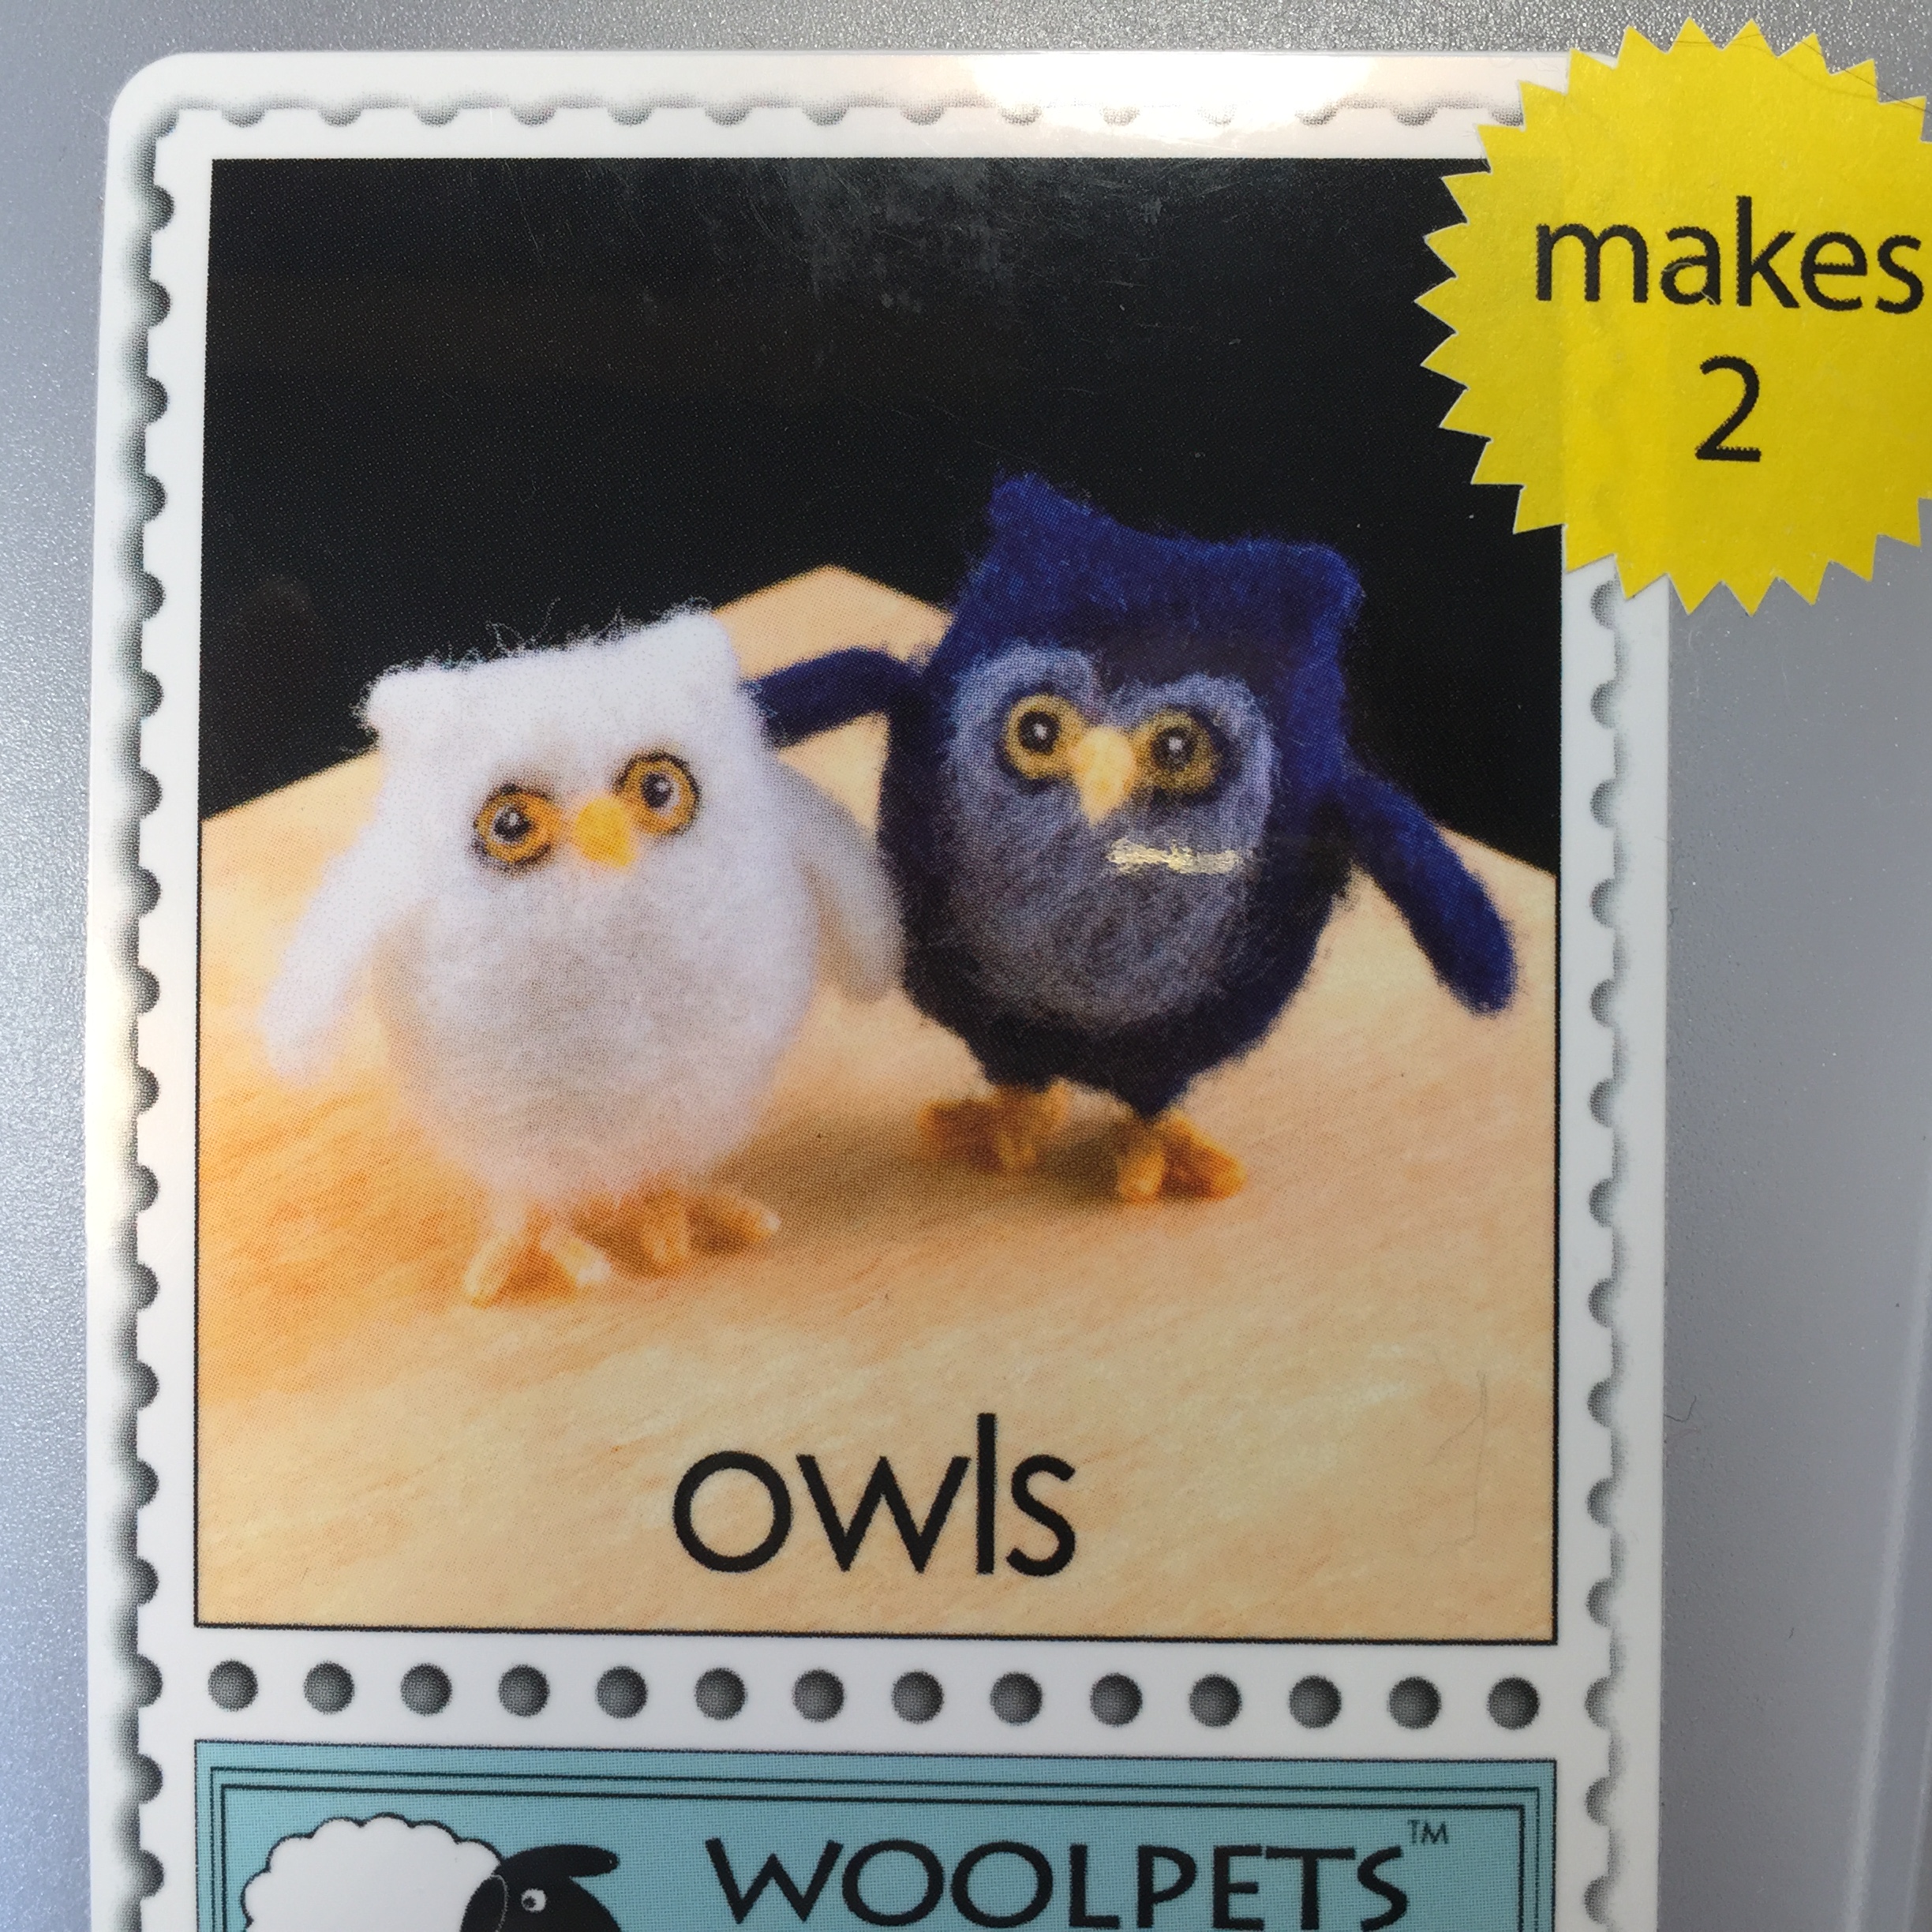
Owl Felting Kit by WoolPets
Animalium (optional)
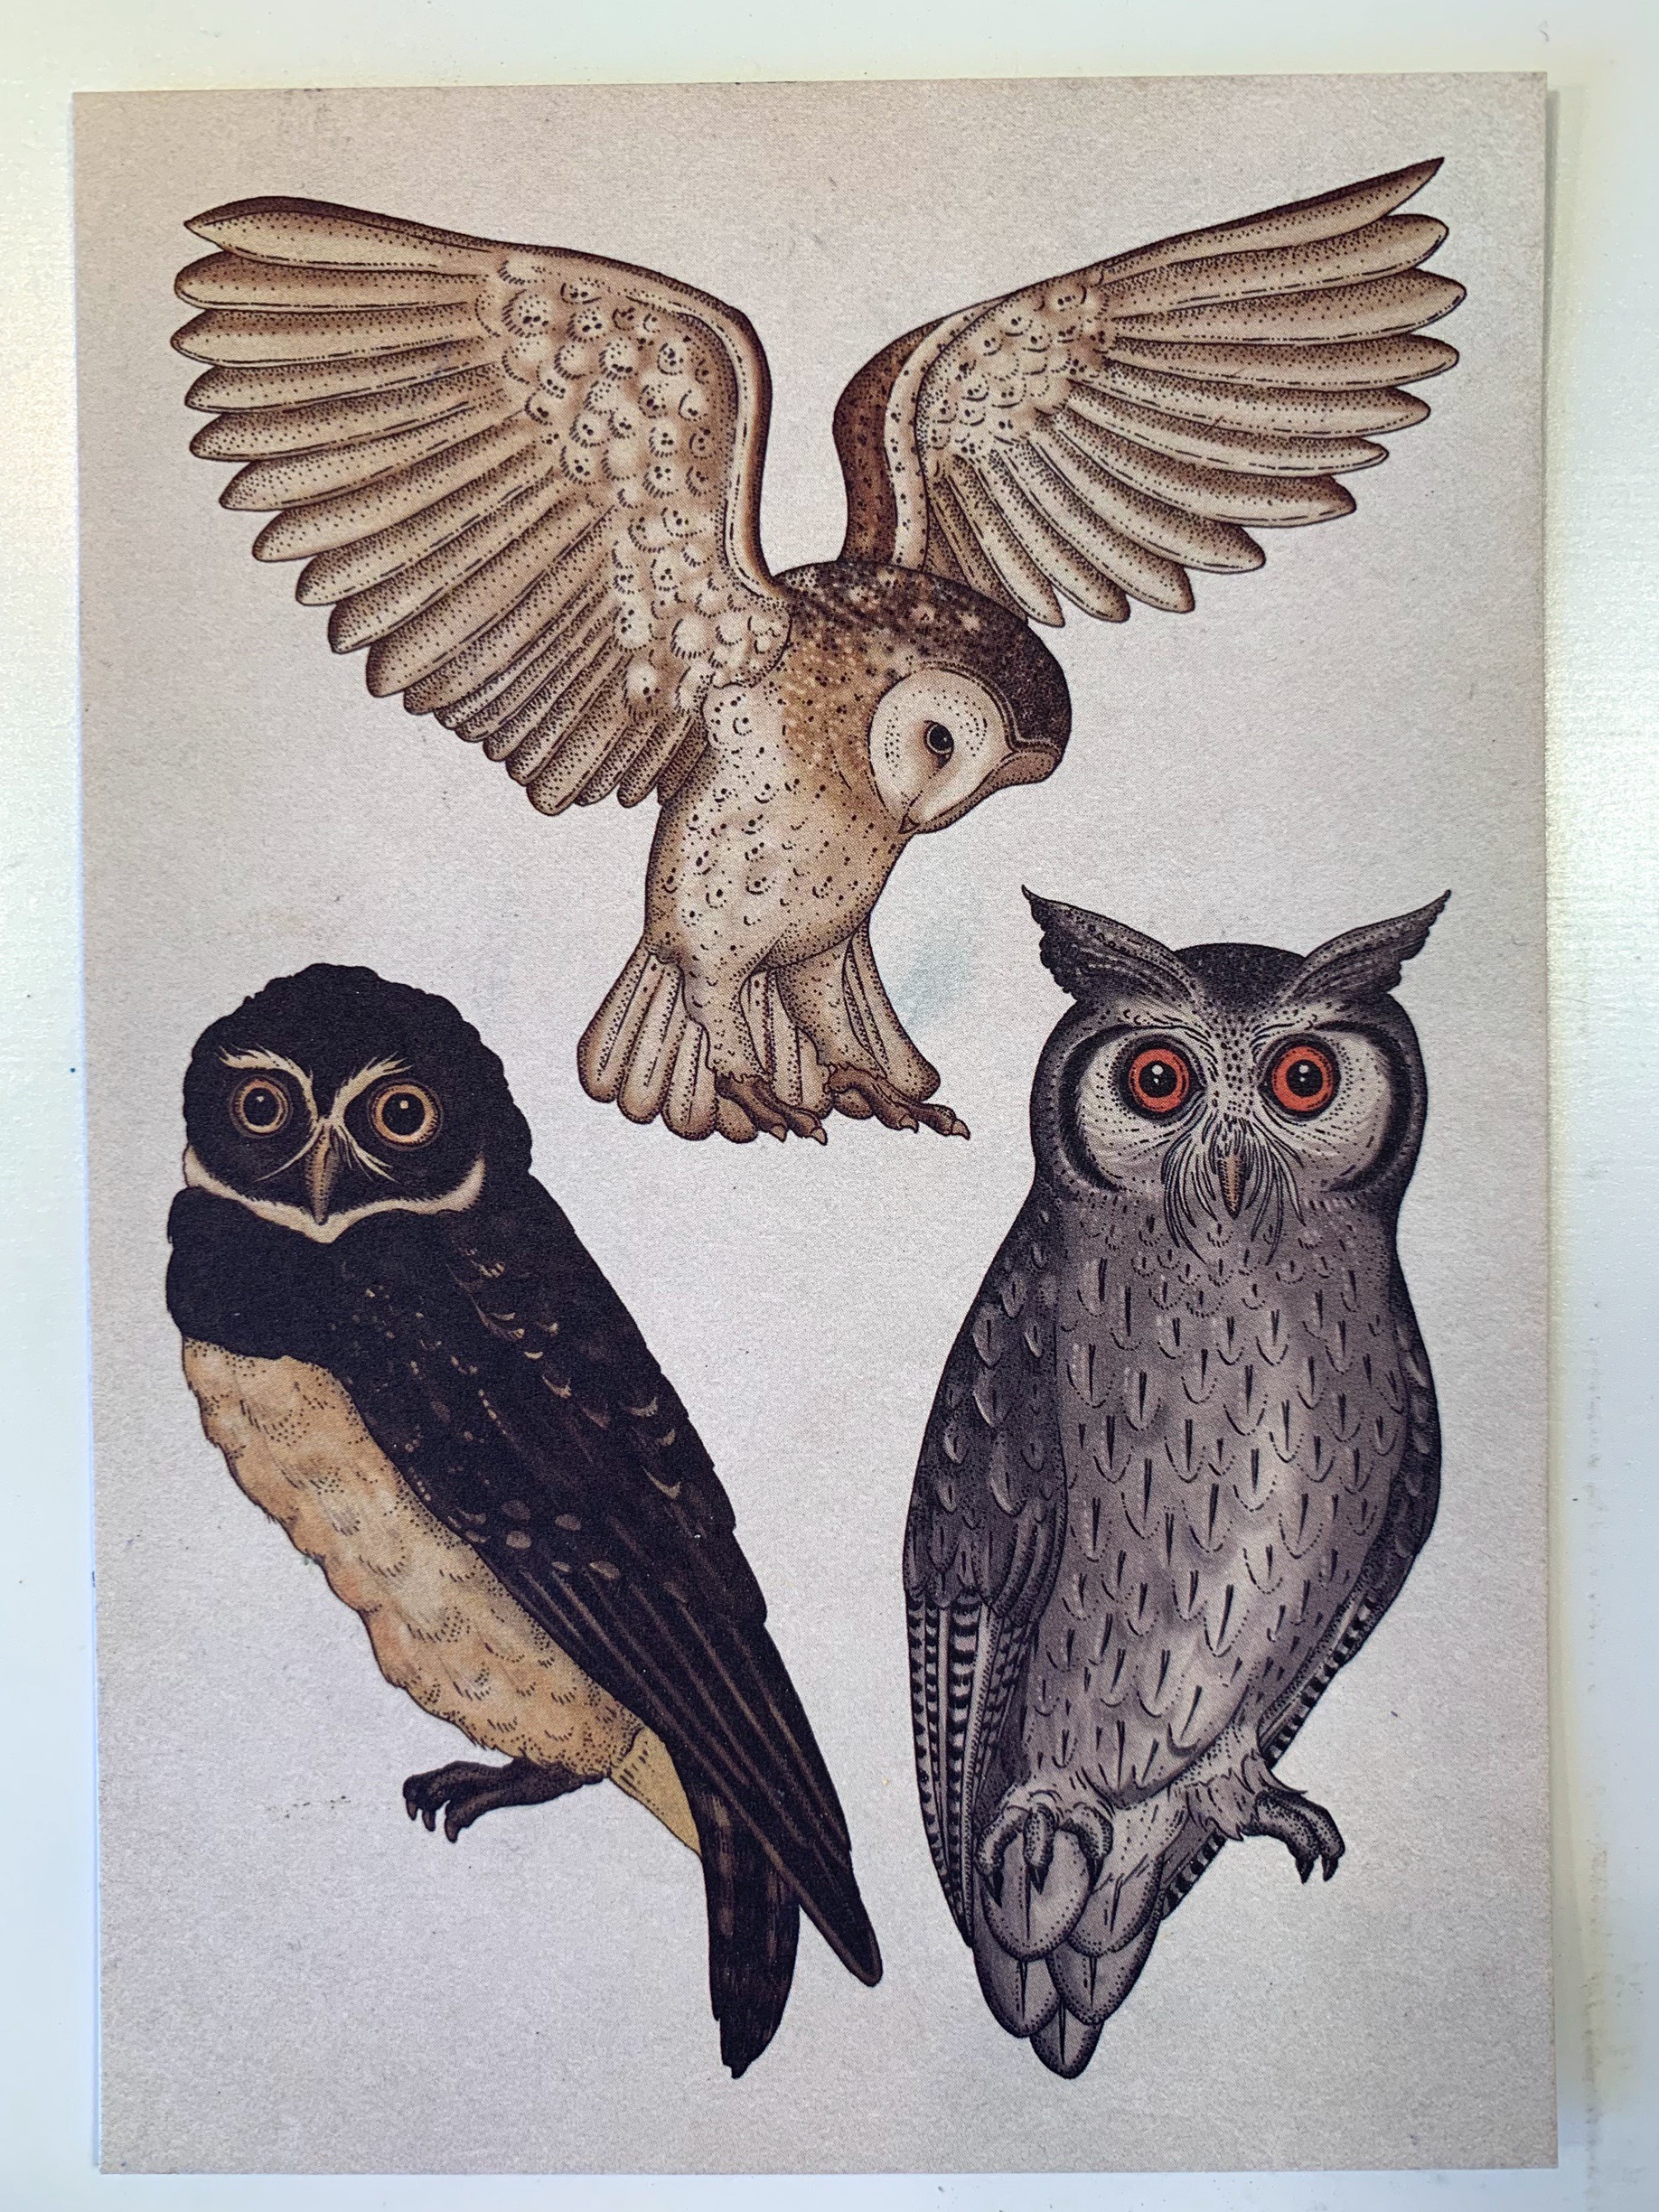
Animalium Postcards (optional)


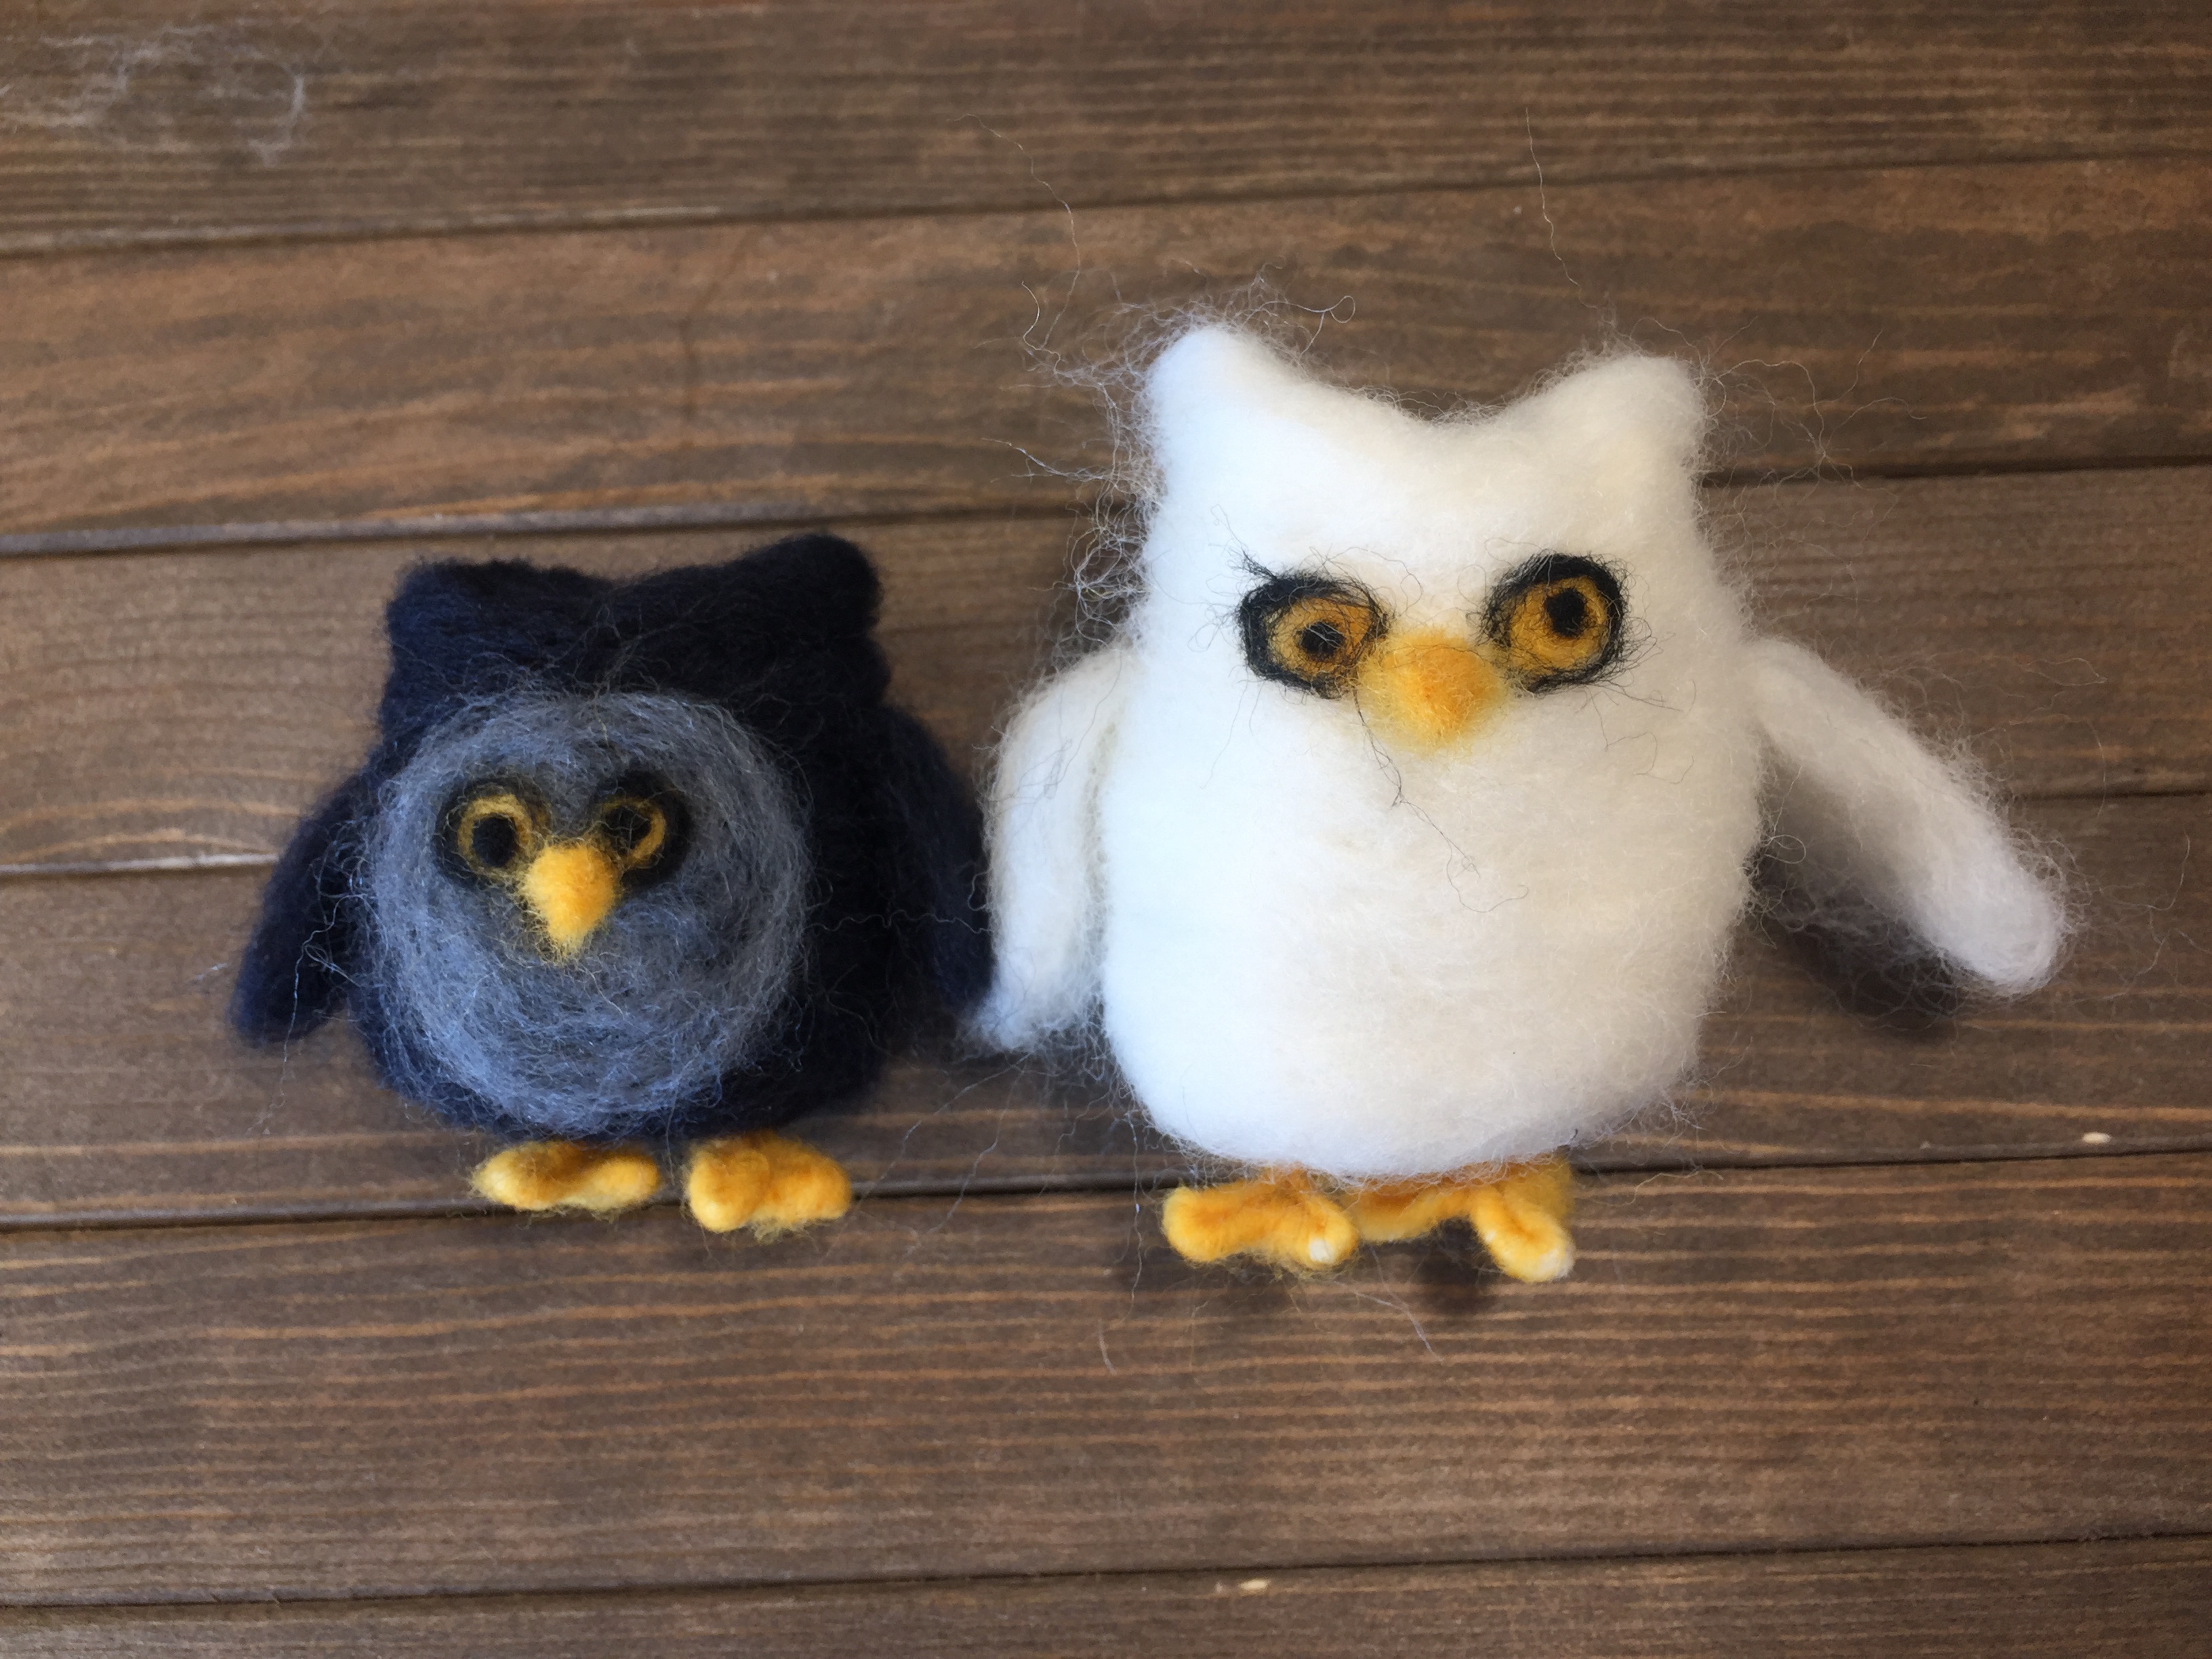
We also made felted owls as a handwork project a couple years before this unit. I think it’s the perfect handwork project to coordinate with this unit study. You can see the tutorial on how we made these adorable wool felted owls. Please note that very sharp needles are used for wool felting and this project is not suitable for young children. Please supervise your child if you wish to do this project.


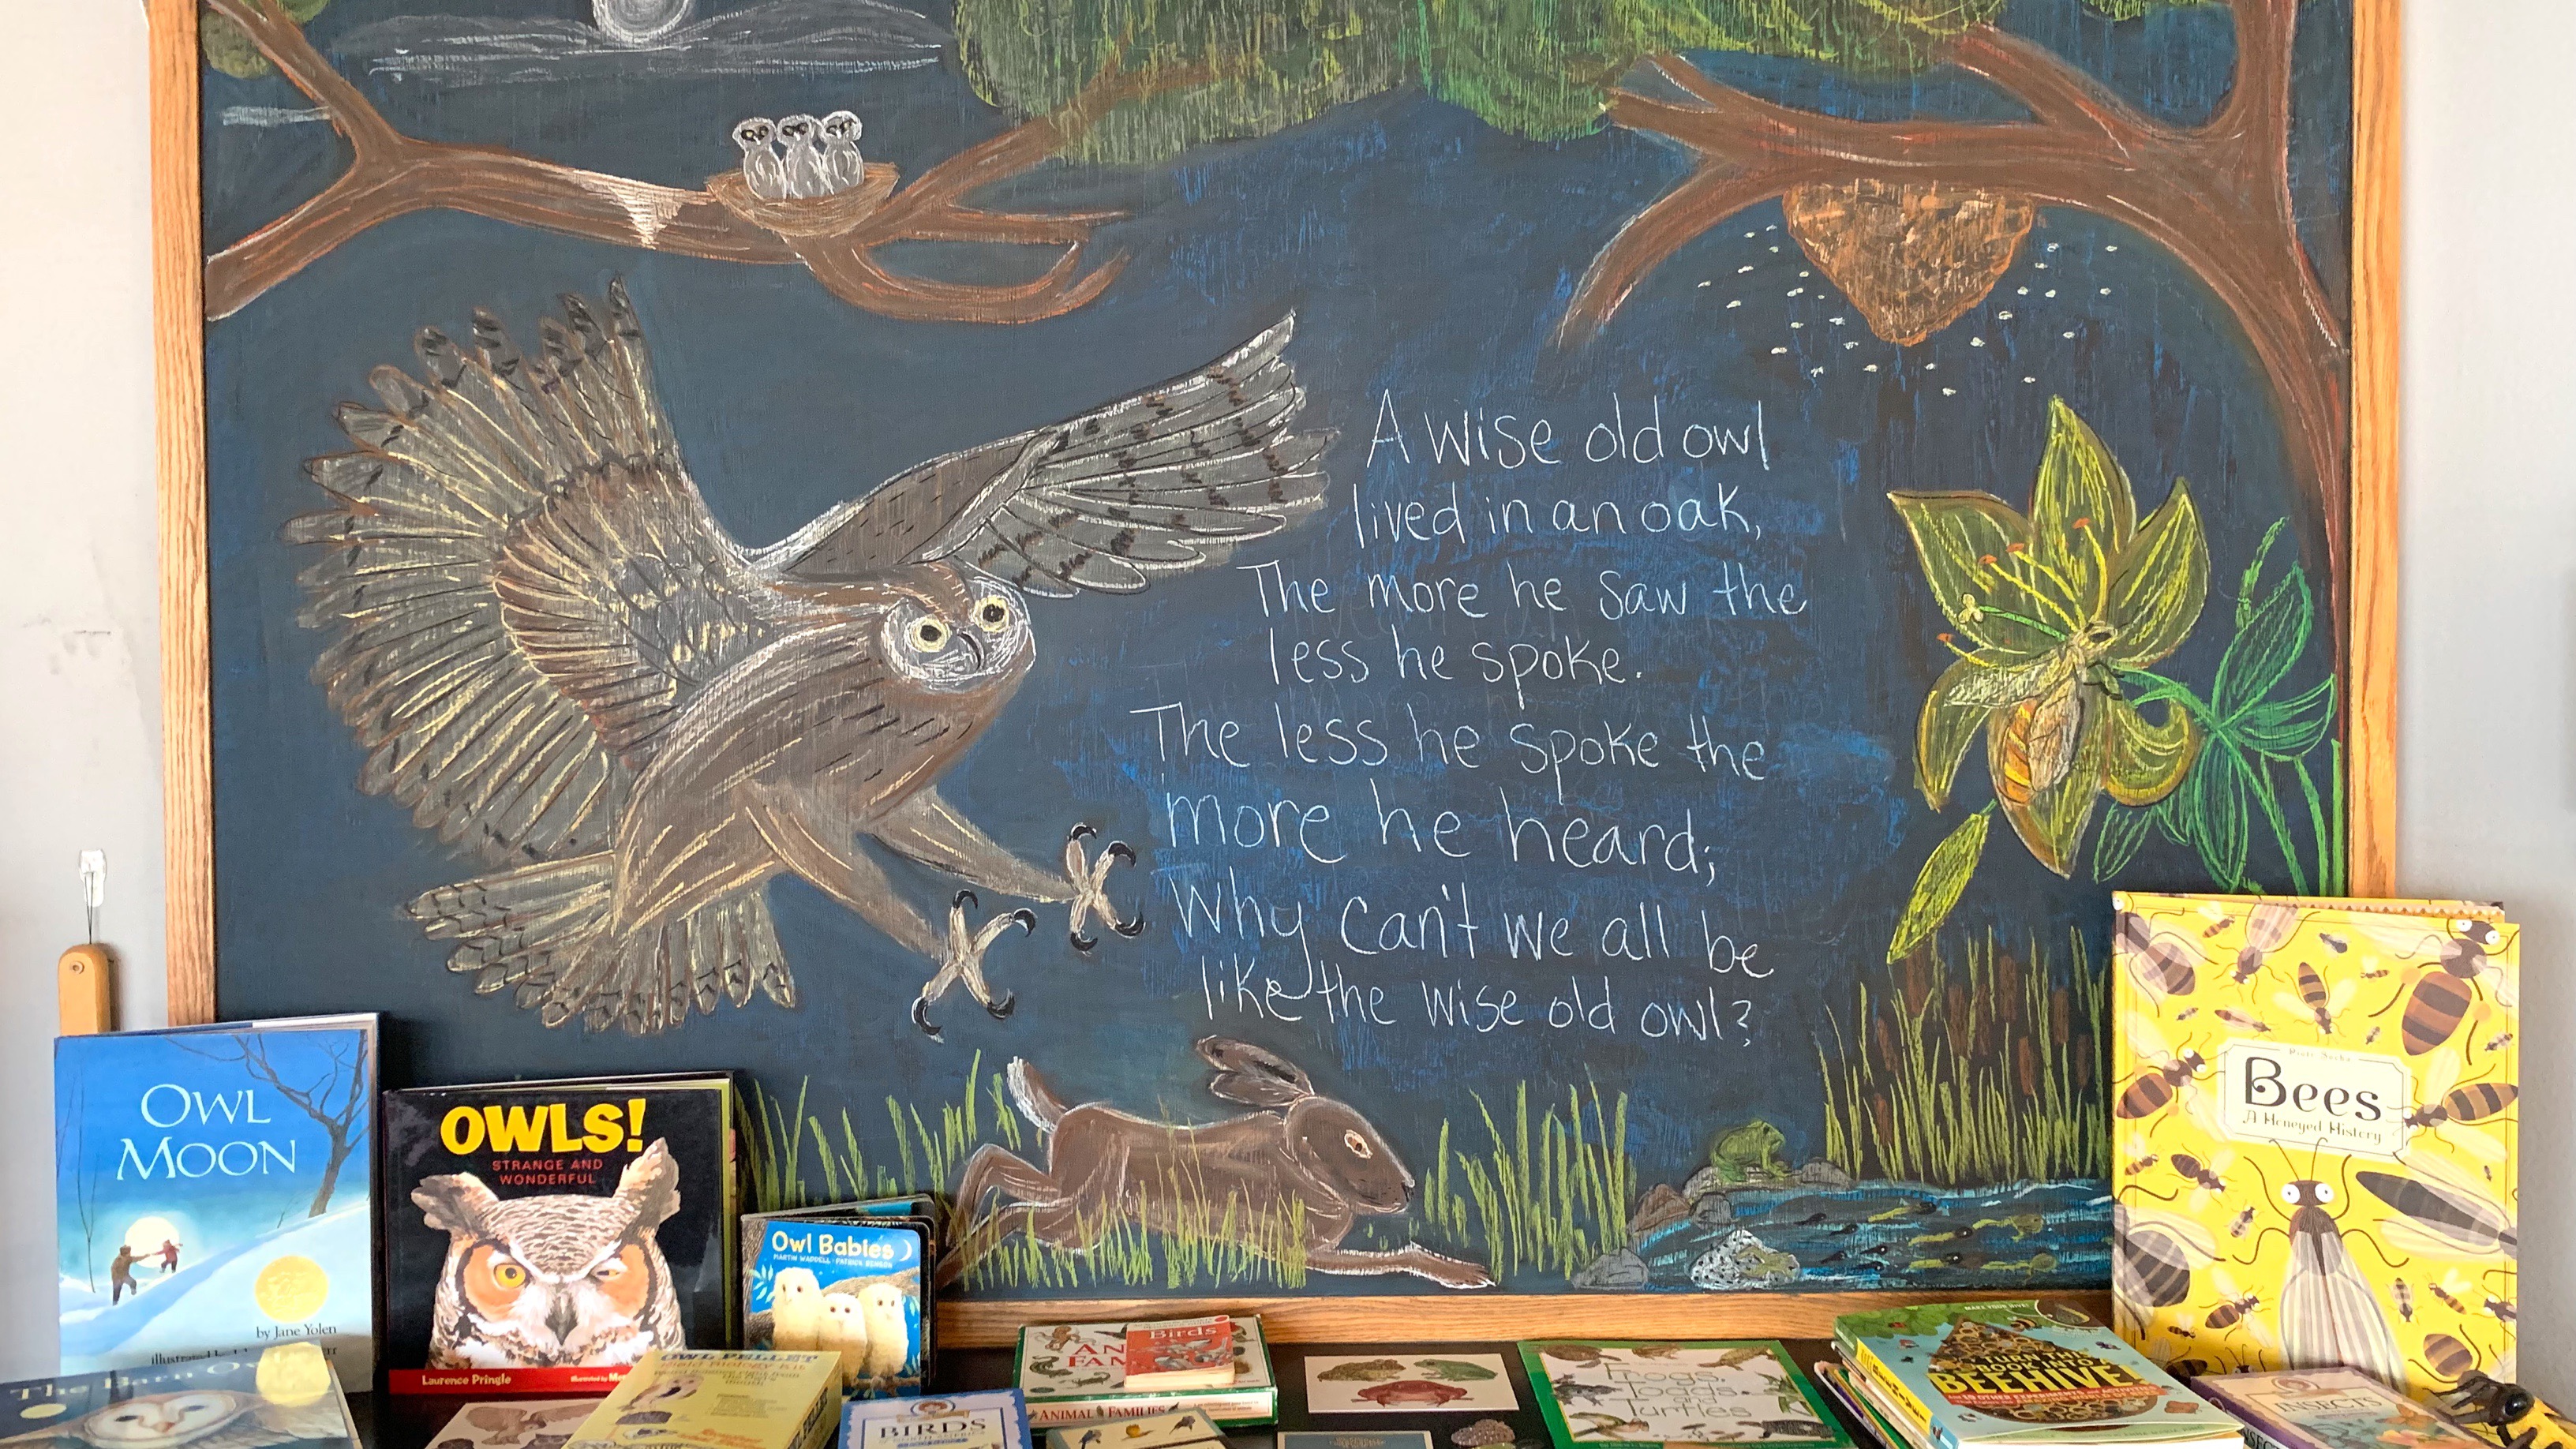


Art inspiration for chalk drawings usually comes from material we plan to use in our unit study or main lesson block. The Chalk Drawing for our Owl Unit is one we plan to keep up for the whole duration of the unit. Sometimes I forgo a chalk drawing, other times, I put one up to last the whole unit and still other times, I’ll do multiple chalk drawings during a single main lesson block. If I do multiple chalk drawings, I’ll do them on a smaller chalkboard that measures about 2’x3′. If I do a large single drawing to span a whole unit or season, I’m drawing it on one of two main chalkboards I have in my school room. One is 4’x6′ and it’s the one I’m drawing on today. The other one is a DIY chalkboard I made recently, and while it works pretty well, it’s not as good as the one I bought.
Check out the blog post for our complete Owl unit study with links to the books and resources we’ve used for this unit as well as the projects we’ve done.
For this chalk drawing, I have one main scene with two smaller drawings incorporated into the chalk drawing. The chalk drawing of the Life Cycle of a Frog is small and is worked into the lower corner of the drawing. The chalk drawing for our bee unit is beehive that incorporated into the upper right corner of the chalk drawing. The only thing obviously out of place is the enlarged flower with a bee which may eventually be replaced to include a poem or other drawing. This will work for all of our spring/summer nature units on Birds (with a sub unit on owls), Frogs and Bees.You can see the complete playlist for activities for our Bee unit as we have done this unit before and will keep adding lessons and projects as this unit comes around again.
Check out our complete Owl Unit Study playlist with videos on how we put this unit together, the resources we used and the projects we did.
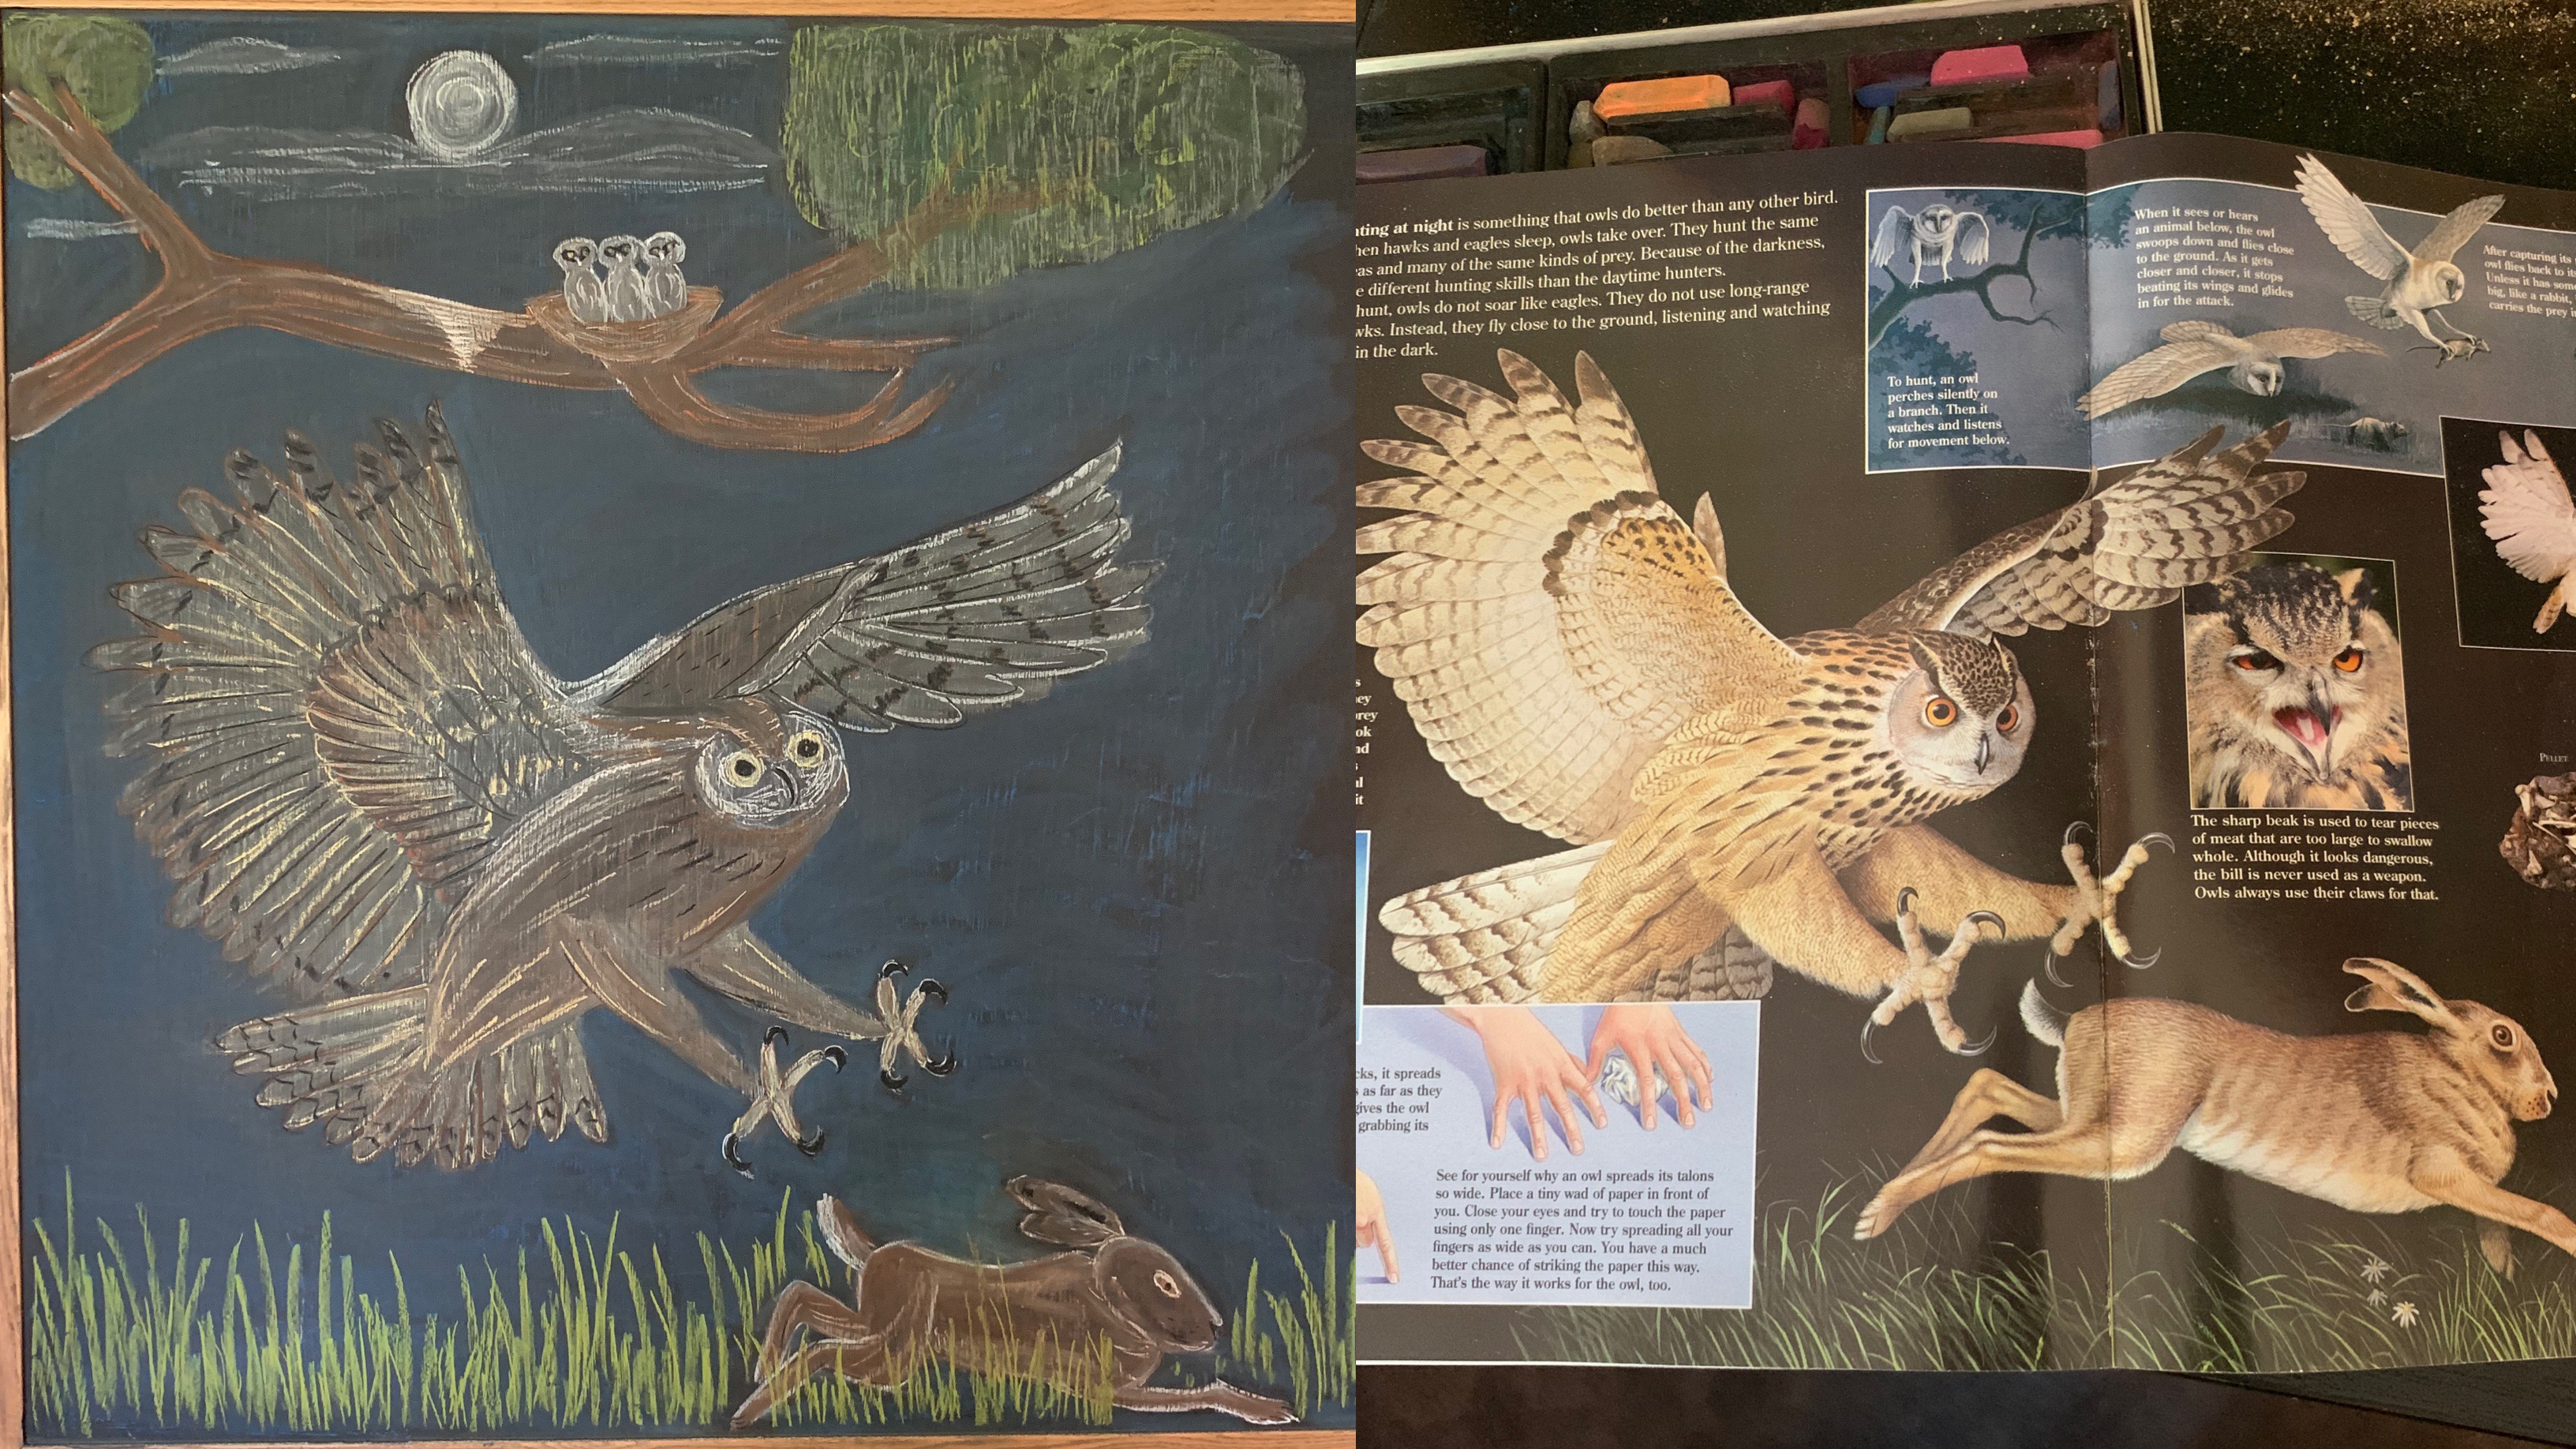
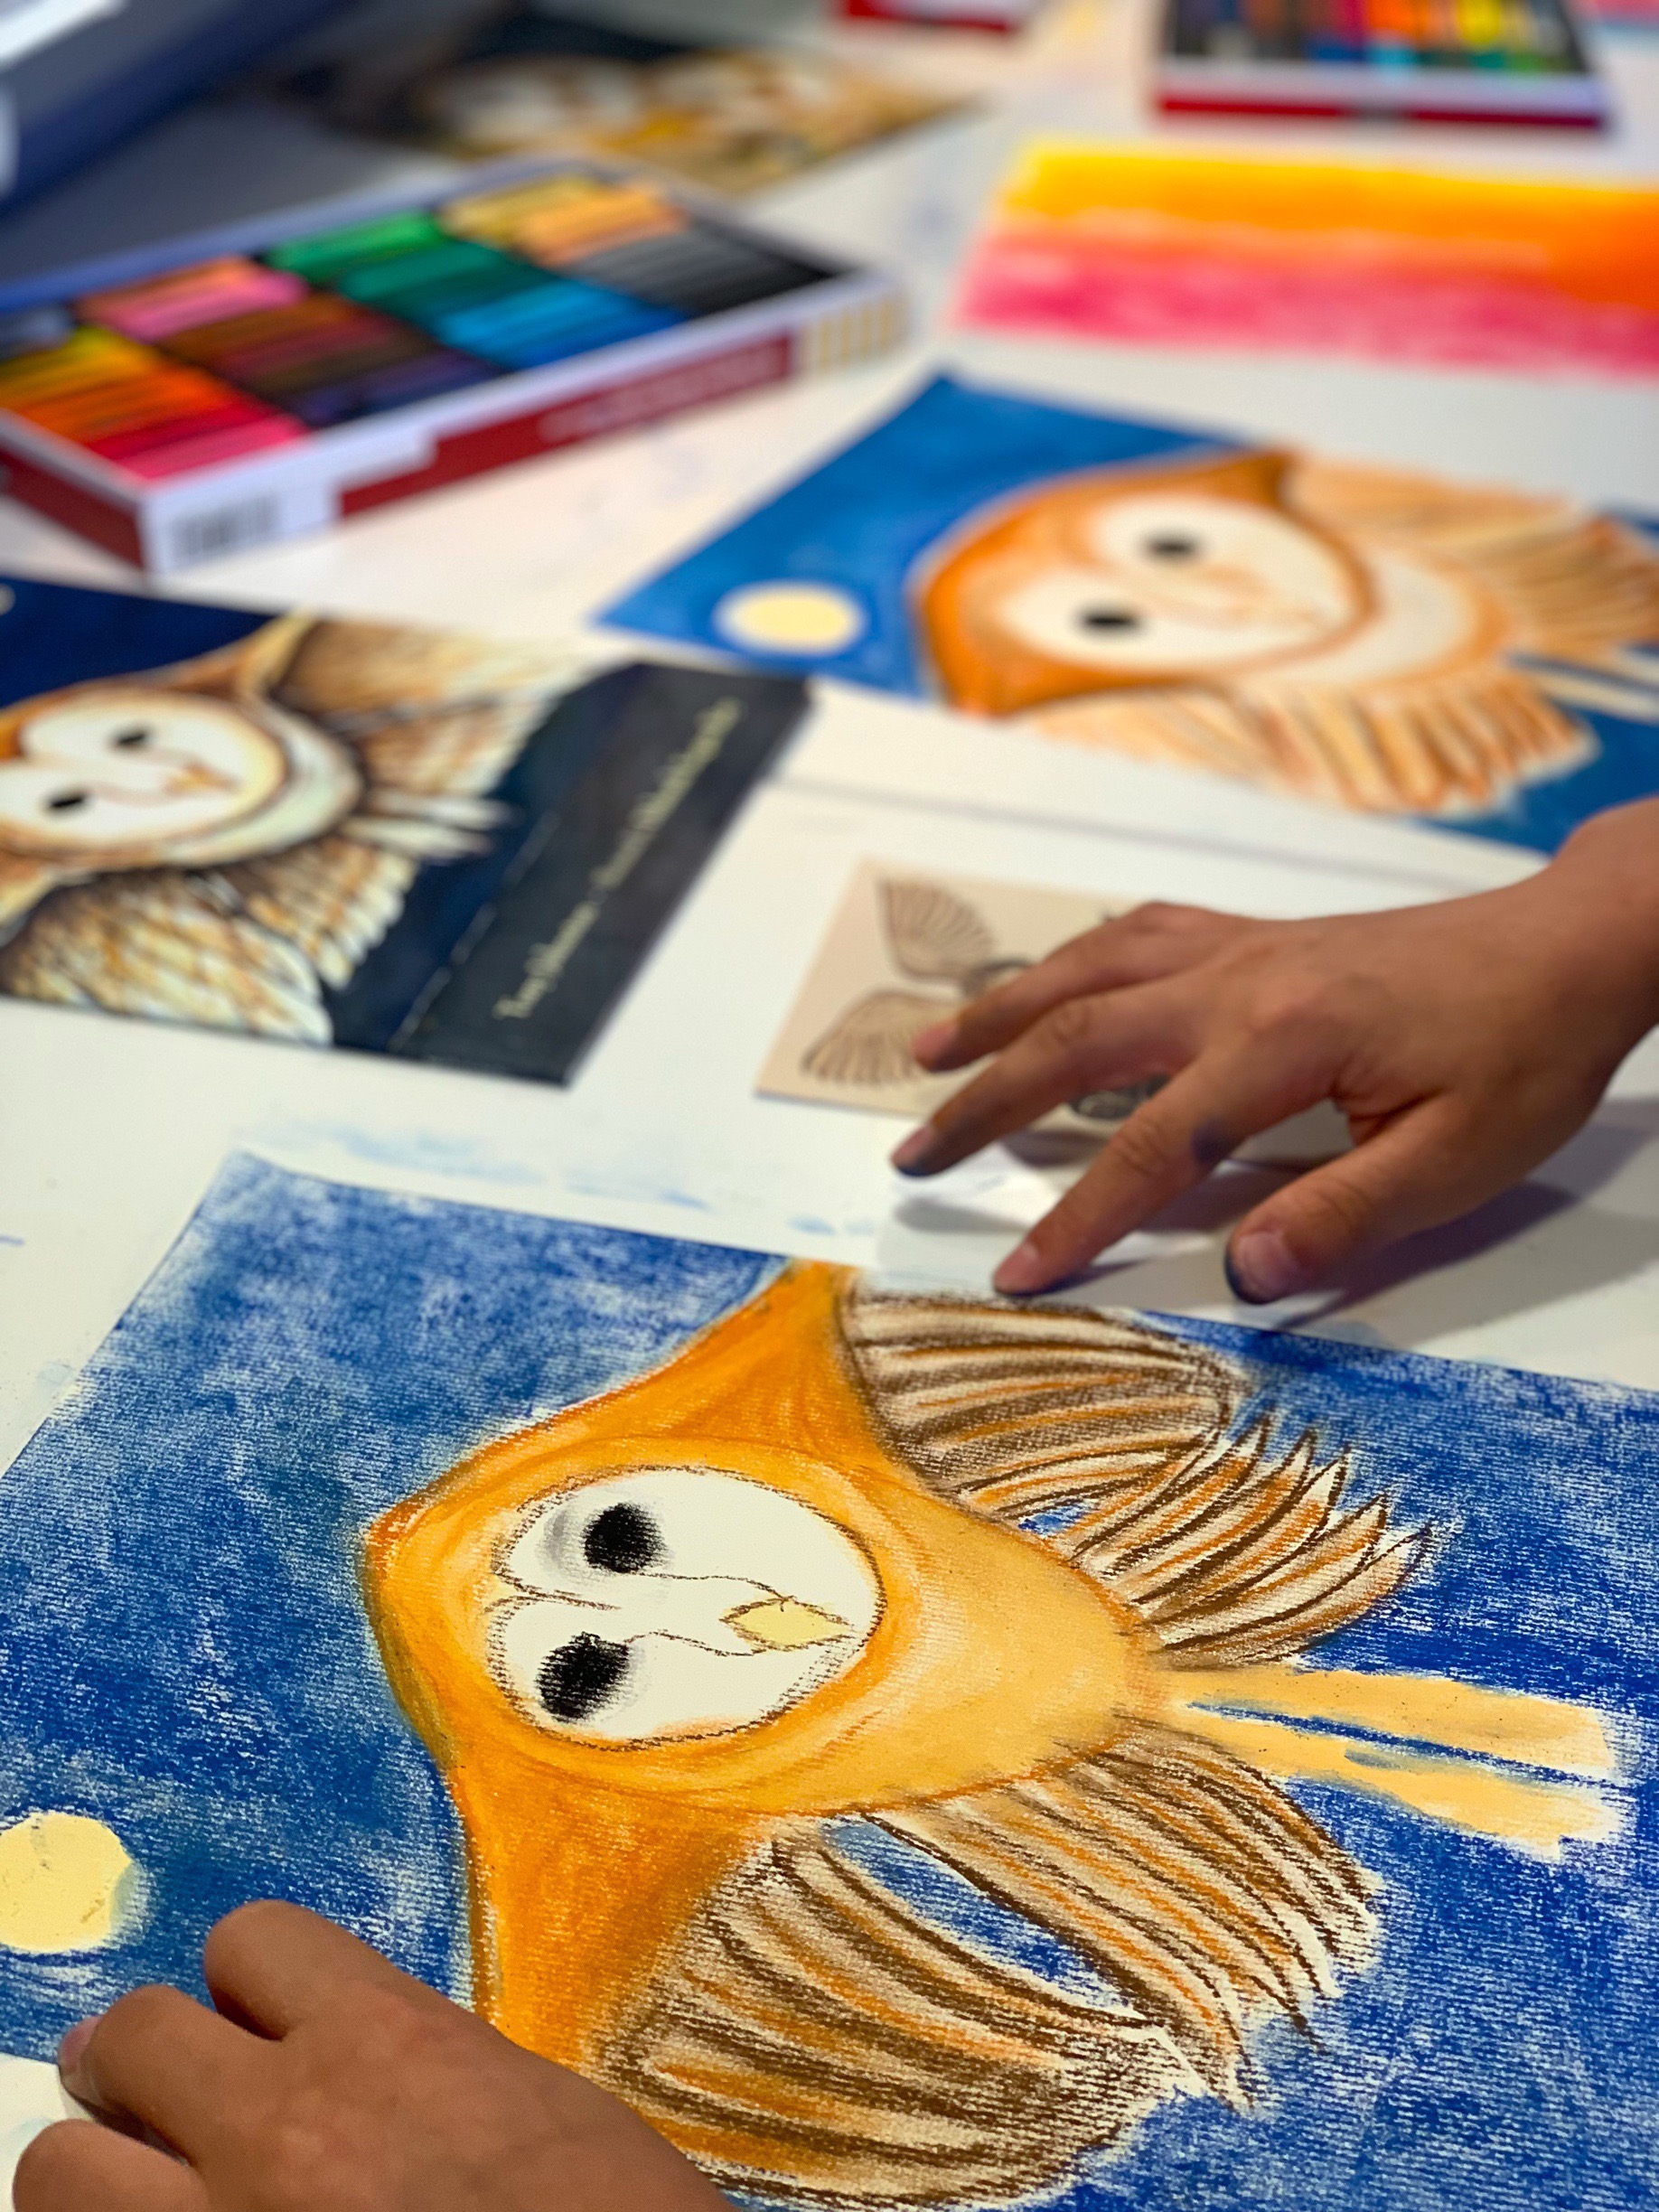
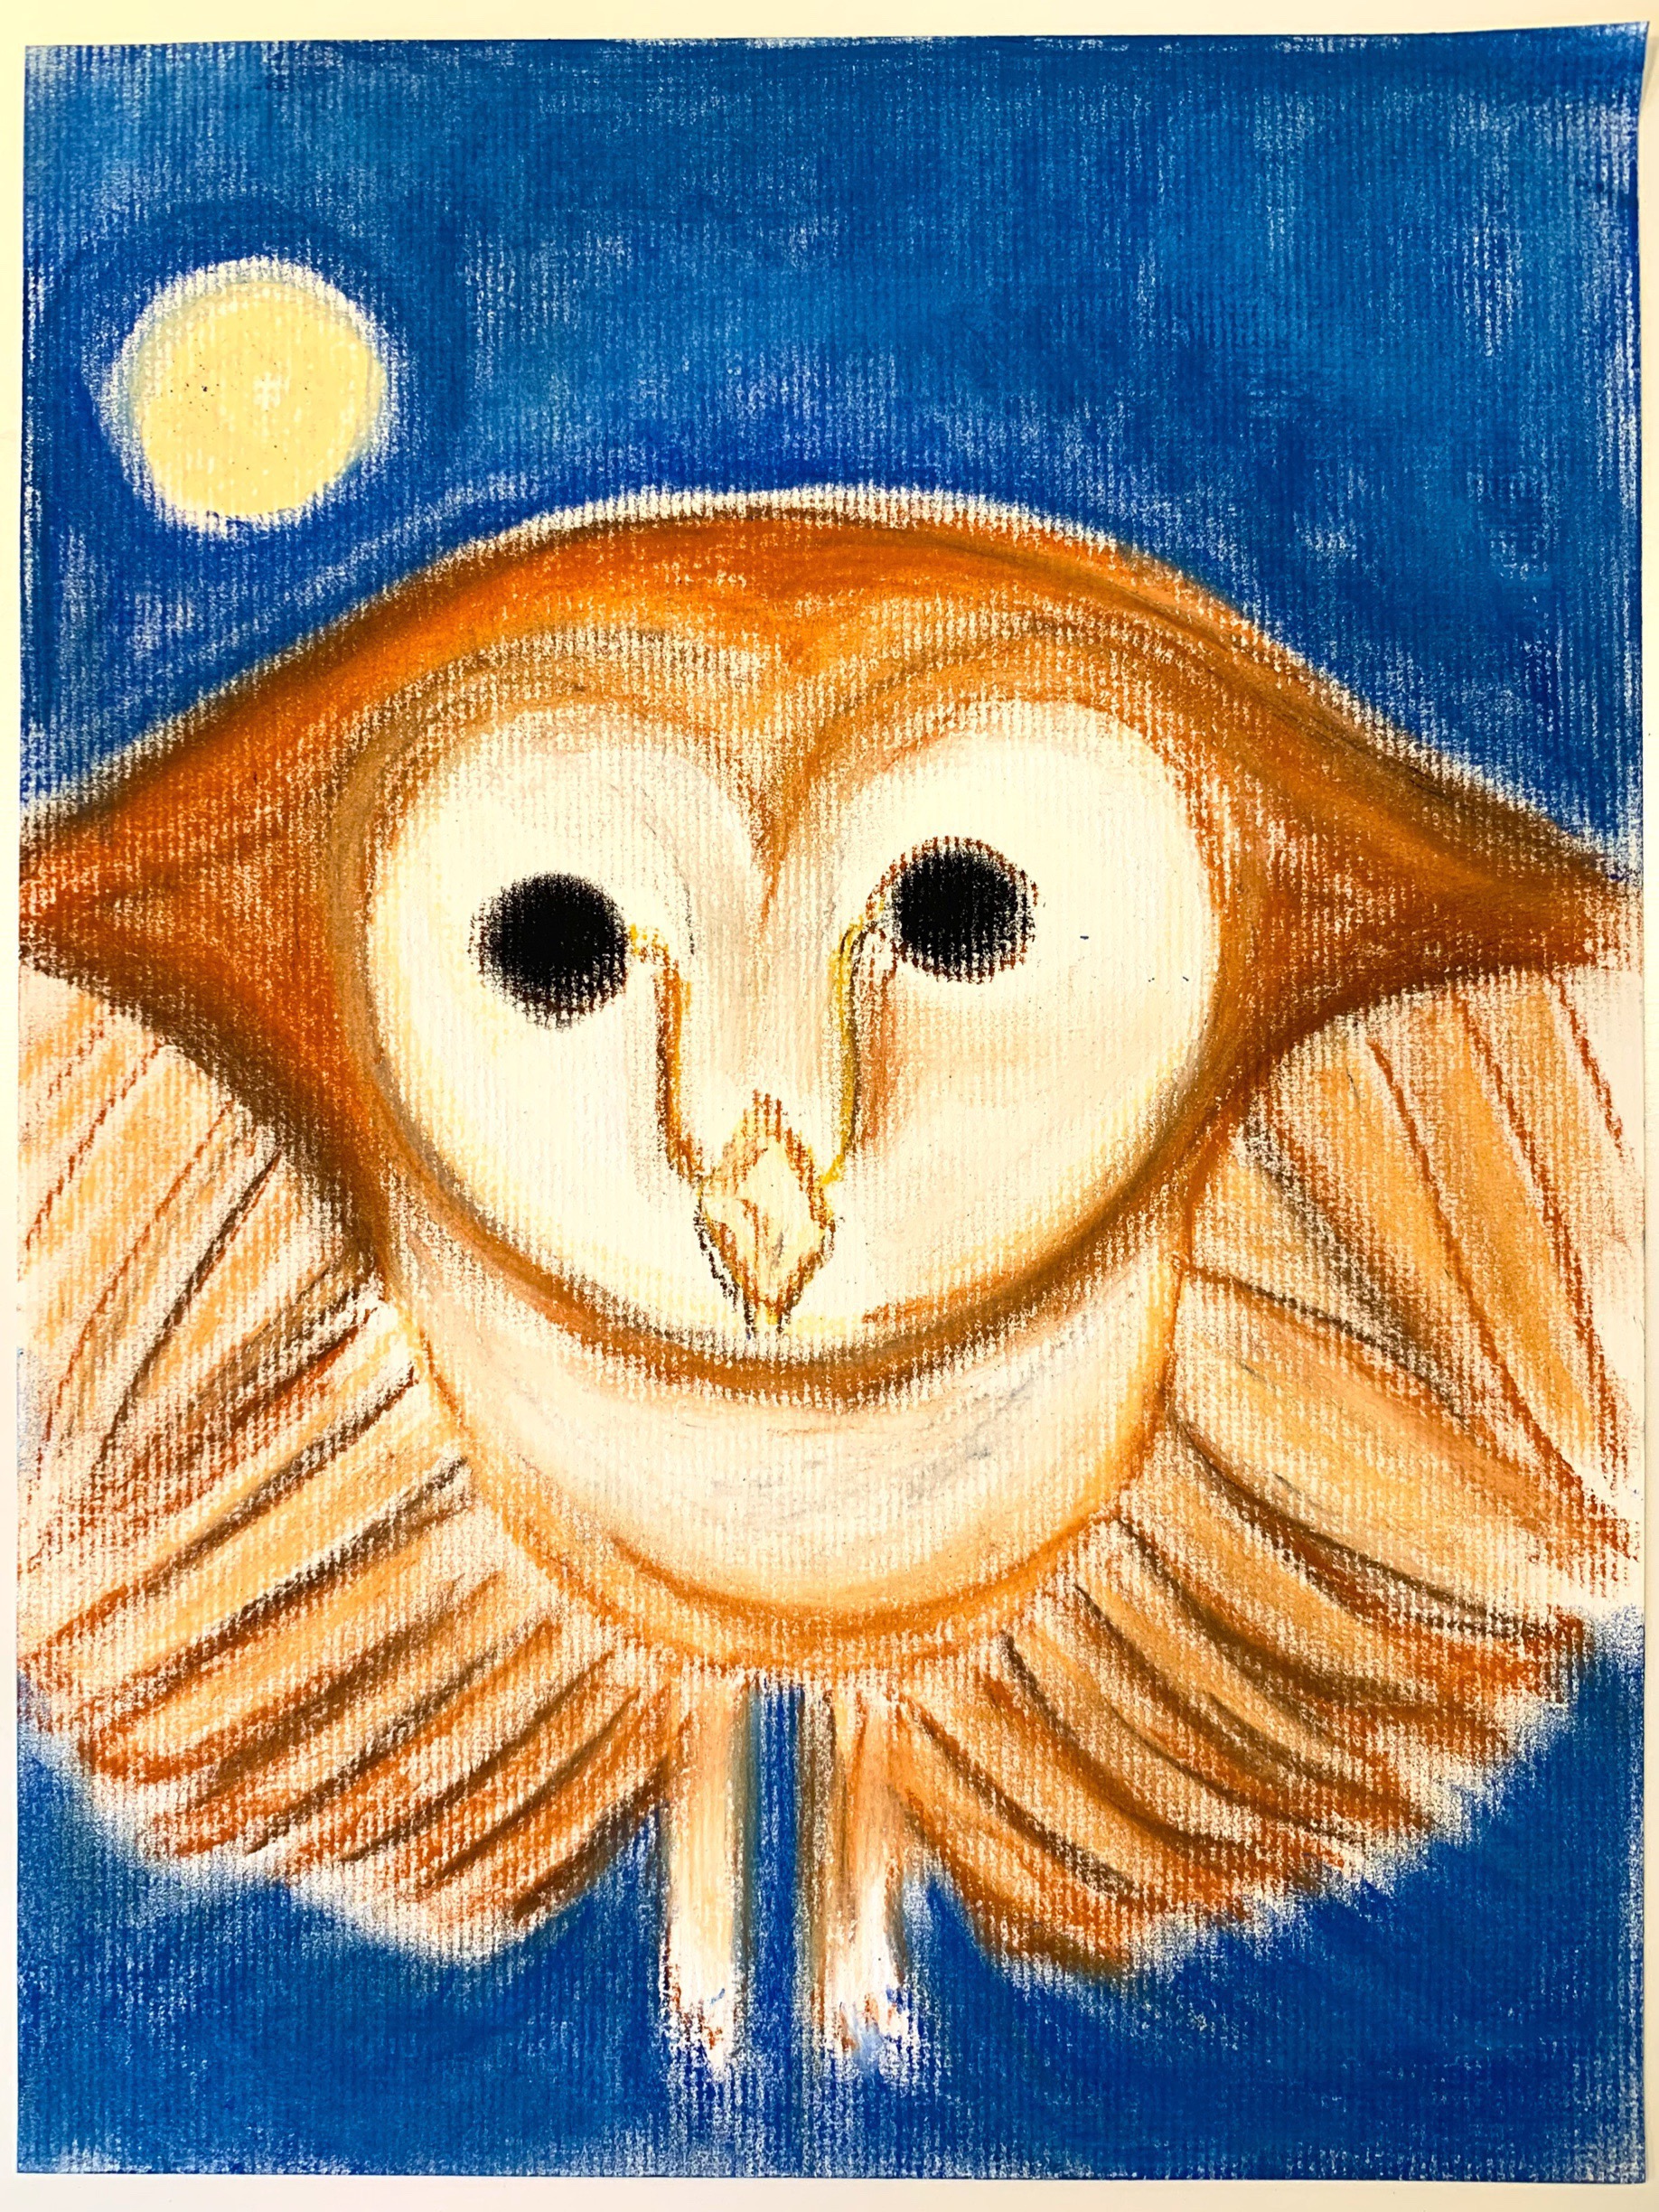
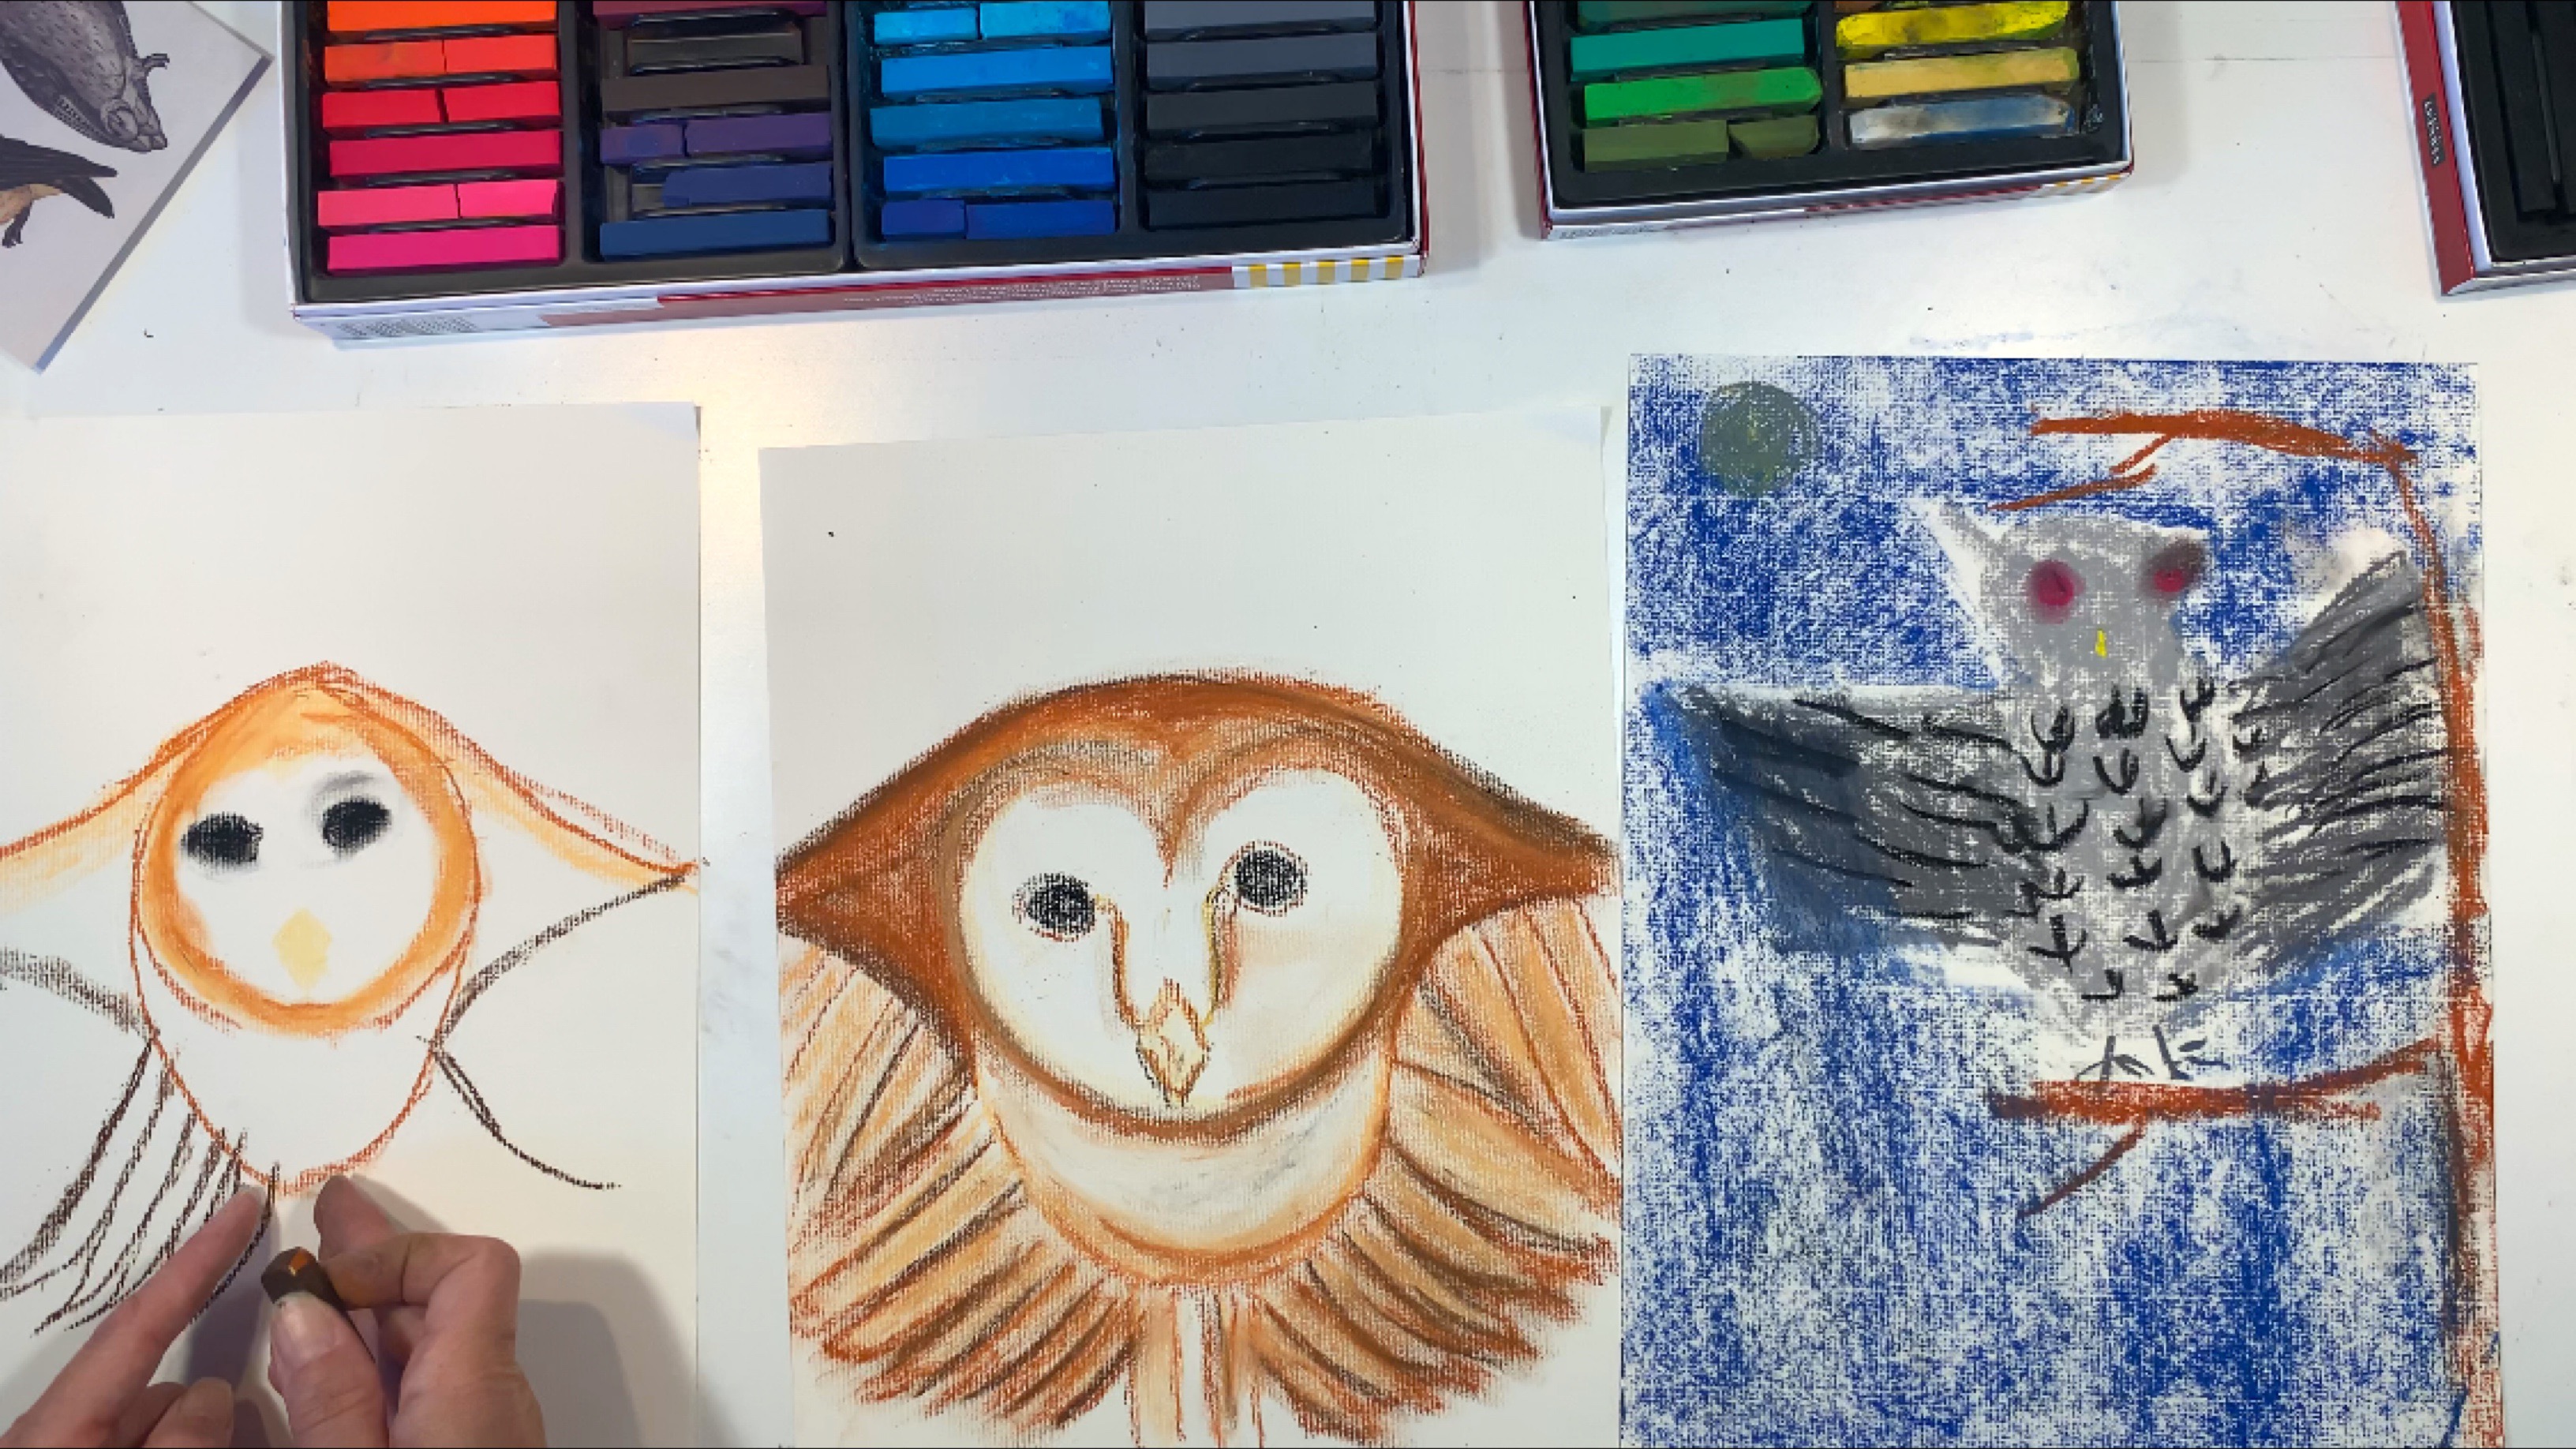
For this project I used by Sargent Art Chalk Pastels. I used Owls by Zoobooks as art inspiration for this drawing. Later, my son drew this into his main lesson book.
This drawing took about an hour and 10 minutes. I’m working on a 4’x6′ slate chalkboard that I painted with chalkboard paint after the slate had lost its texture. My chalks were not sticking well so I painted it. This was a mobil chalkboard on wheels that I eventually mounted on the wall.
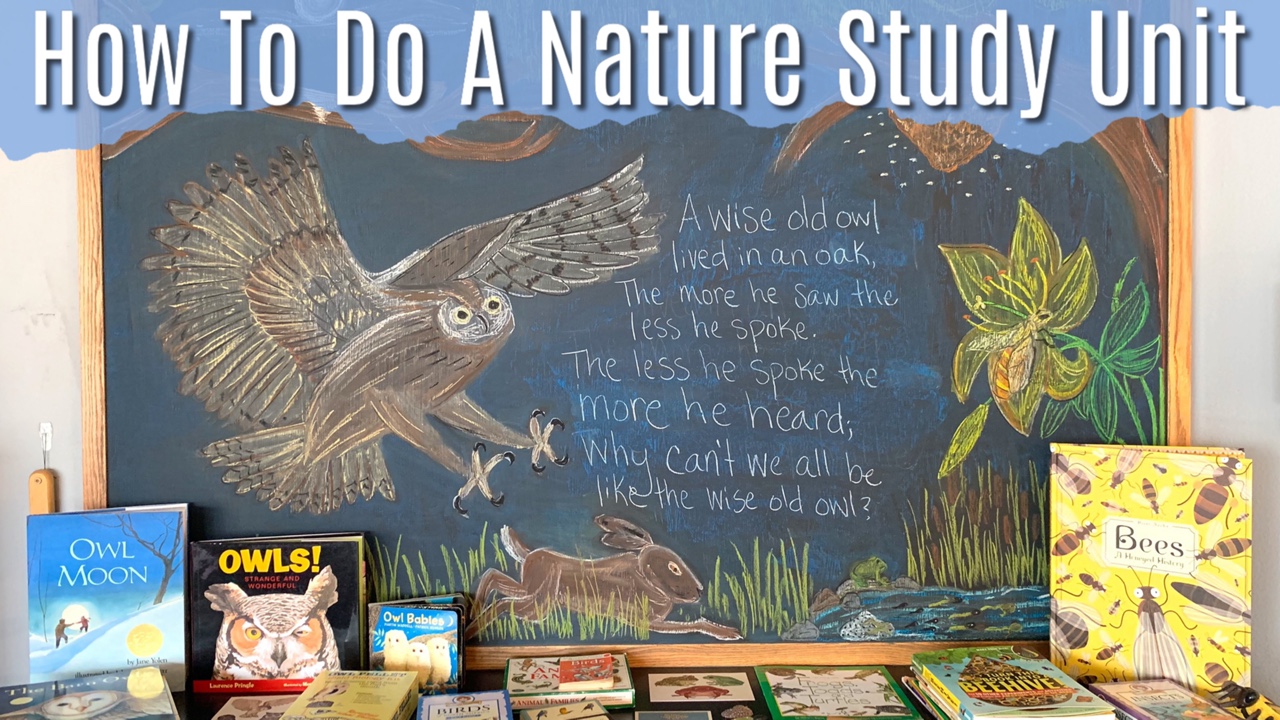
We display our unit study material on the shelf beneath the chalkboard.
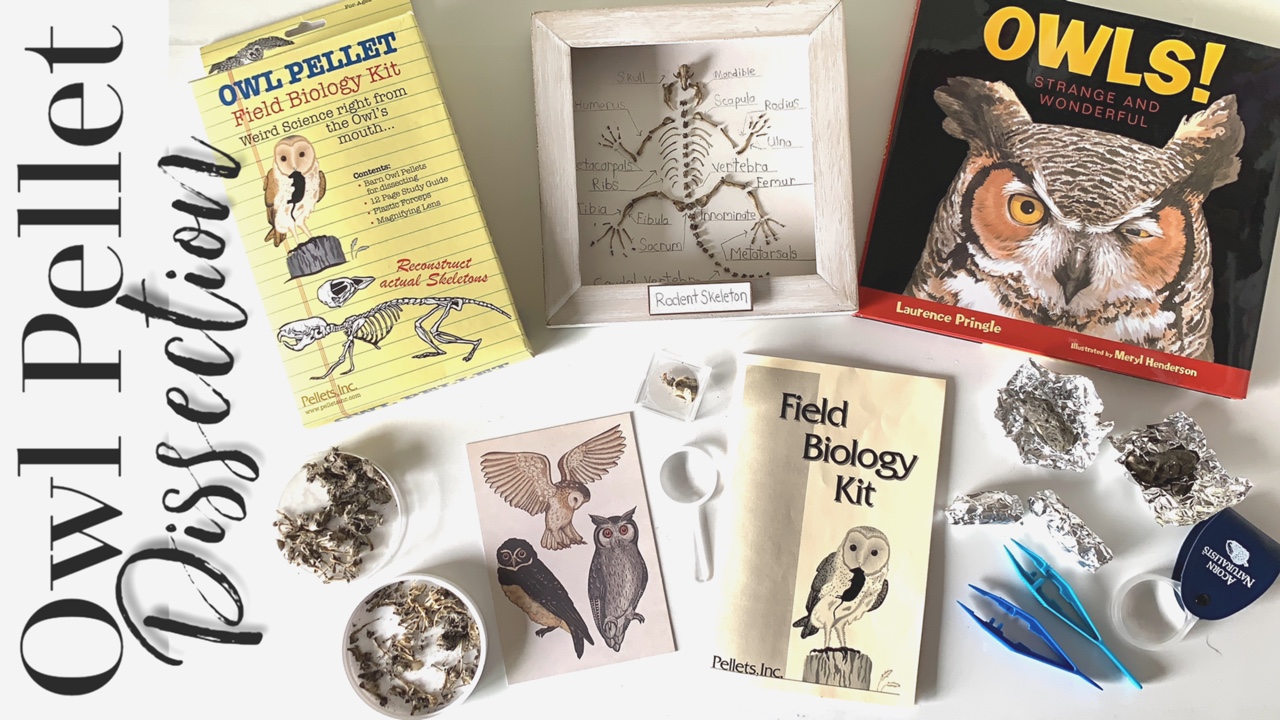
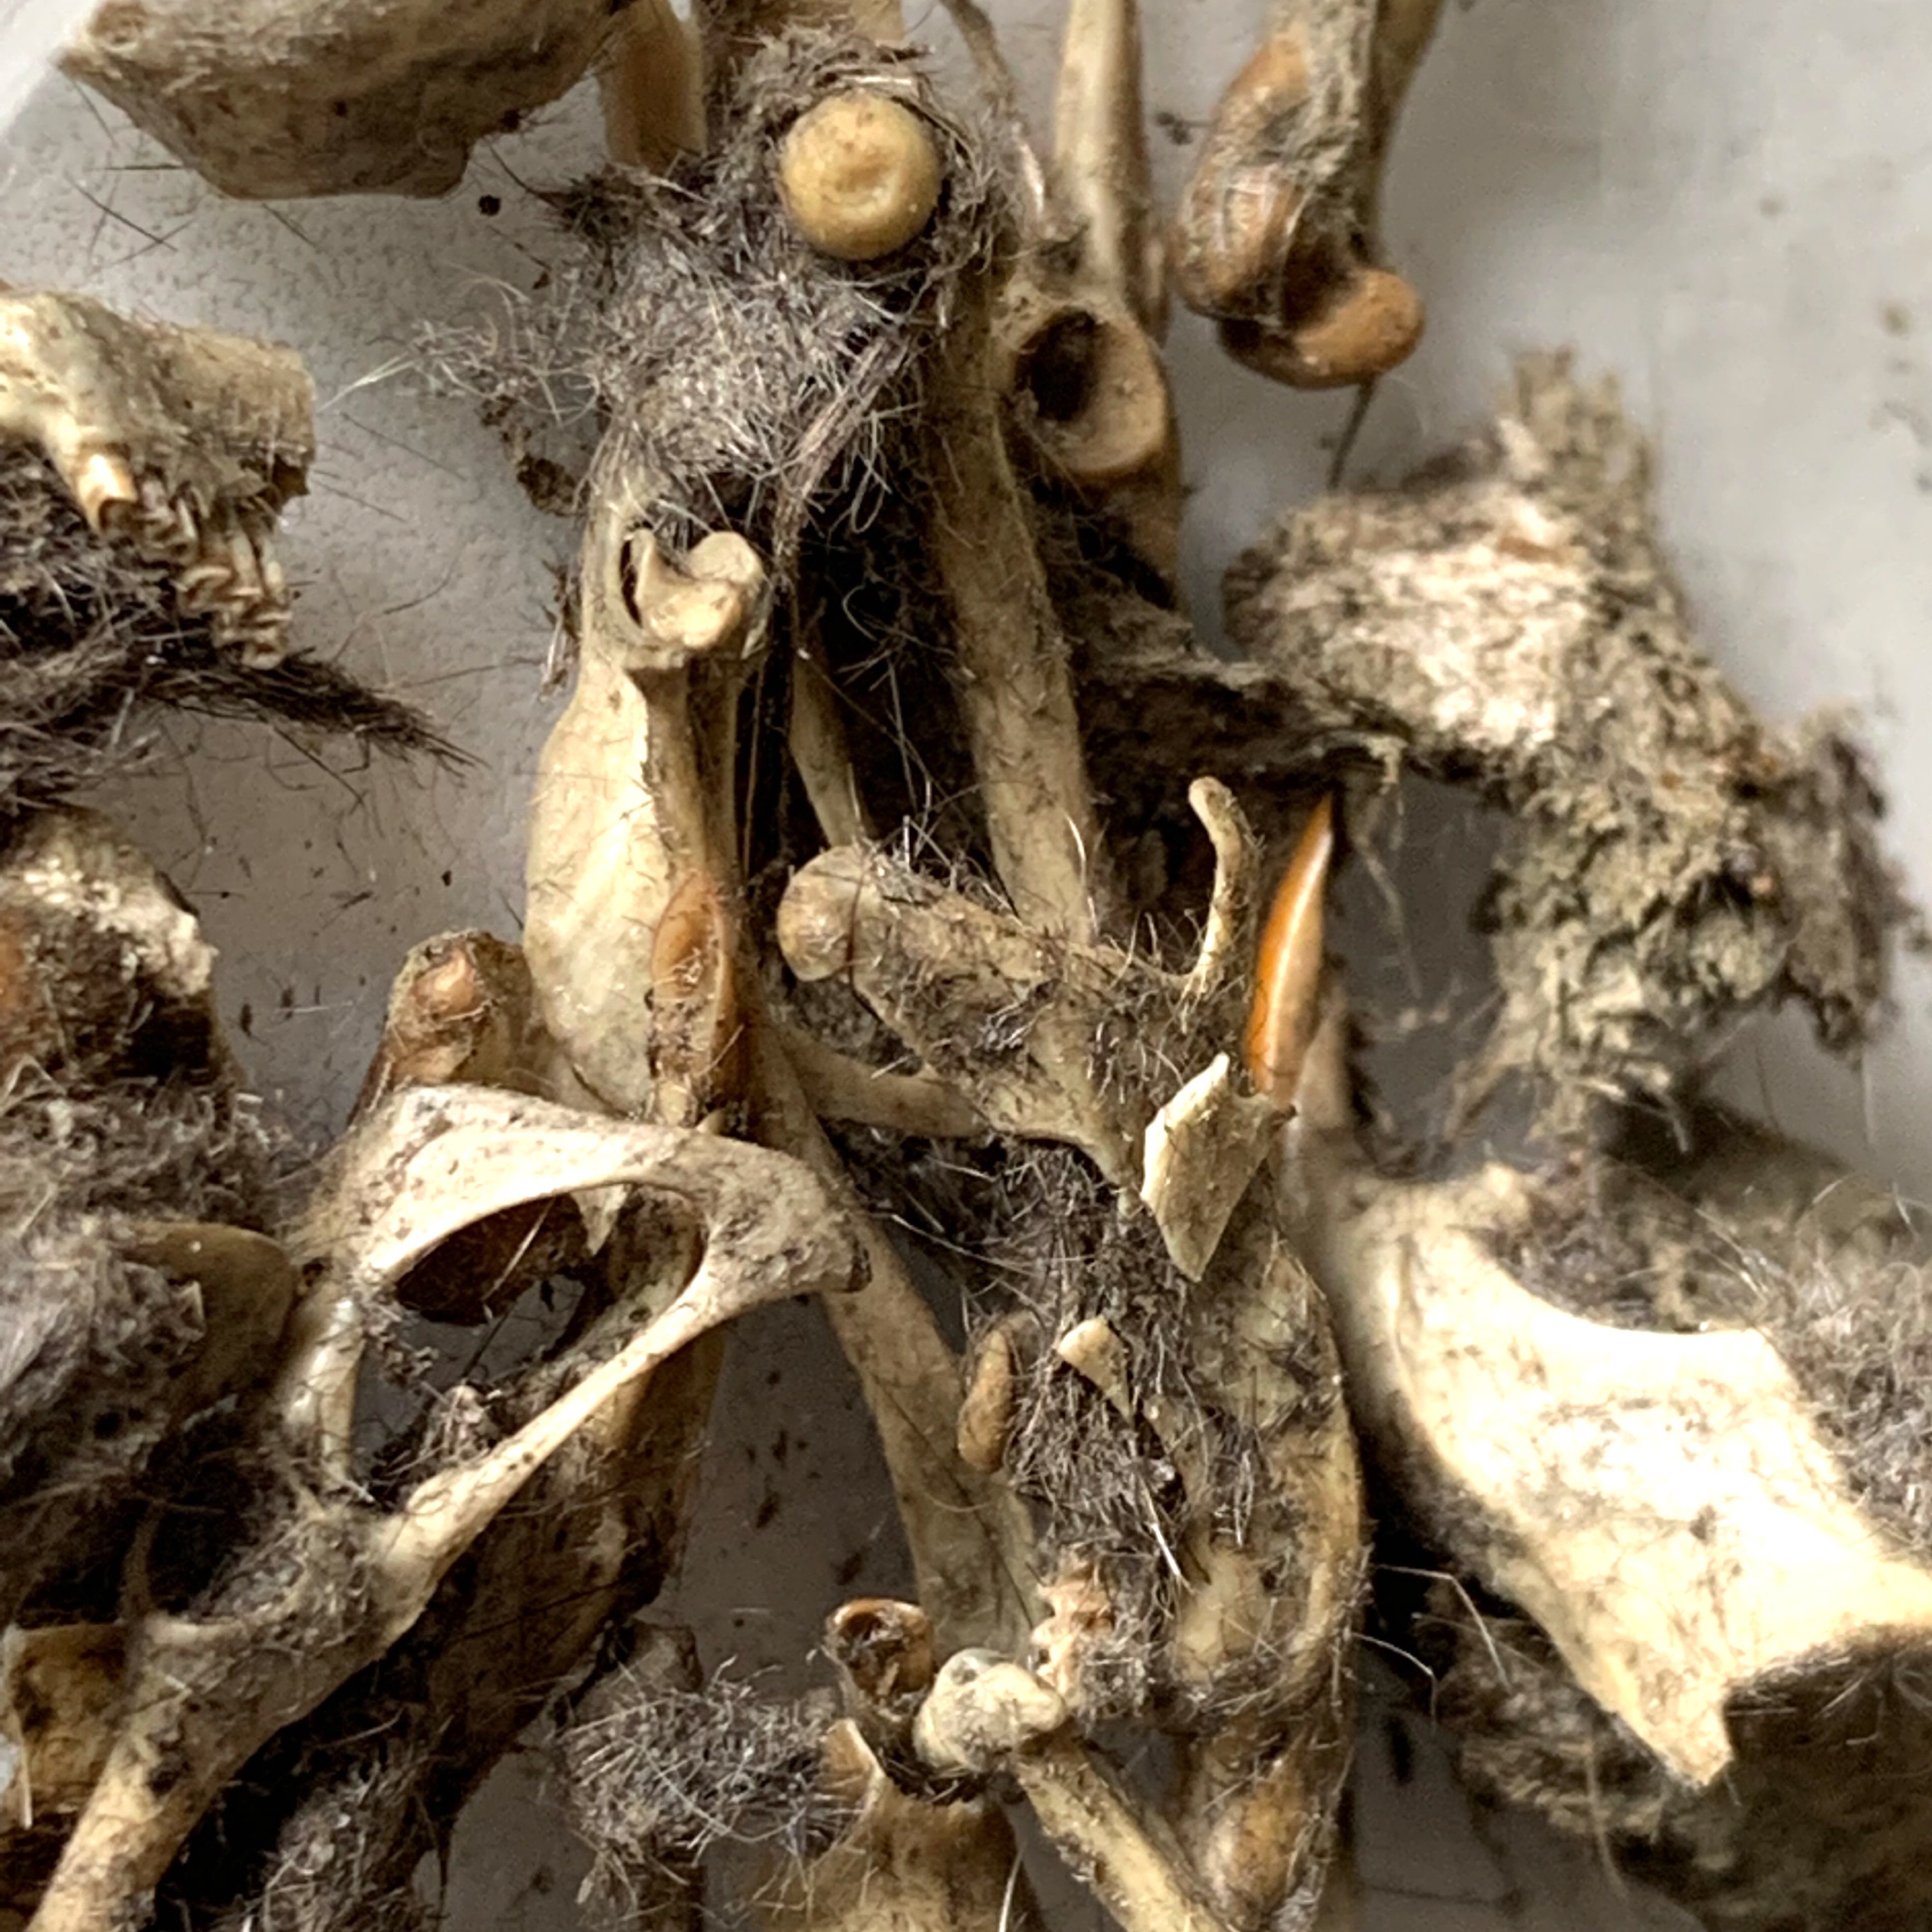
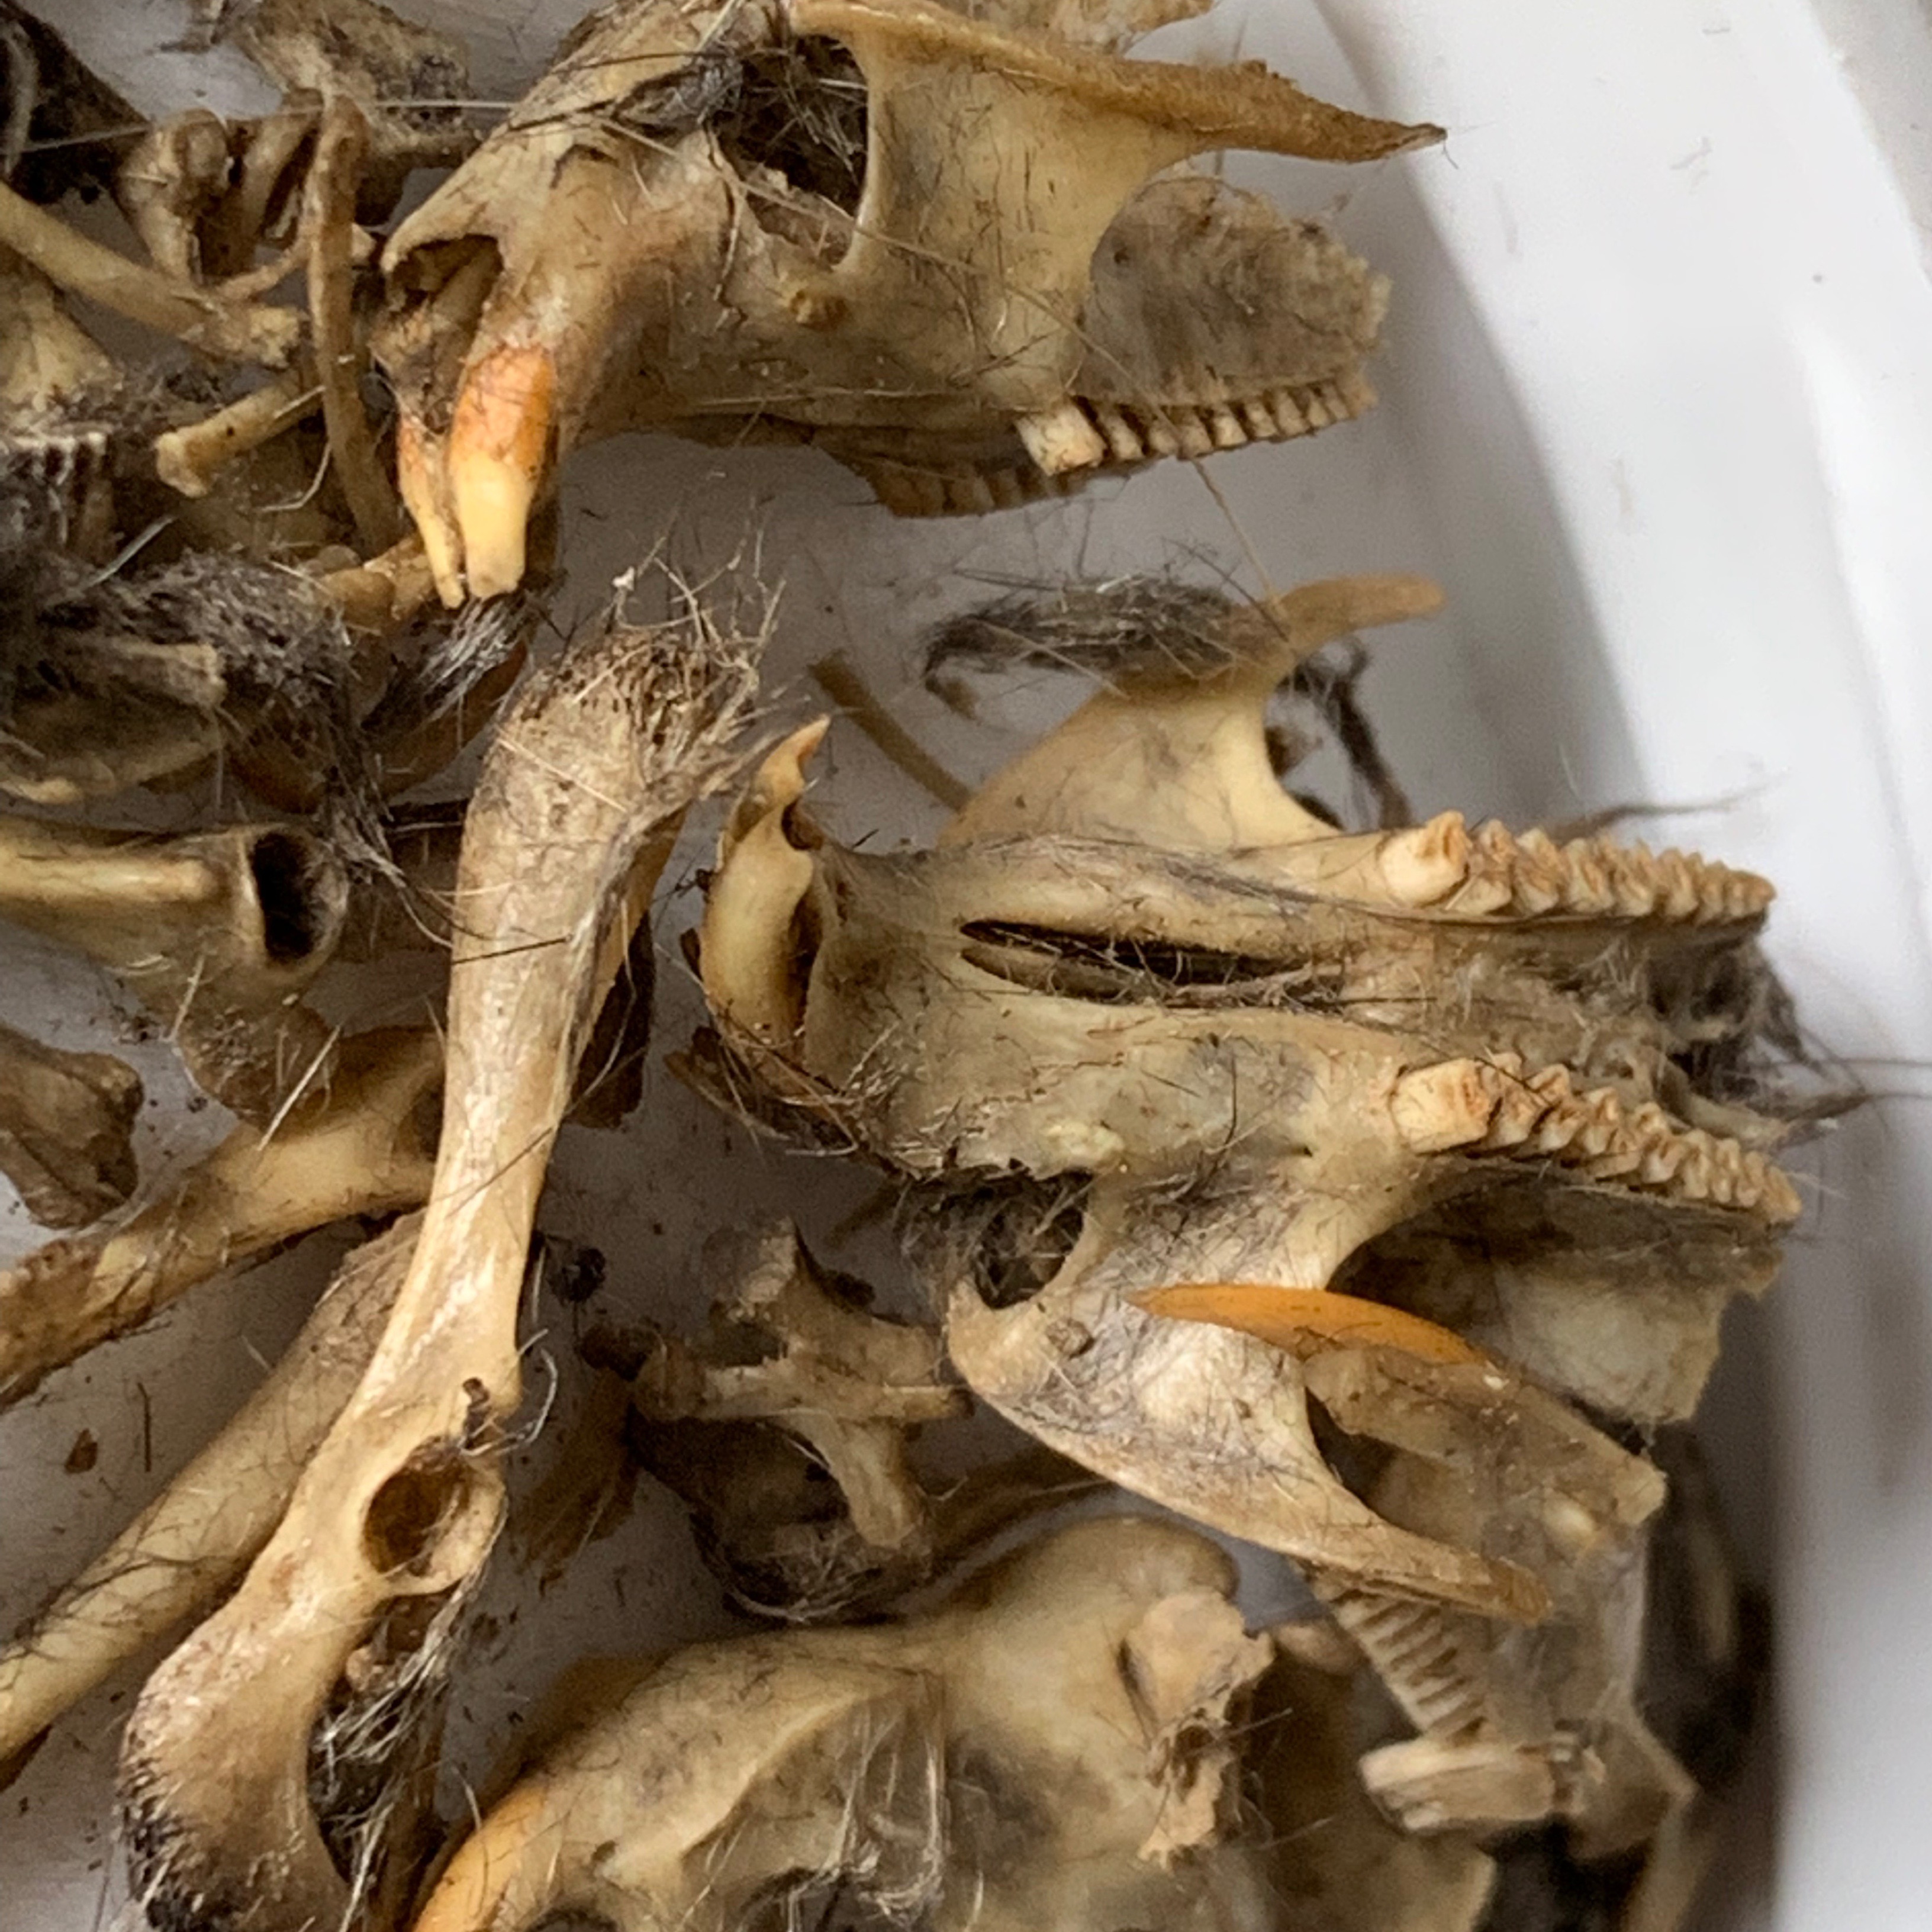
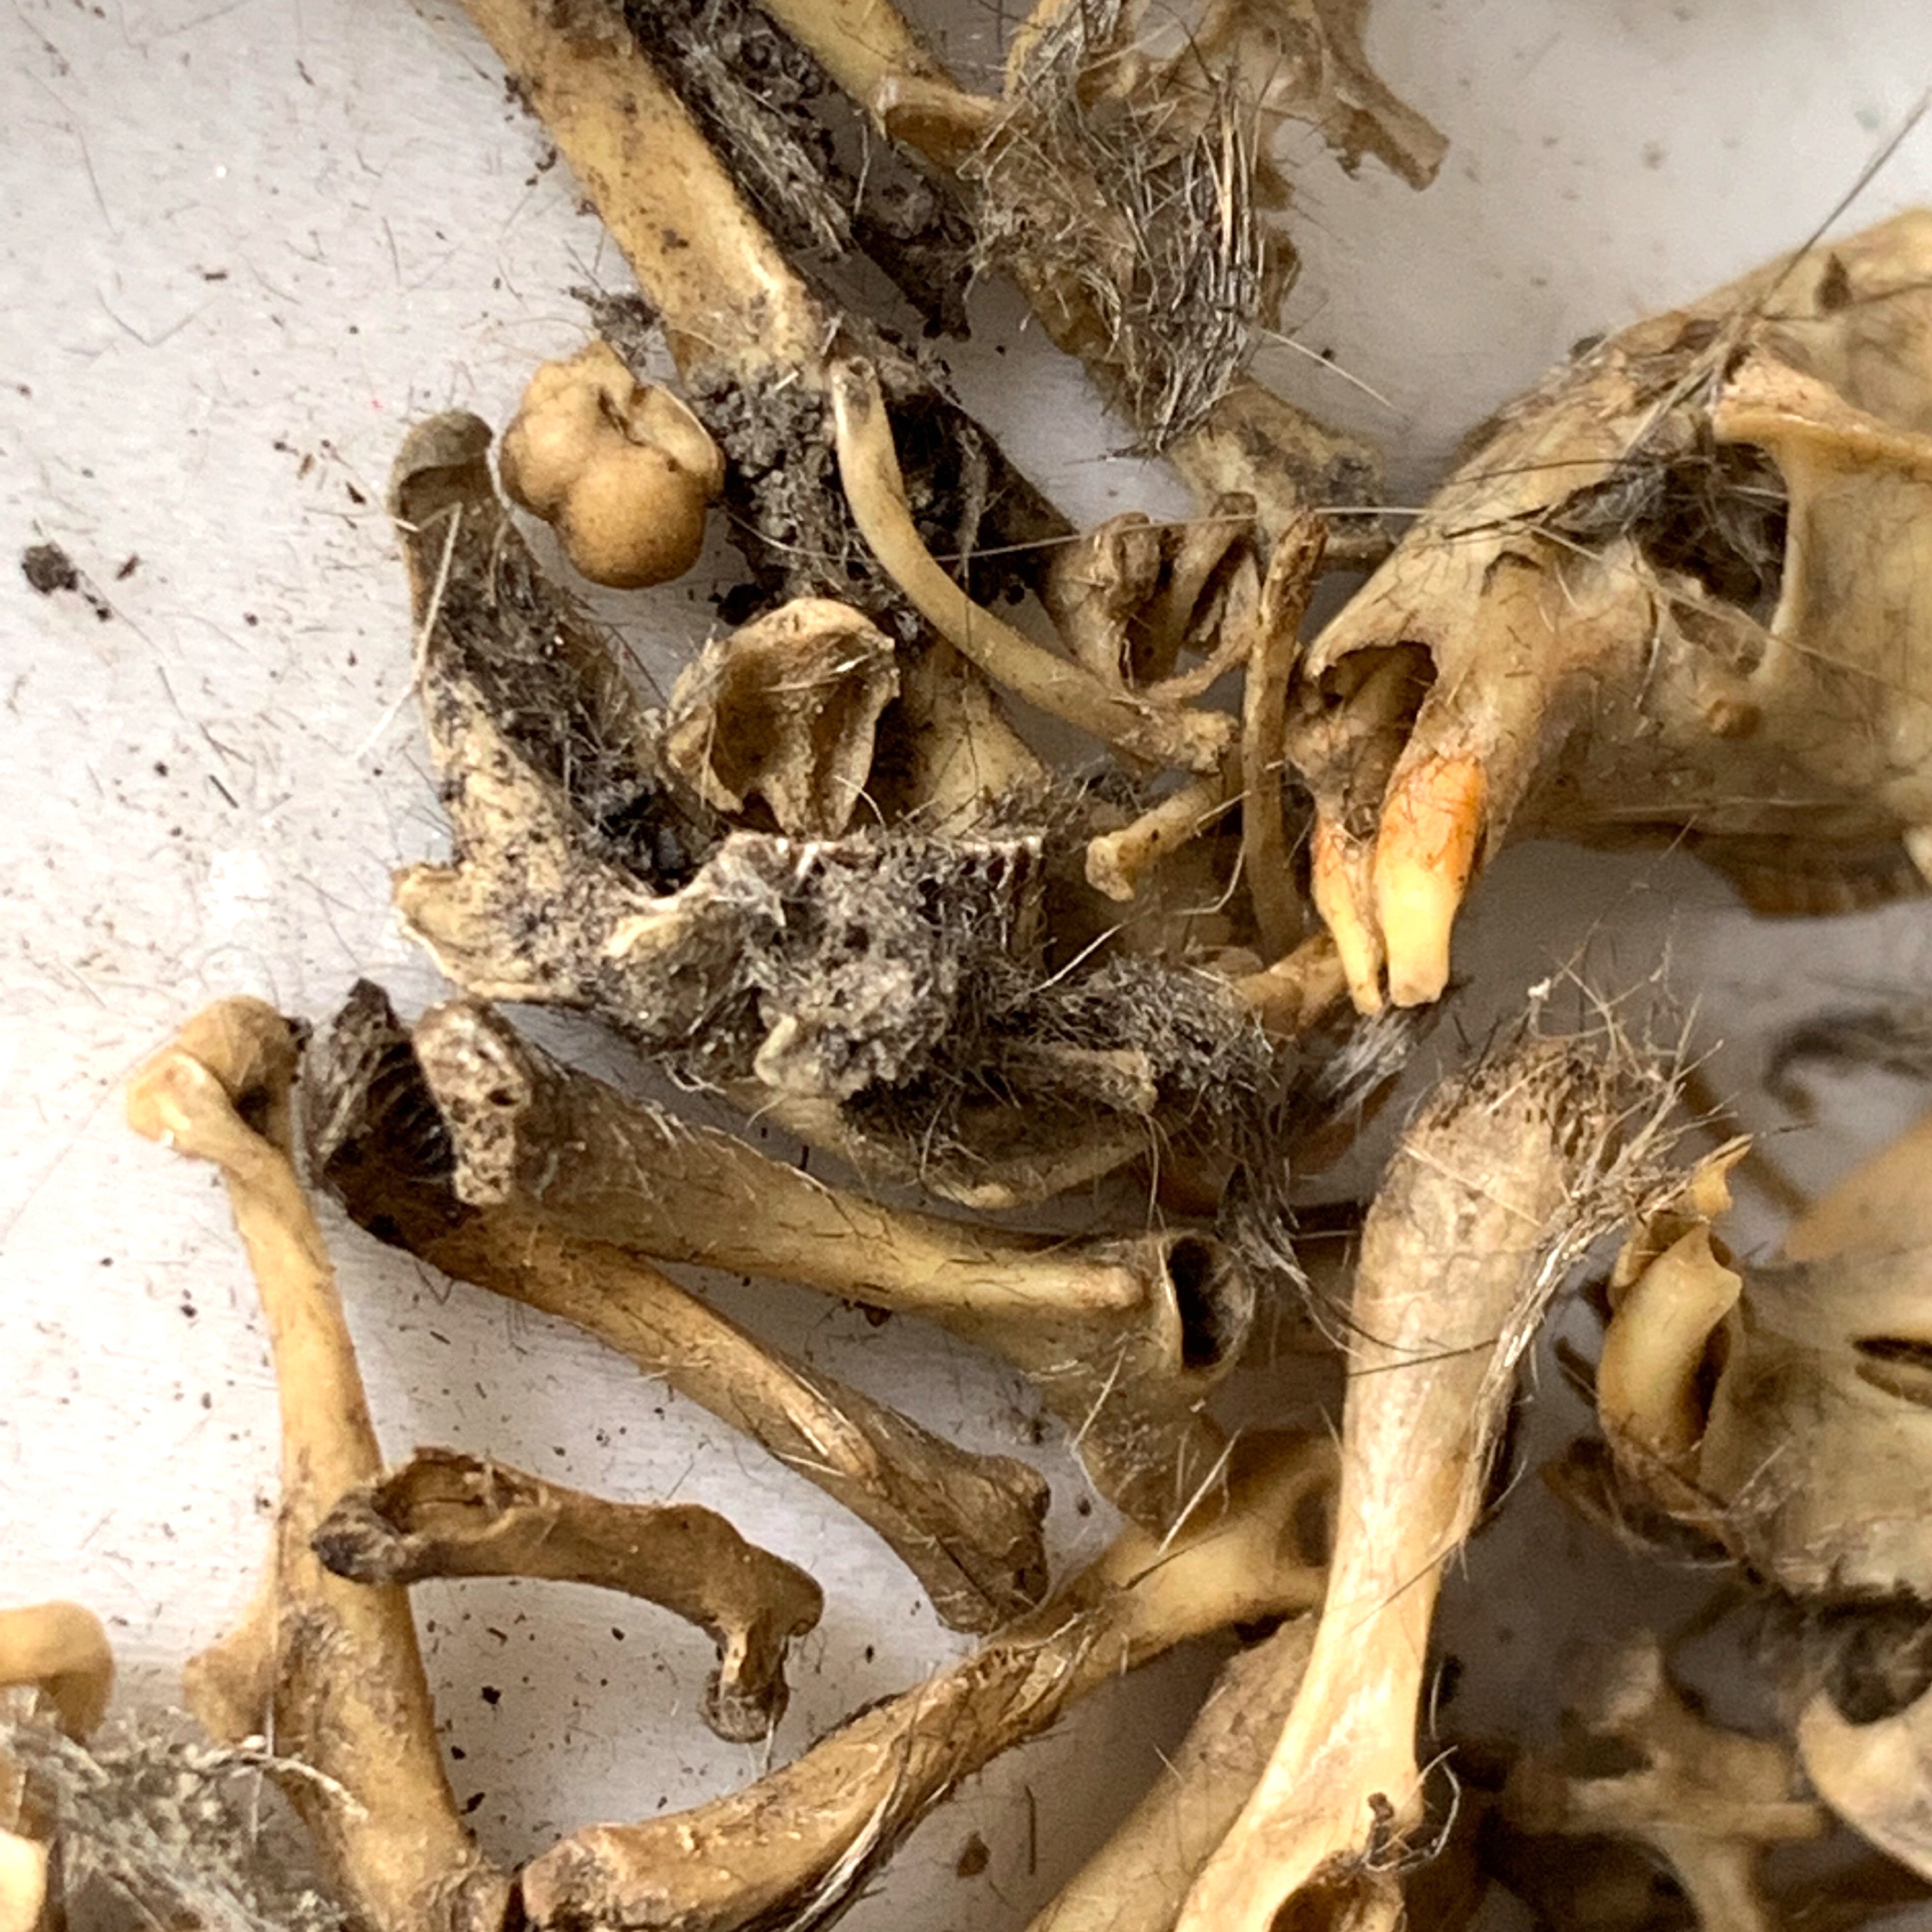
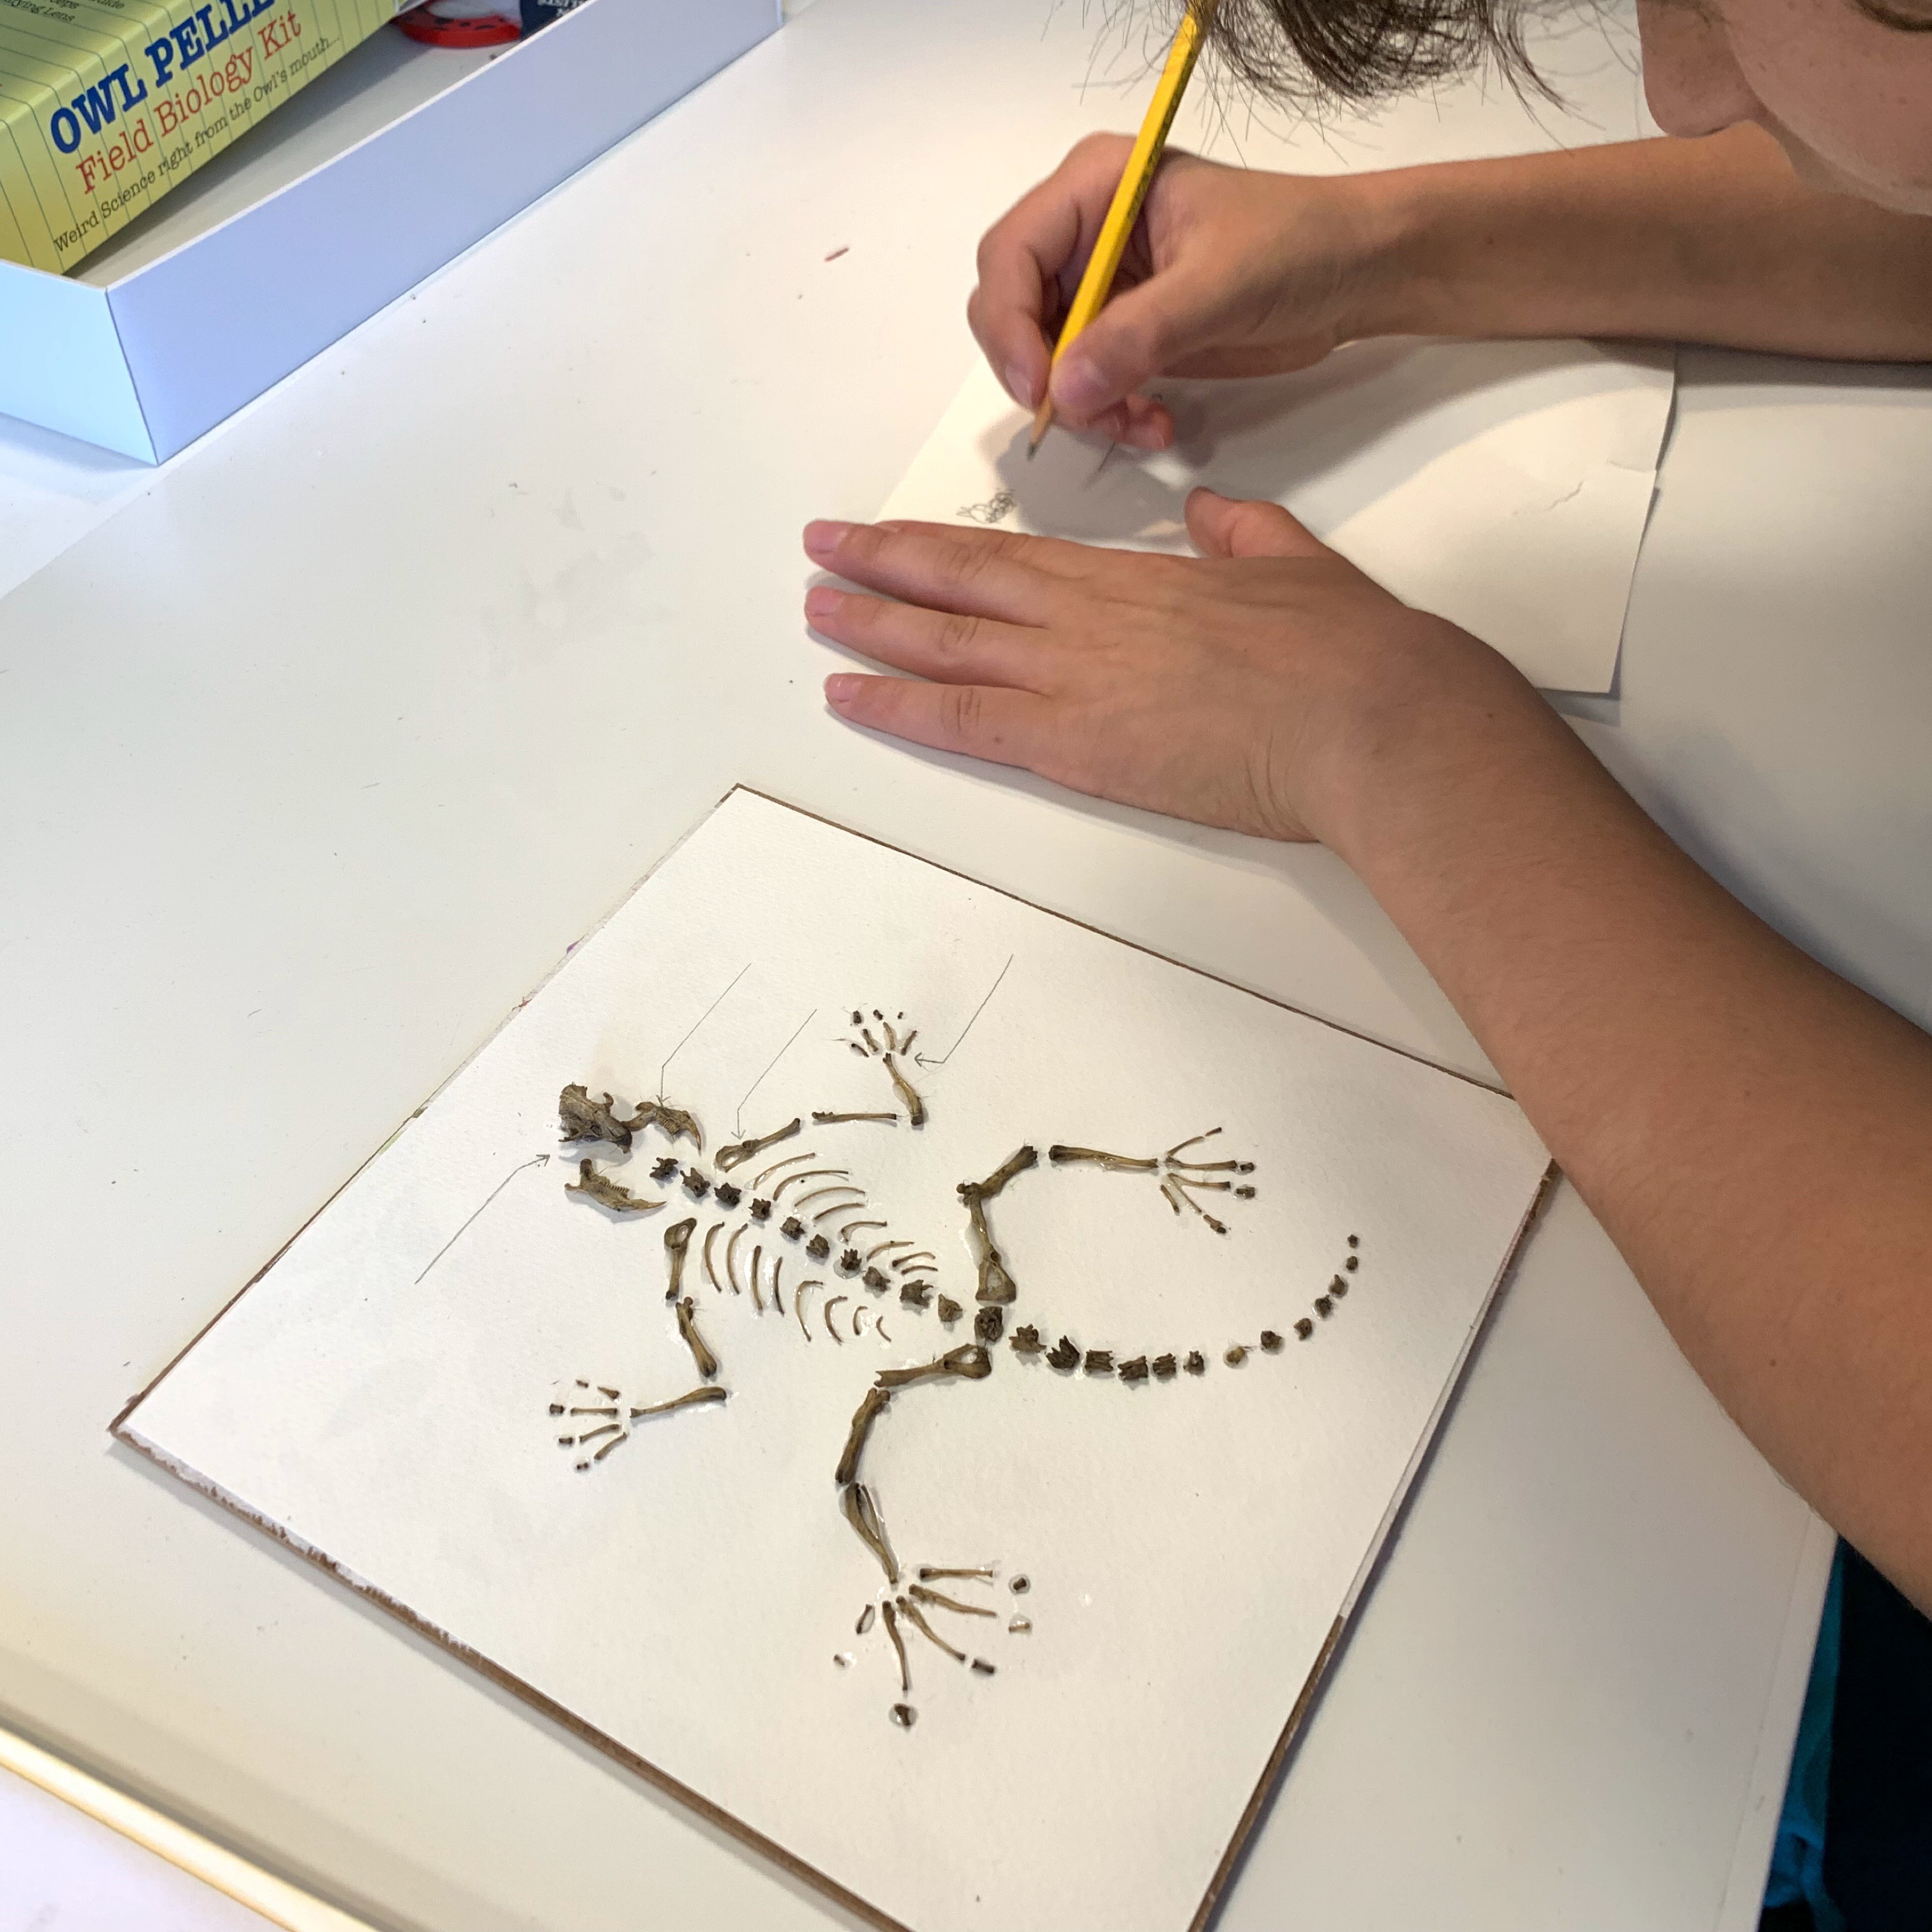
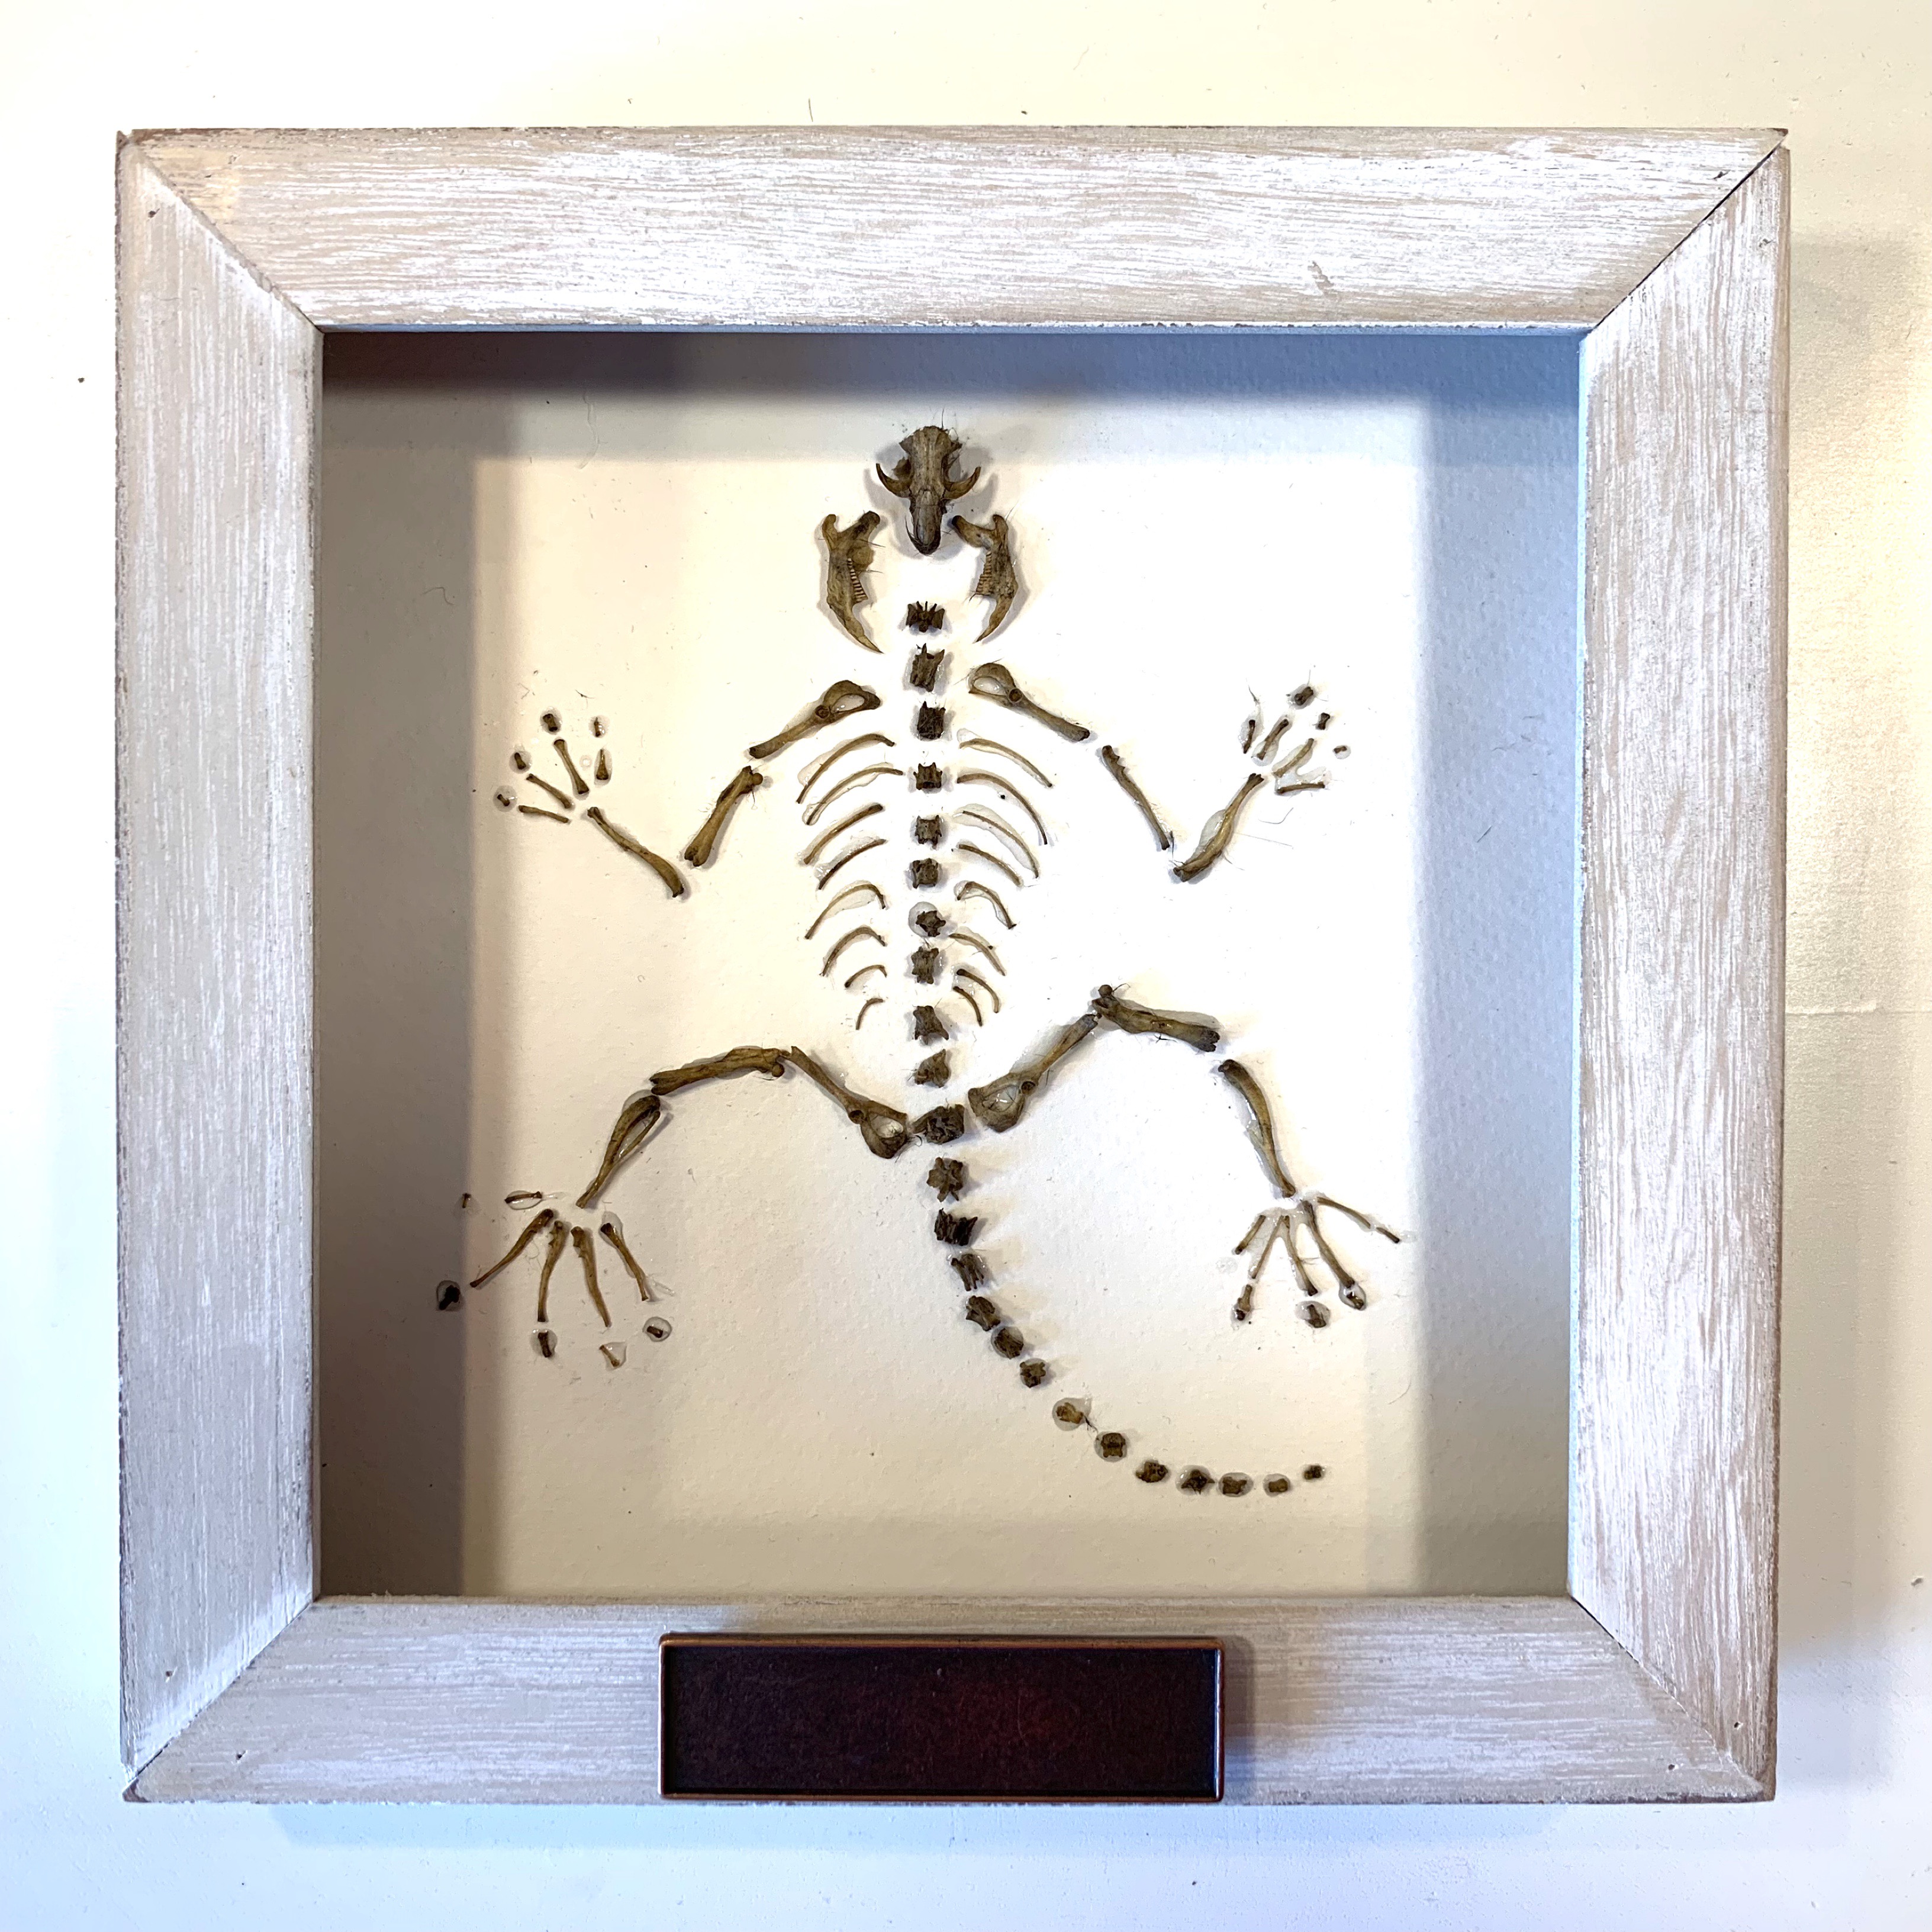
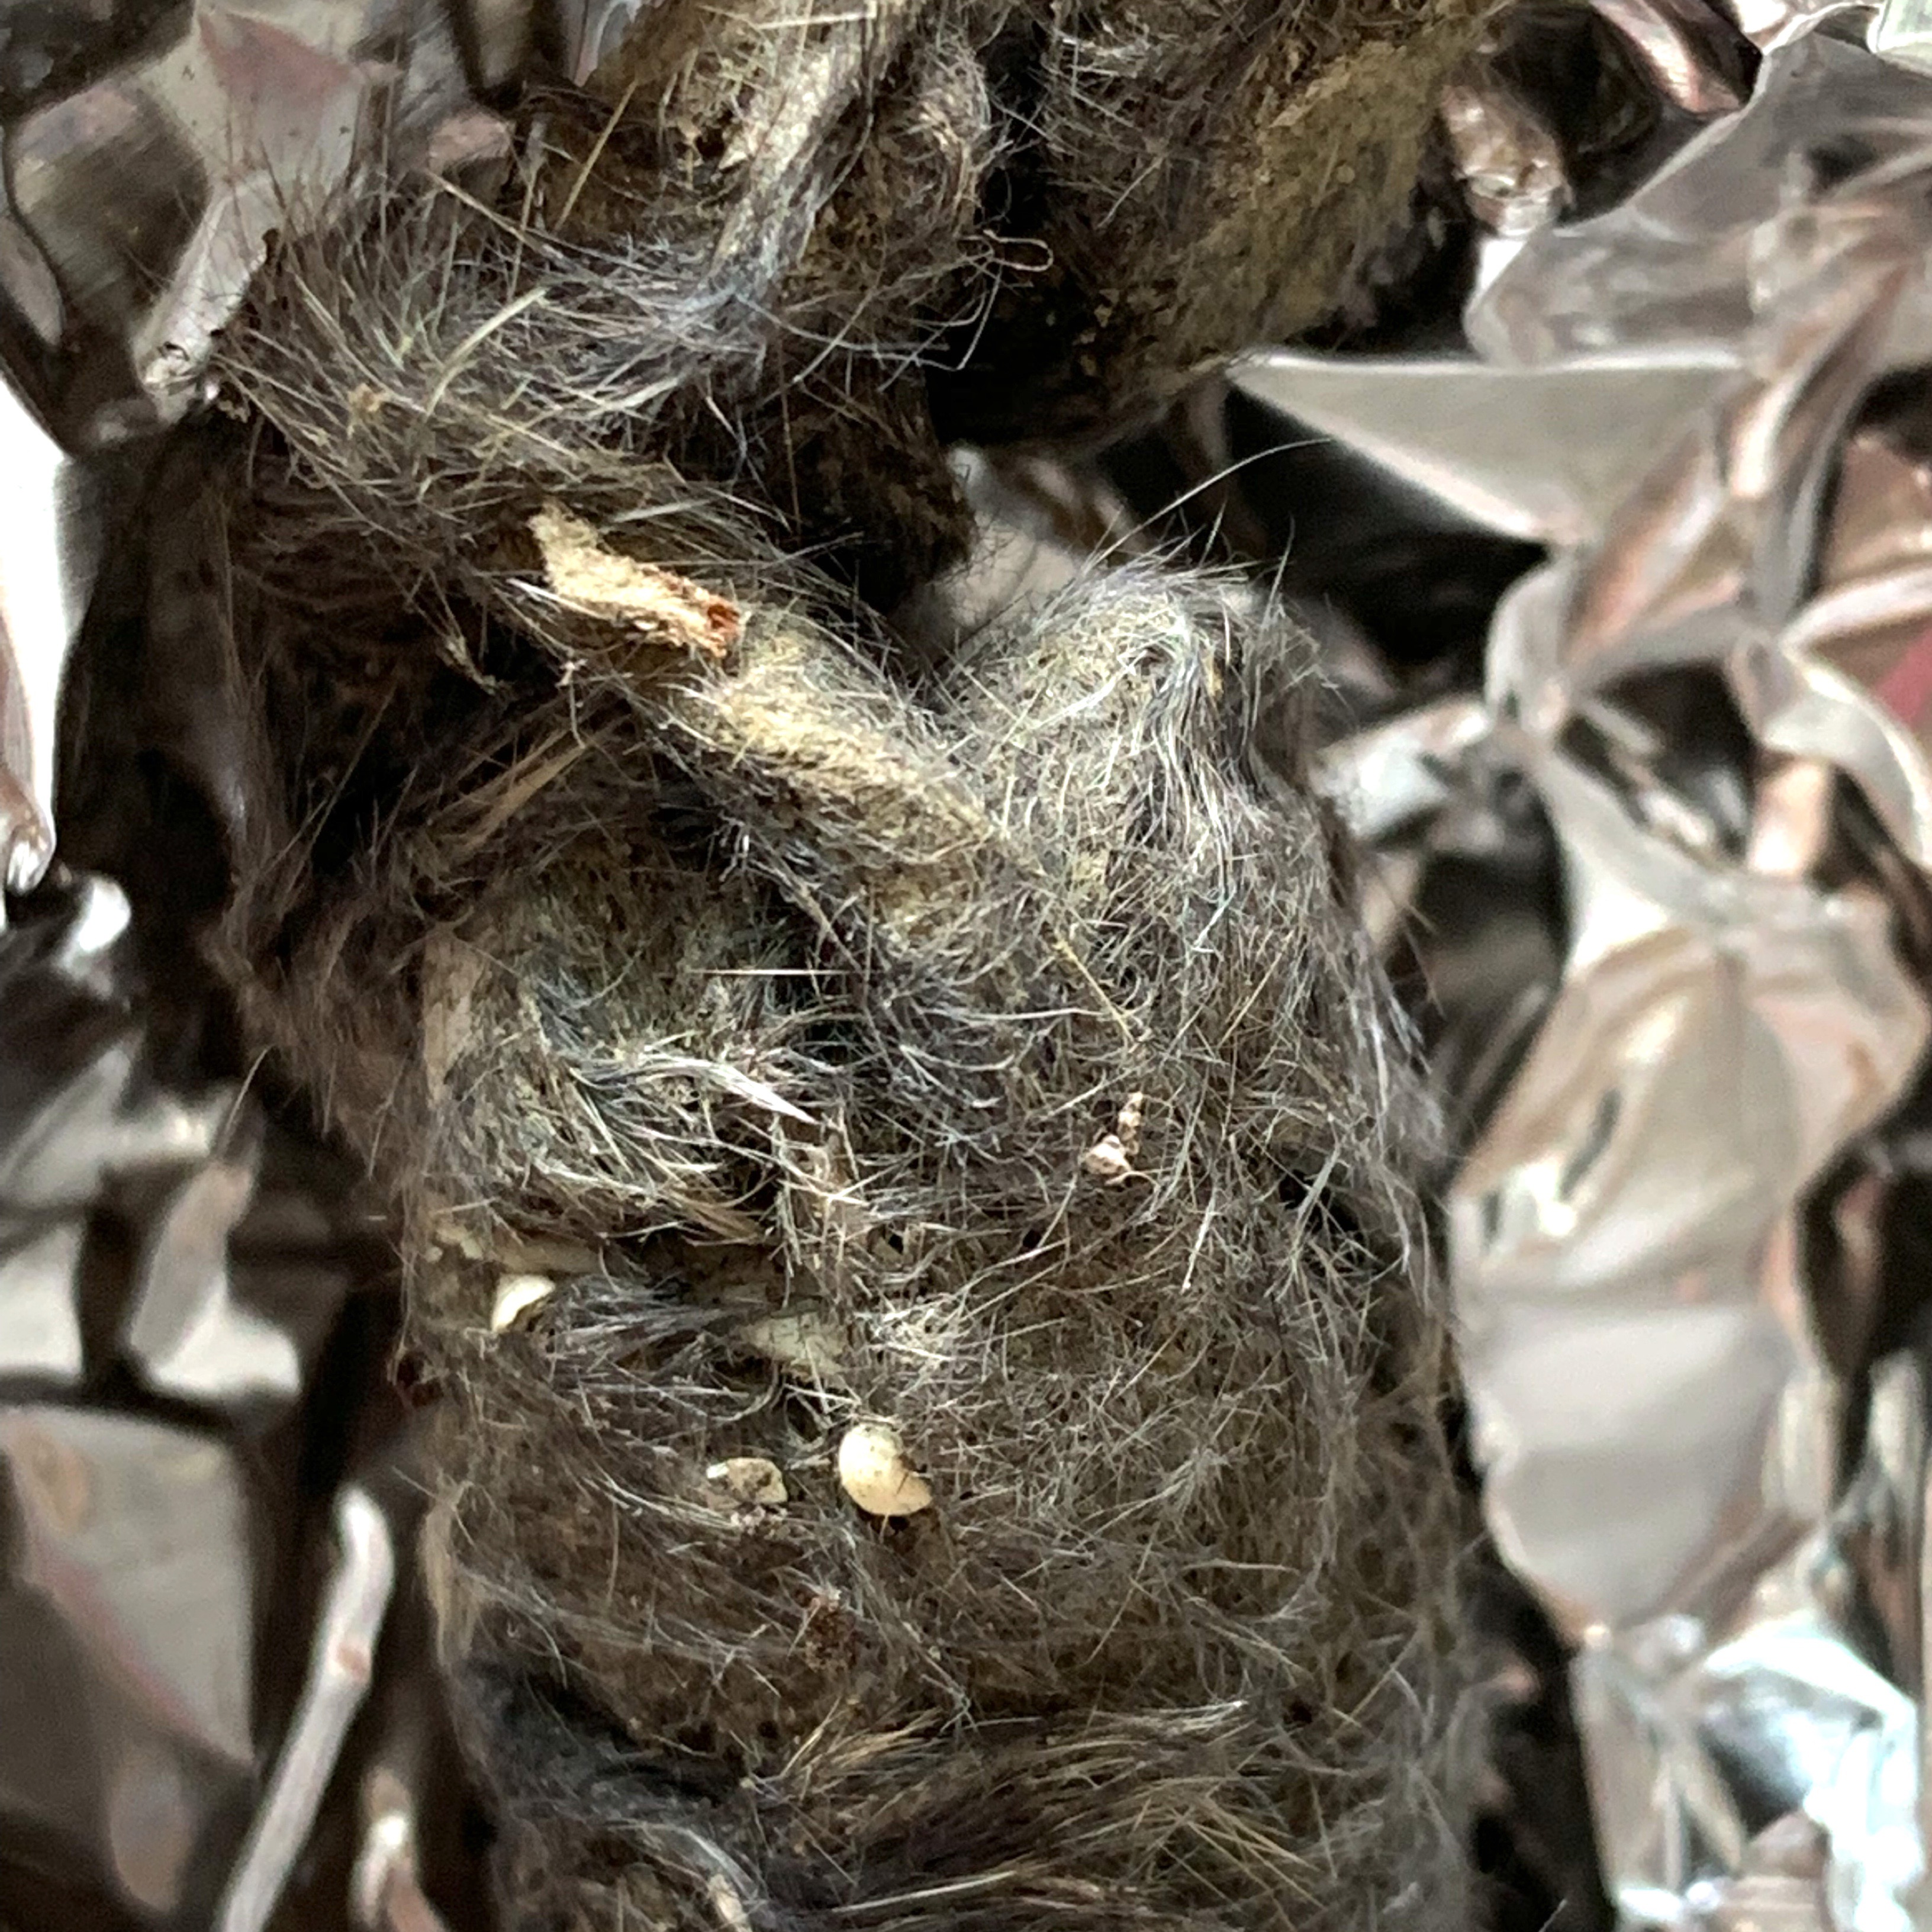
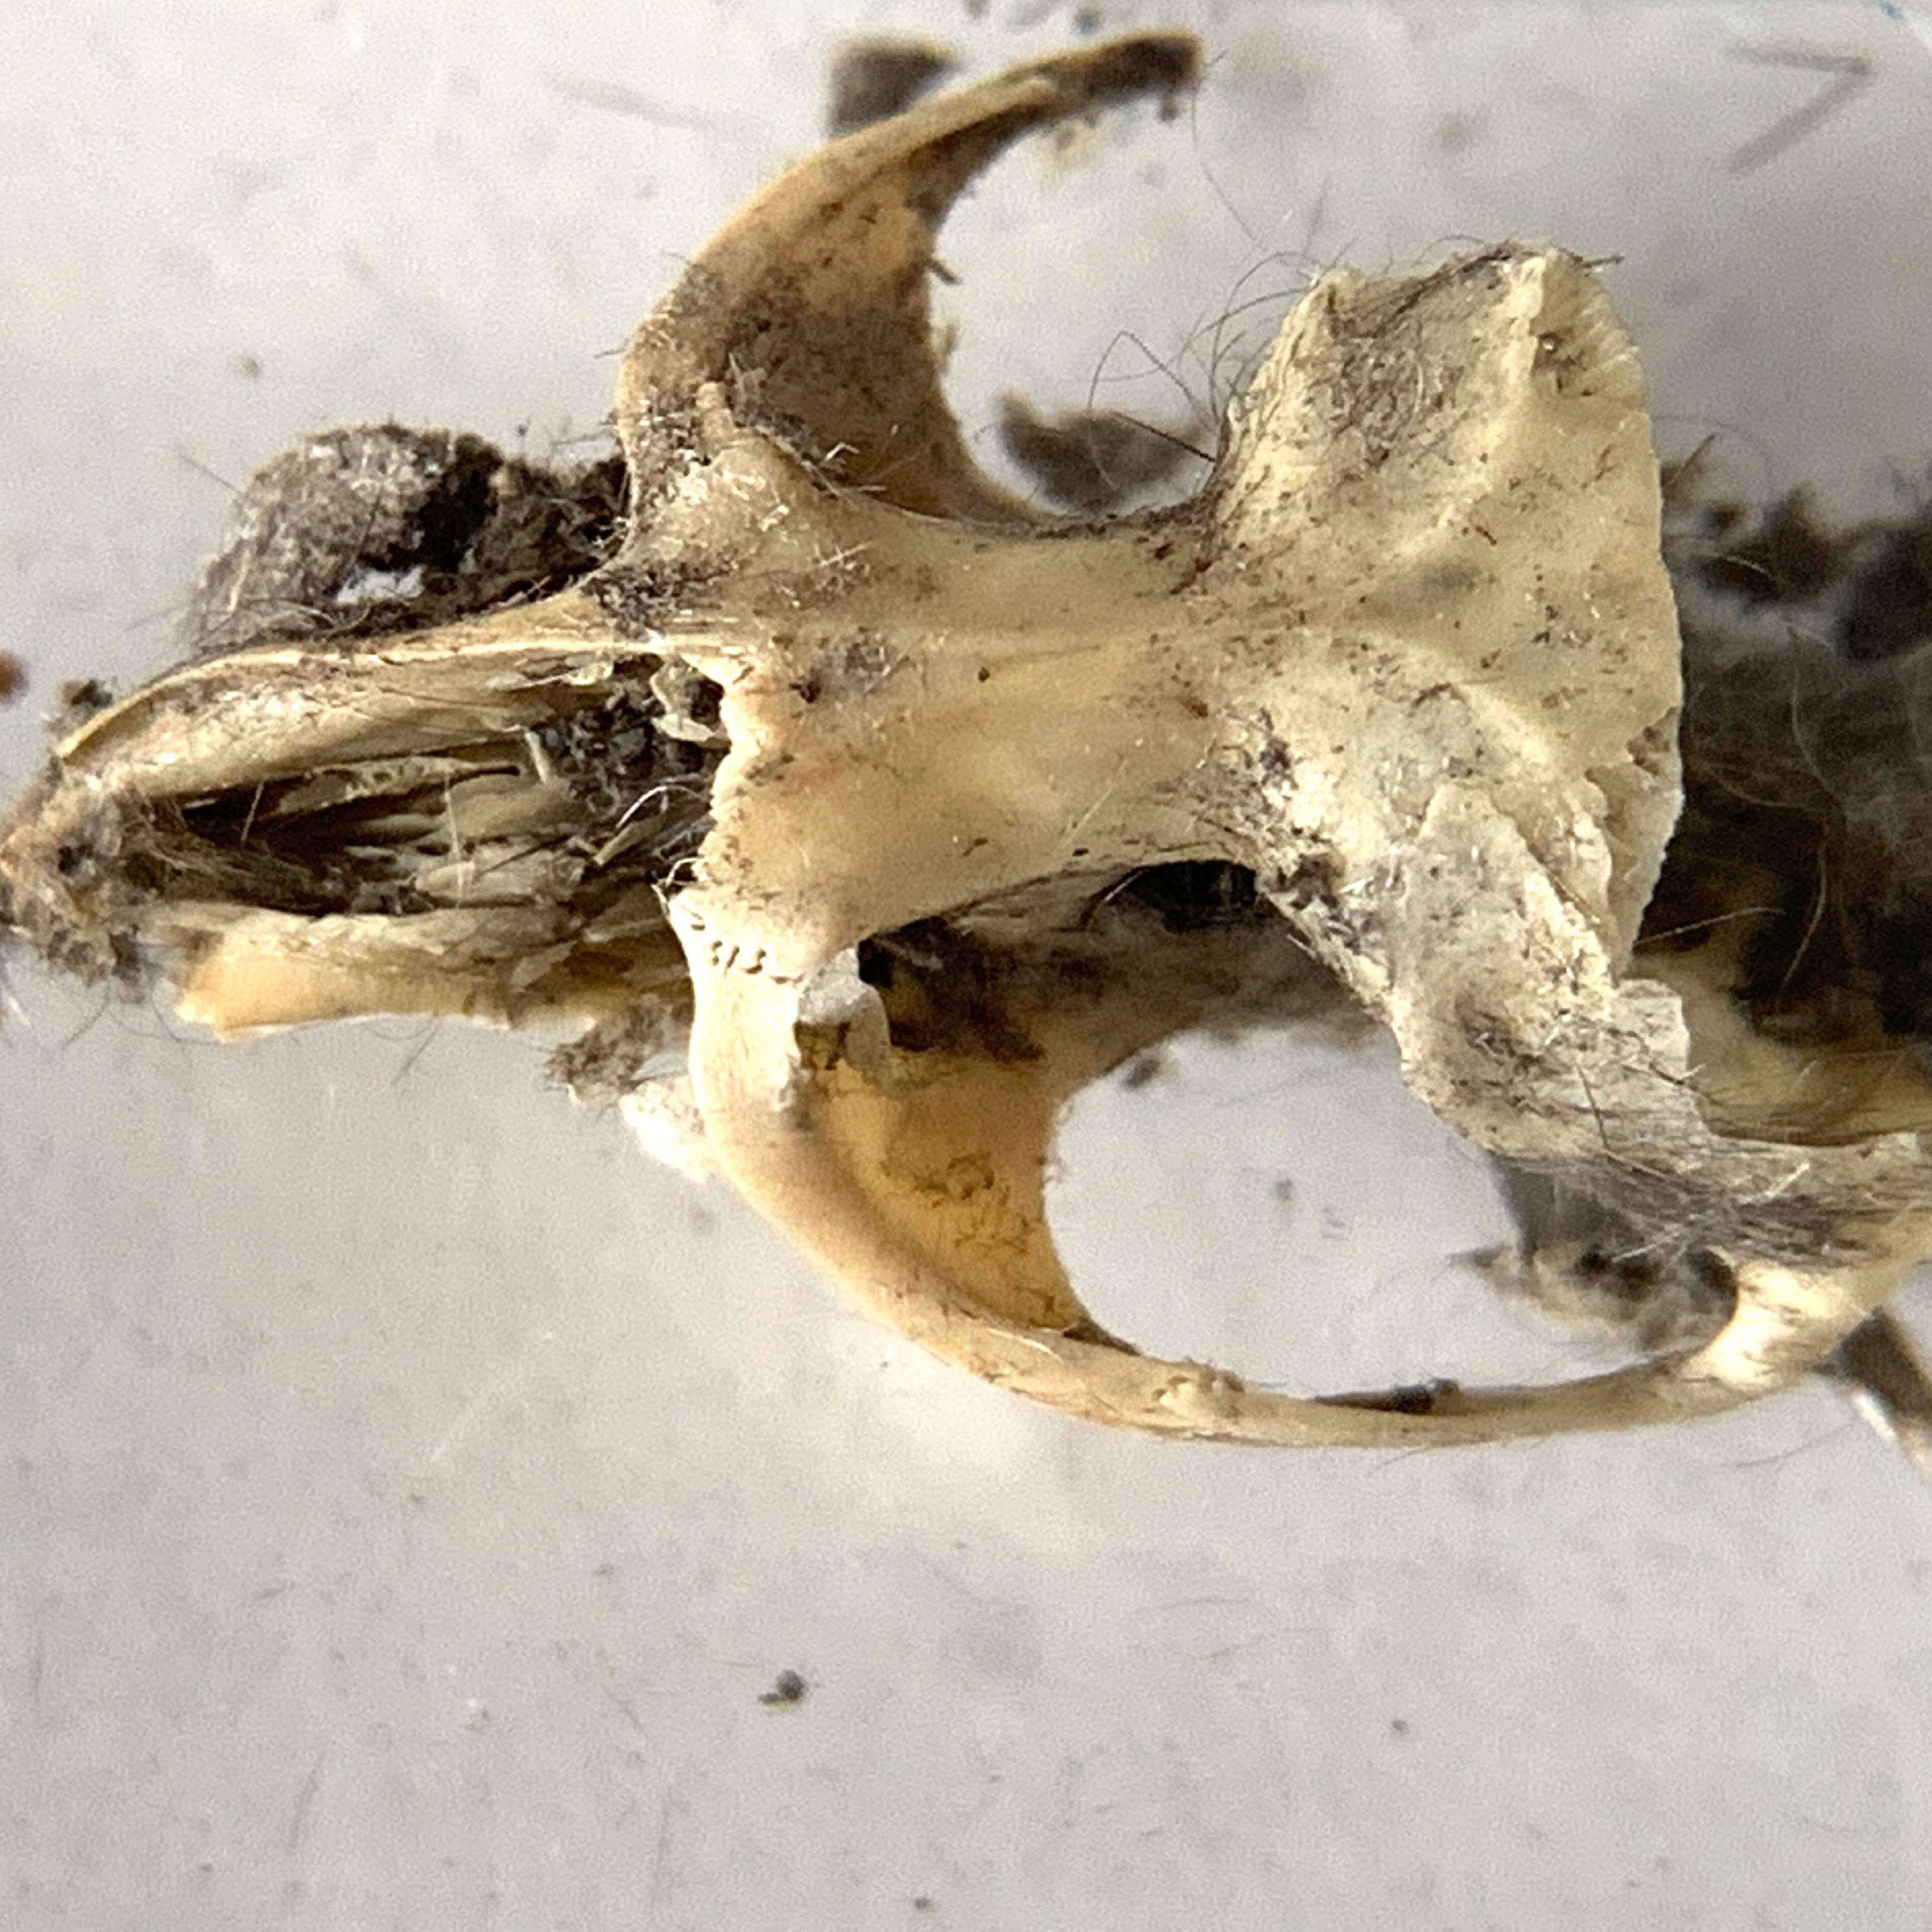
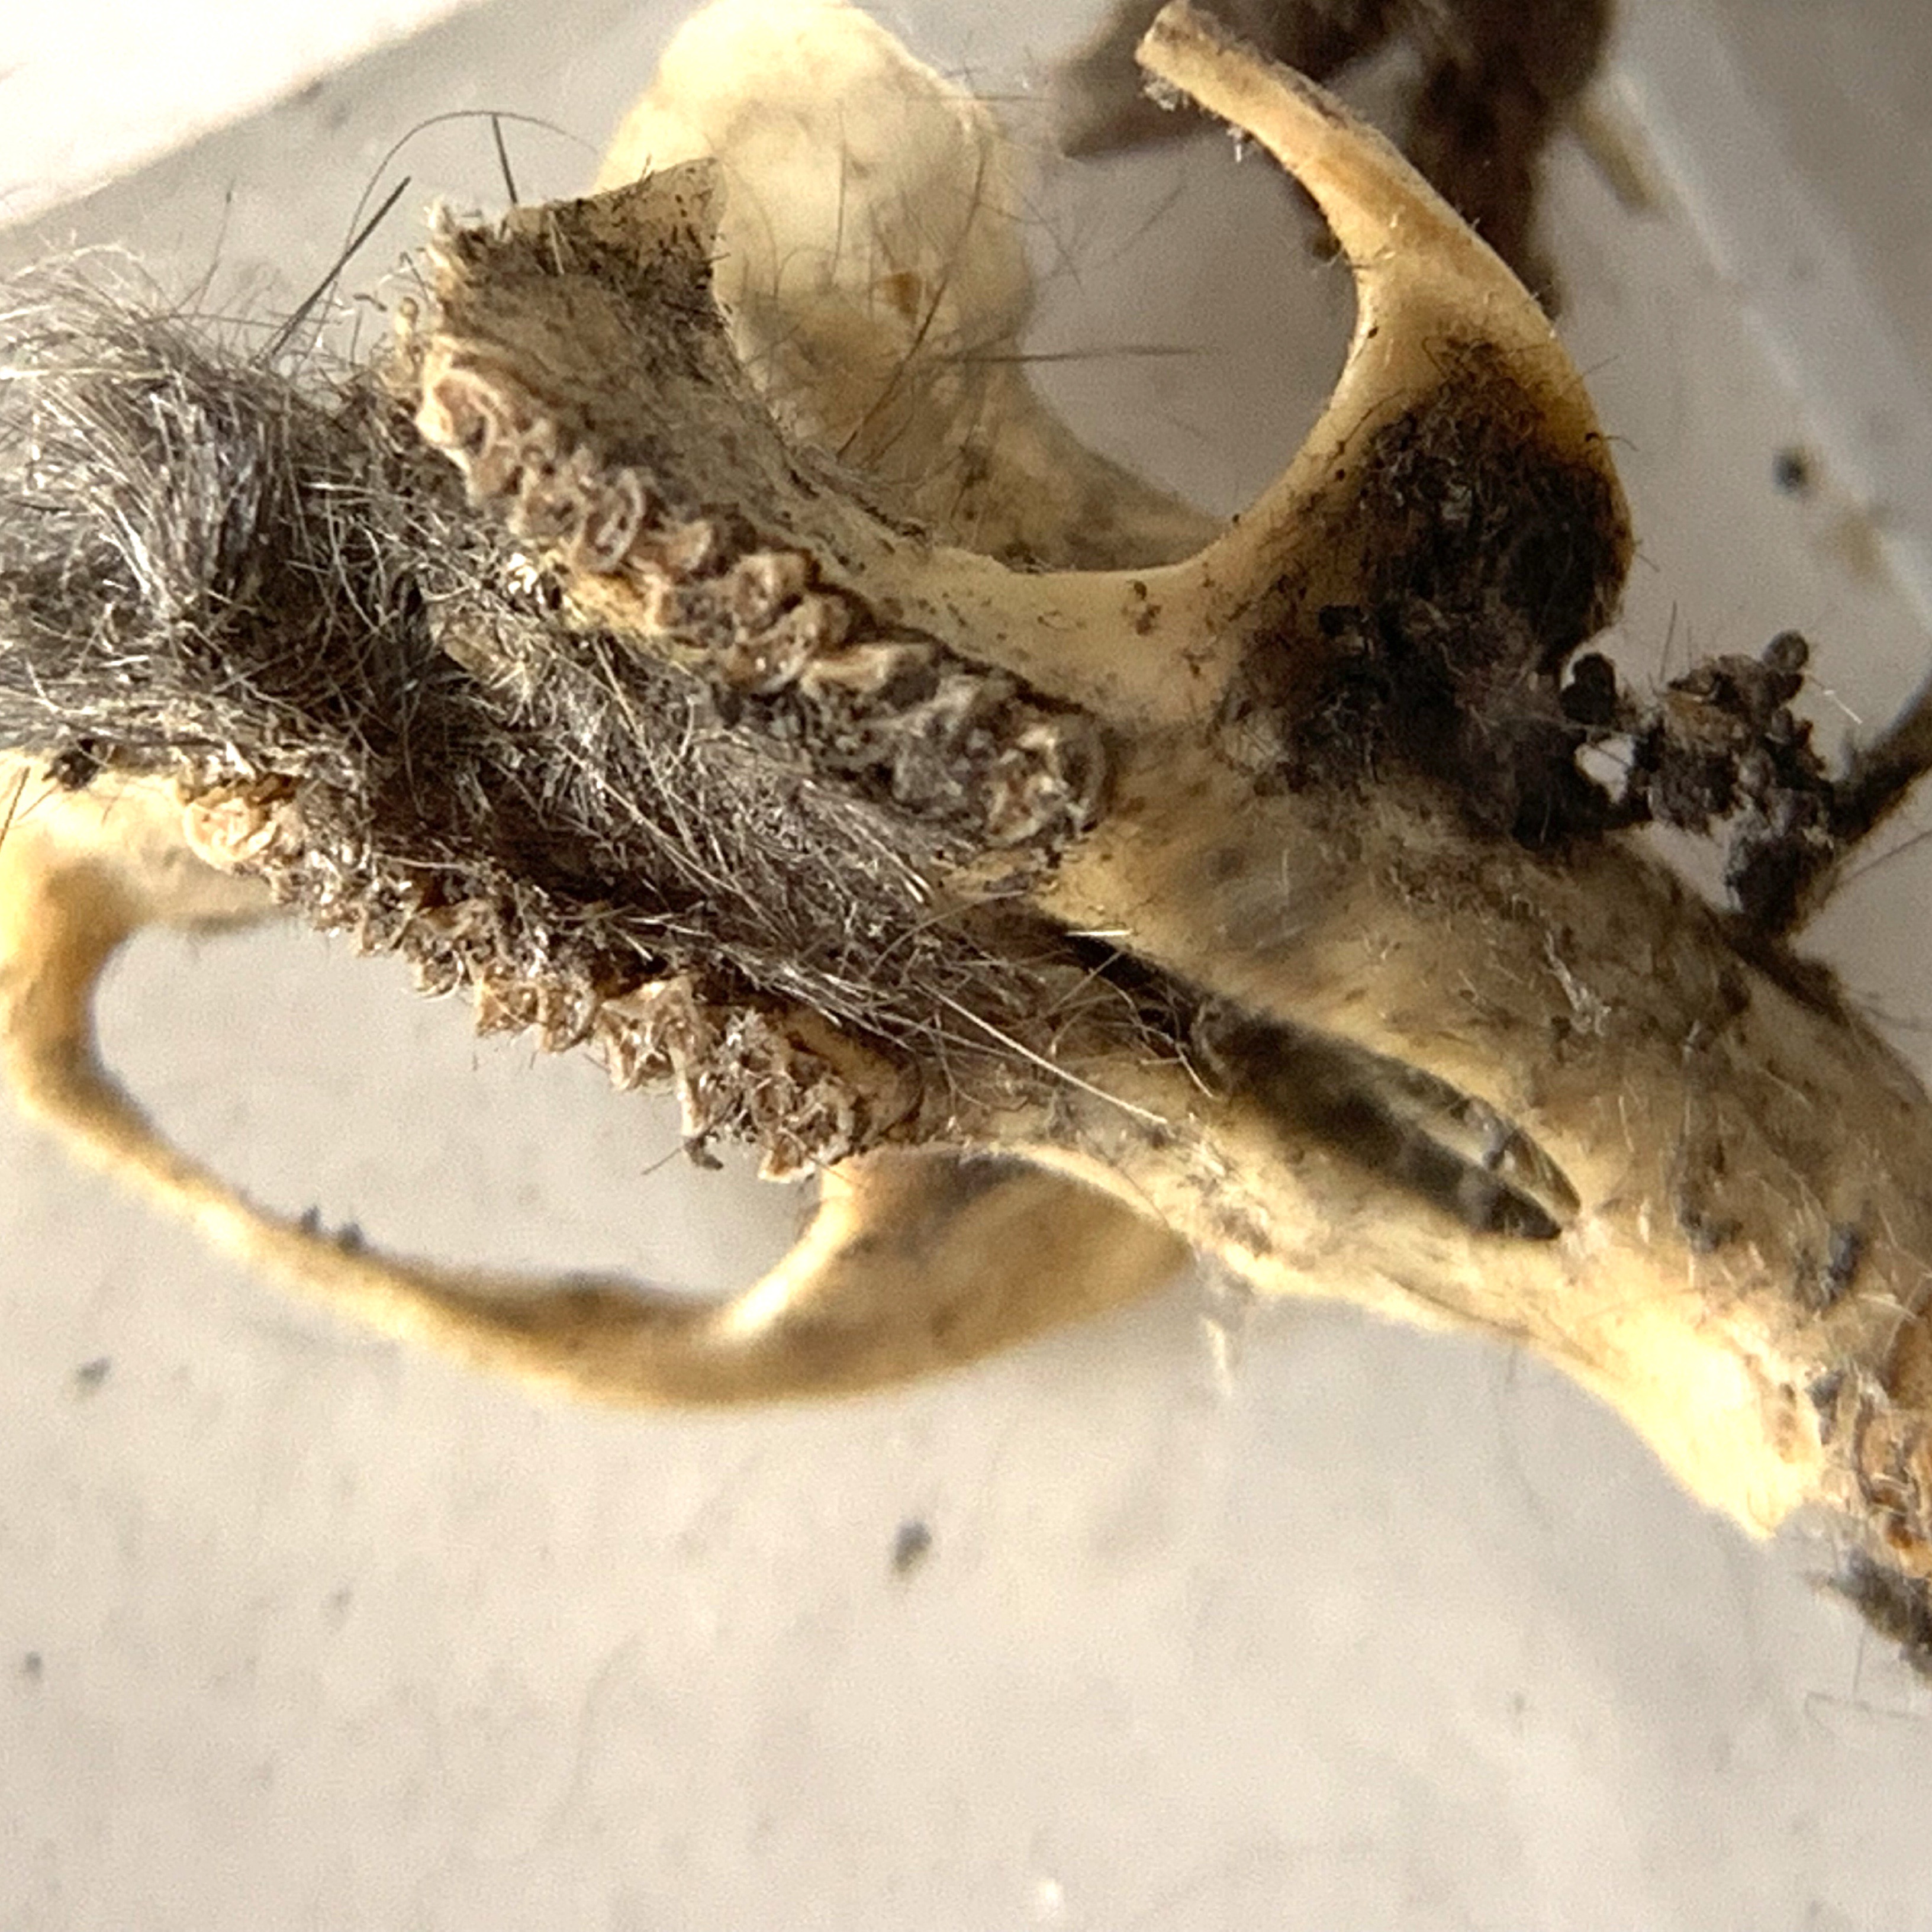
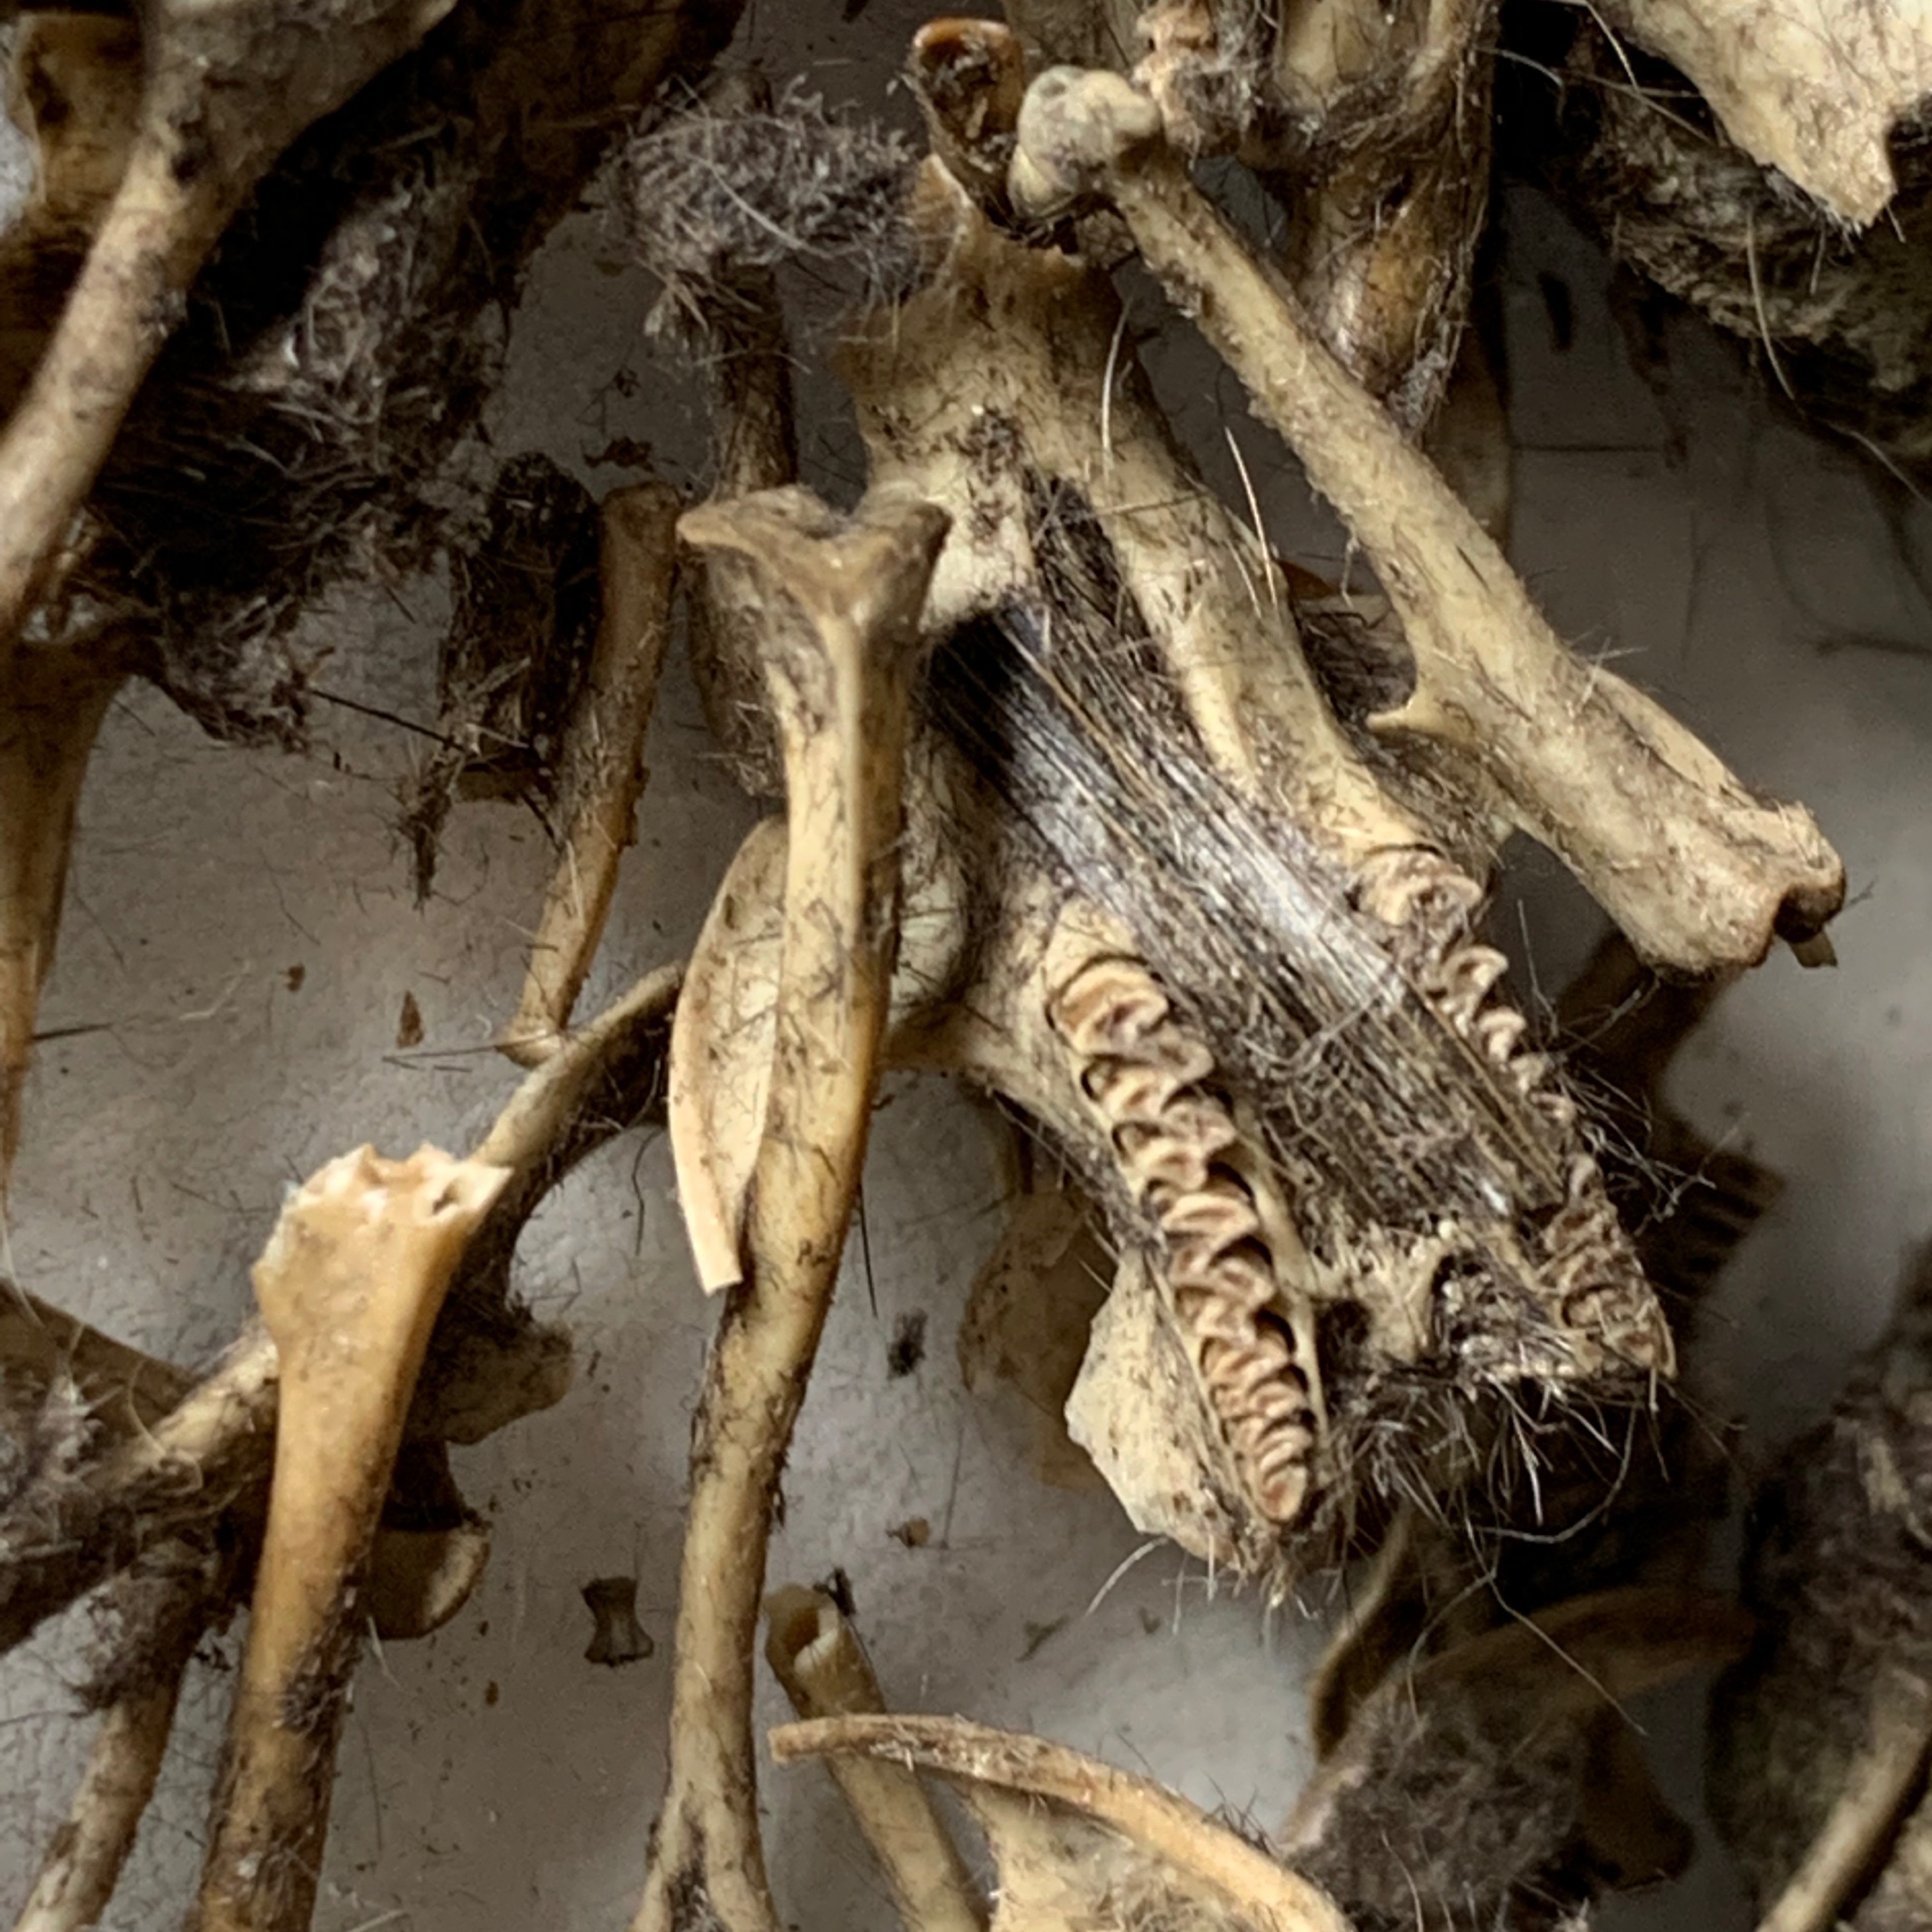
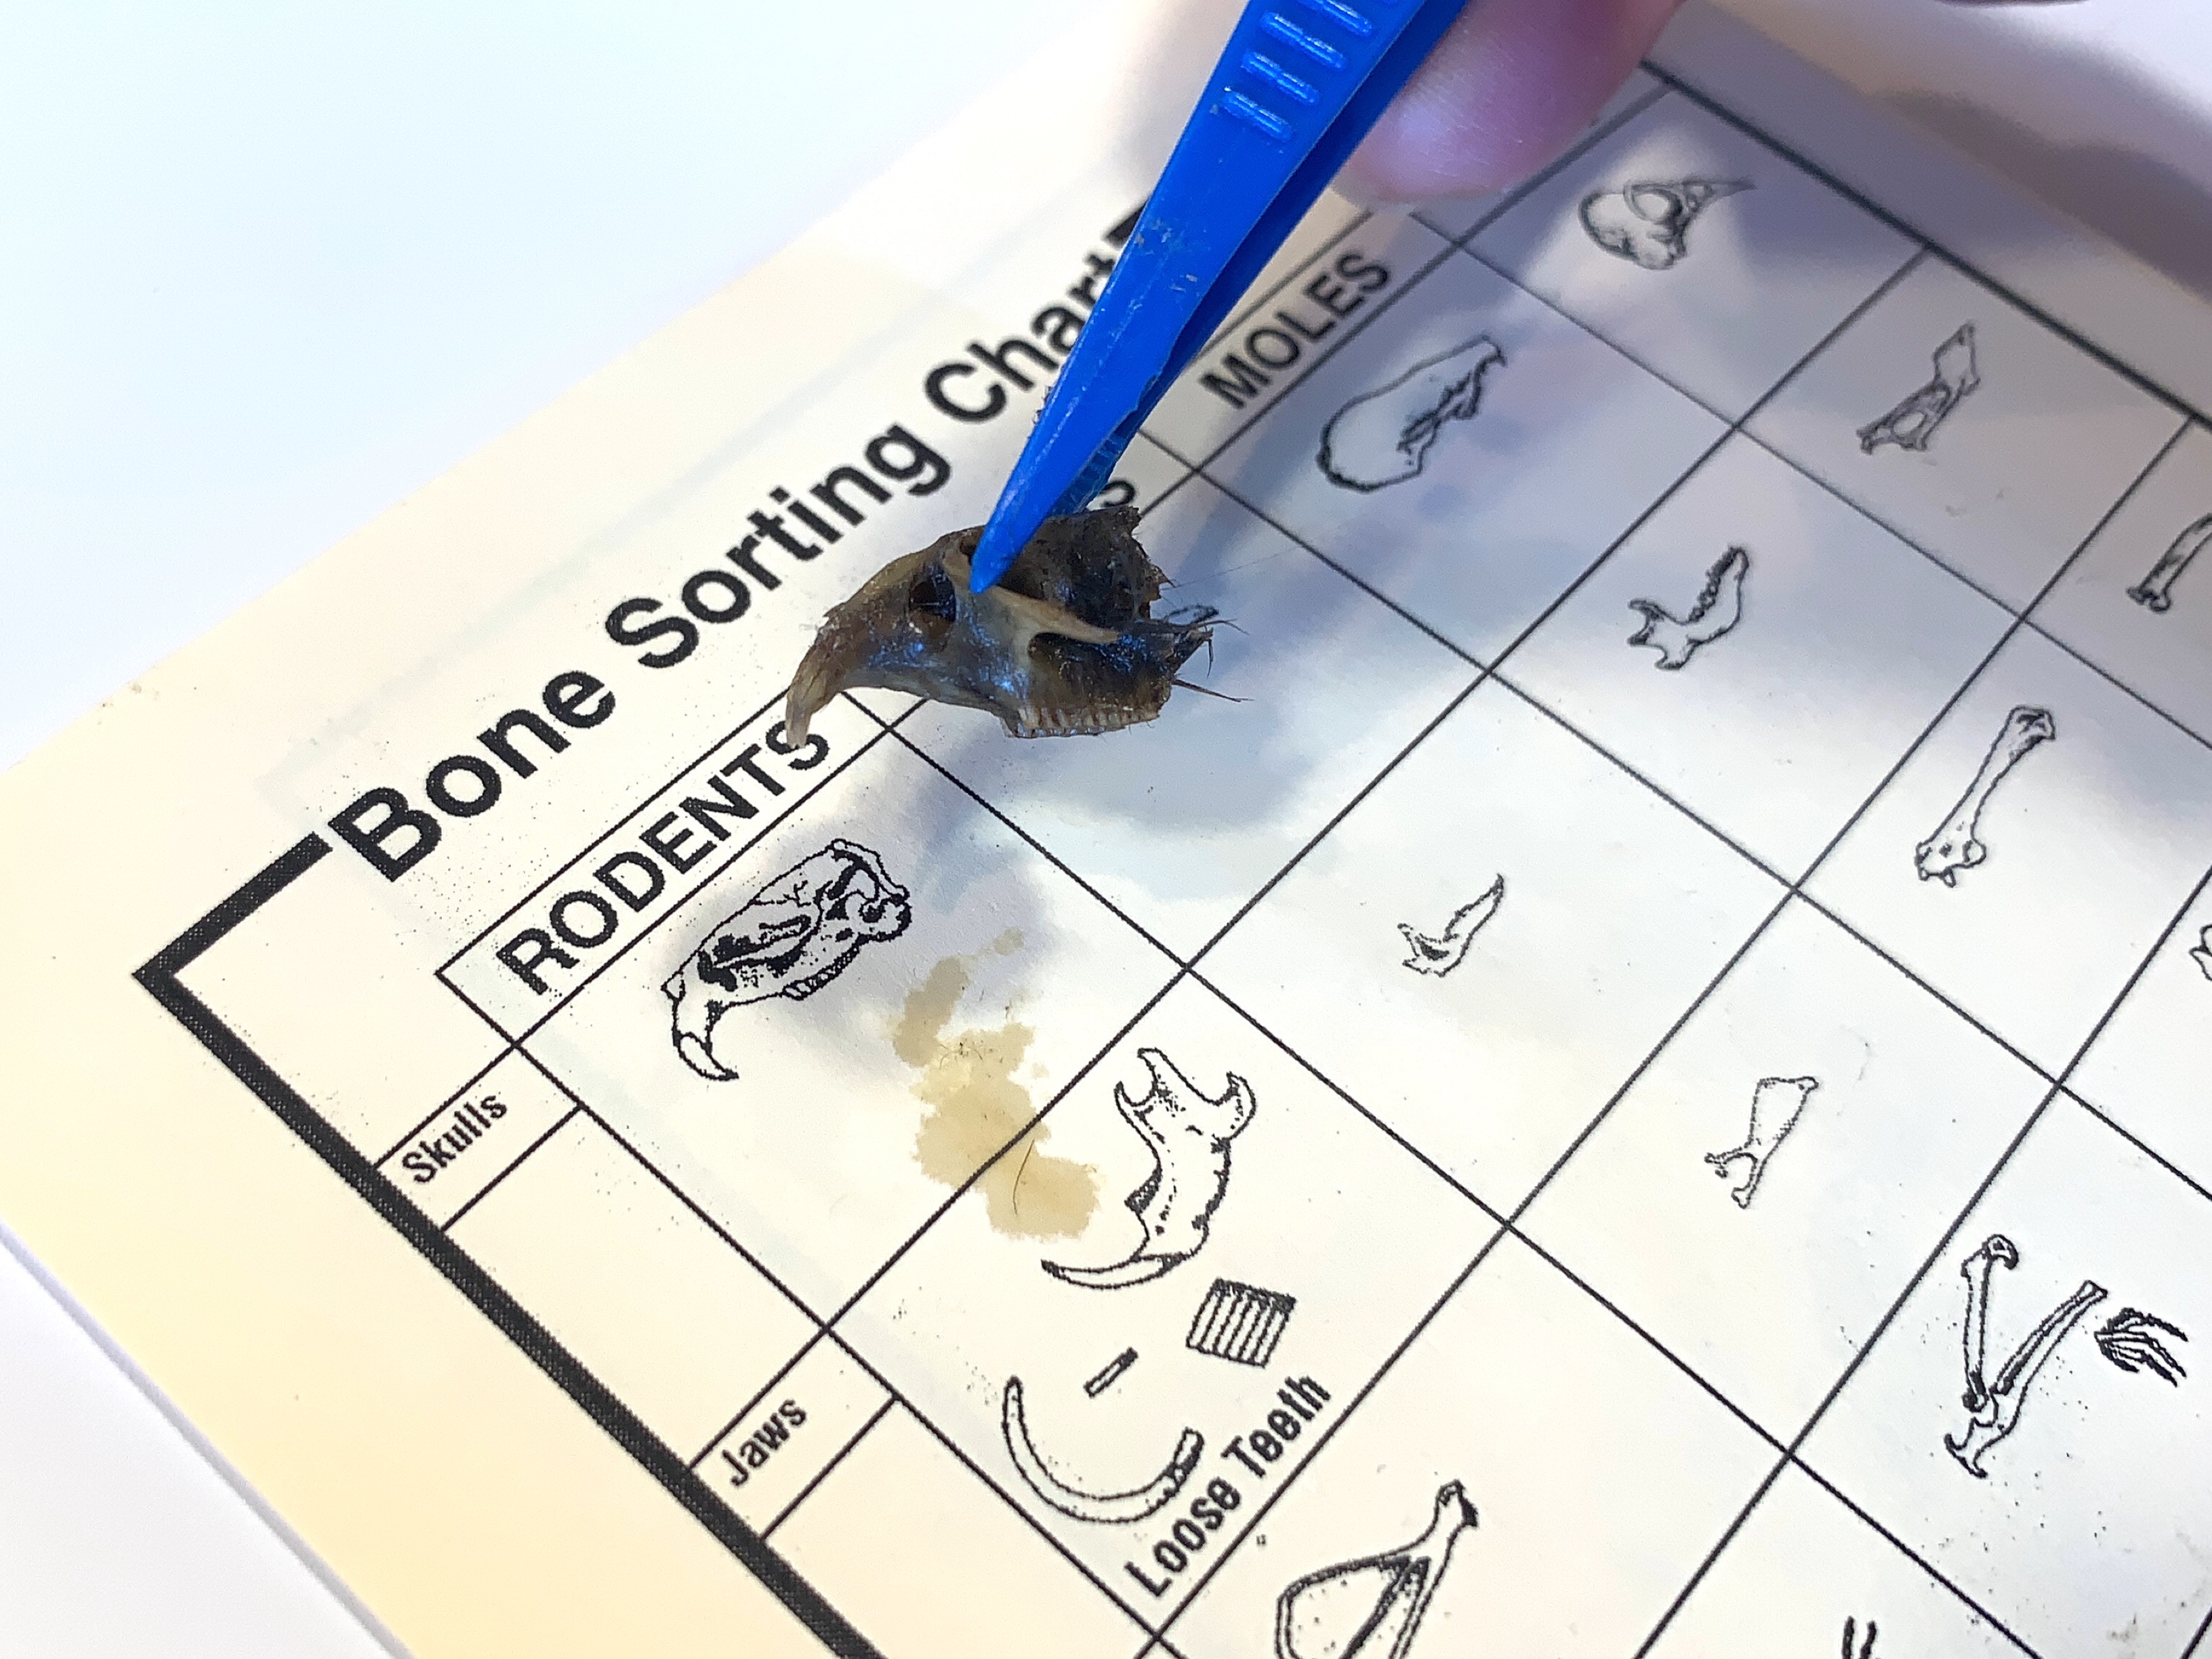
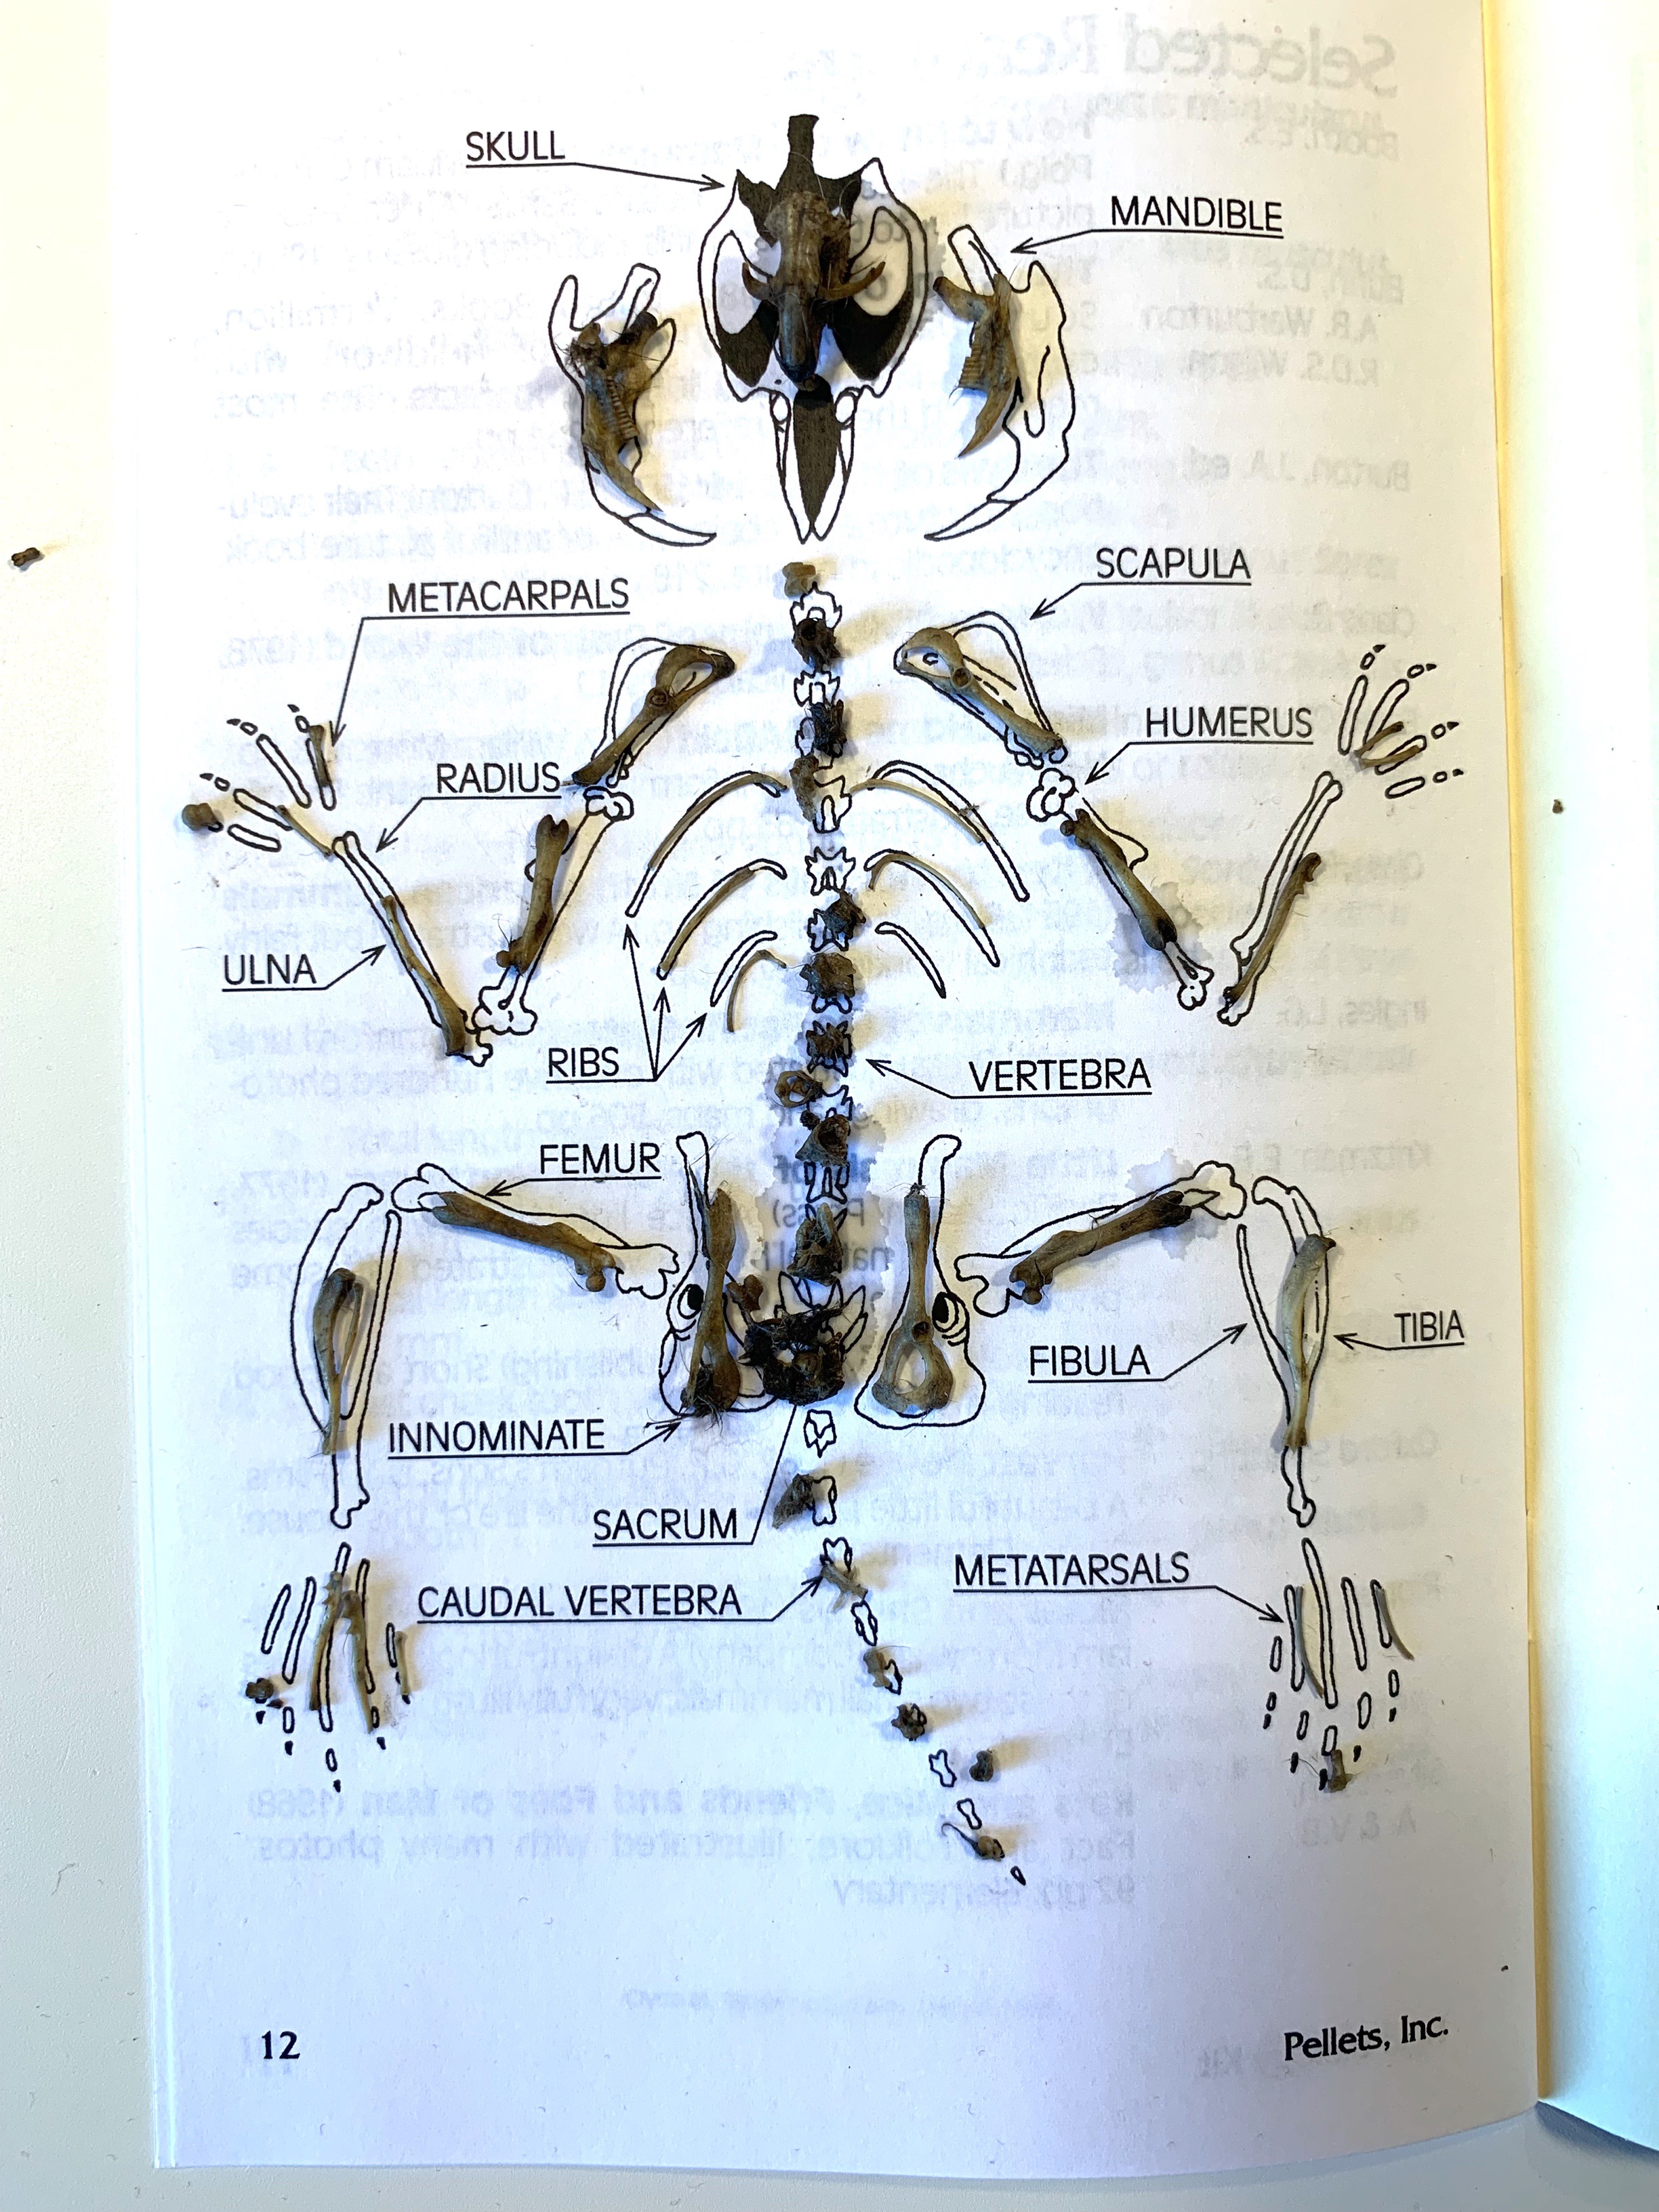
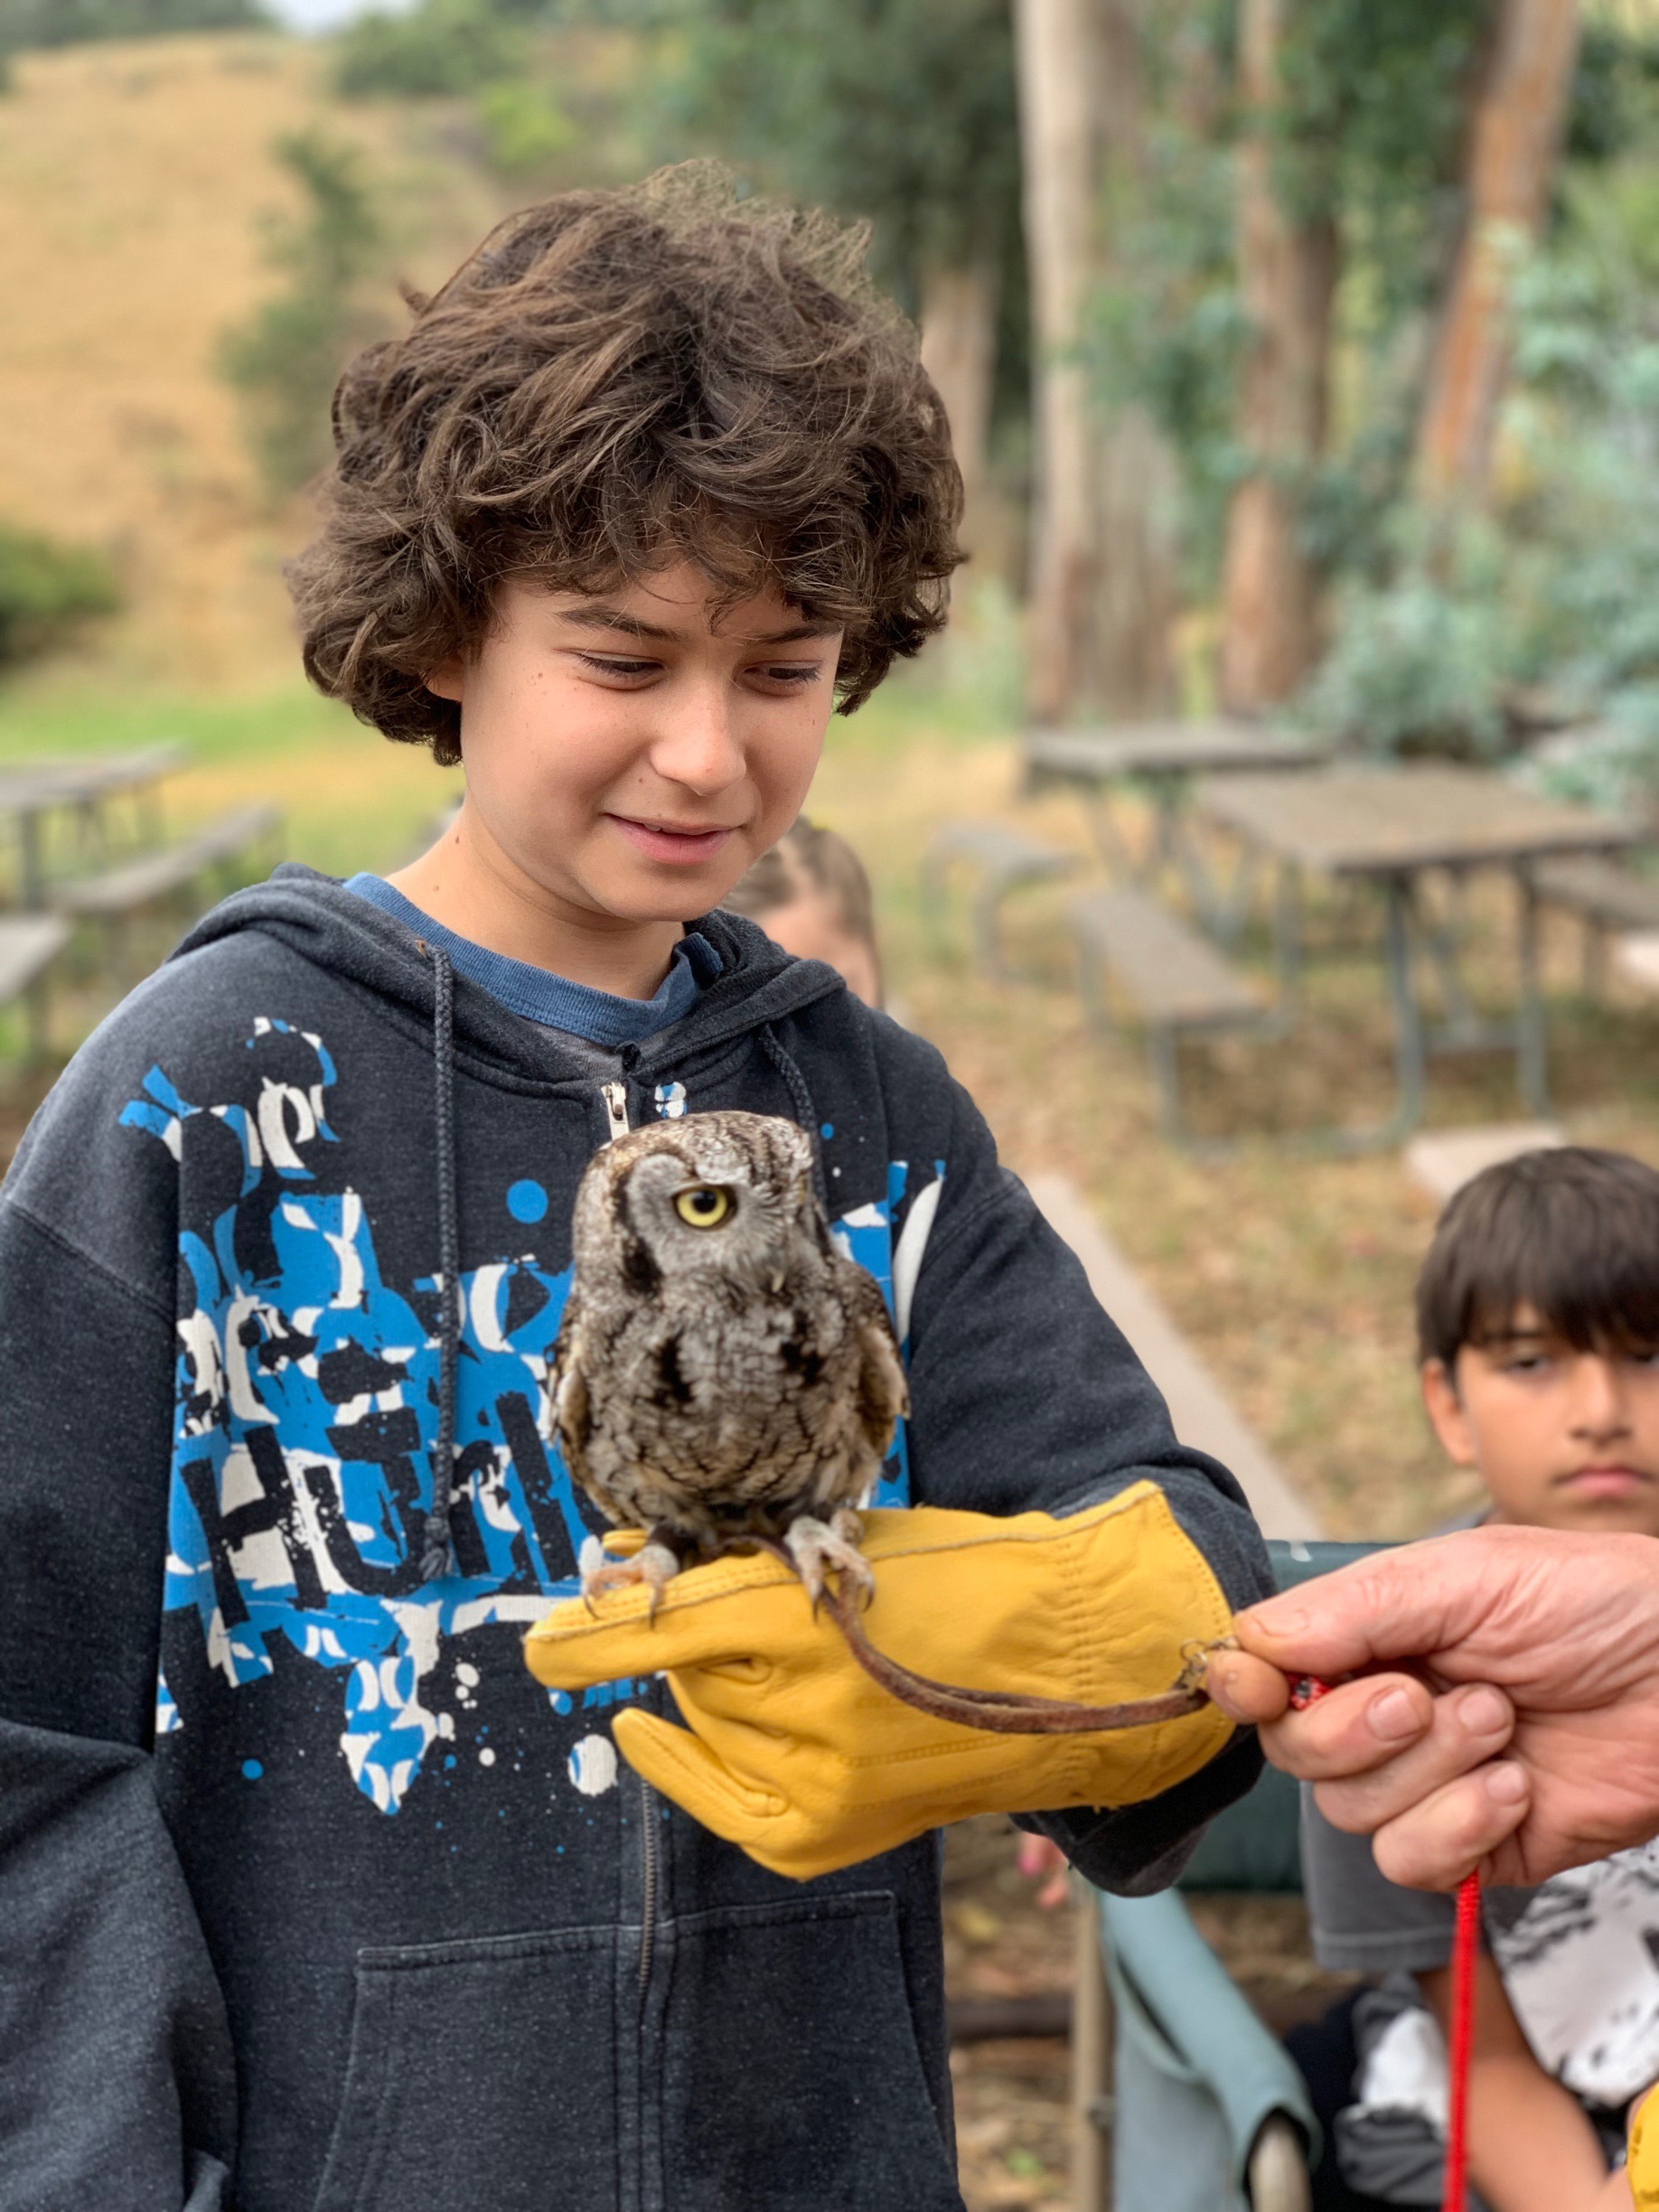
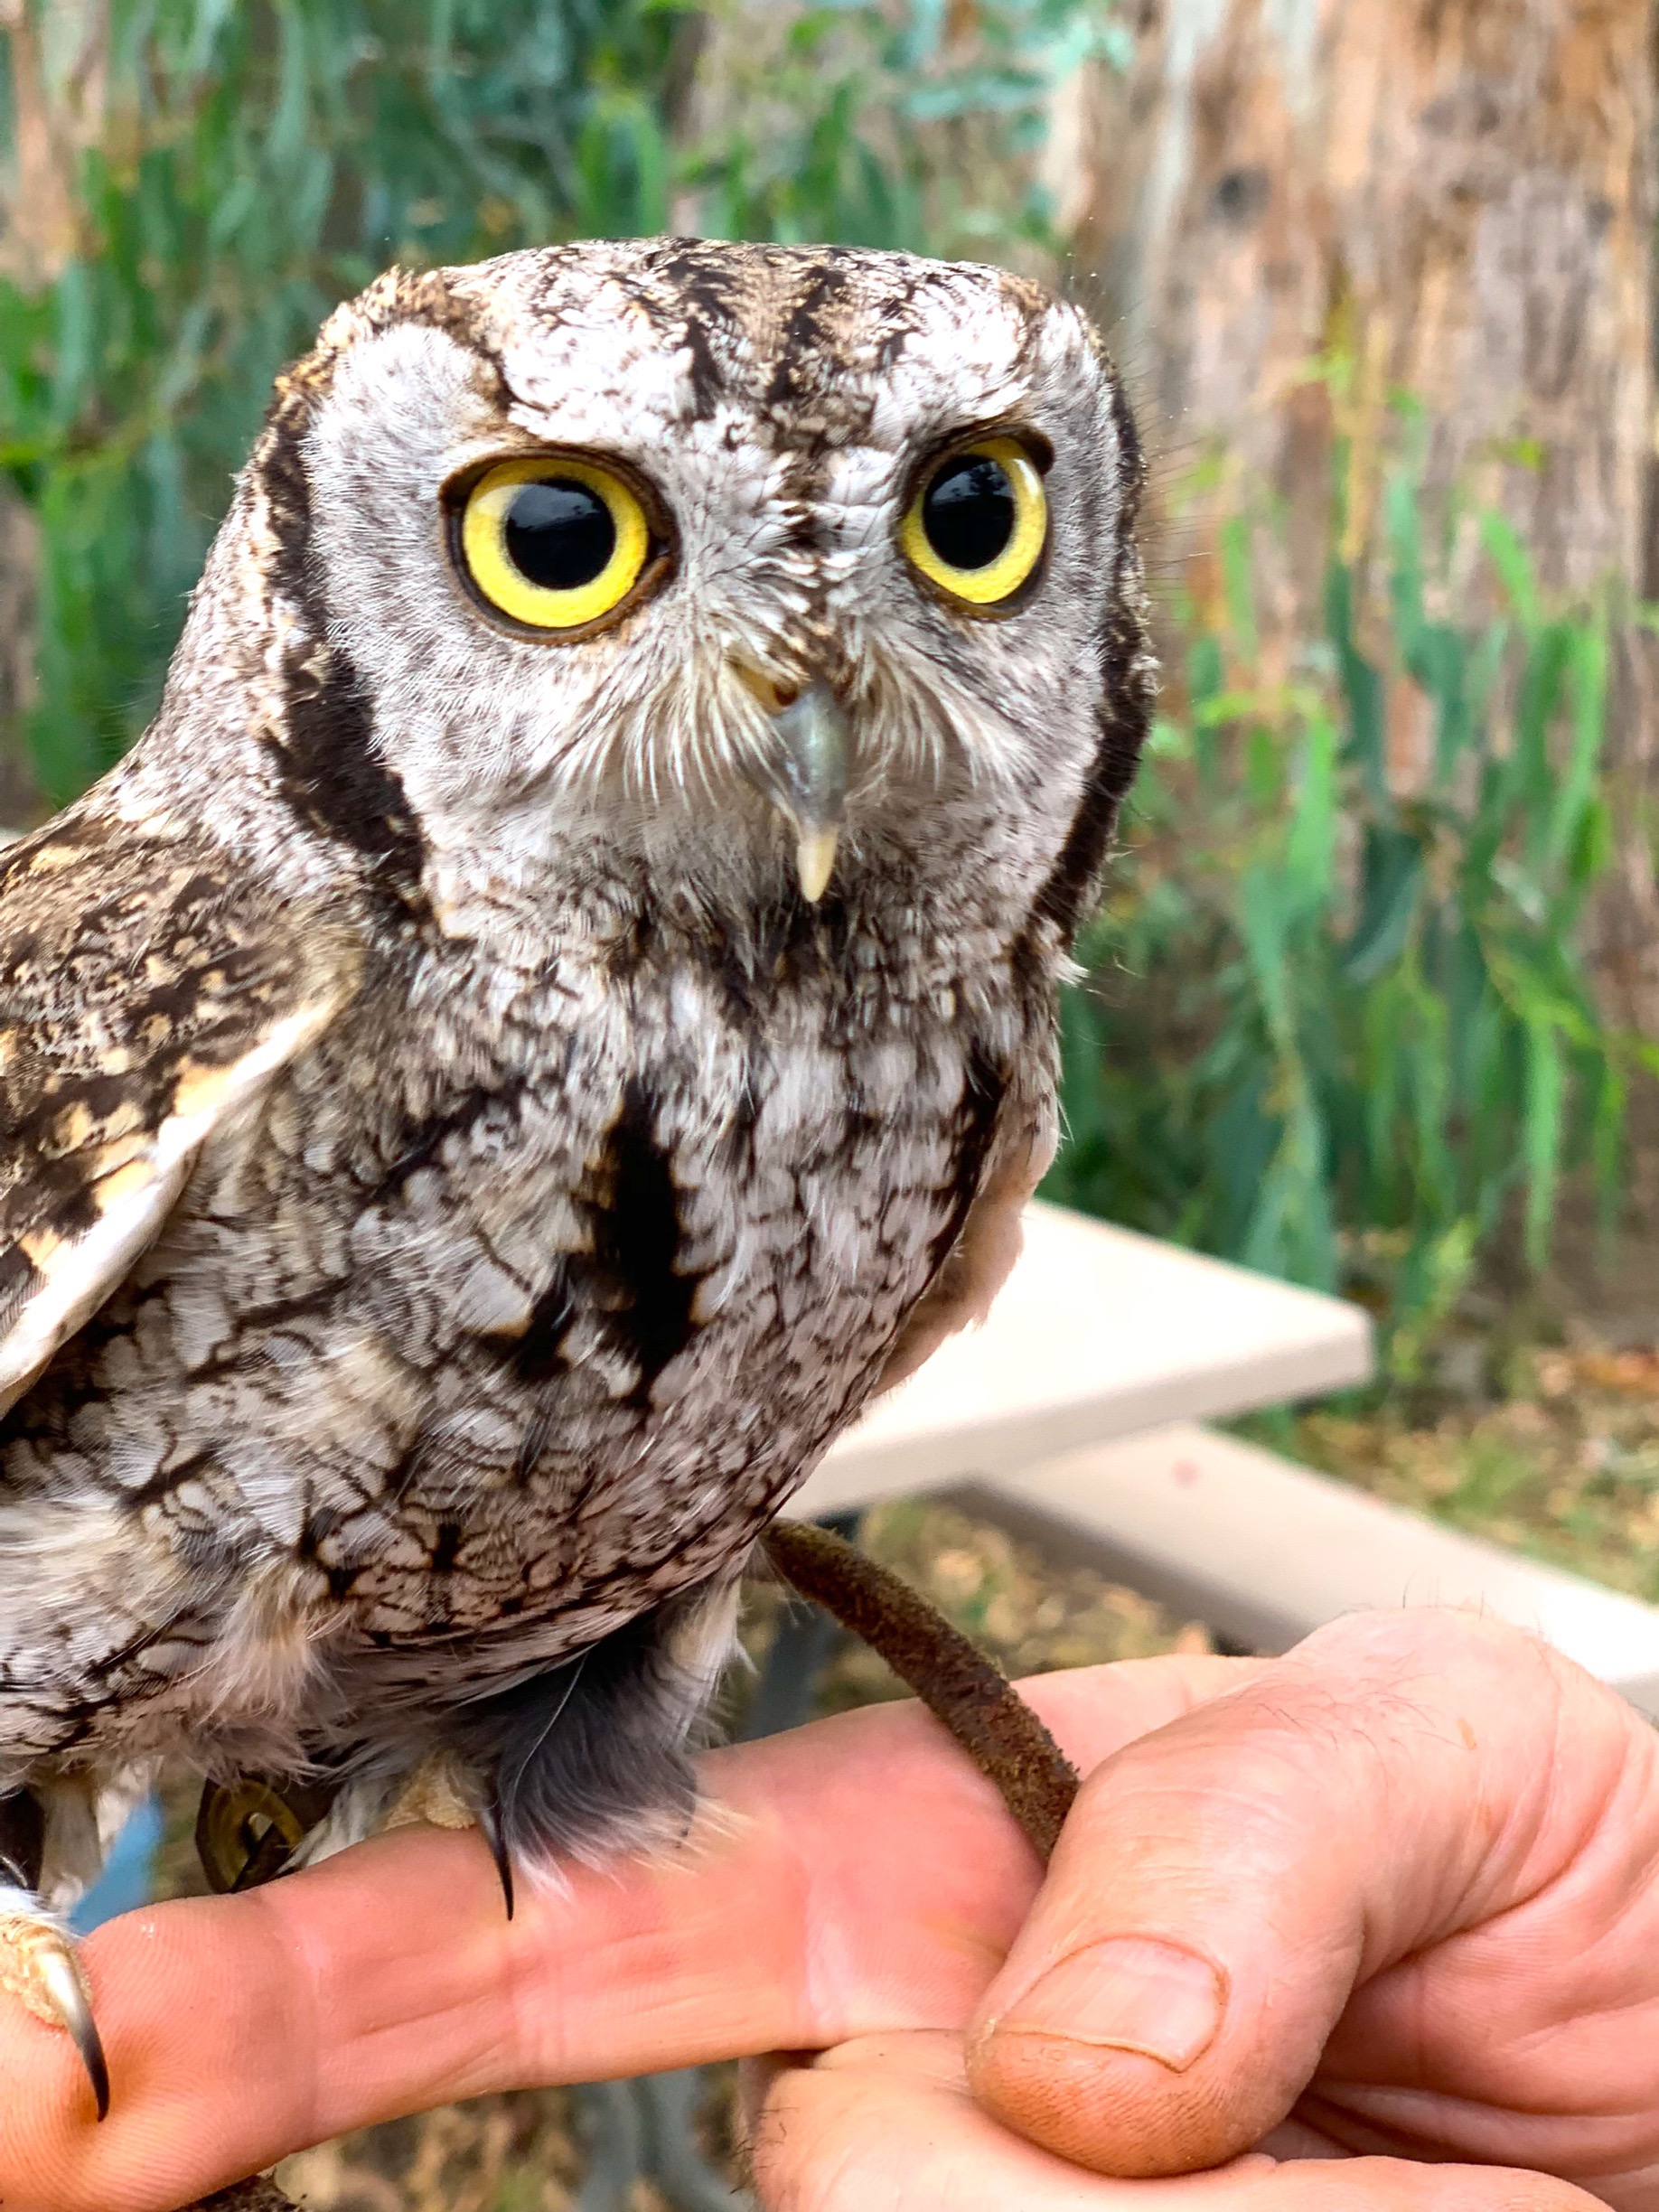
If you’ve never done an owl pellet dissection before, fair warning, it can be hard to stomach this activity. We took this project to the next level by assembling a complete rodent skeleton out of the remains we found in the owl pellet. While that wasn’t our initial intentions, I’m really glad we did so, and I found it to be the most educational part of this project.
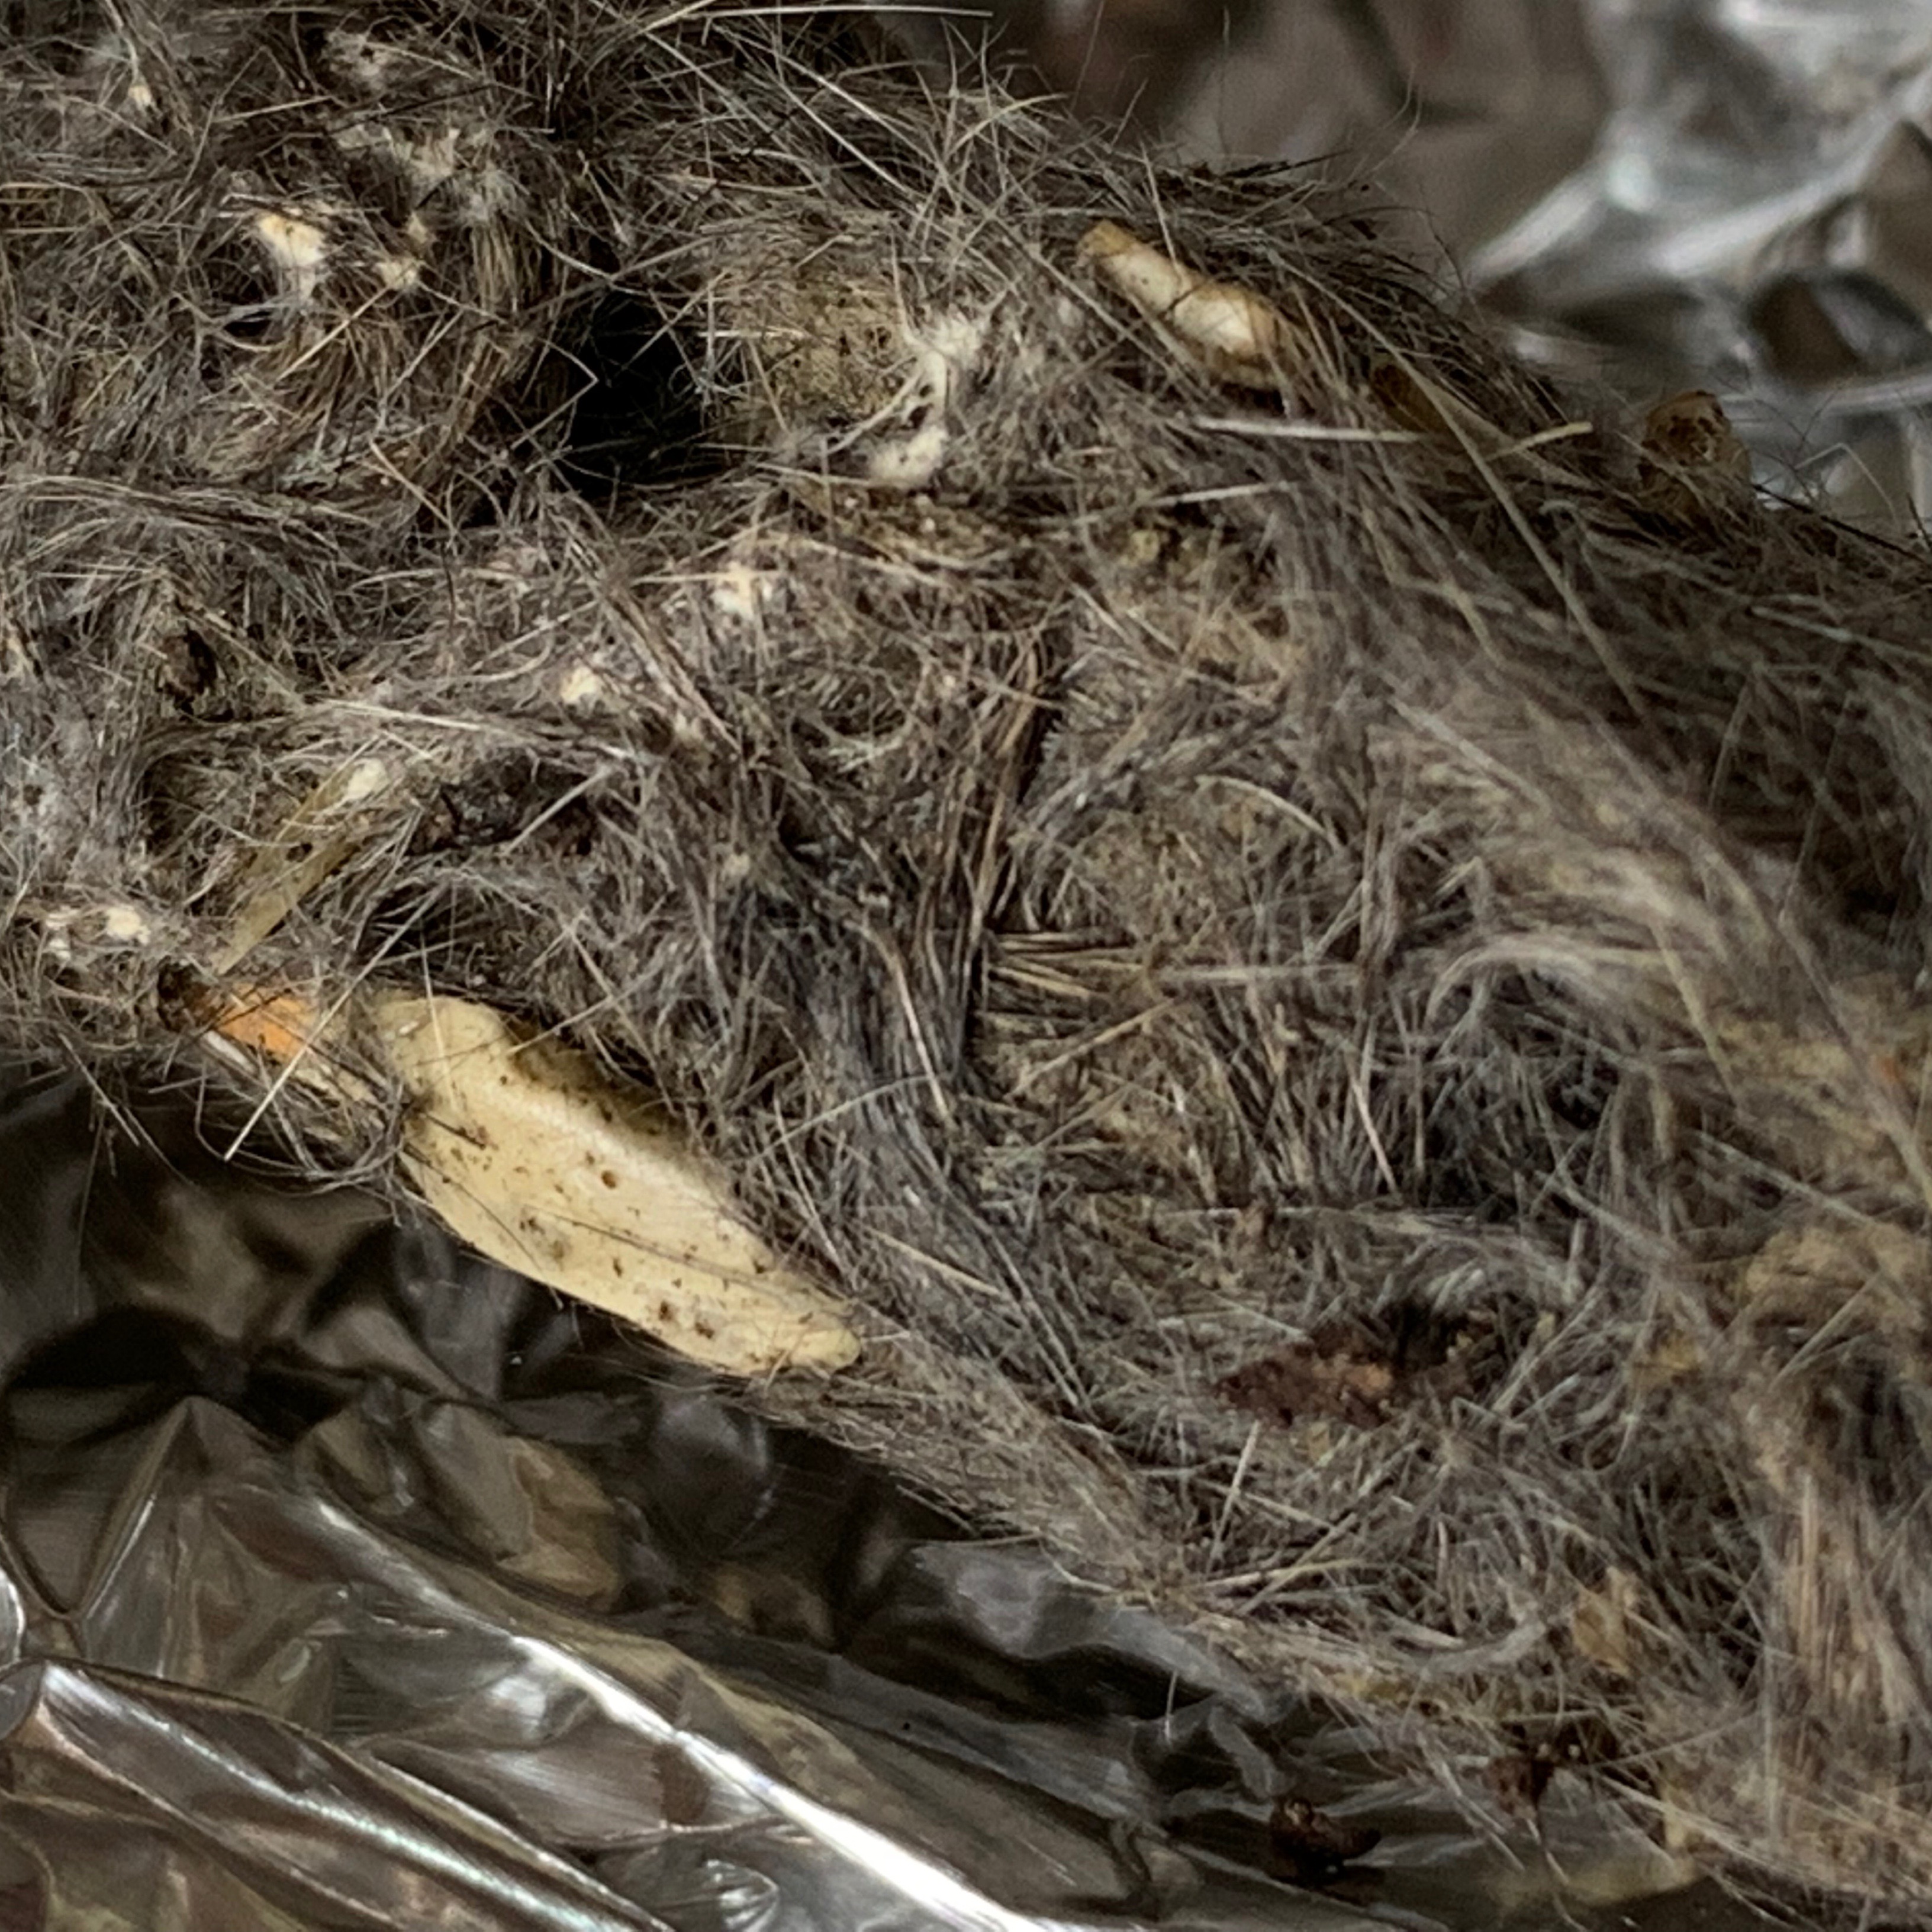
We used an Owl Pellet Field Biology Kit from Rainbow Resource. I highly recommend this one because the owl pellets were big and we found a lot of bones in them. We were also sent some owl pellets from a friend’s property and that gave us a chance to observe the differences between them. The smaller owl pellets contained fewer bones and needed to be prepared for safe dissection. To safely dissect owl pellets you find in the wild, wrap them in aluminum foil and bake them for 45 minutes at 350 degrees fahrenheit. This ensures that the bacteria and germs are killed. This is especially necessary if you are working in a classroom or with children. The downside to doing this (I believe) is that the owl pellets harden and became too difficult to dissect without soaking. The small owl pellets from the wild needed at least 15 minutes to soak in very hot water. This helped open up the owl pellets and made it easier to find the bones. However, there may be a bit of an odor when you soak your owl pellets. Also, you may find the wet fur and bones less pleasant than the dry ones. The texture does change when it’s all wet and if you are easily grossed out by these kinds of things, soaking the owl pellet will just make it worse for you!
Overall, we really enjoyed the process, and the owl pellet kit was a hit! The kit we bought contained three owl pellets, a magnifying glass, a pair of tweezers and most importantly, a field guide. The field guide was exceedingly helpful in helping us identify the bones and ultimately the type of animal the owl ate.
I think this kit is the perfect hands-on project to any owl or bird unit.
We mounted our skeleton on 90 lb. watercolor paper by Fabriano using Tombow mono adhesive. The adhesive we used is strong and dries clear. It also takes a long time to dry making it ideal for projects you may have to move things around for.
I framed it in a shadow frame box I picked up after Easter at PartyCity for only 50 cents. They were heavily discounted because the frame had an Easter image. I popped out the backing using an X-acto knife (the kids were not around and would not be allowed to do this part of the project) to cut along the back and separate the glue. I mounted the finished project using a glue stick. I’m not sure if the glue was acid-free, but I recommend that you check before using on a project like this. I used Gorilla Wood Glue to glue the frame onto the backing. I finished off the frame with a metal label plate from my scrapbooking stash.
I’m very pleased with how this activity and project turned out. It took the better part of one afternoon to do the initial dissection and the better part of a second day to finish the project and hang it in our school room. I kept the leftover undissected small owl pellets in the box along with the other materials for us to do in the future. Now that they are baked, I do think they’ll last a while.
We did pull out a few things from our own materials for this project: extra tweezers and magnifying glasses and boxes as well as petri dishes and paper plates for dissection. The kit recommends placing a piece of white paper under the dissecting owl pellet, but if you soak the pellet, I recommend something heavier.
I did this project with my 8-year-old daughter and 12-year-old son as part of a homeschool science unit study on Owls.
Check out our complete Owl Unit Study with videos on how we put this unit together, the resources we used and the projects we did.
Finding hands-on projects for our unit studies and main lesson blocks brings me so much joy, especially when we can make adorable owl peg dolls like these. They were pretty simple to do, but had their challenges. Making the eyes were too hard for my 8-year-old daughter and 12-year-old son, so after they attempted, I helped them fix it up. The beaks were also really hard to do and while we found some solutions, I’m thinking they are eventually going to break off. While those small pieces are choking hazards for young children, these peg dolls babies are also very small and so I don’t recommend giving these to young children. Also, as we used a mix of Lyra Opaque watercolors (which I believe are safe for children), I don’t know about the acrylic paint we use to make the black around the eyes. For that reason, I advise you check the safety of your paints and keep these objects (whether painted or not), out of the hands of small children.
For the first time, I glued the peg doll base onto a small square of watercolor paper using a glue dot so the children and I would have an easier time painting them. I don’t know why it took me so long to figure that out! But oh did it make things easier.
I’m using peg doll babies and Lyra Opaque watercolors for this project. You can find these materials at A Child’s Dream. I used various materials for the beak.
Check out our complete Owl Unit Study with videos on how we put this unit together, the resources we used and the projects we did. You can also check out our larger Bird Unit Study which includes more projects and resources.
Whenever possible, I incorporate art into our lessons. It’s not a art lesson, rather it’s a science lesson that’s artistically depicted. Sometimes art is the perfect medium for a lesson and when it comes to nature science, I can’t think of a better choice. Each spring, we pull out our nature units, and I find that our main lesson books are either wholly empty or filled with magnificent watercolors. There’s limited writing and a lot more hands on projects.
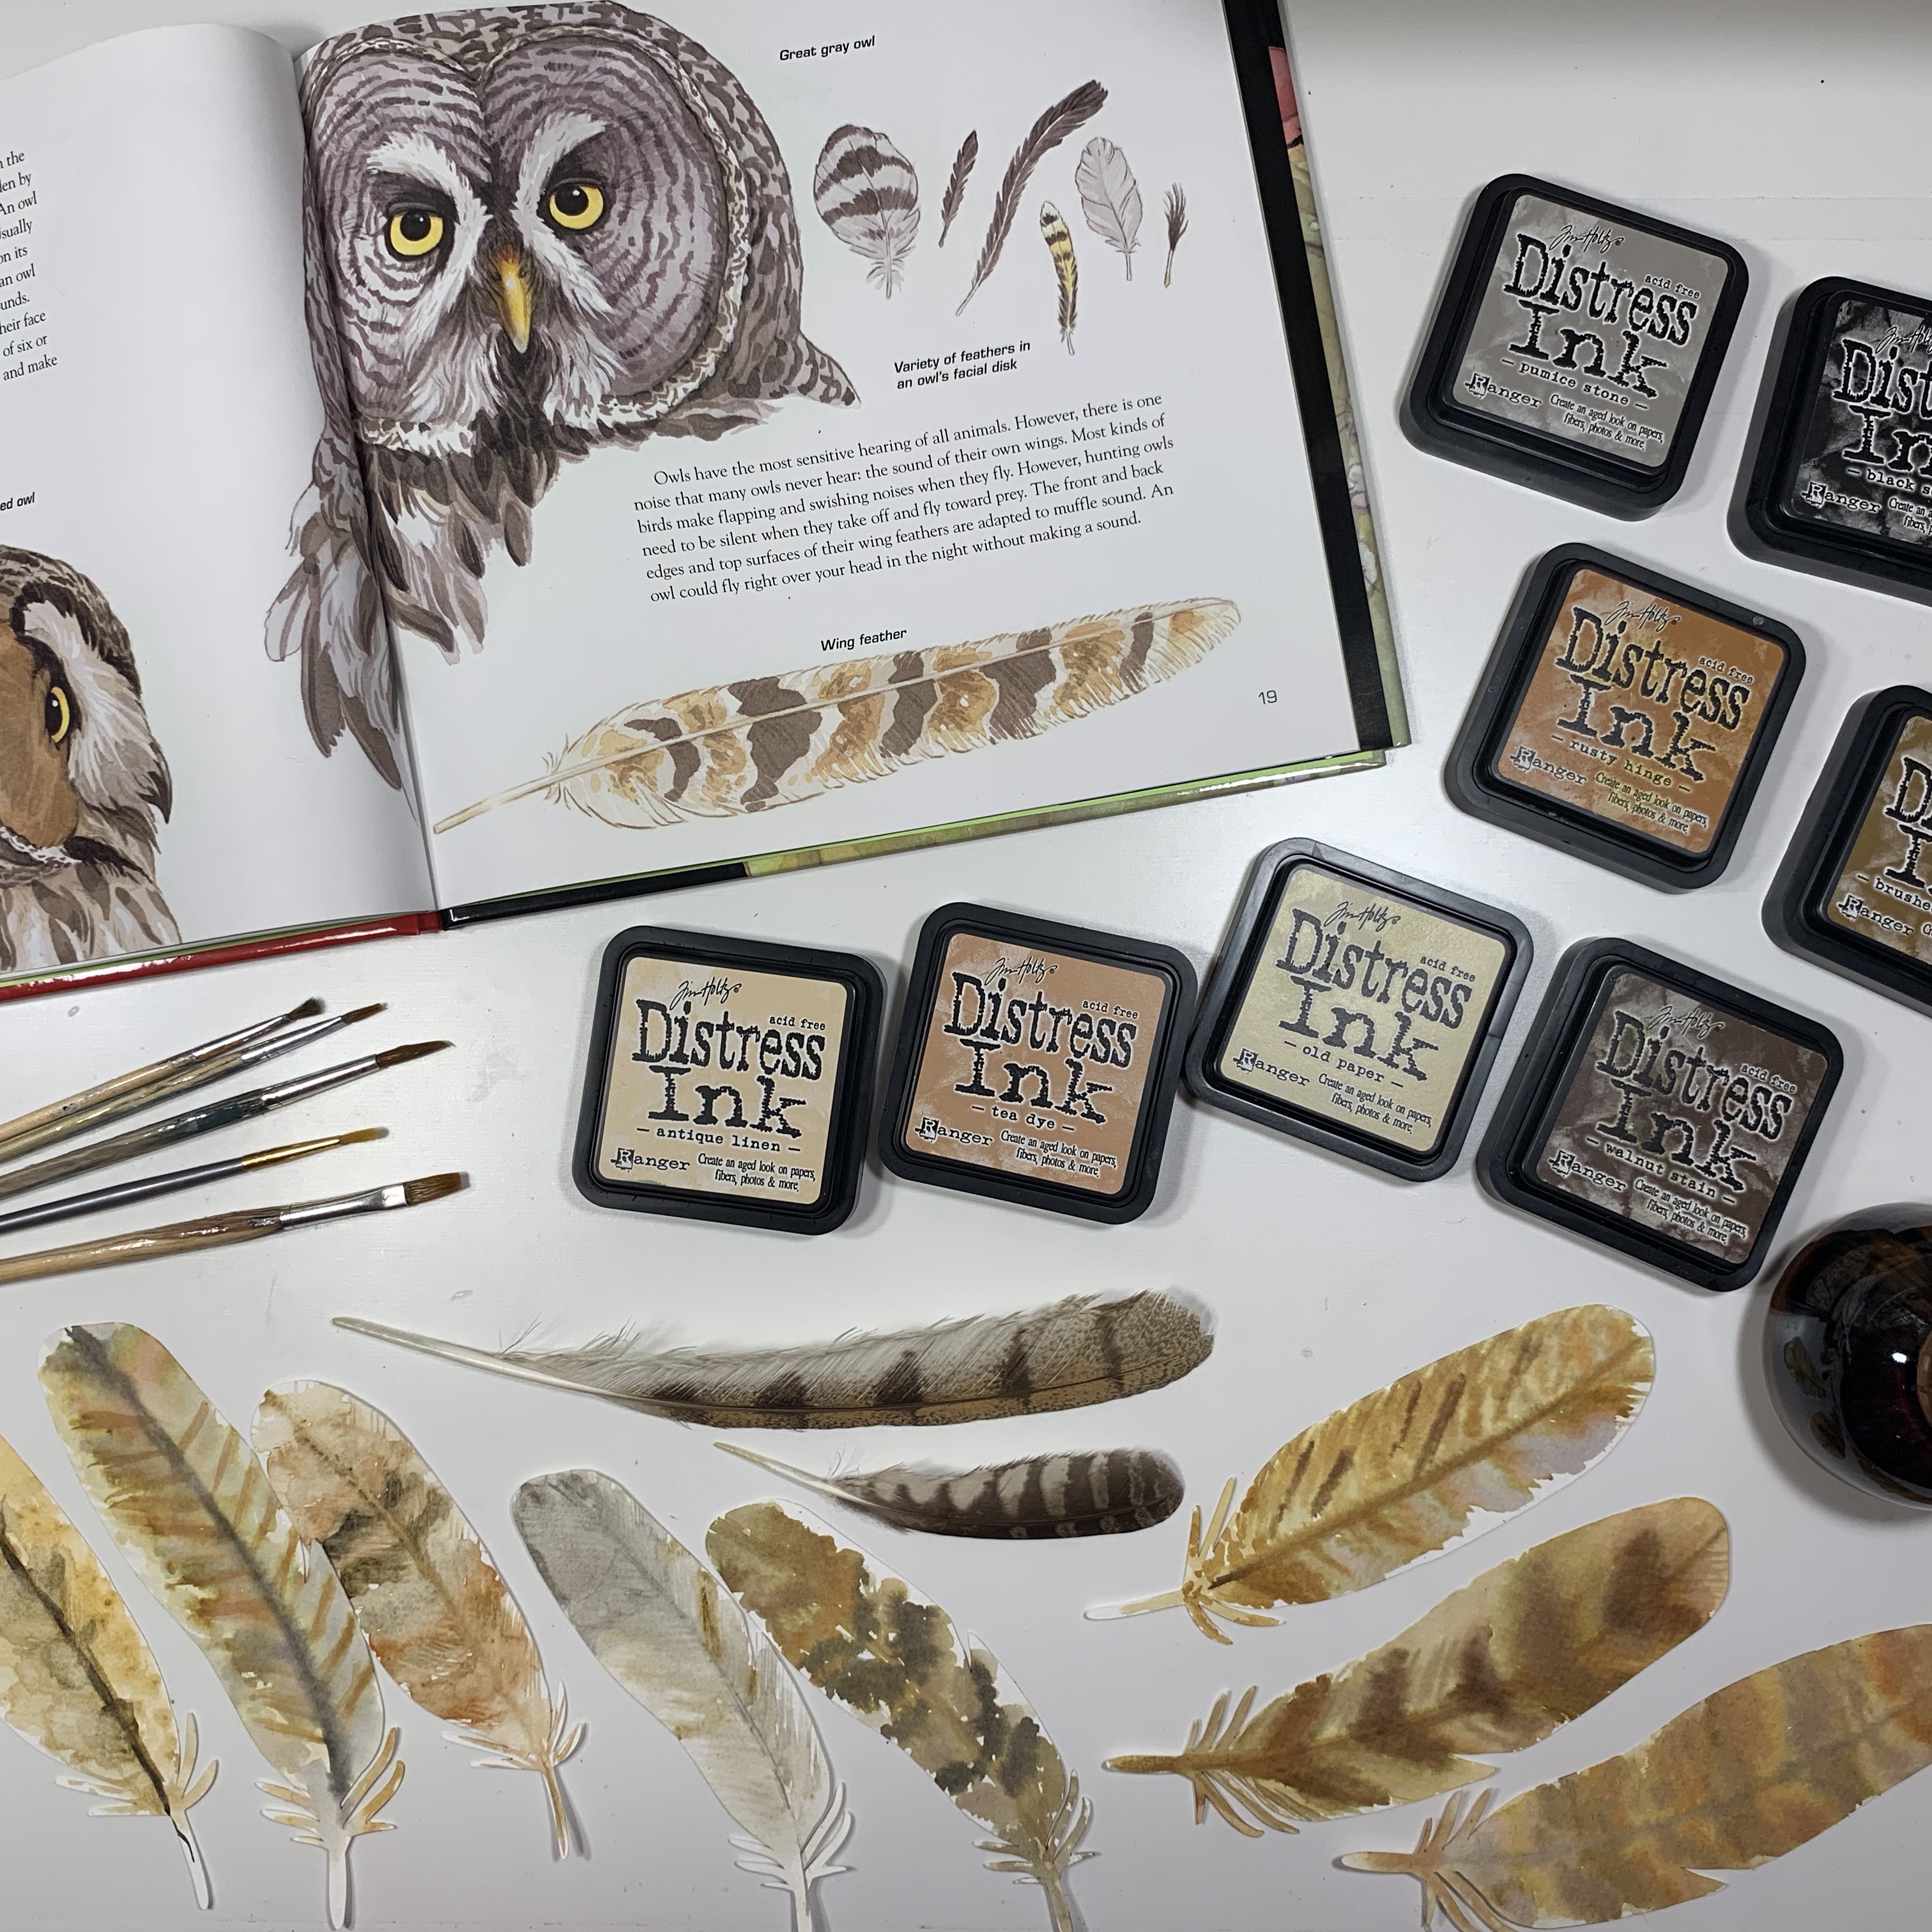
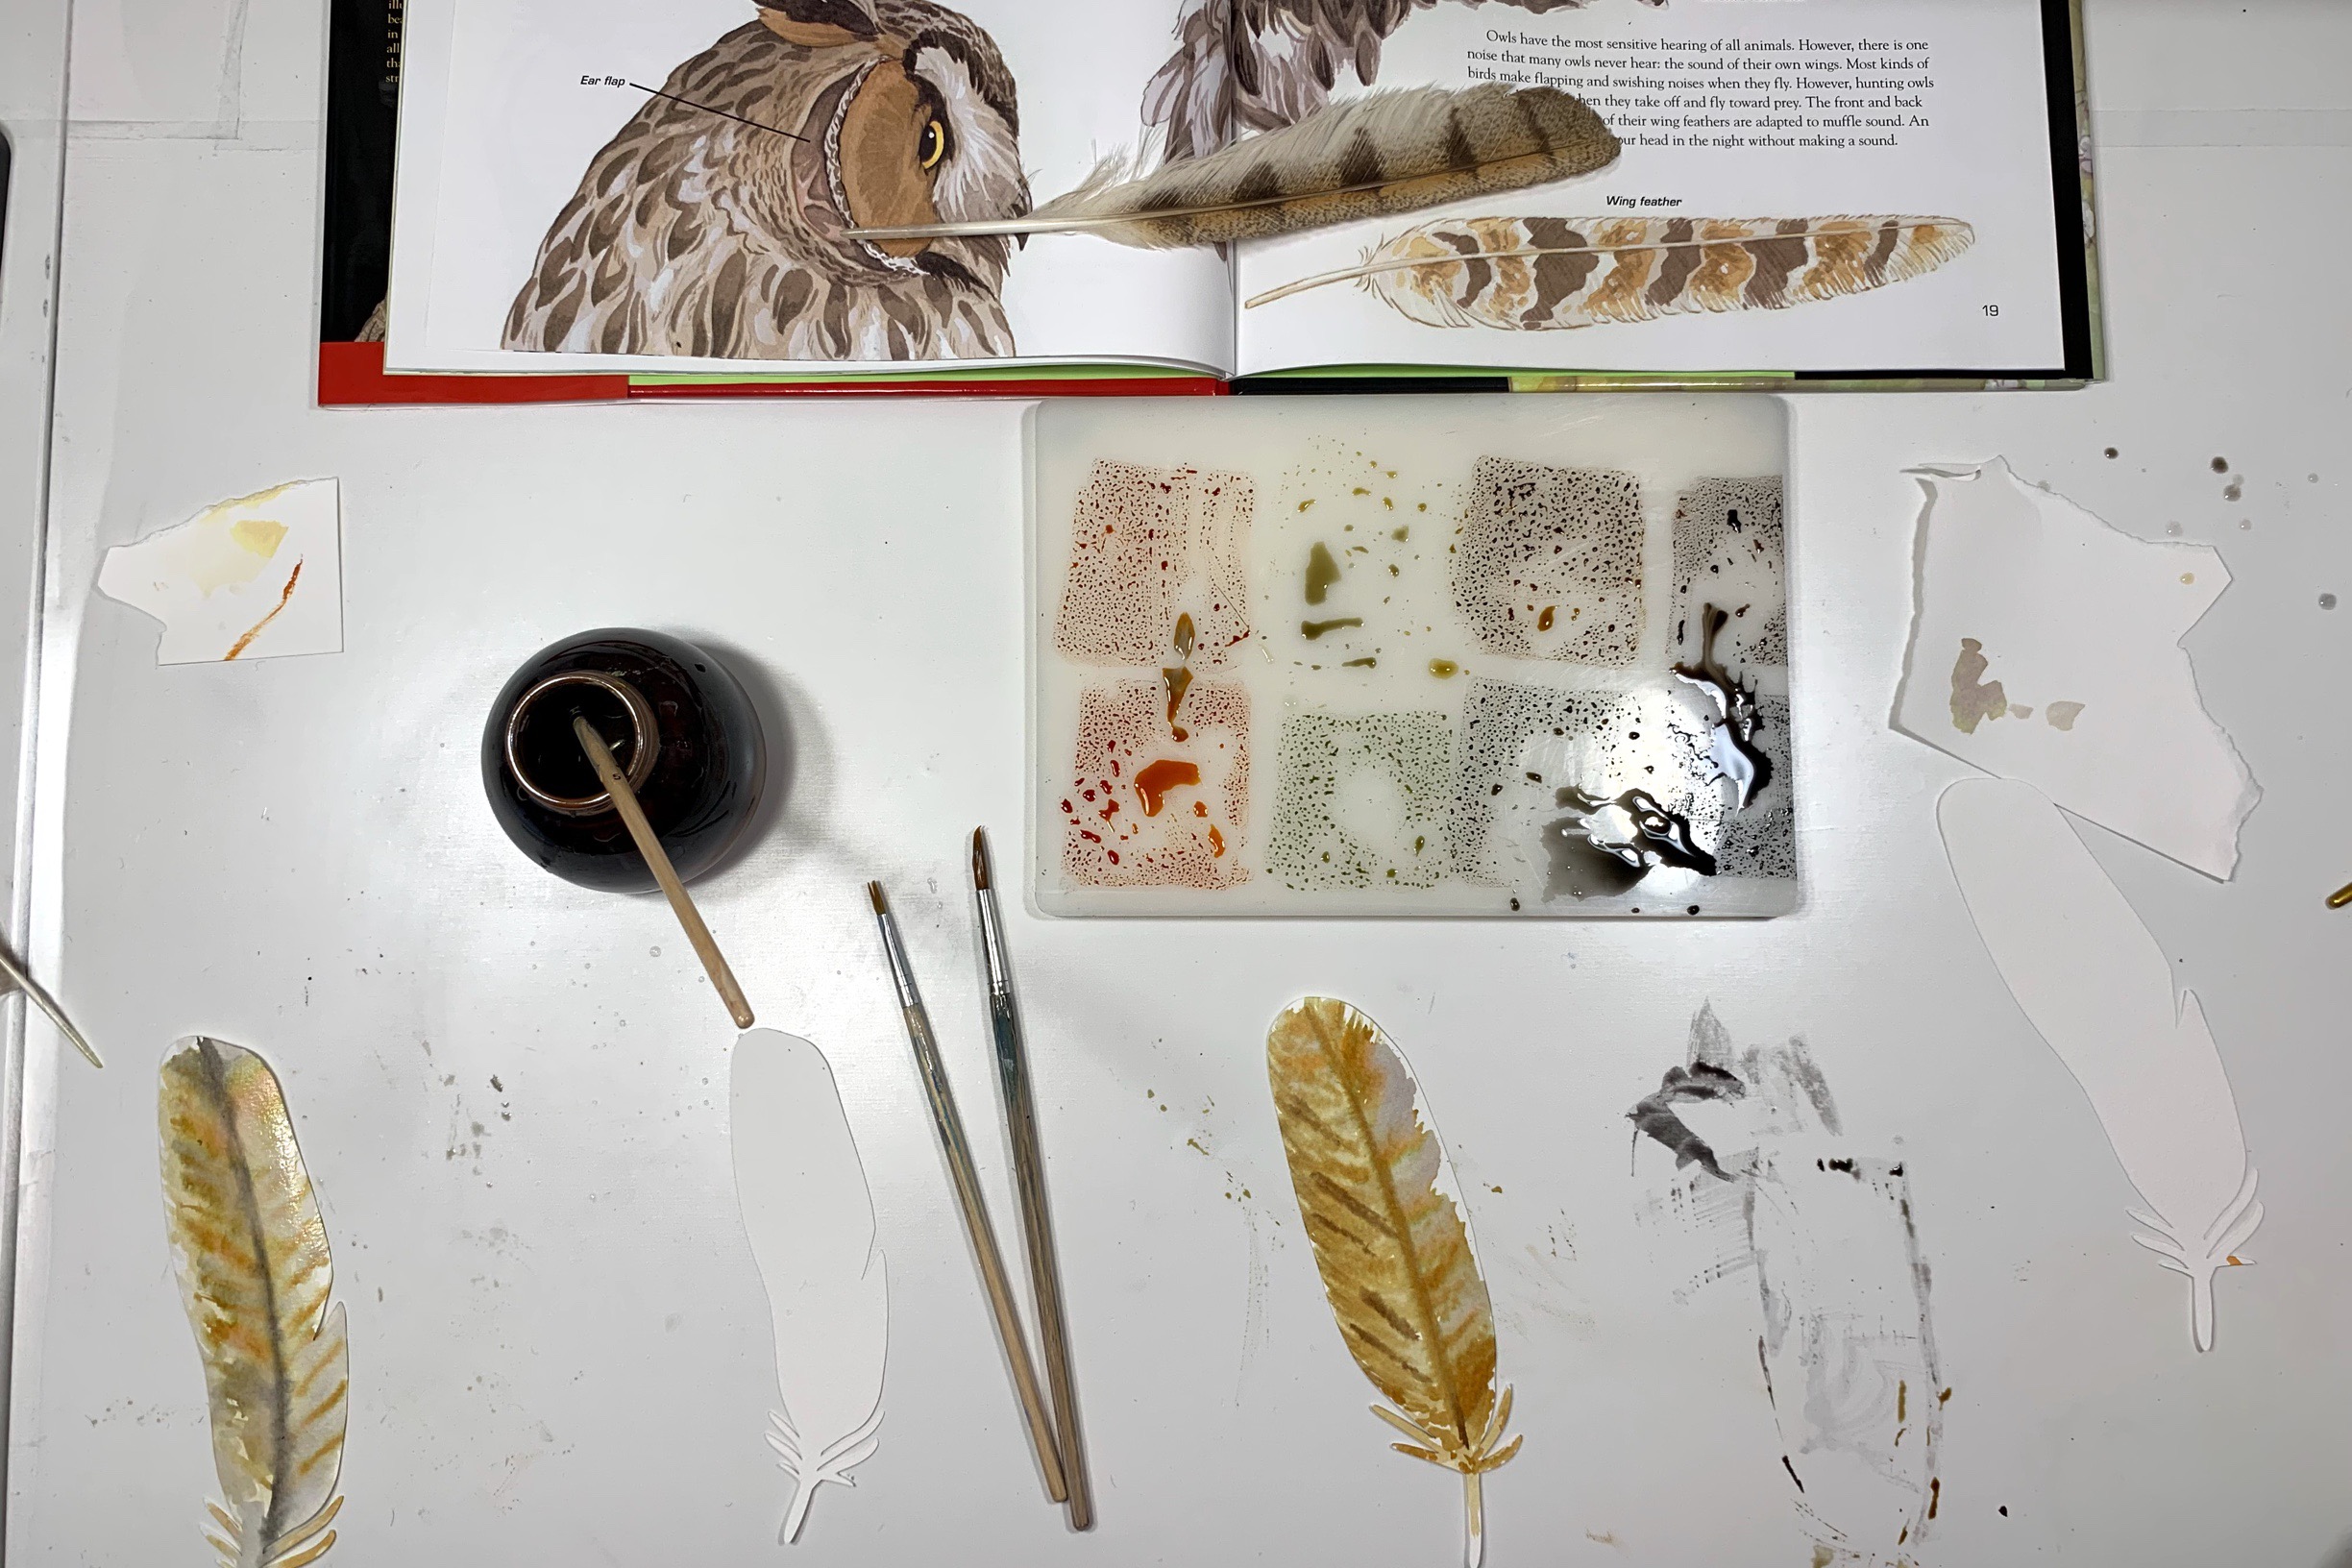
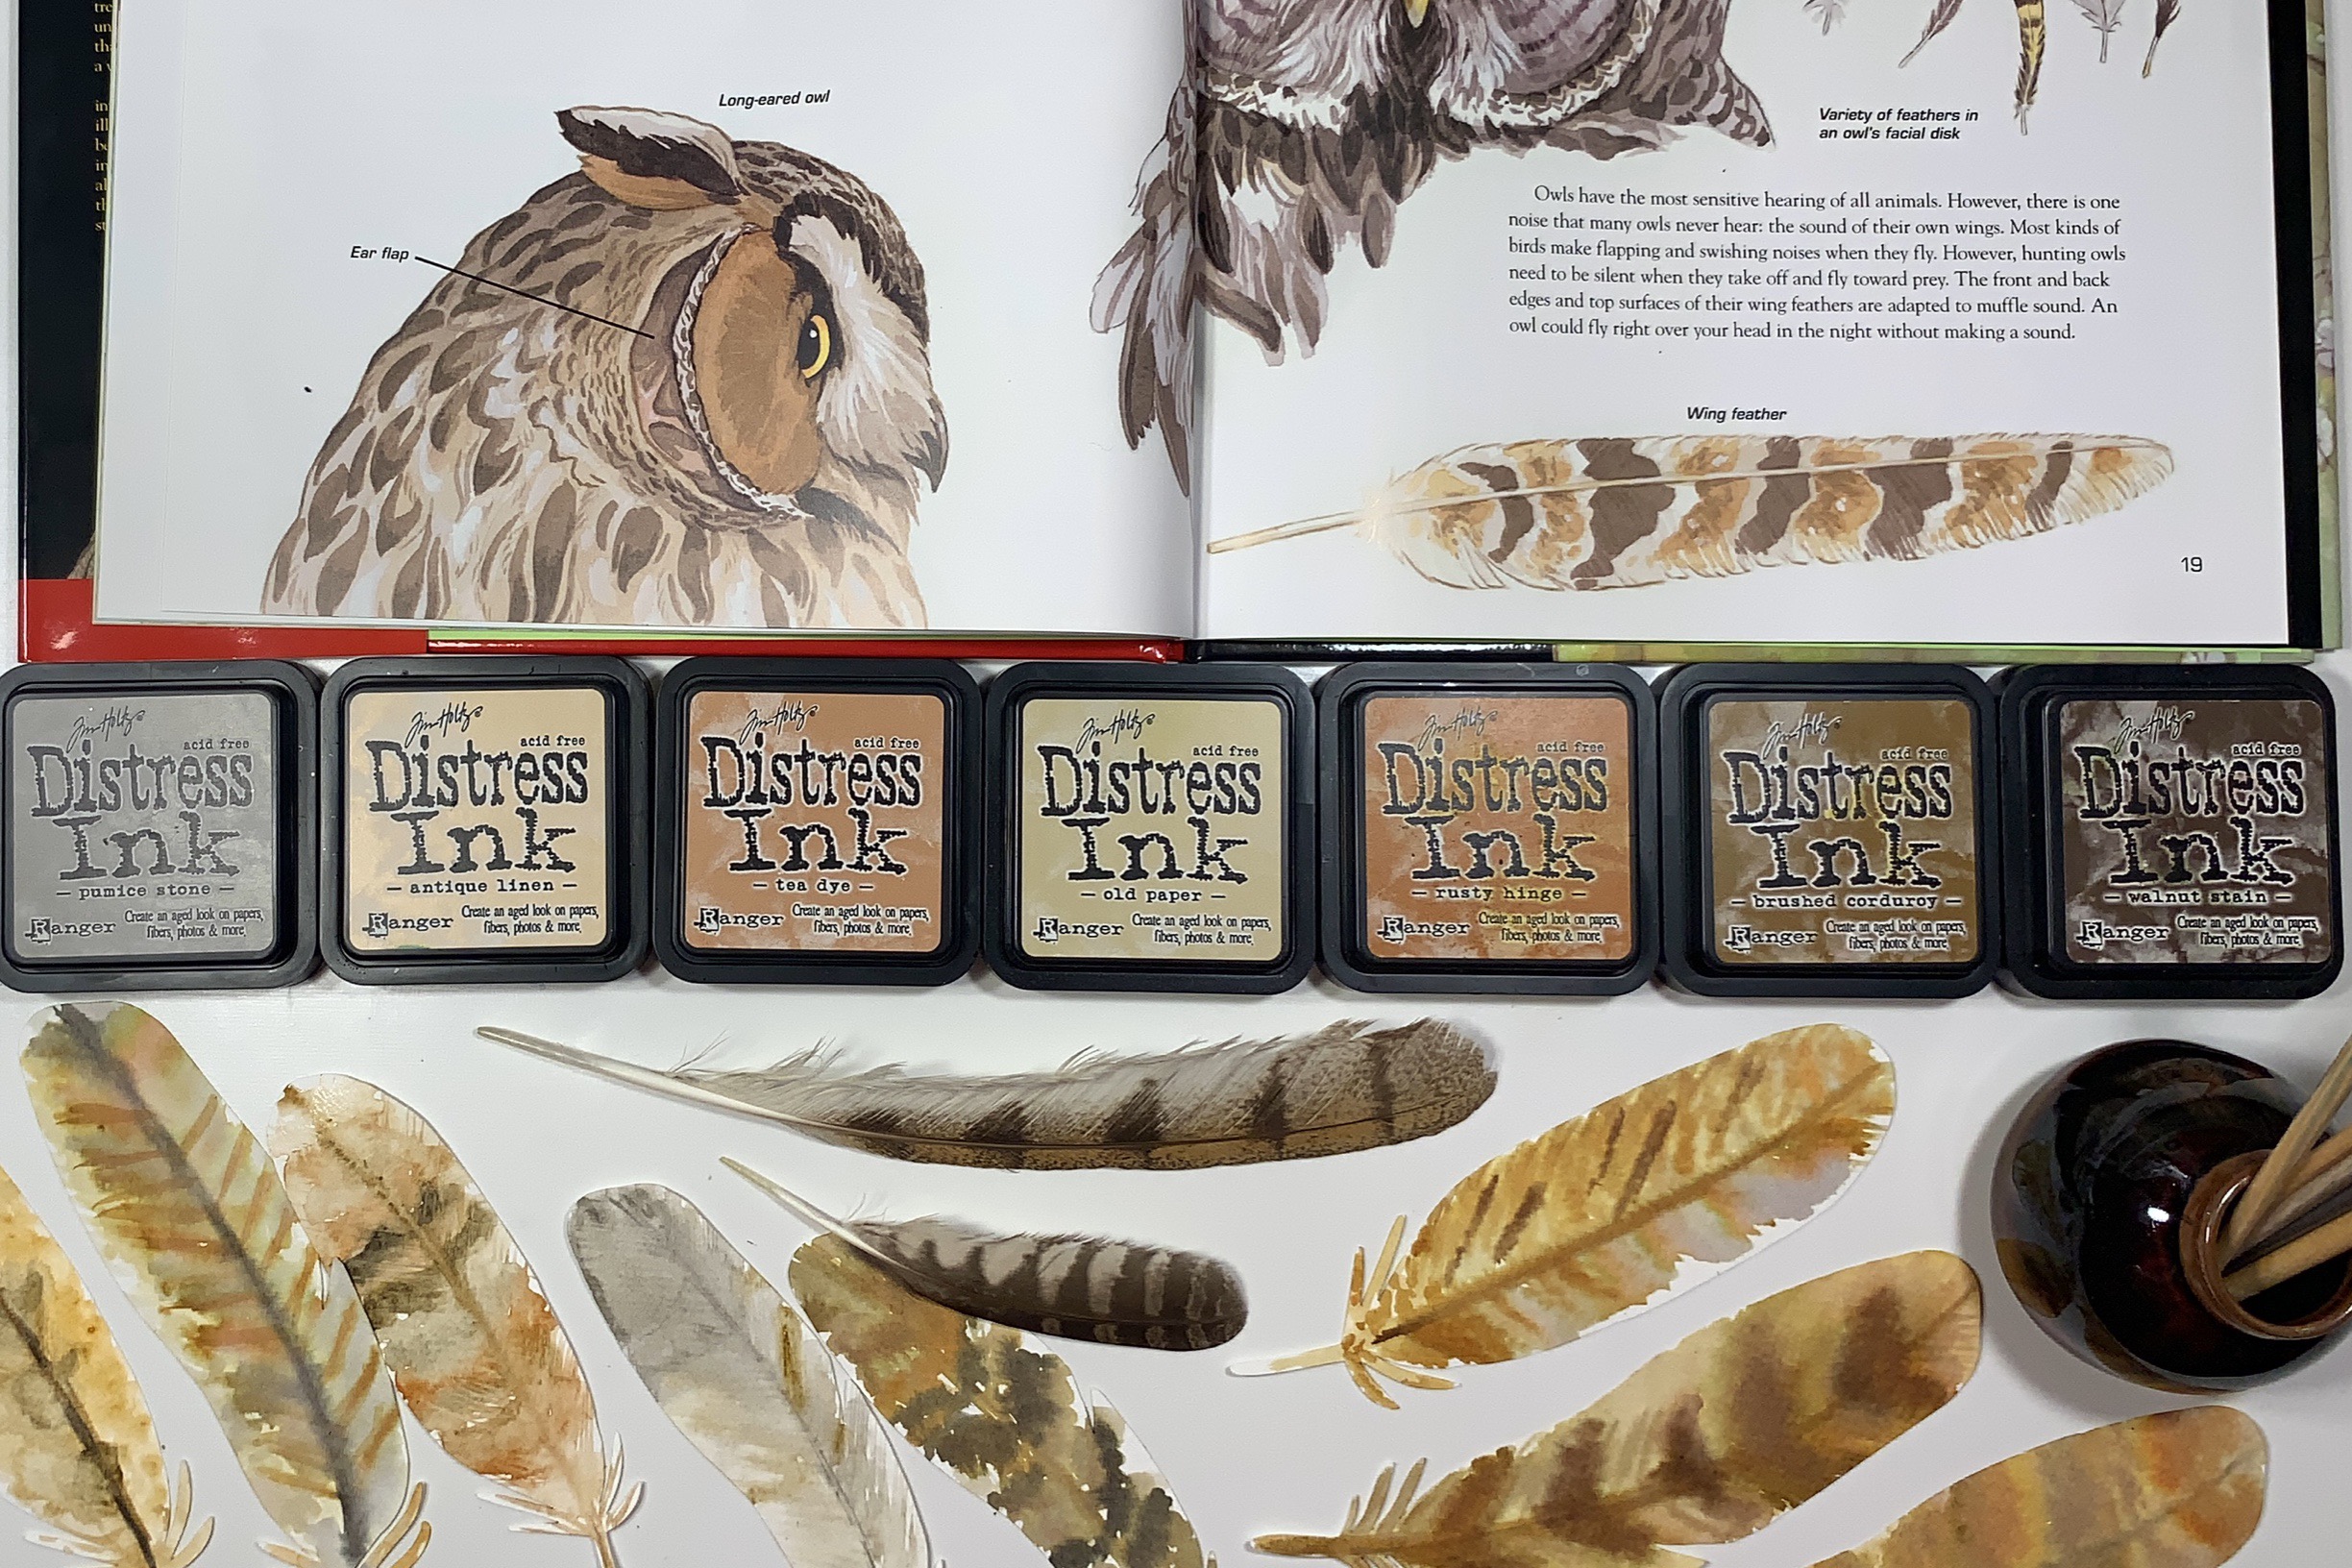
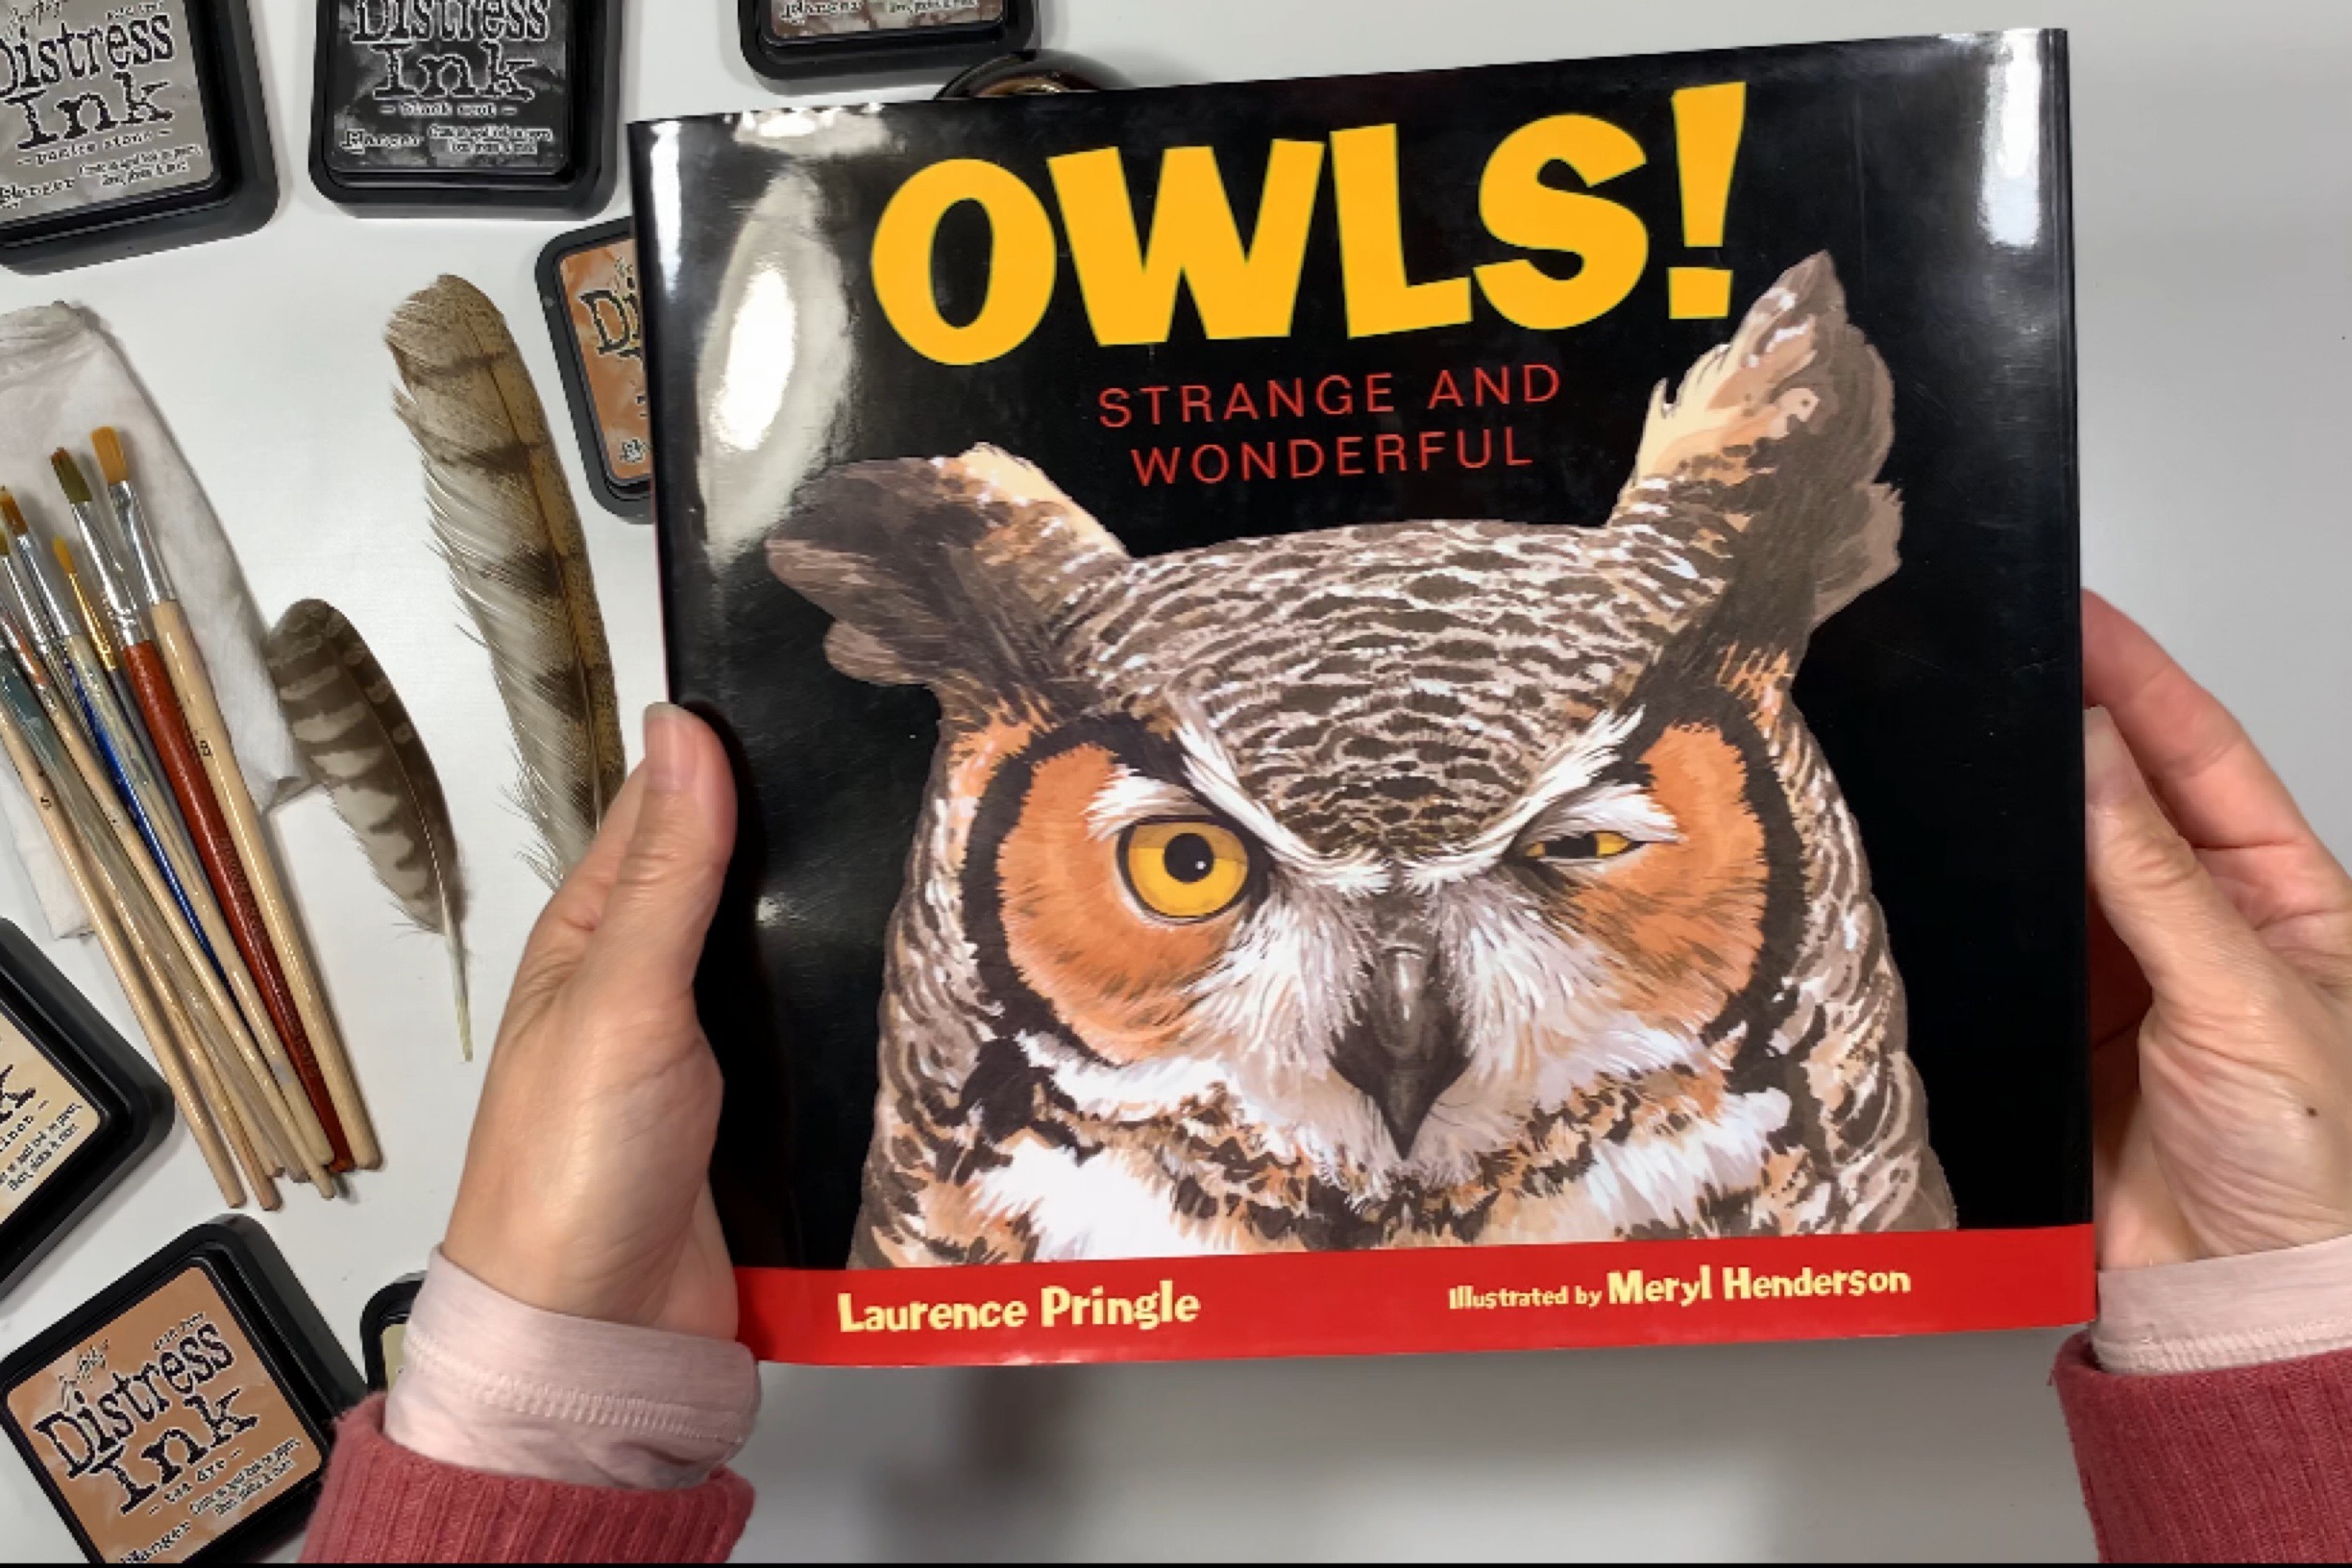
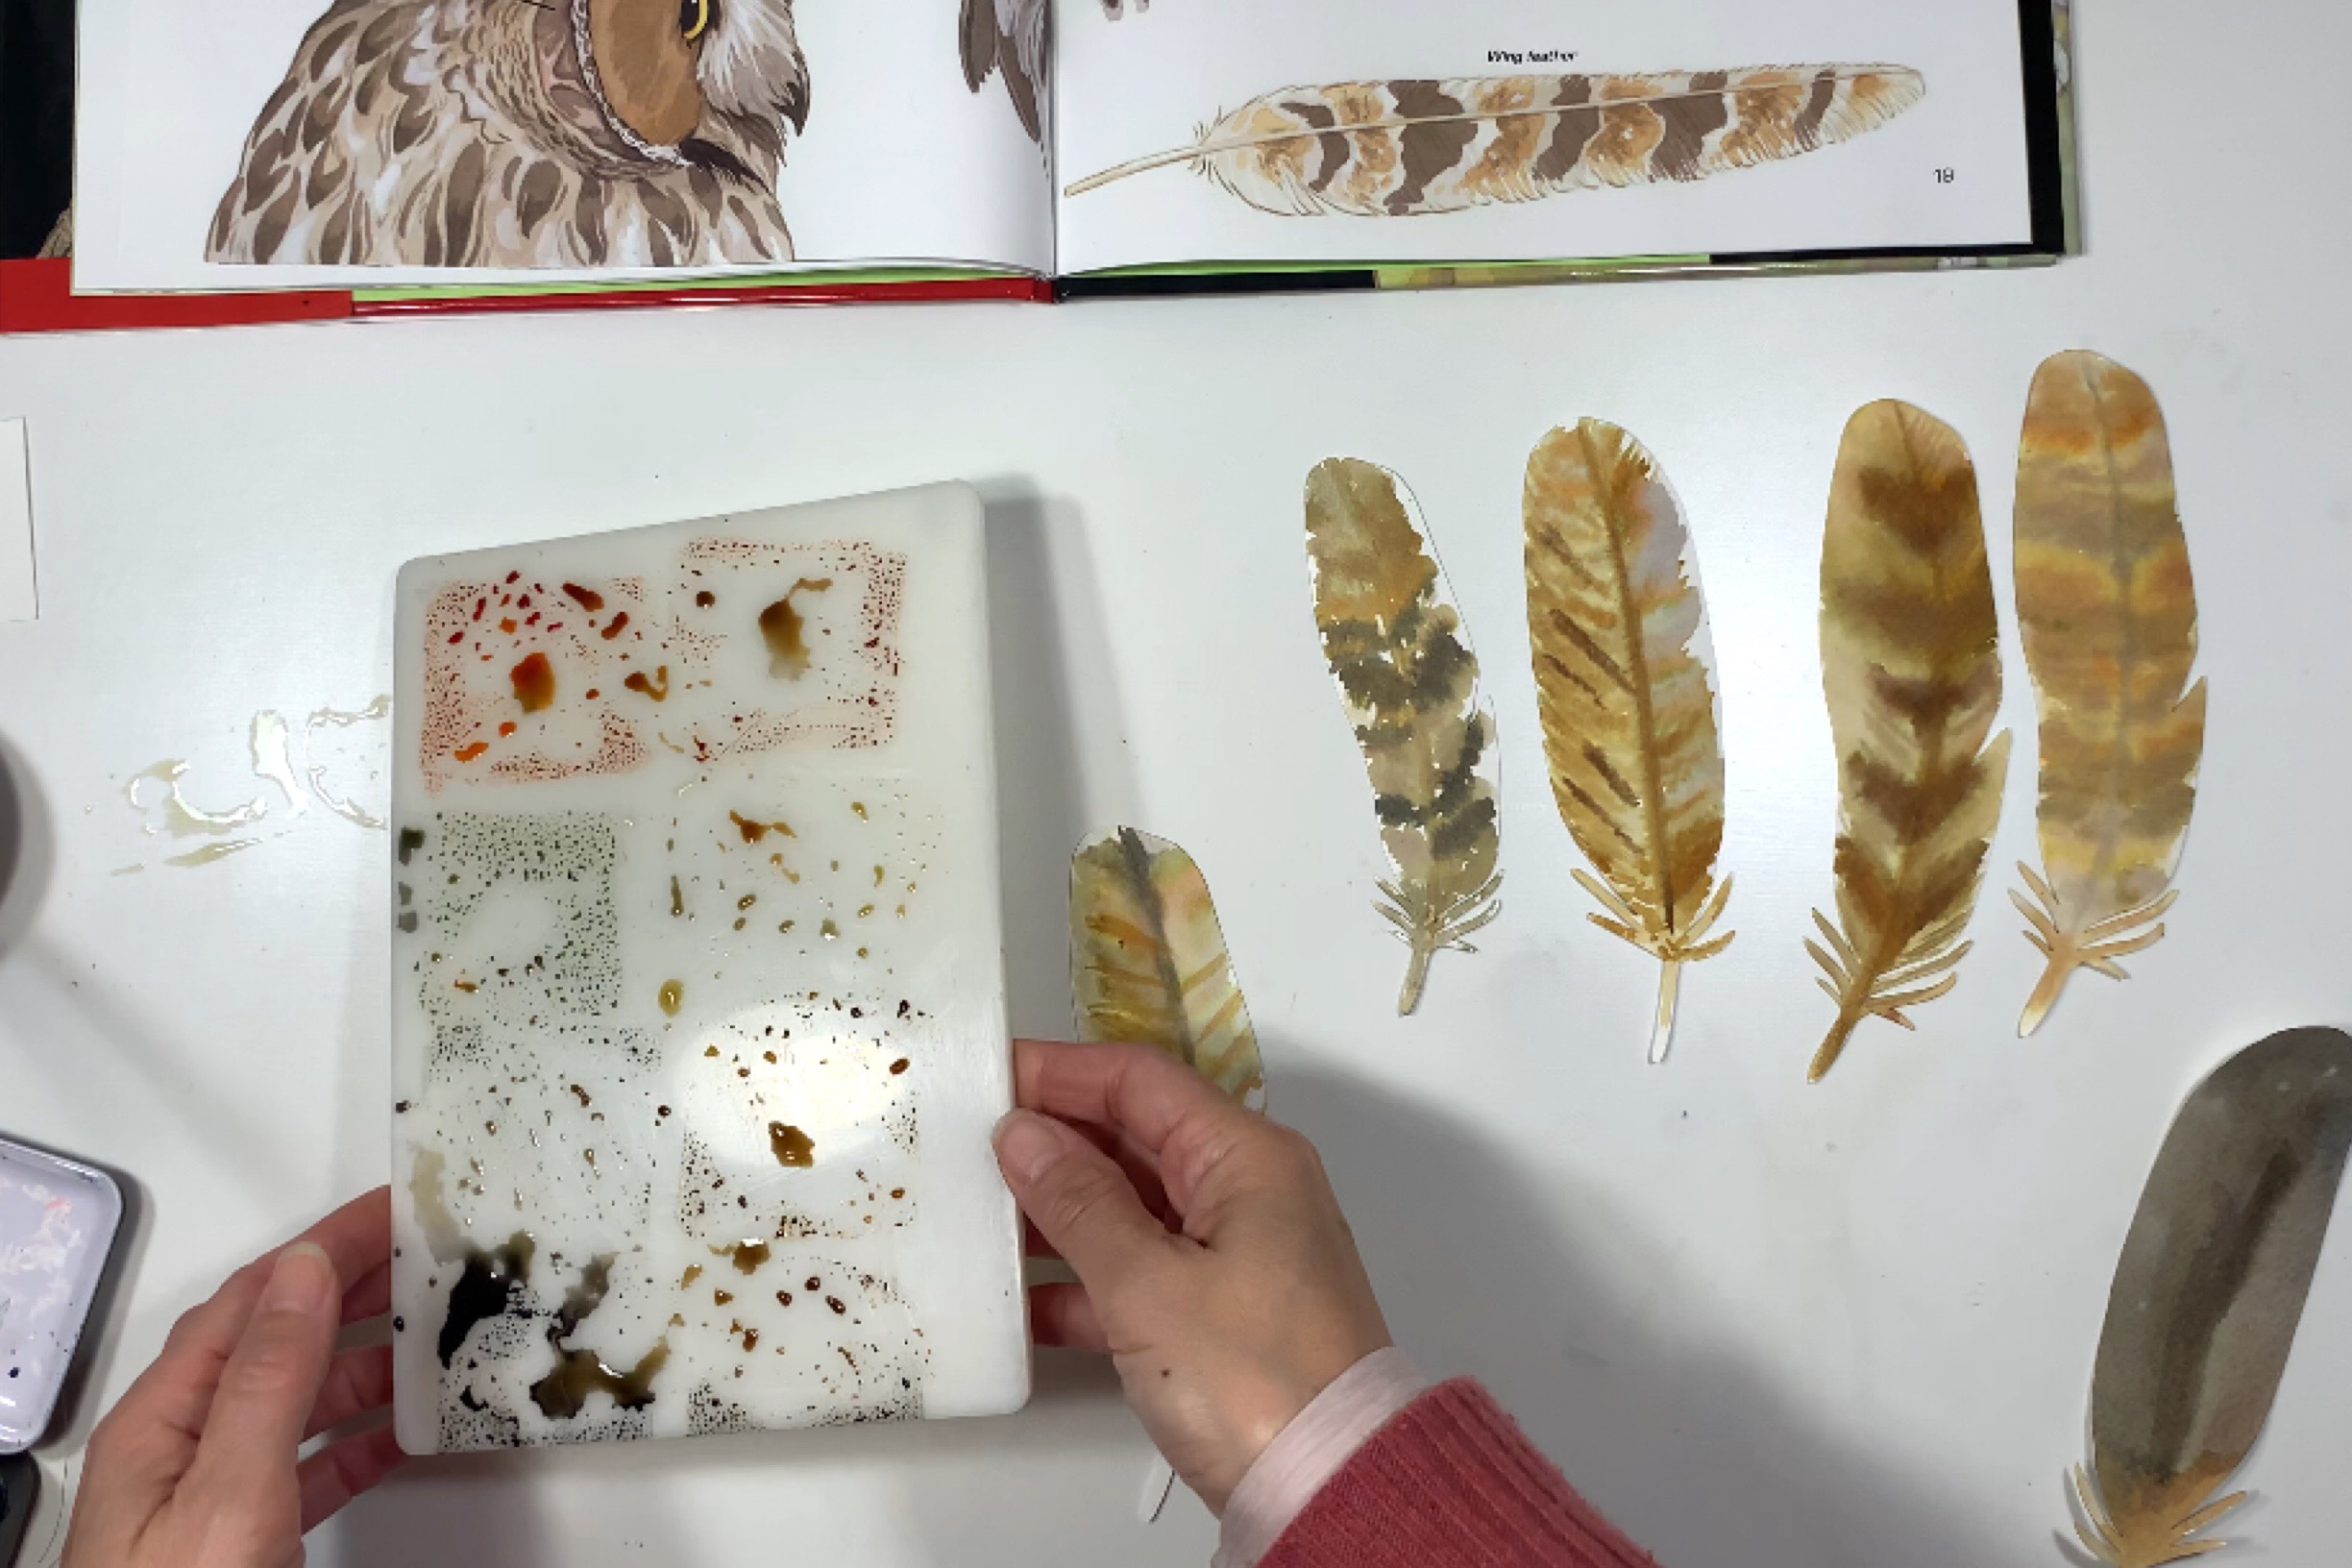
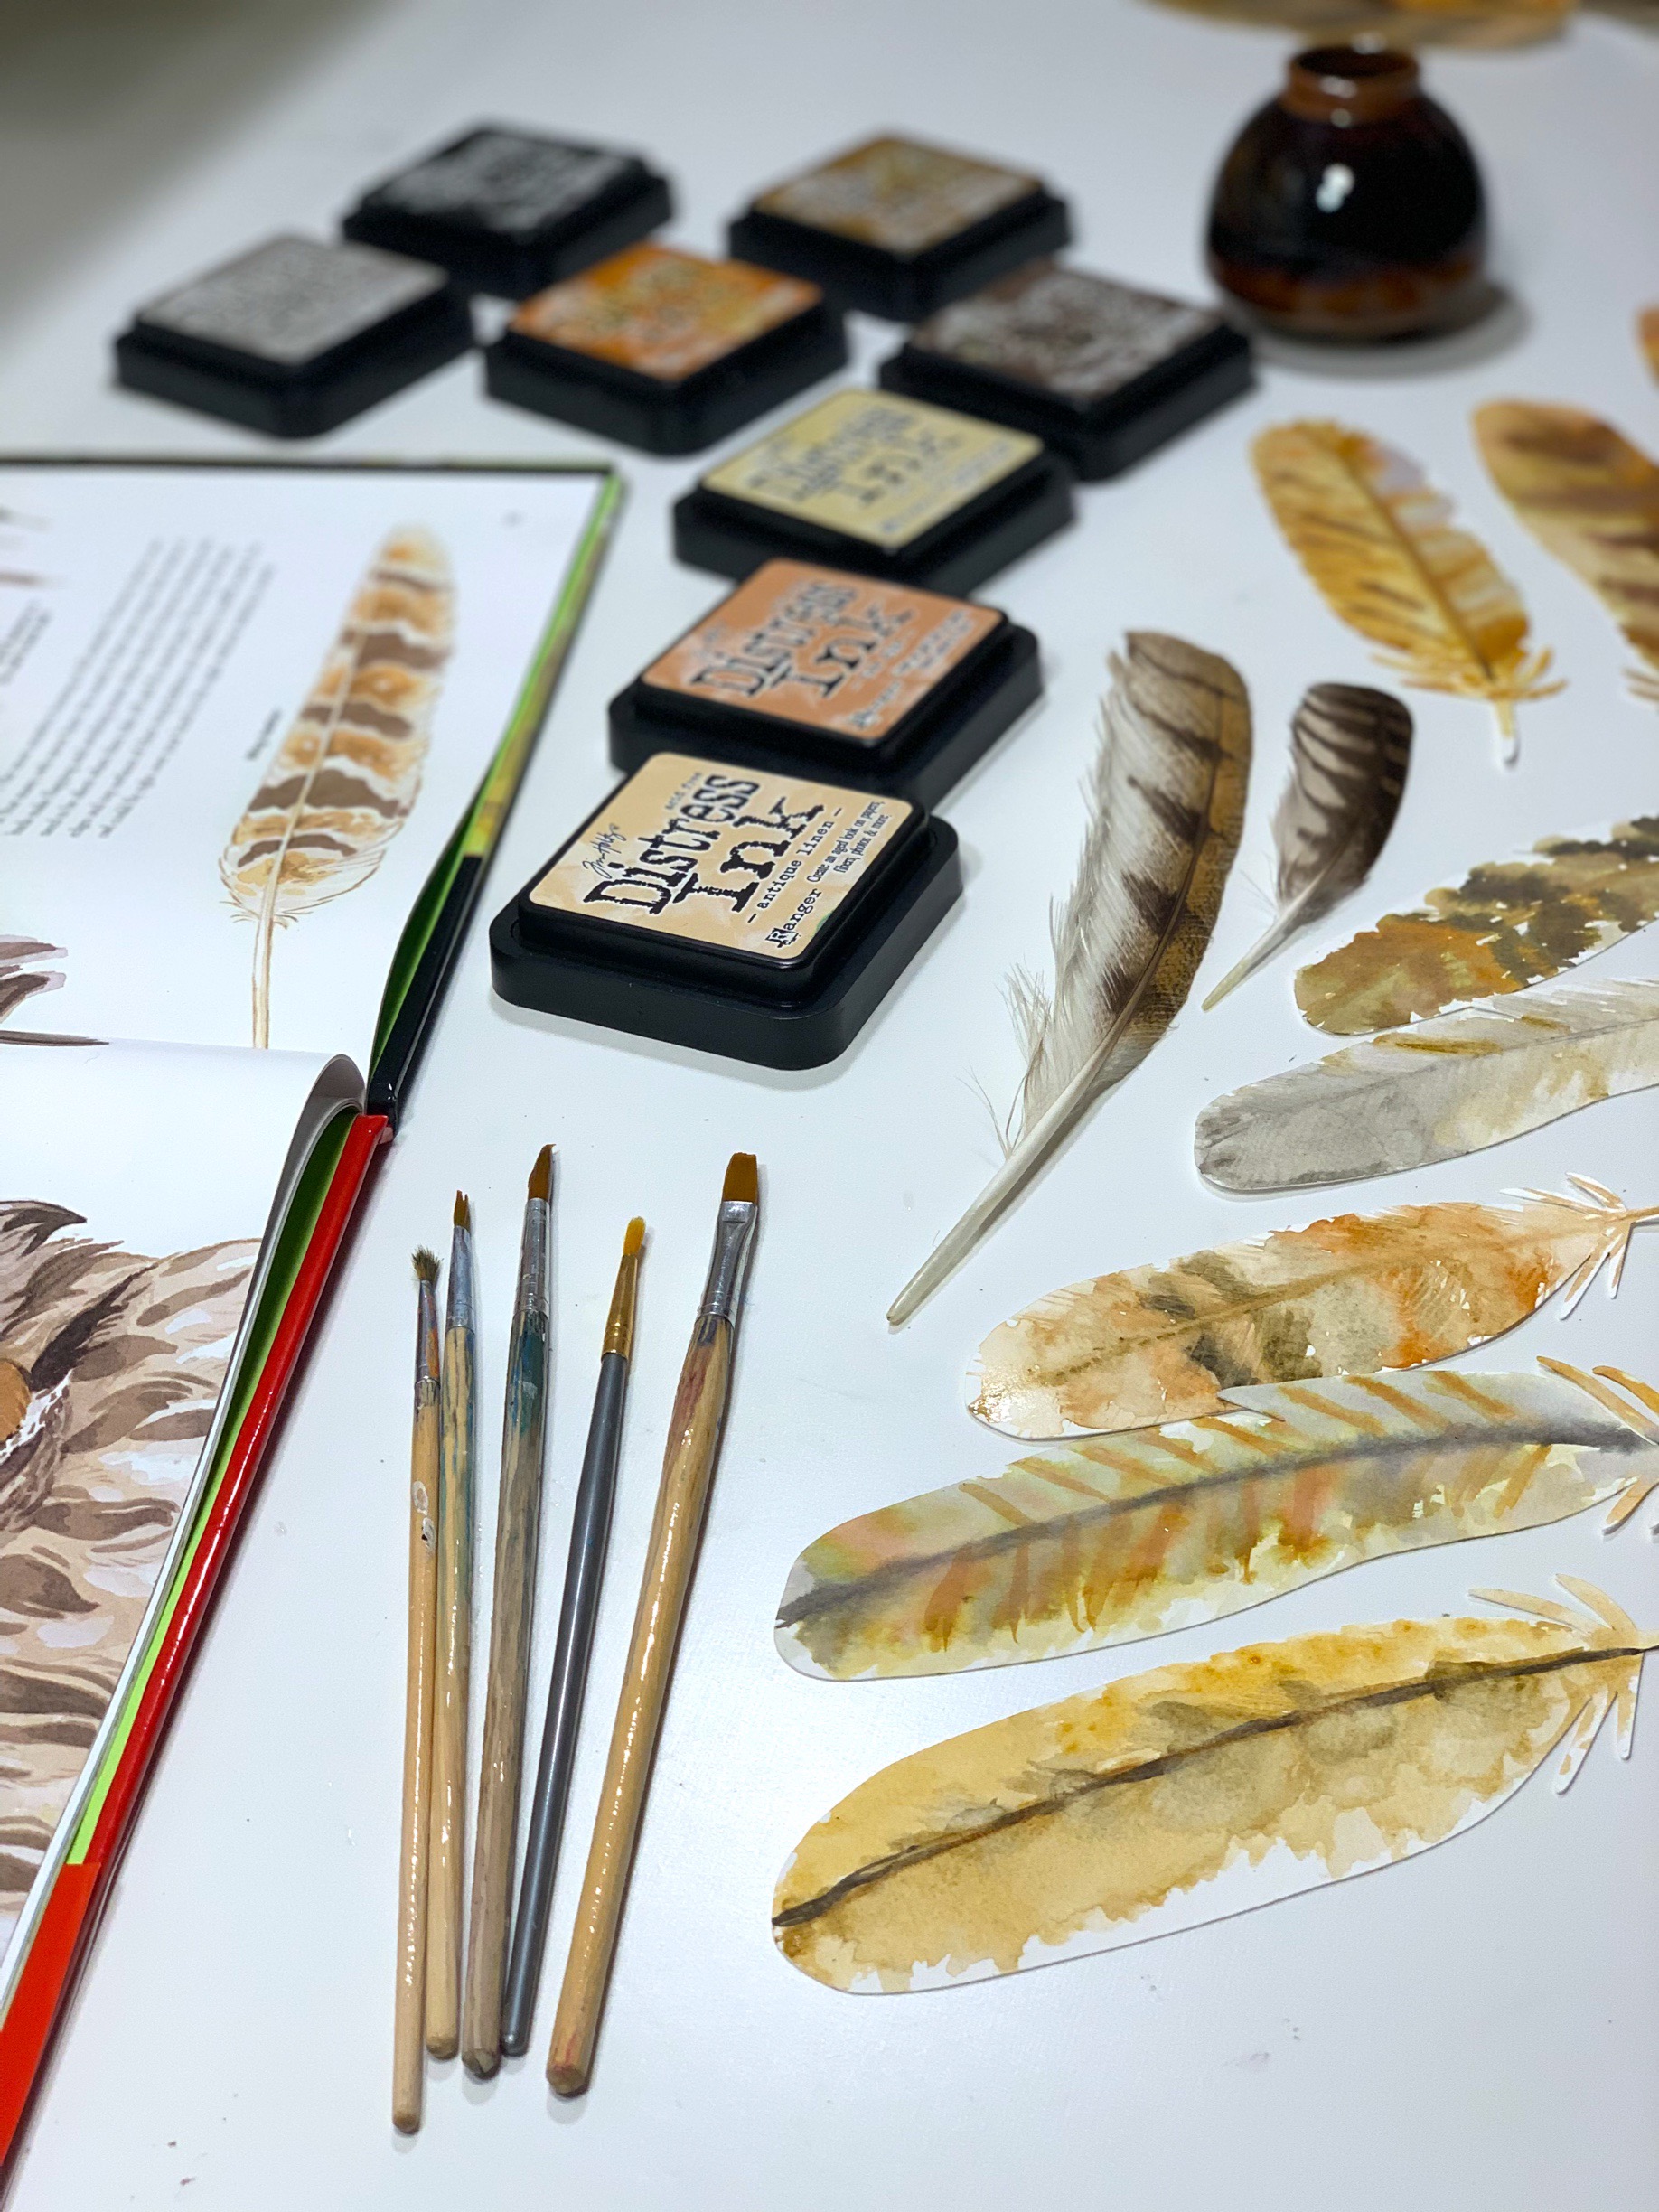

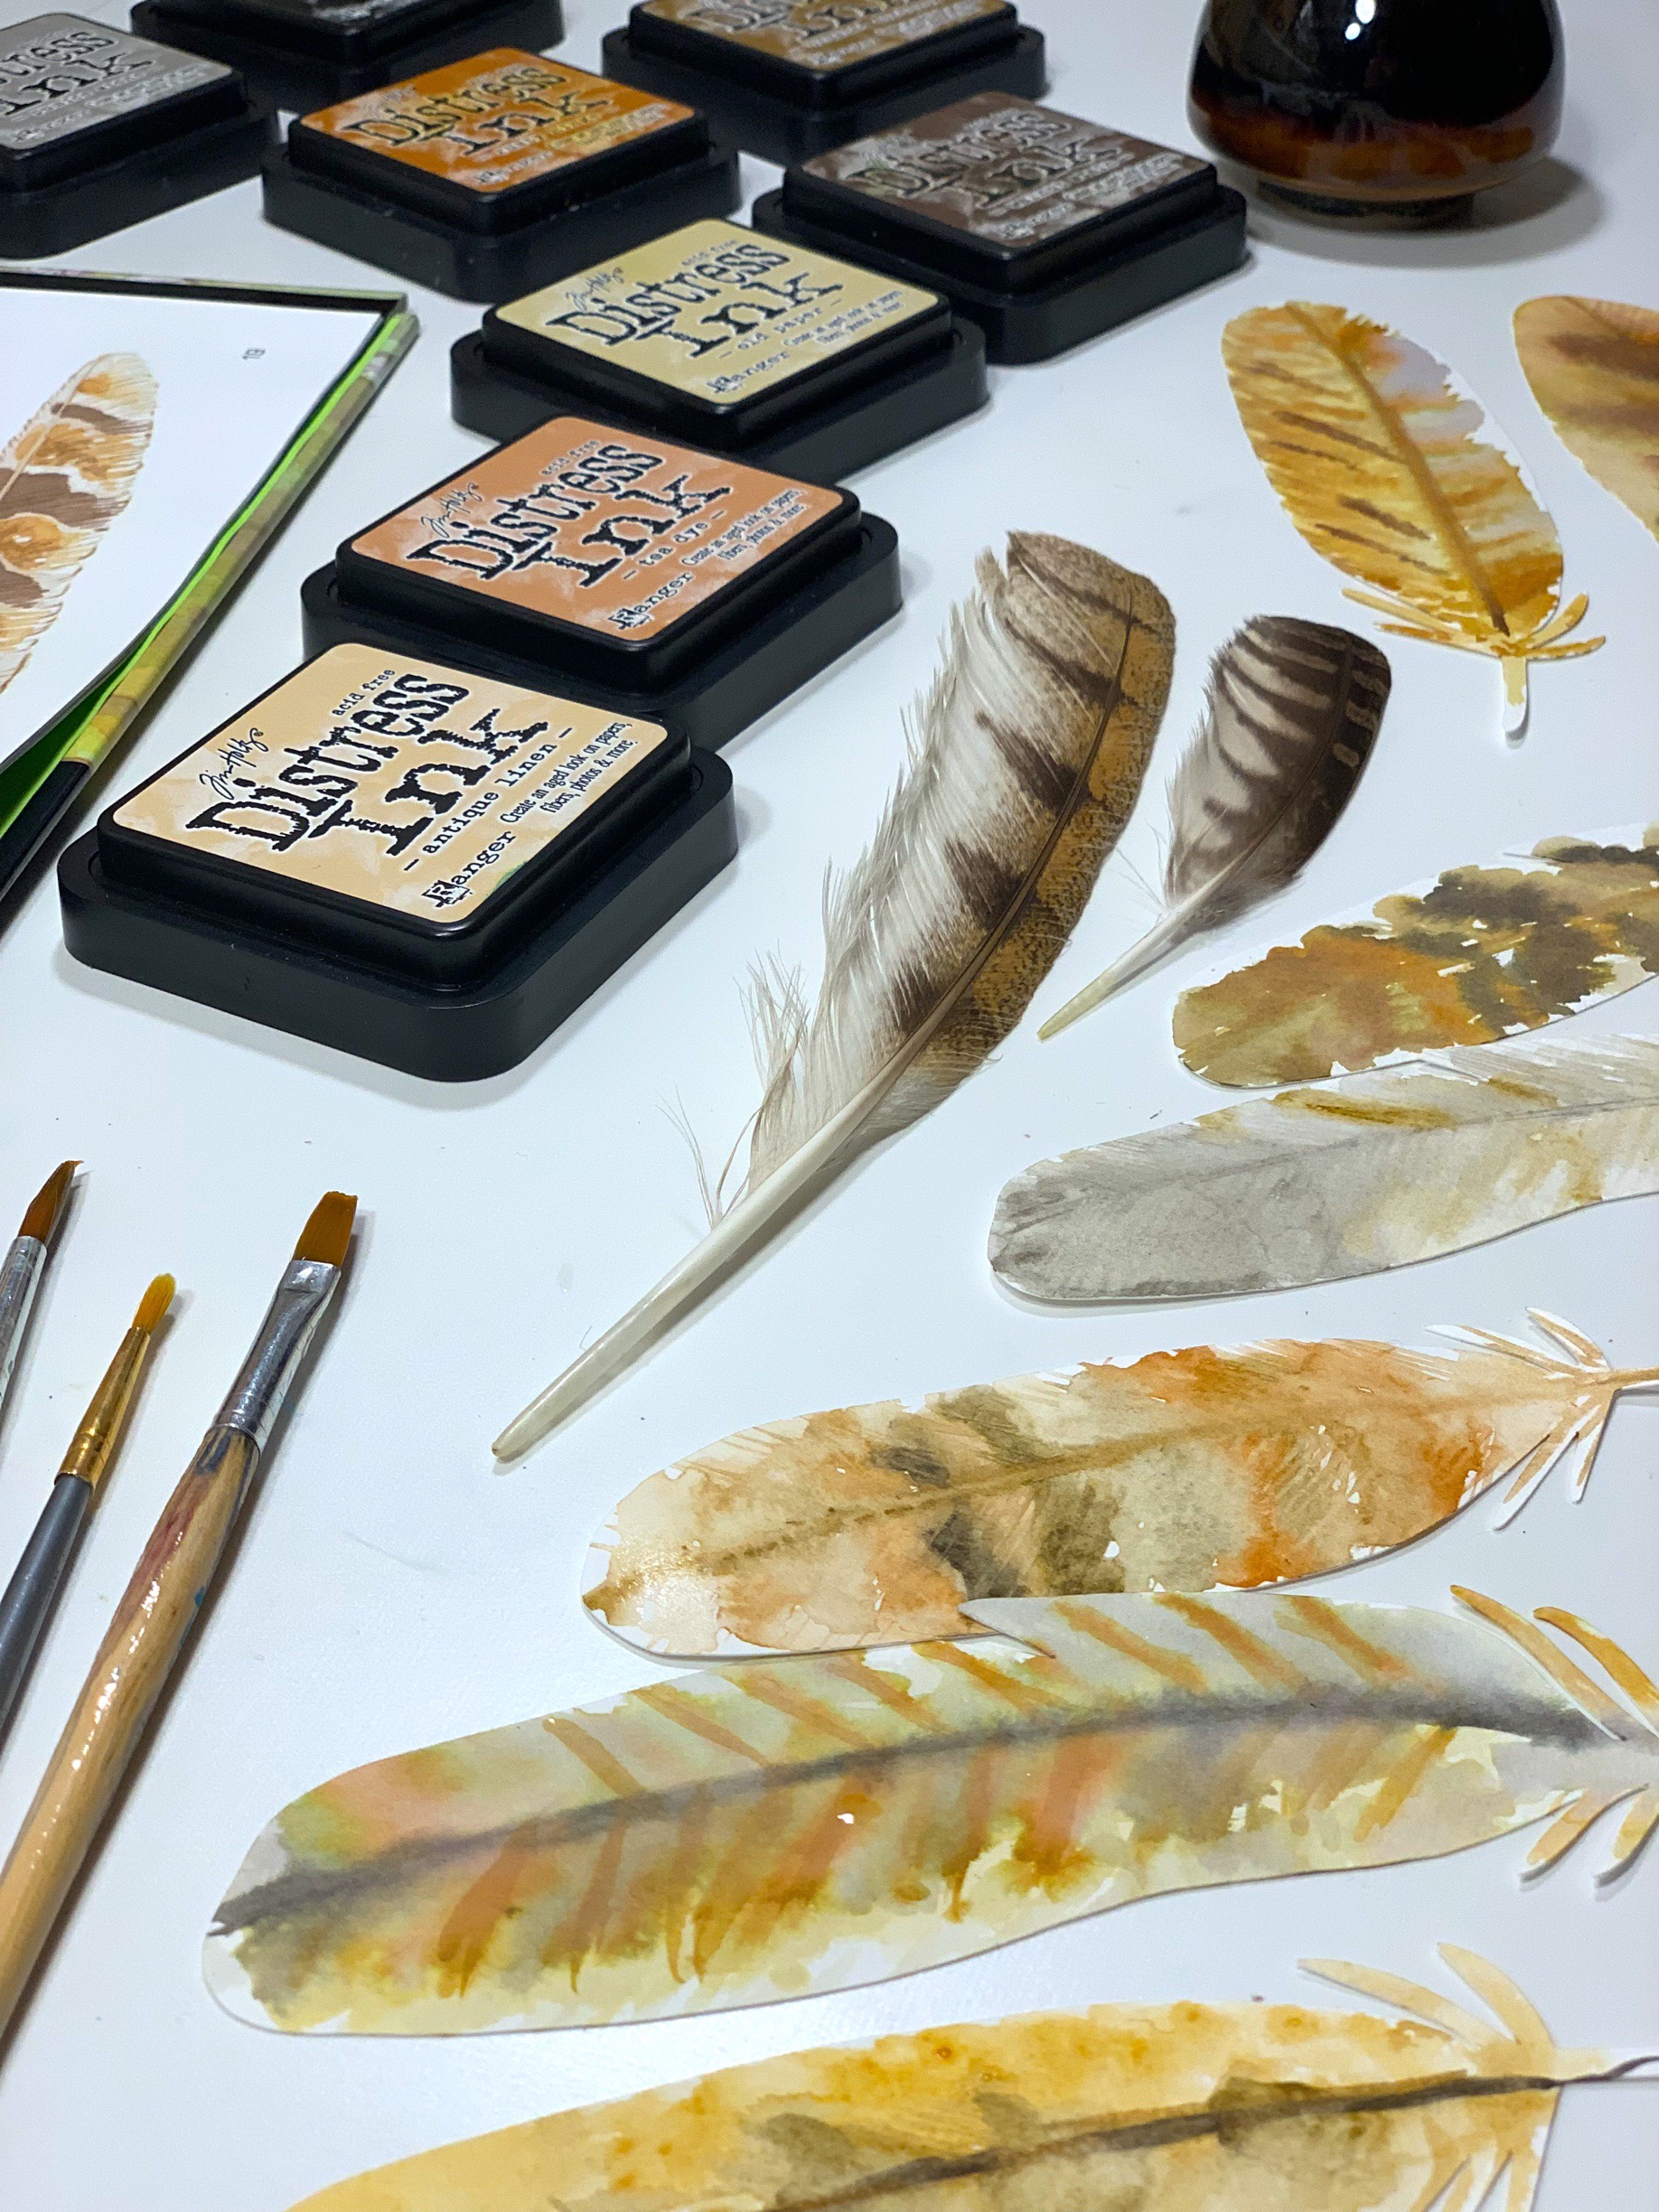
For this lesson, we were inspired by the book “Owls, Strange and Wonderful” by Laurence Pringle. The illustrations are glorious and the text is easy to follow along with and appropriately informative. There are several painted owl feathers, and I thought we could recreate the artwork.
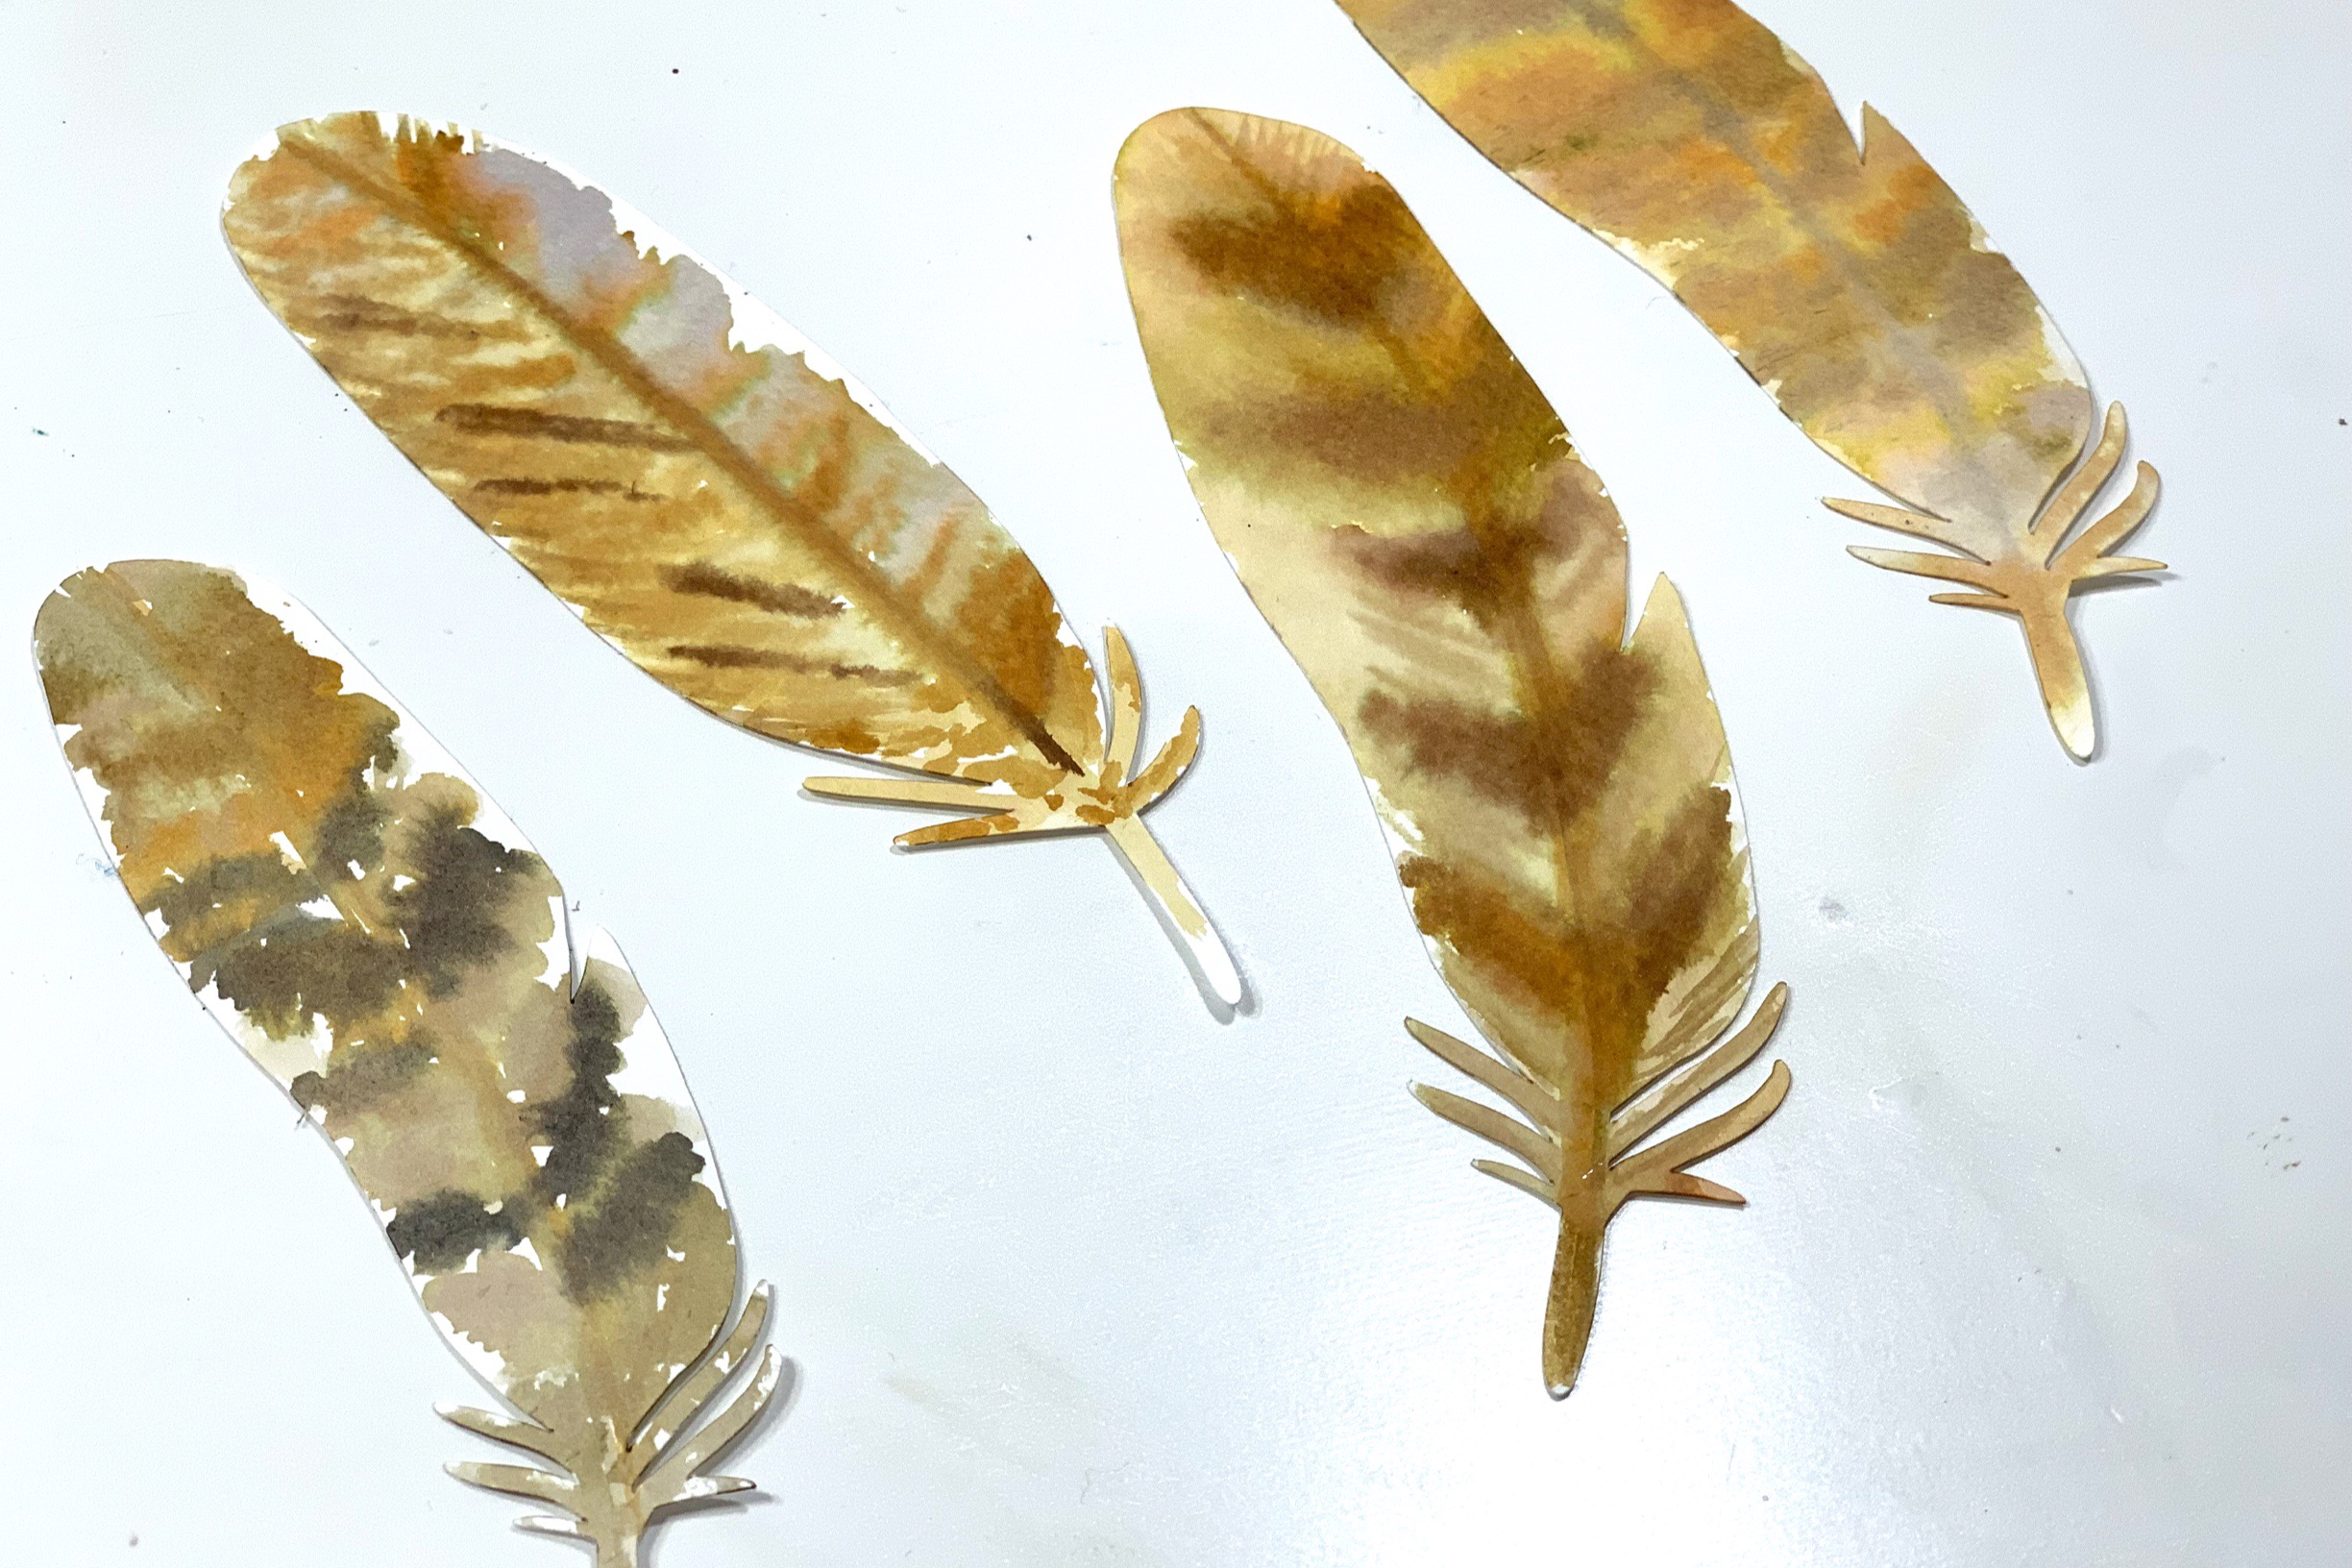
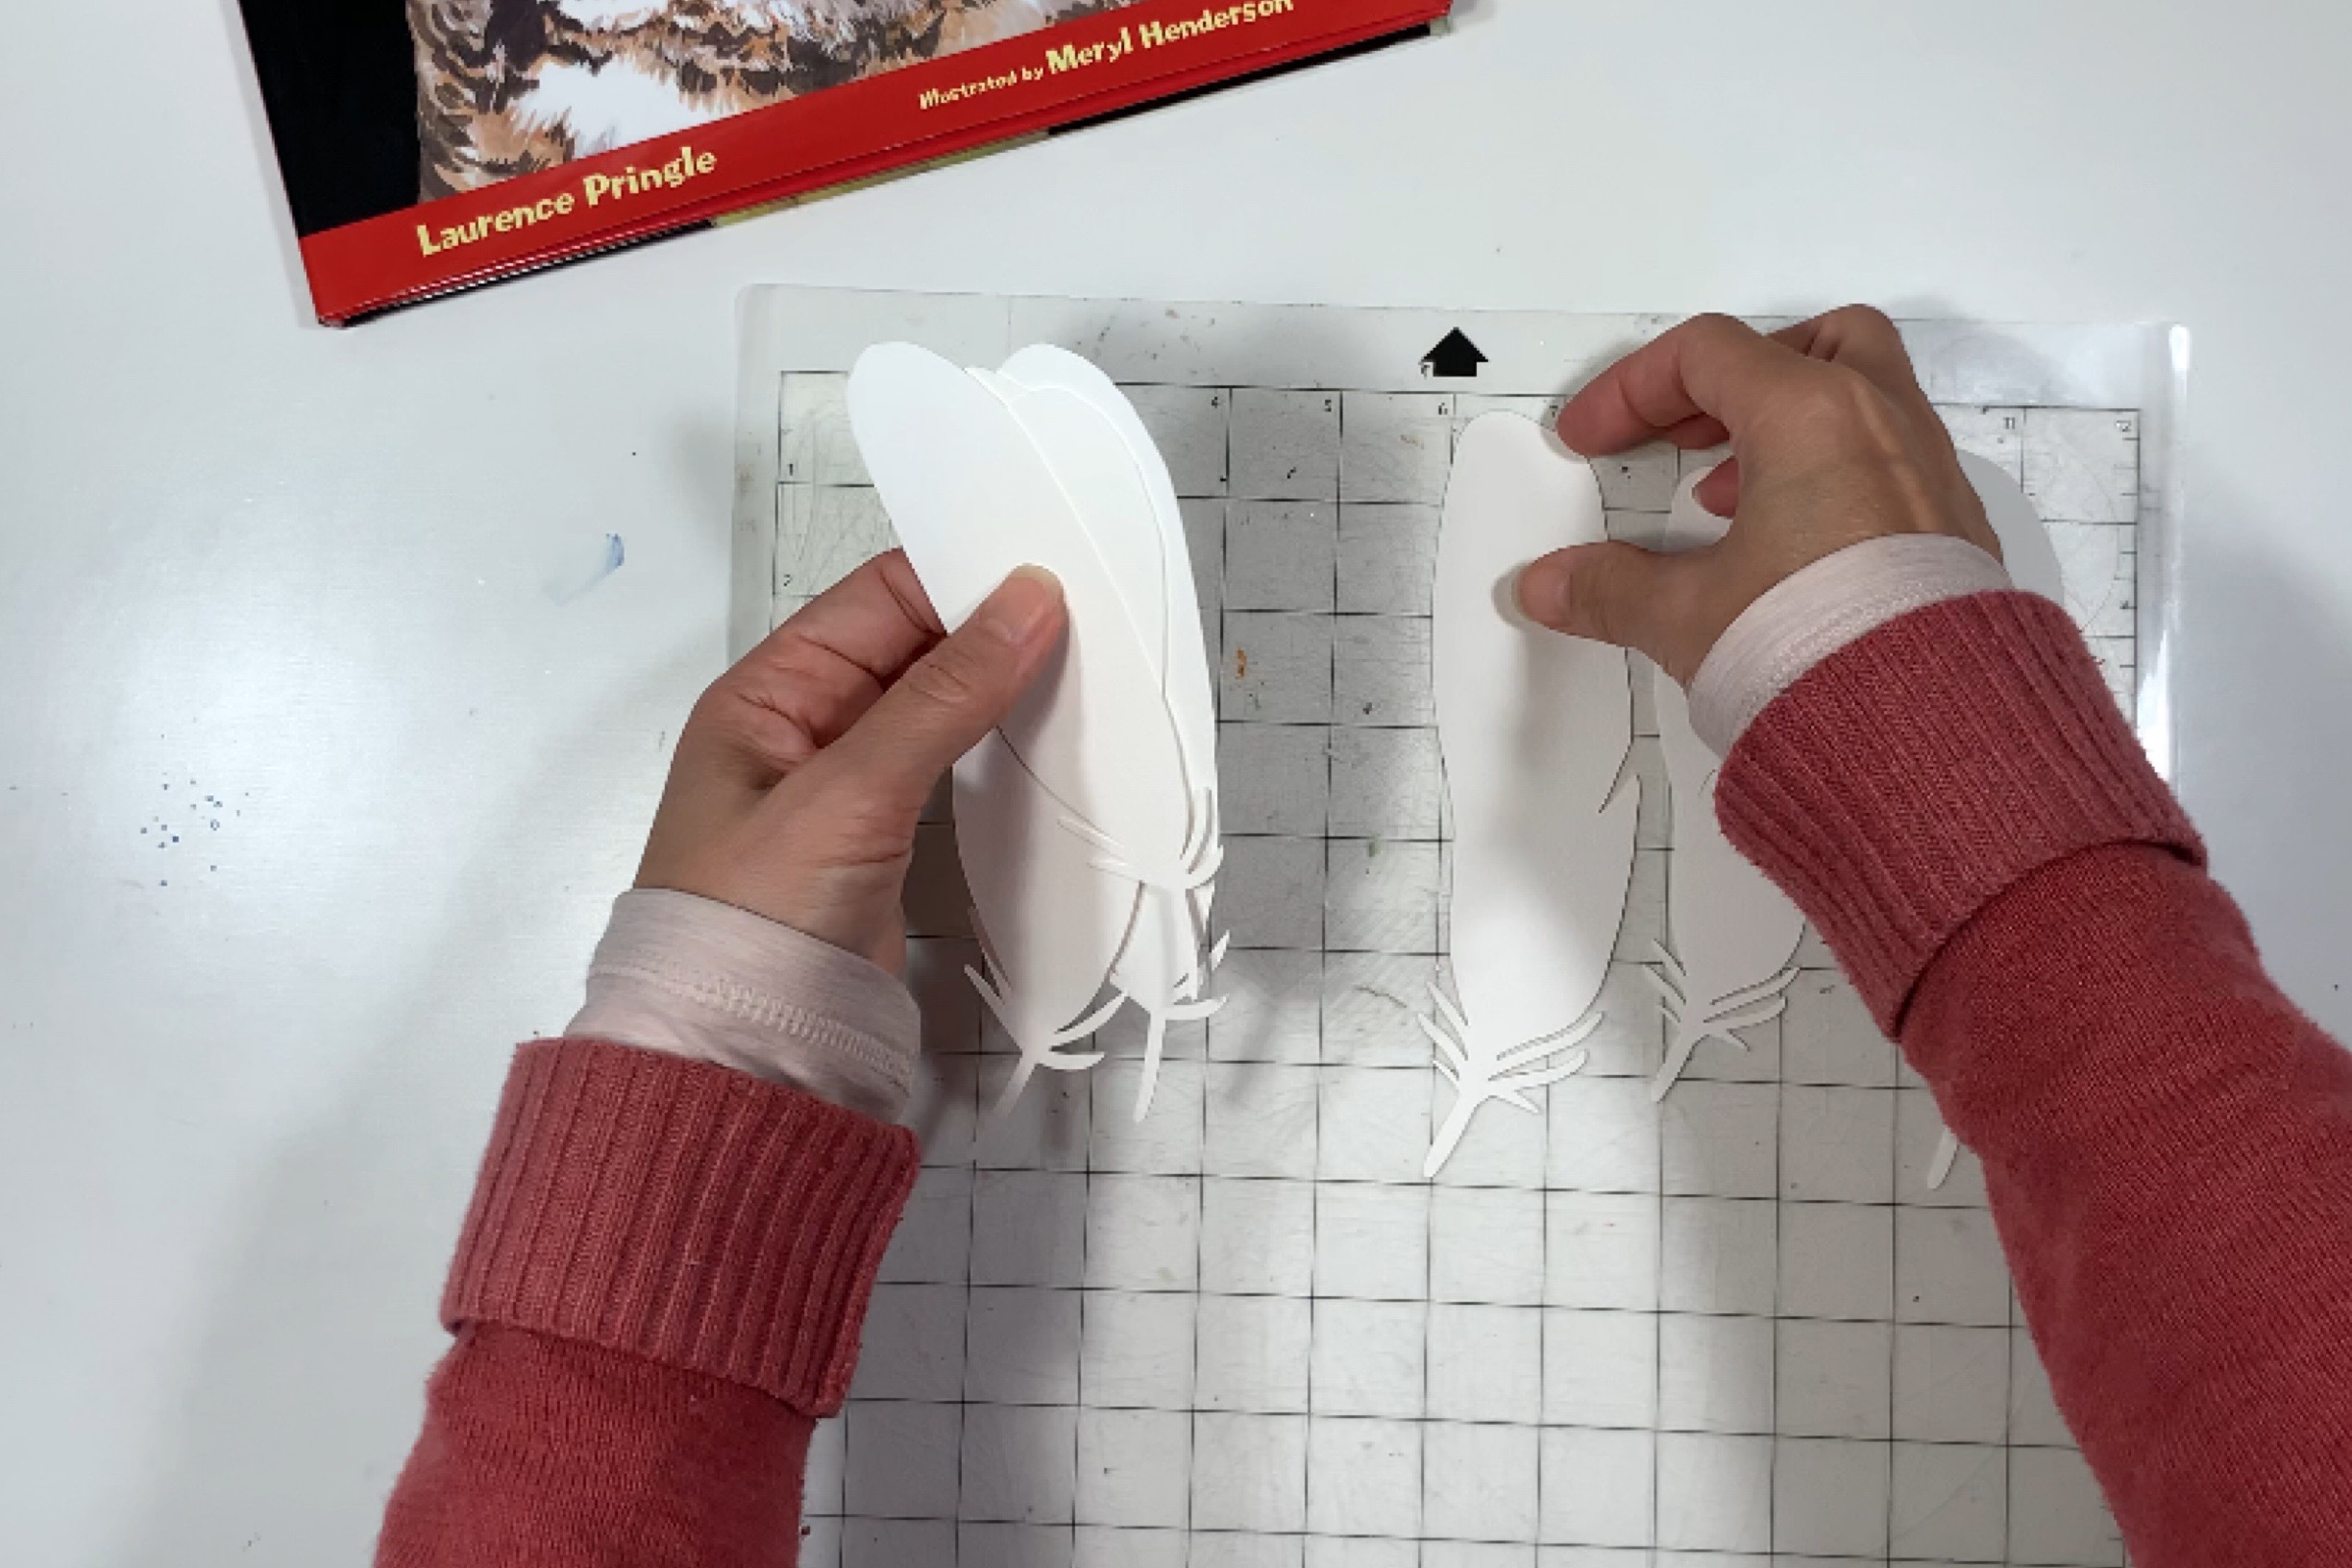
For this project, I used my Silhouette Cameo to die cut feathers from Fabriano 90lb. watercolor paper. You can free hand feathers or skip it entirely and just paint!
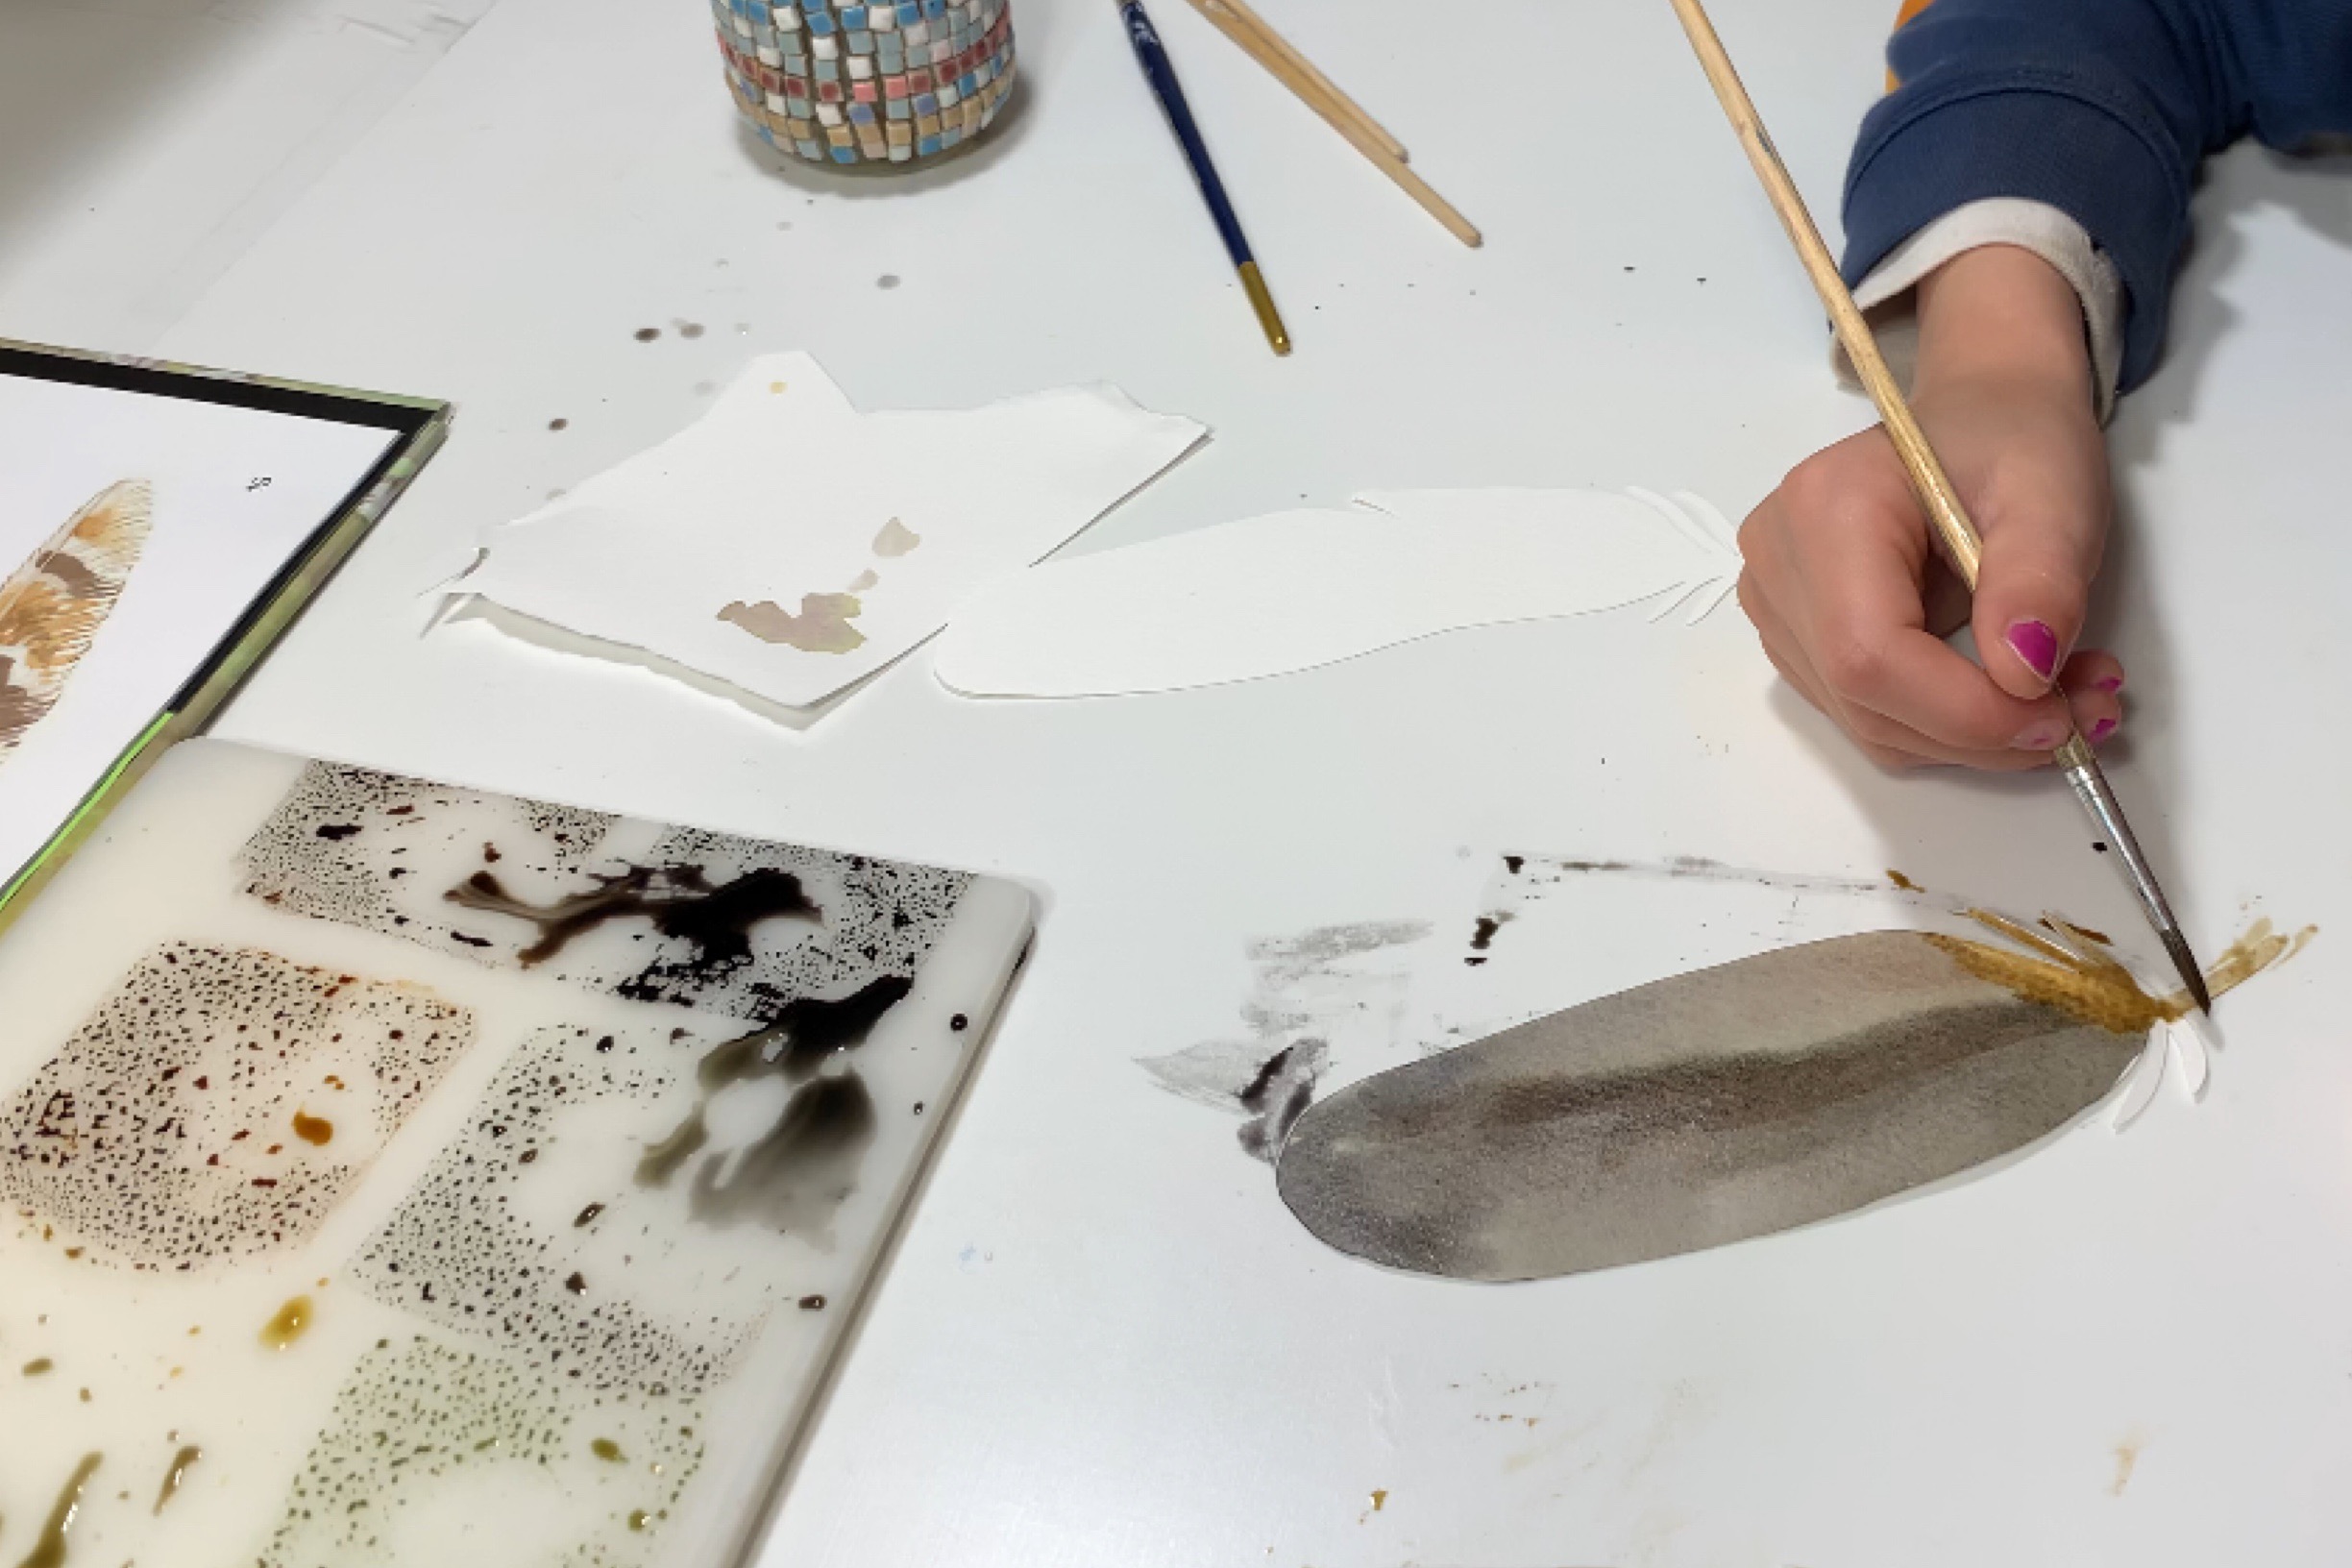
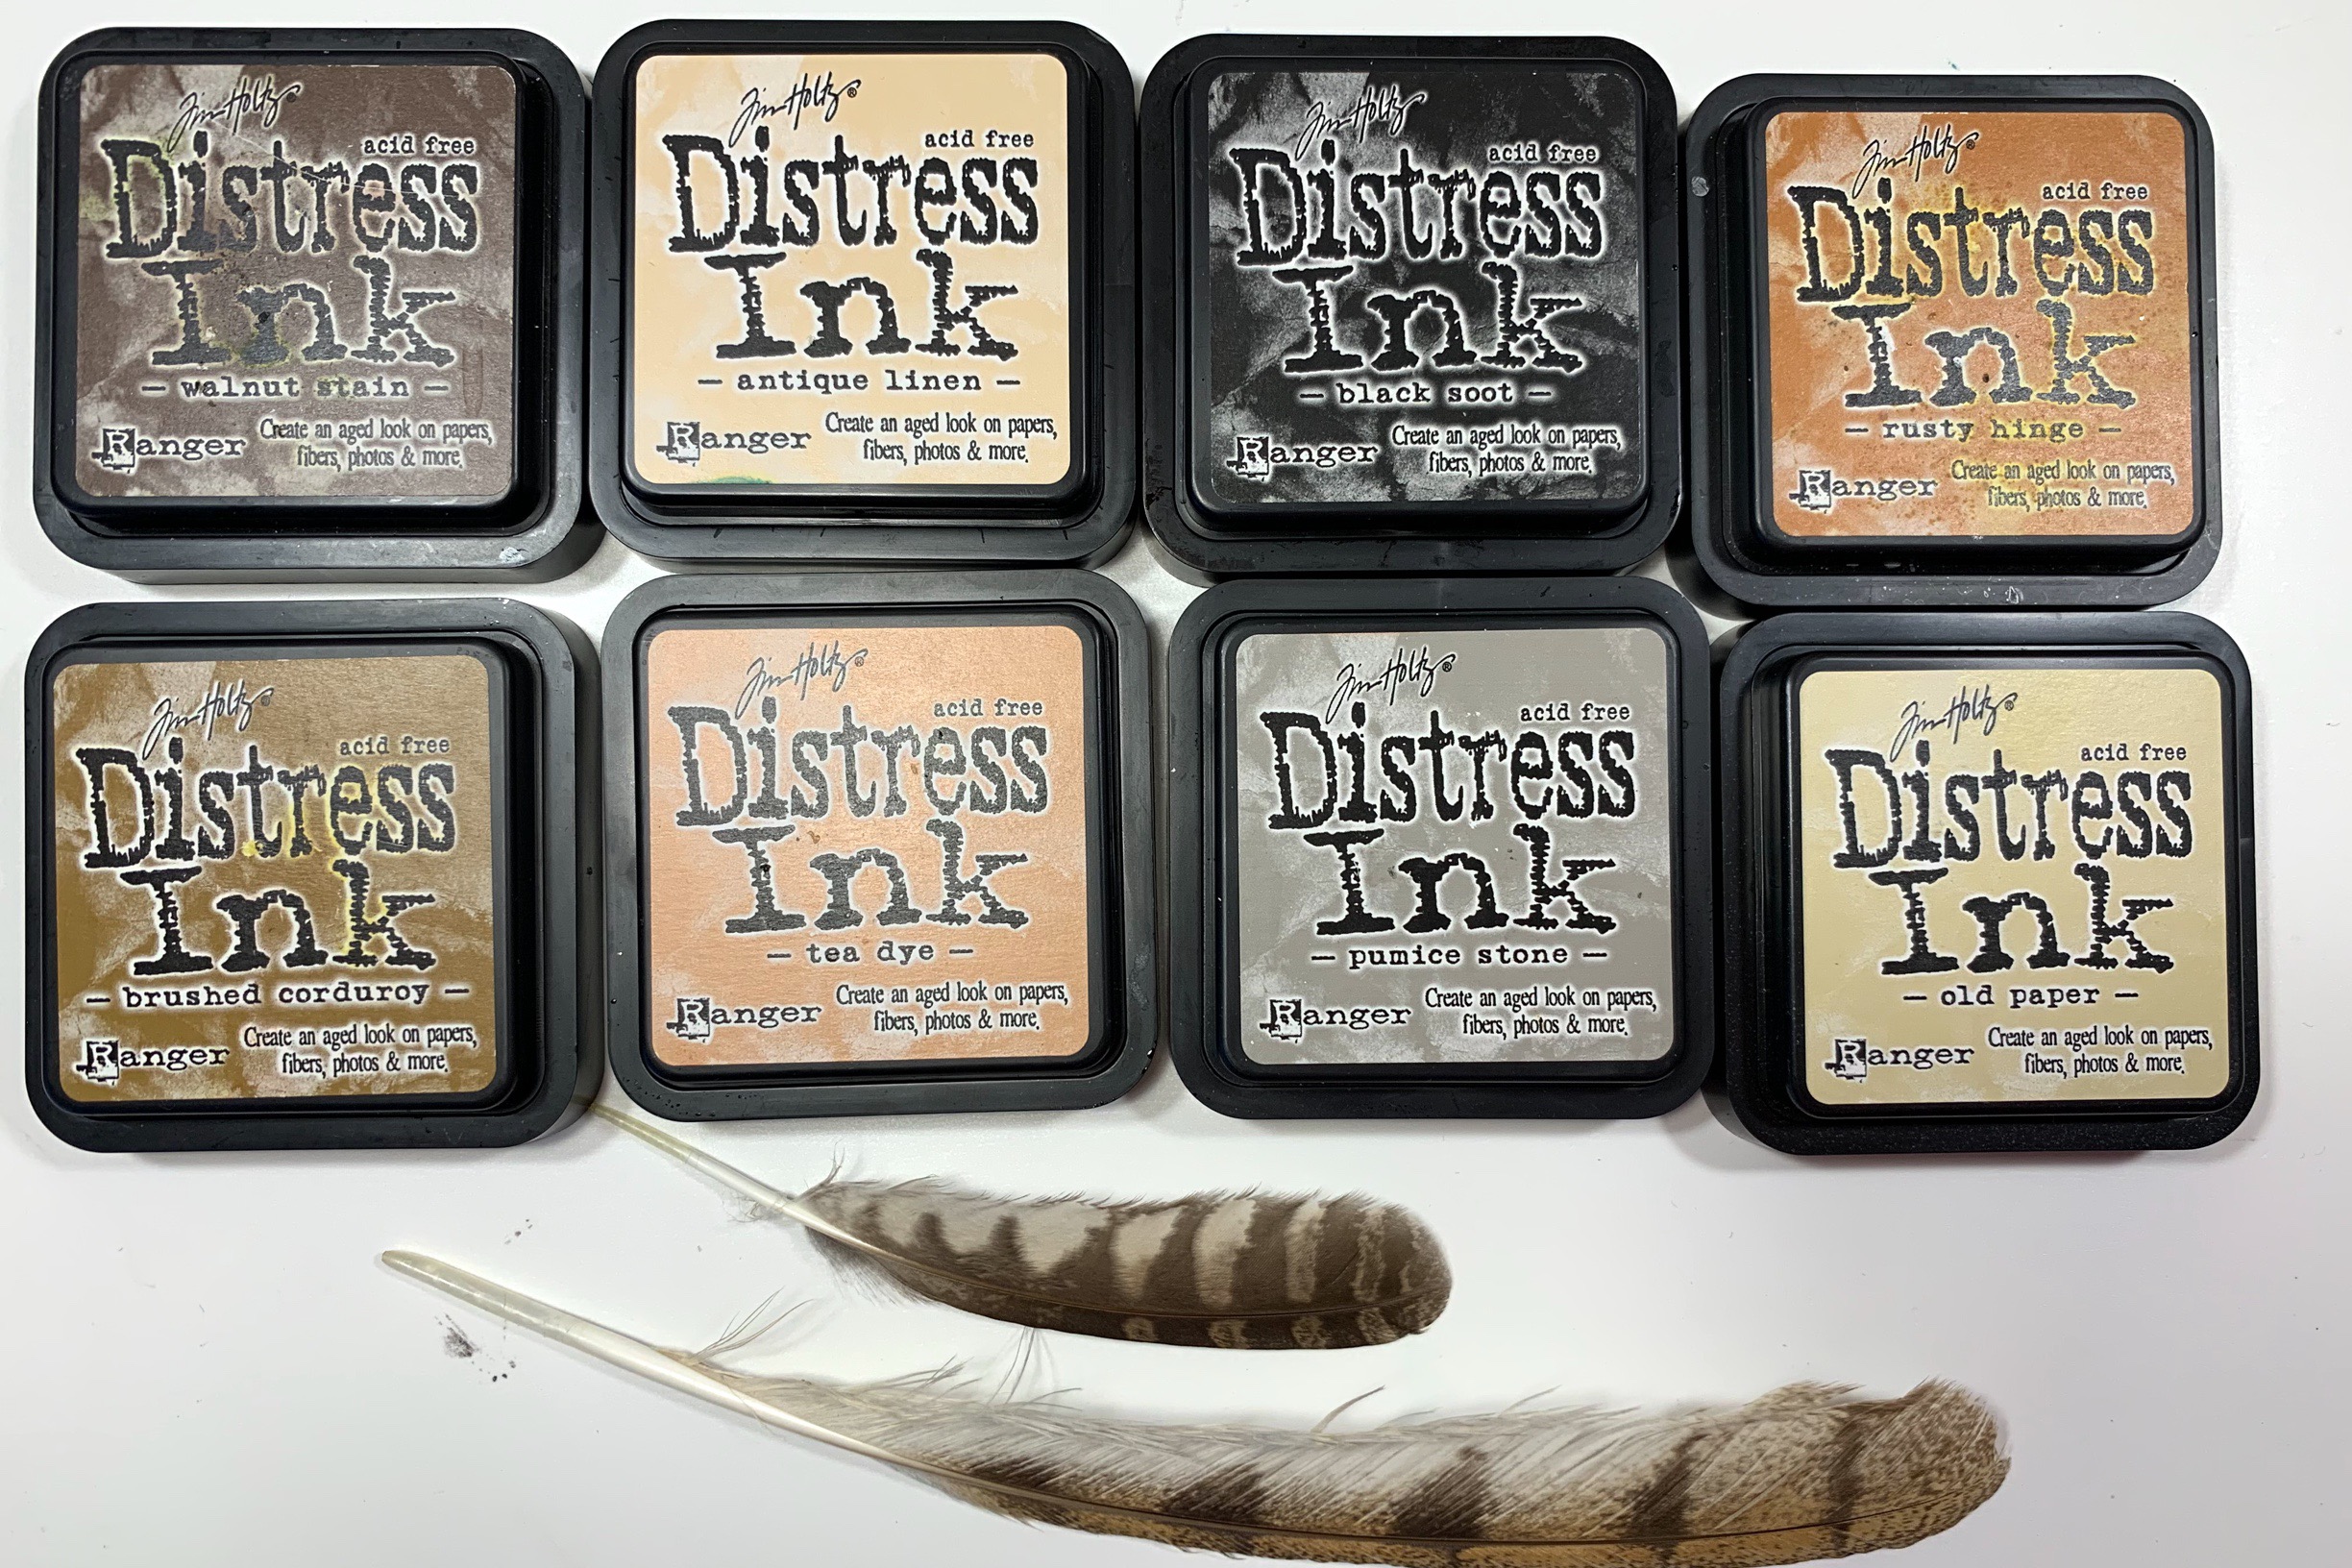
We also used our Distress Inks in a variety of tans and browns.
After cutting the feathers, the children and I tried recreating specific feather patterns. While we had a nice time doing this, we found that accurately watercoloring the patterns was such a challenge!! In the end, it was an artistic representation of the lesson and definitely called on our powers of observation as we looked at the details of each feather.
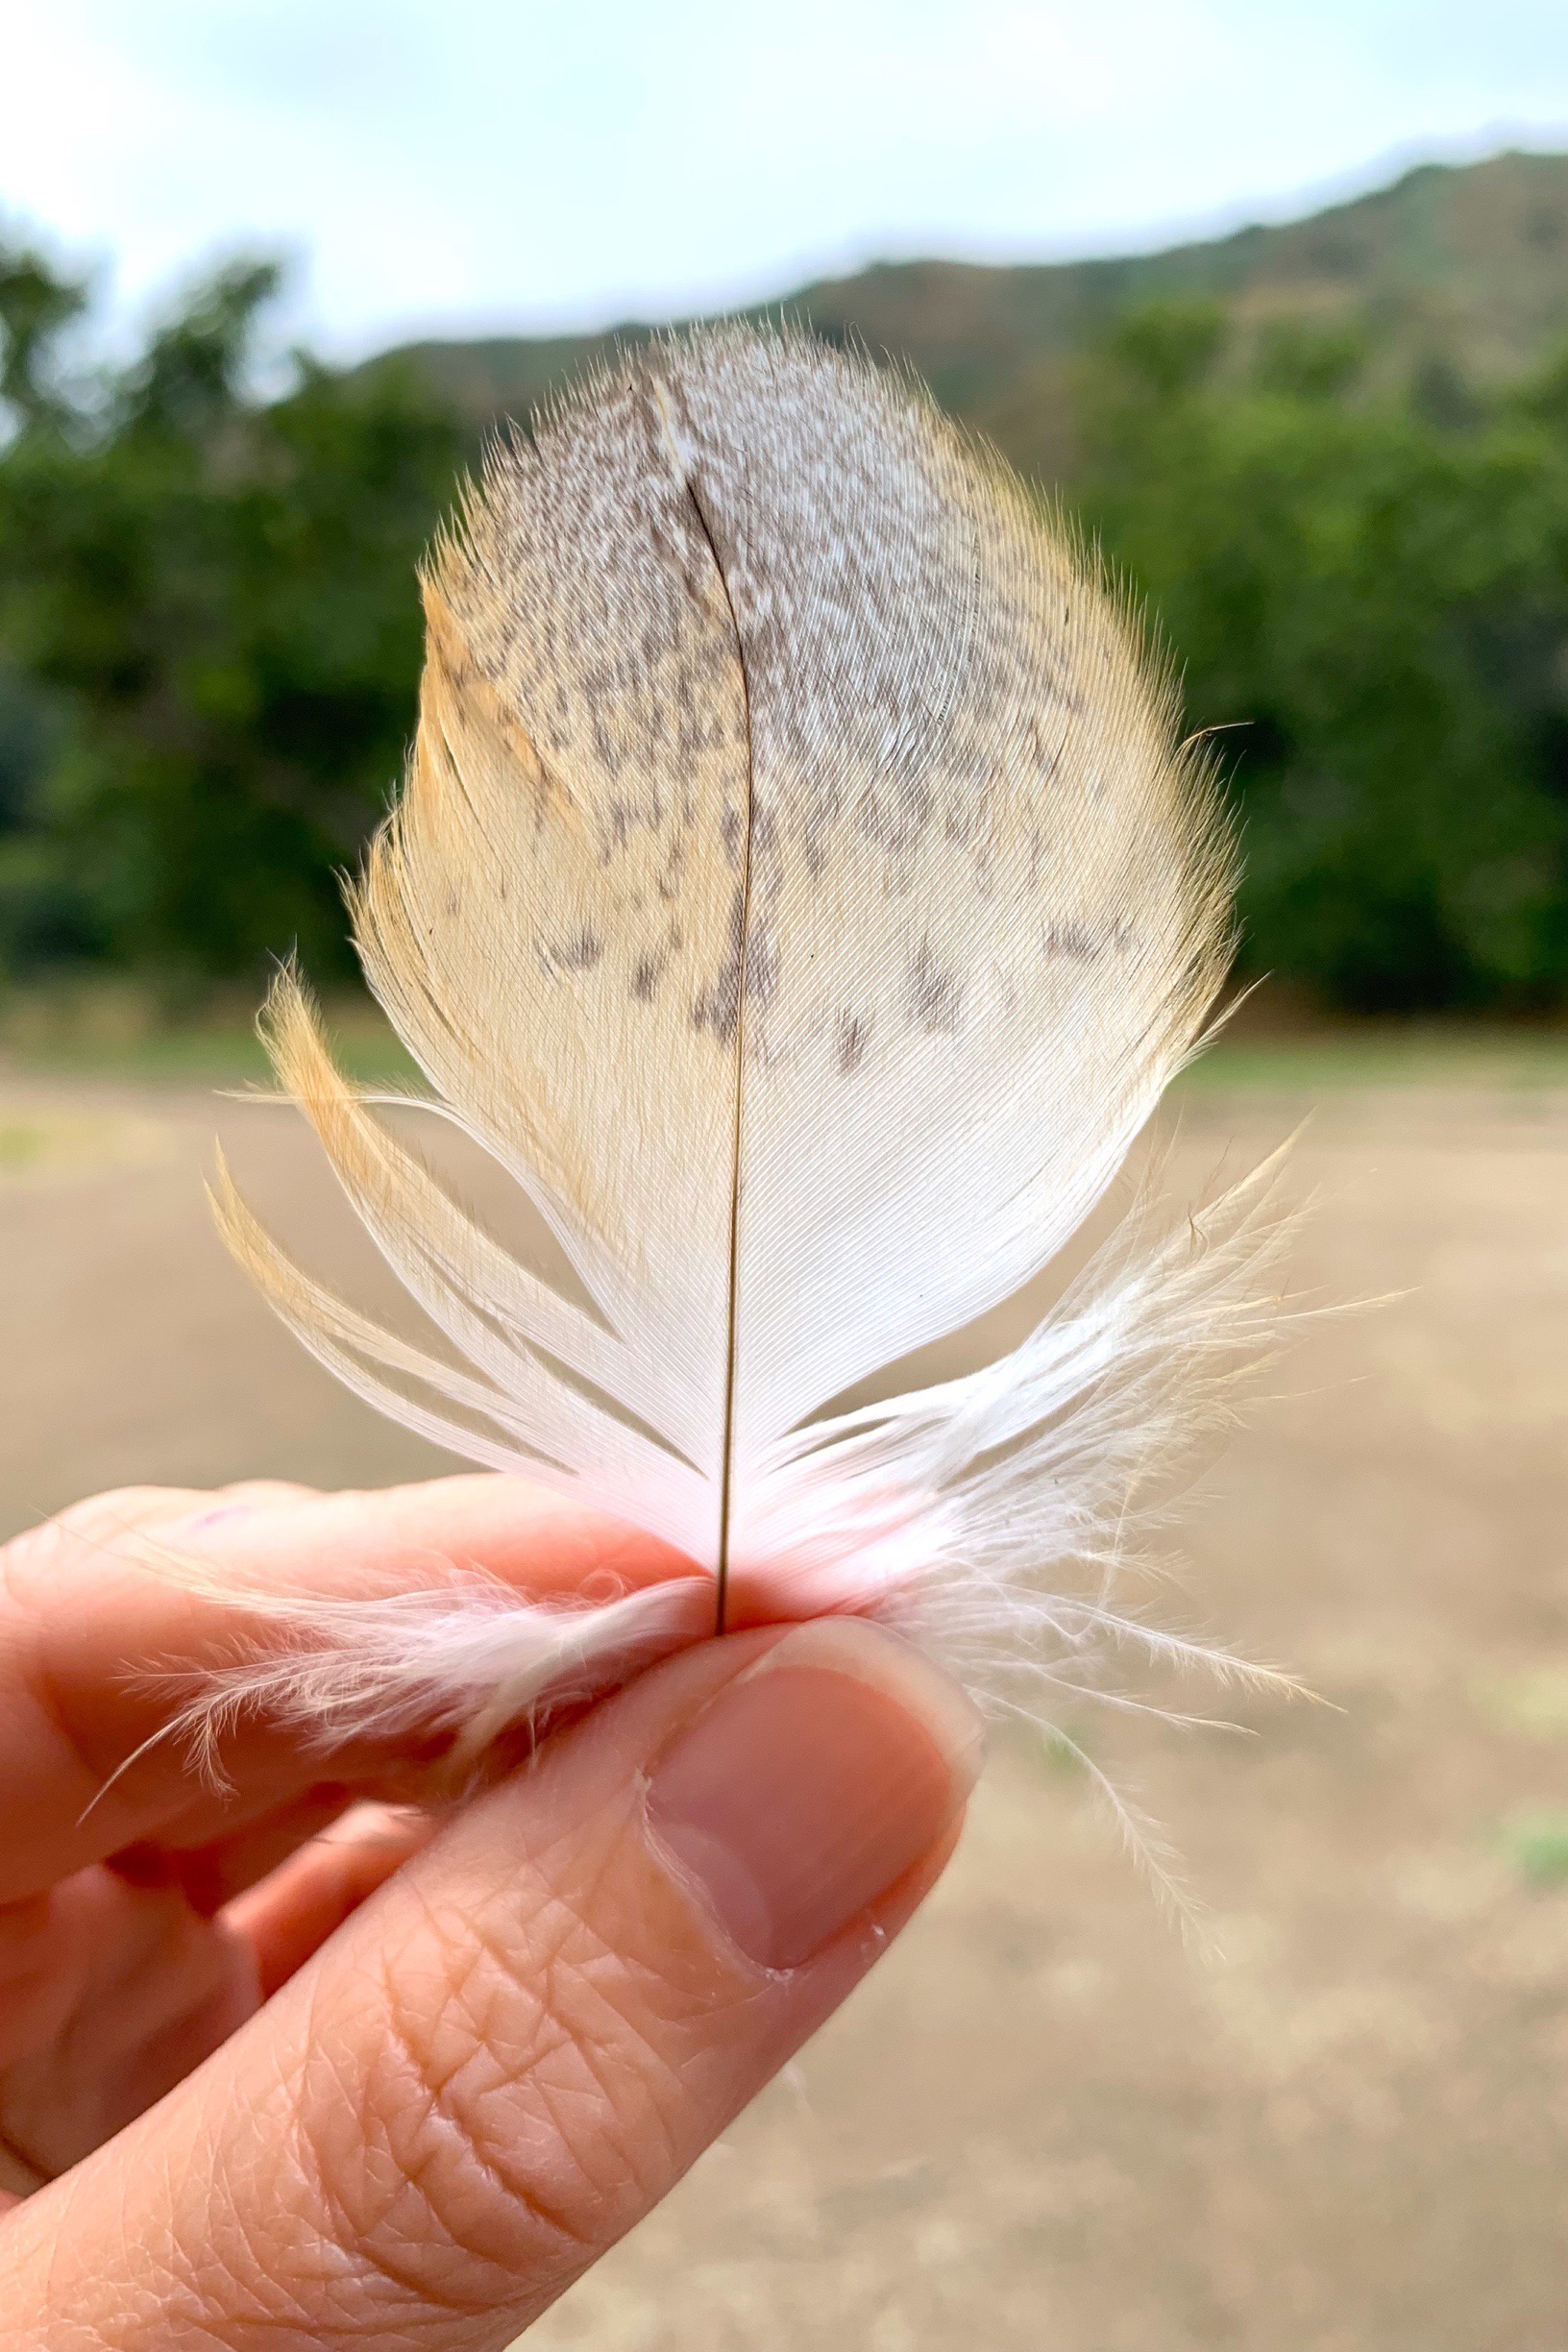
We also had two feathers we got from nature class. The large one is a barn owl feather and the small one is a western screech owl feather.
While you can do this project with any kind of paint, I do recommend using watercolors for the beautiful translucent feel. We used our Distress Inks as watercolors for some and our Winsor Newton watercolors for others. I think both worked well.
Check out our complete Owl Unit Study with videos on how we put this unit together, the resources we used and the projects we did. You can also check out our larger Bird Unit Study which includes more projects and resources.

Whenever possible, I incorporate art into our lessons. It’s not a art lesson, rather it’s a science lesson that’s artistically depicted. Sometimes art is the perfect medium for a lesson and when it comes to nature science, I can’t think of a better choice. Each spring, we pull out our nature units, and I find that our main lesson books are either wholly empty or filled with magnificent watercolors. There’s limited writing and a lot more hands on projects.
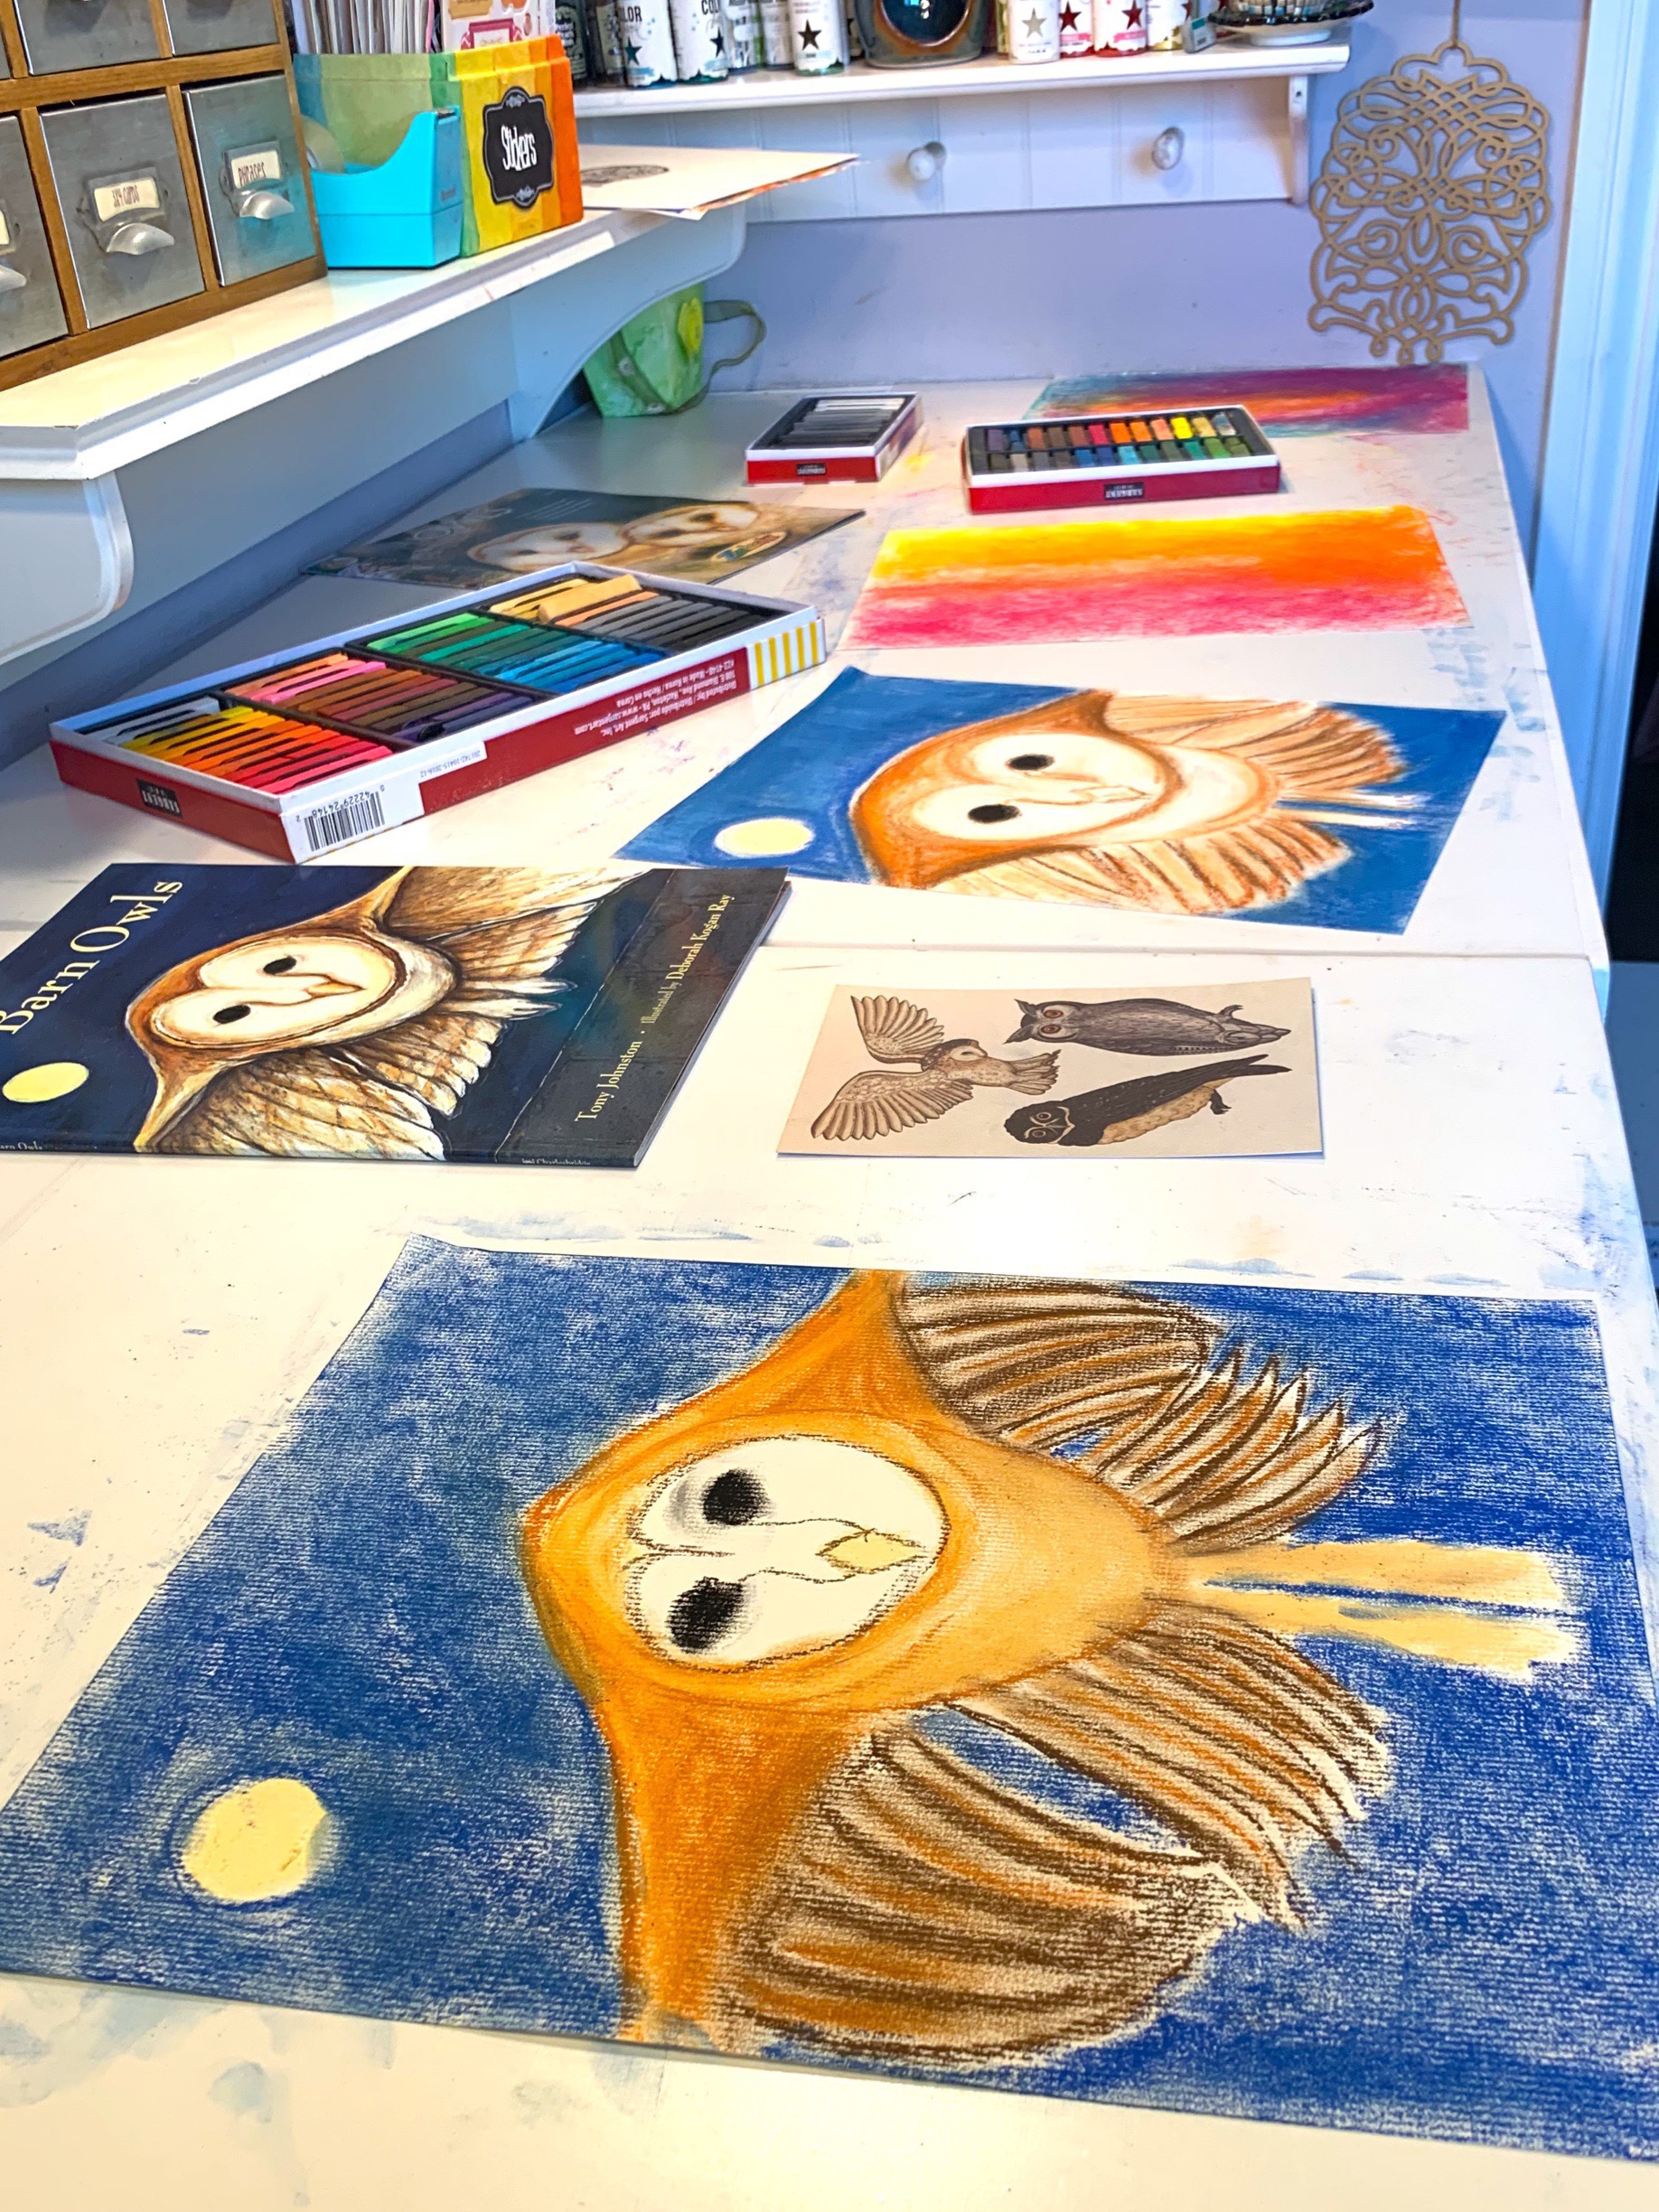
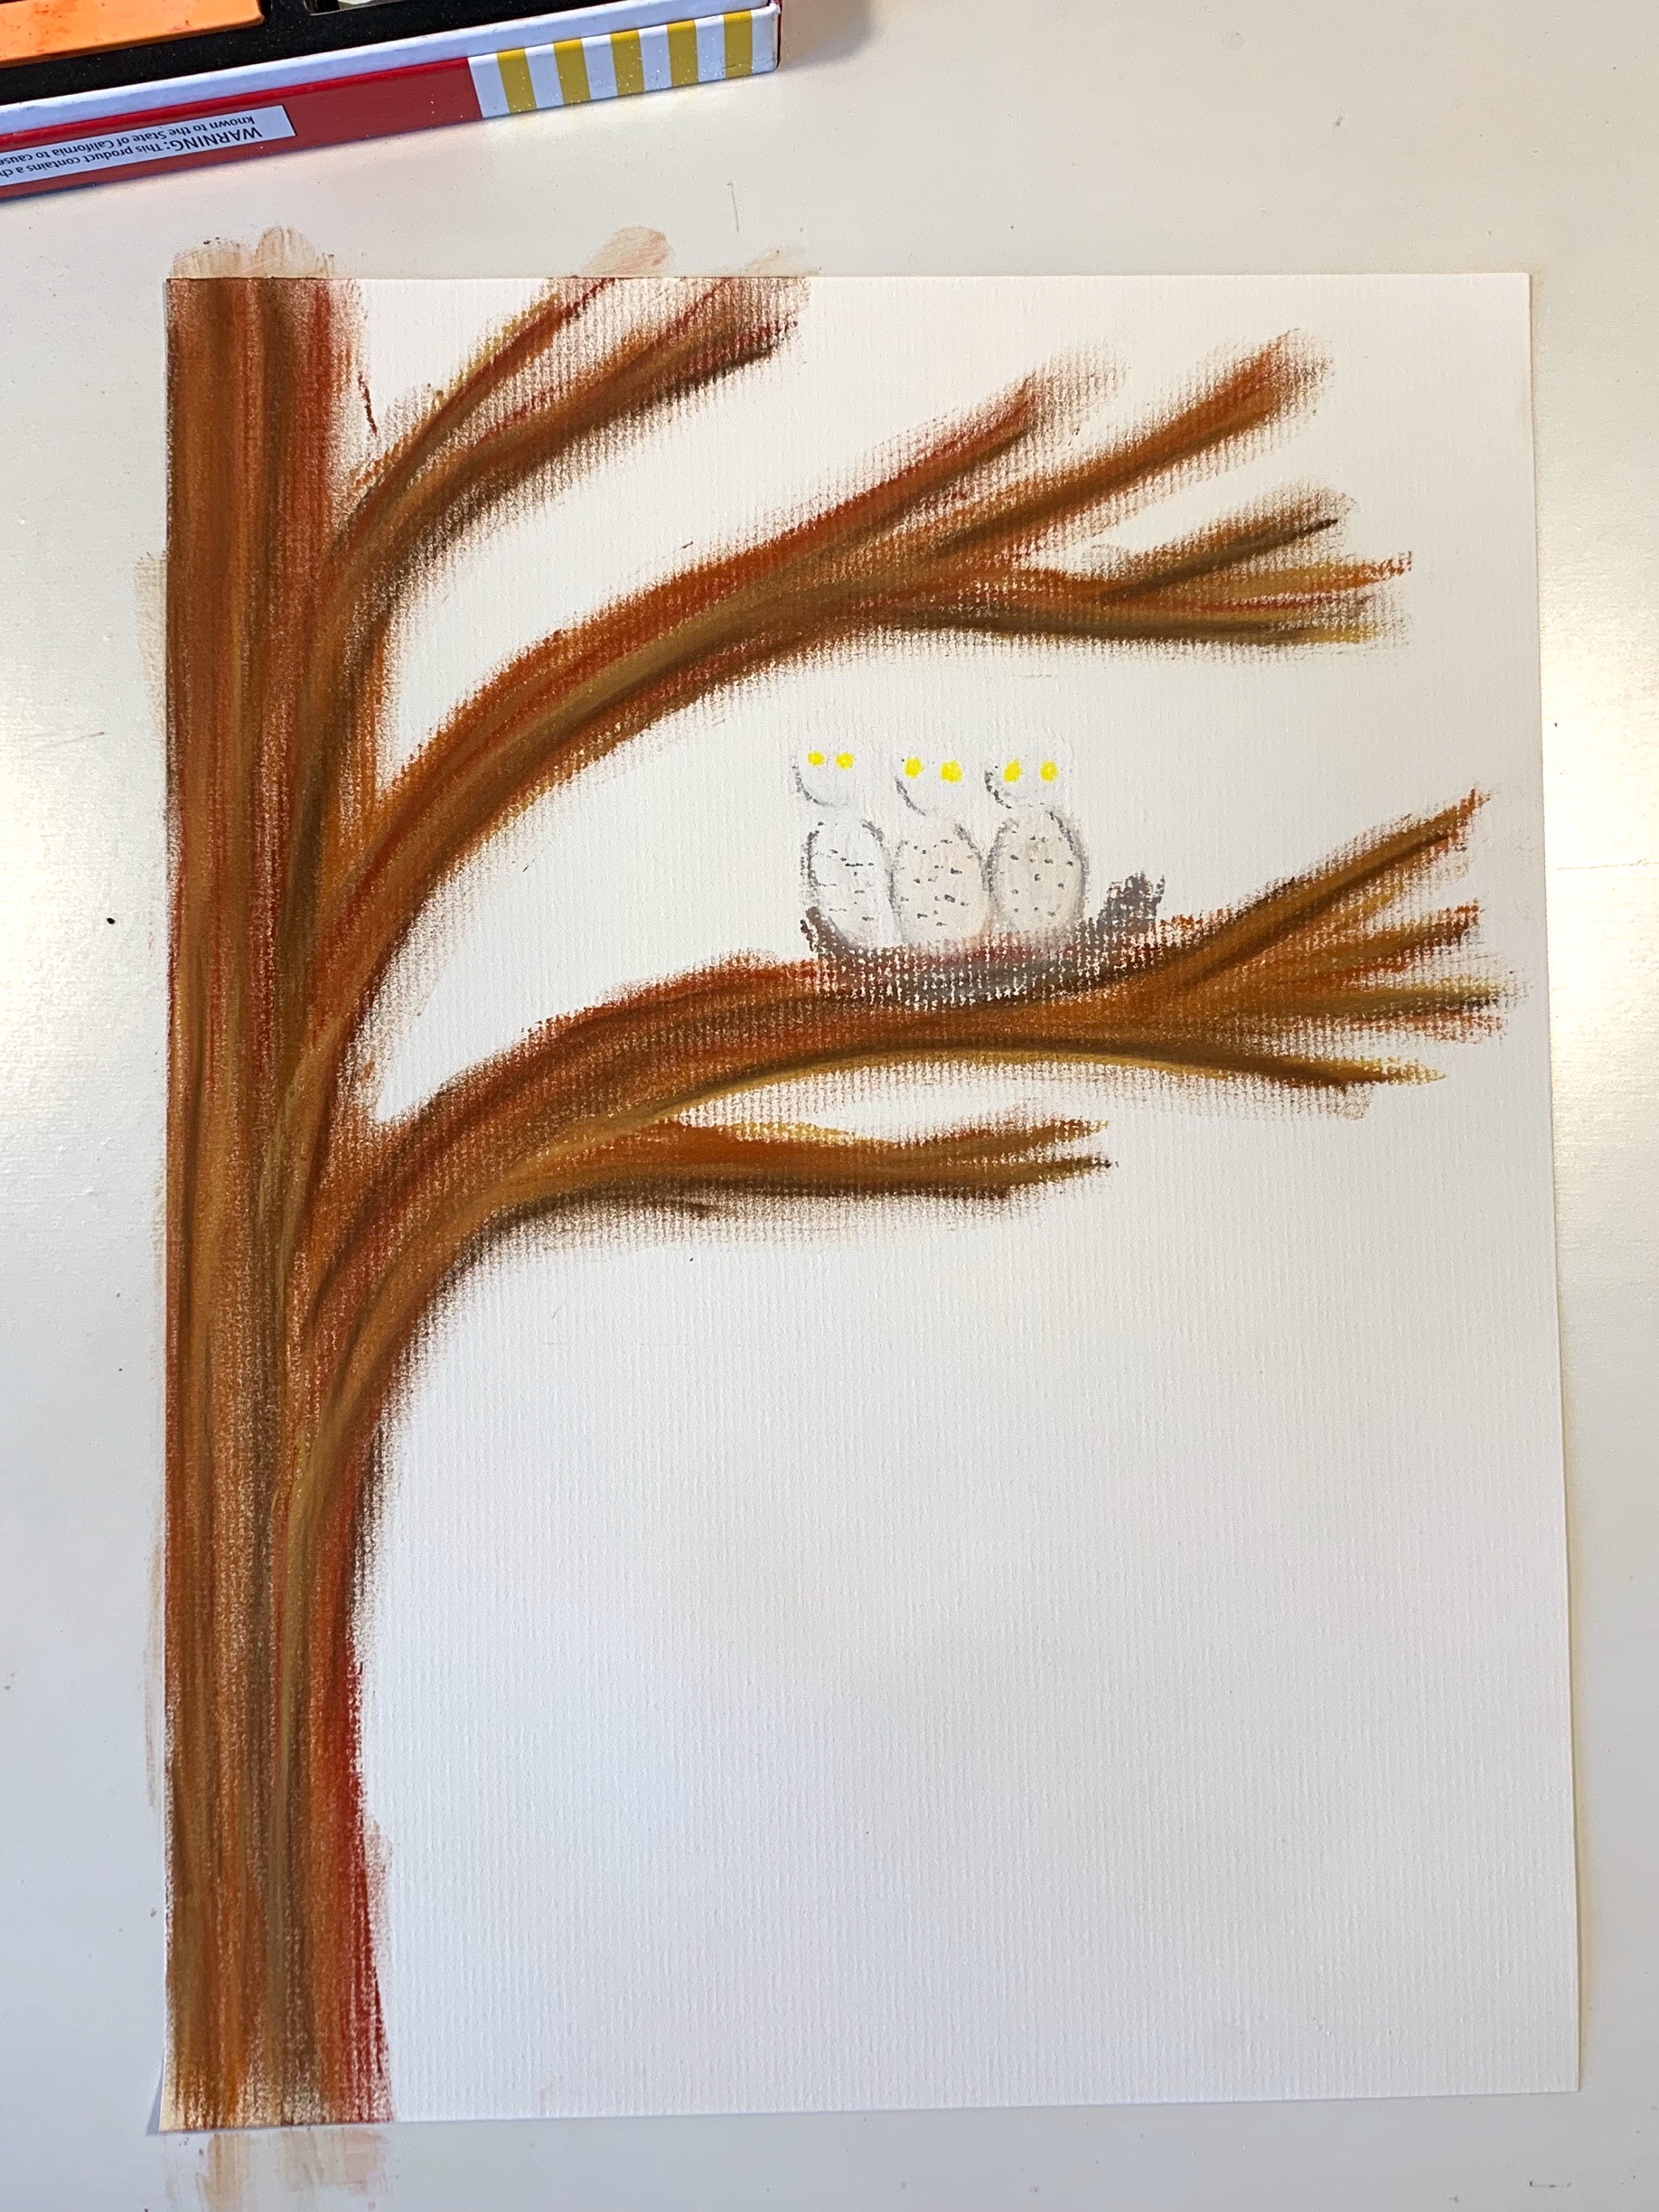
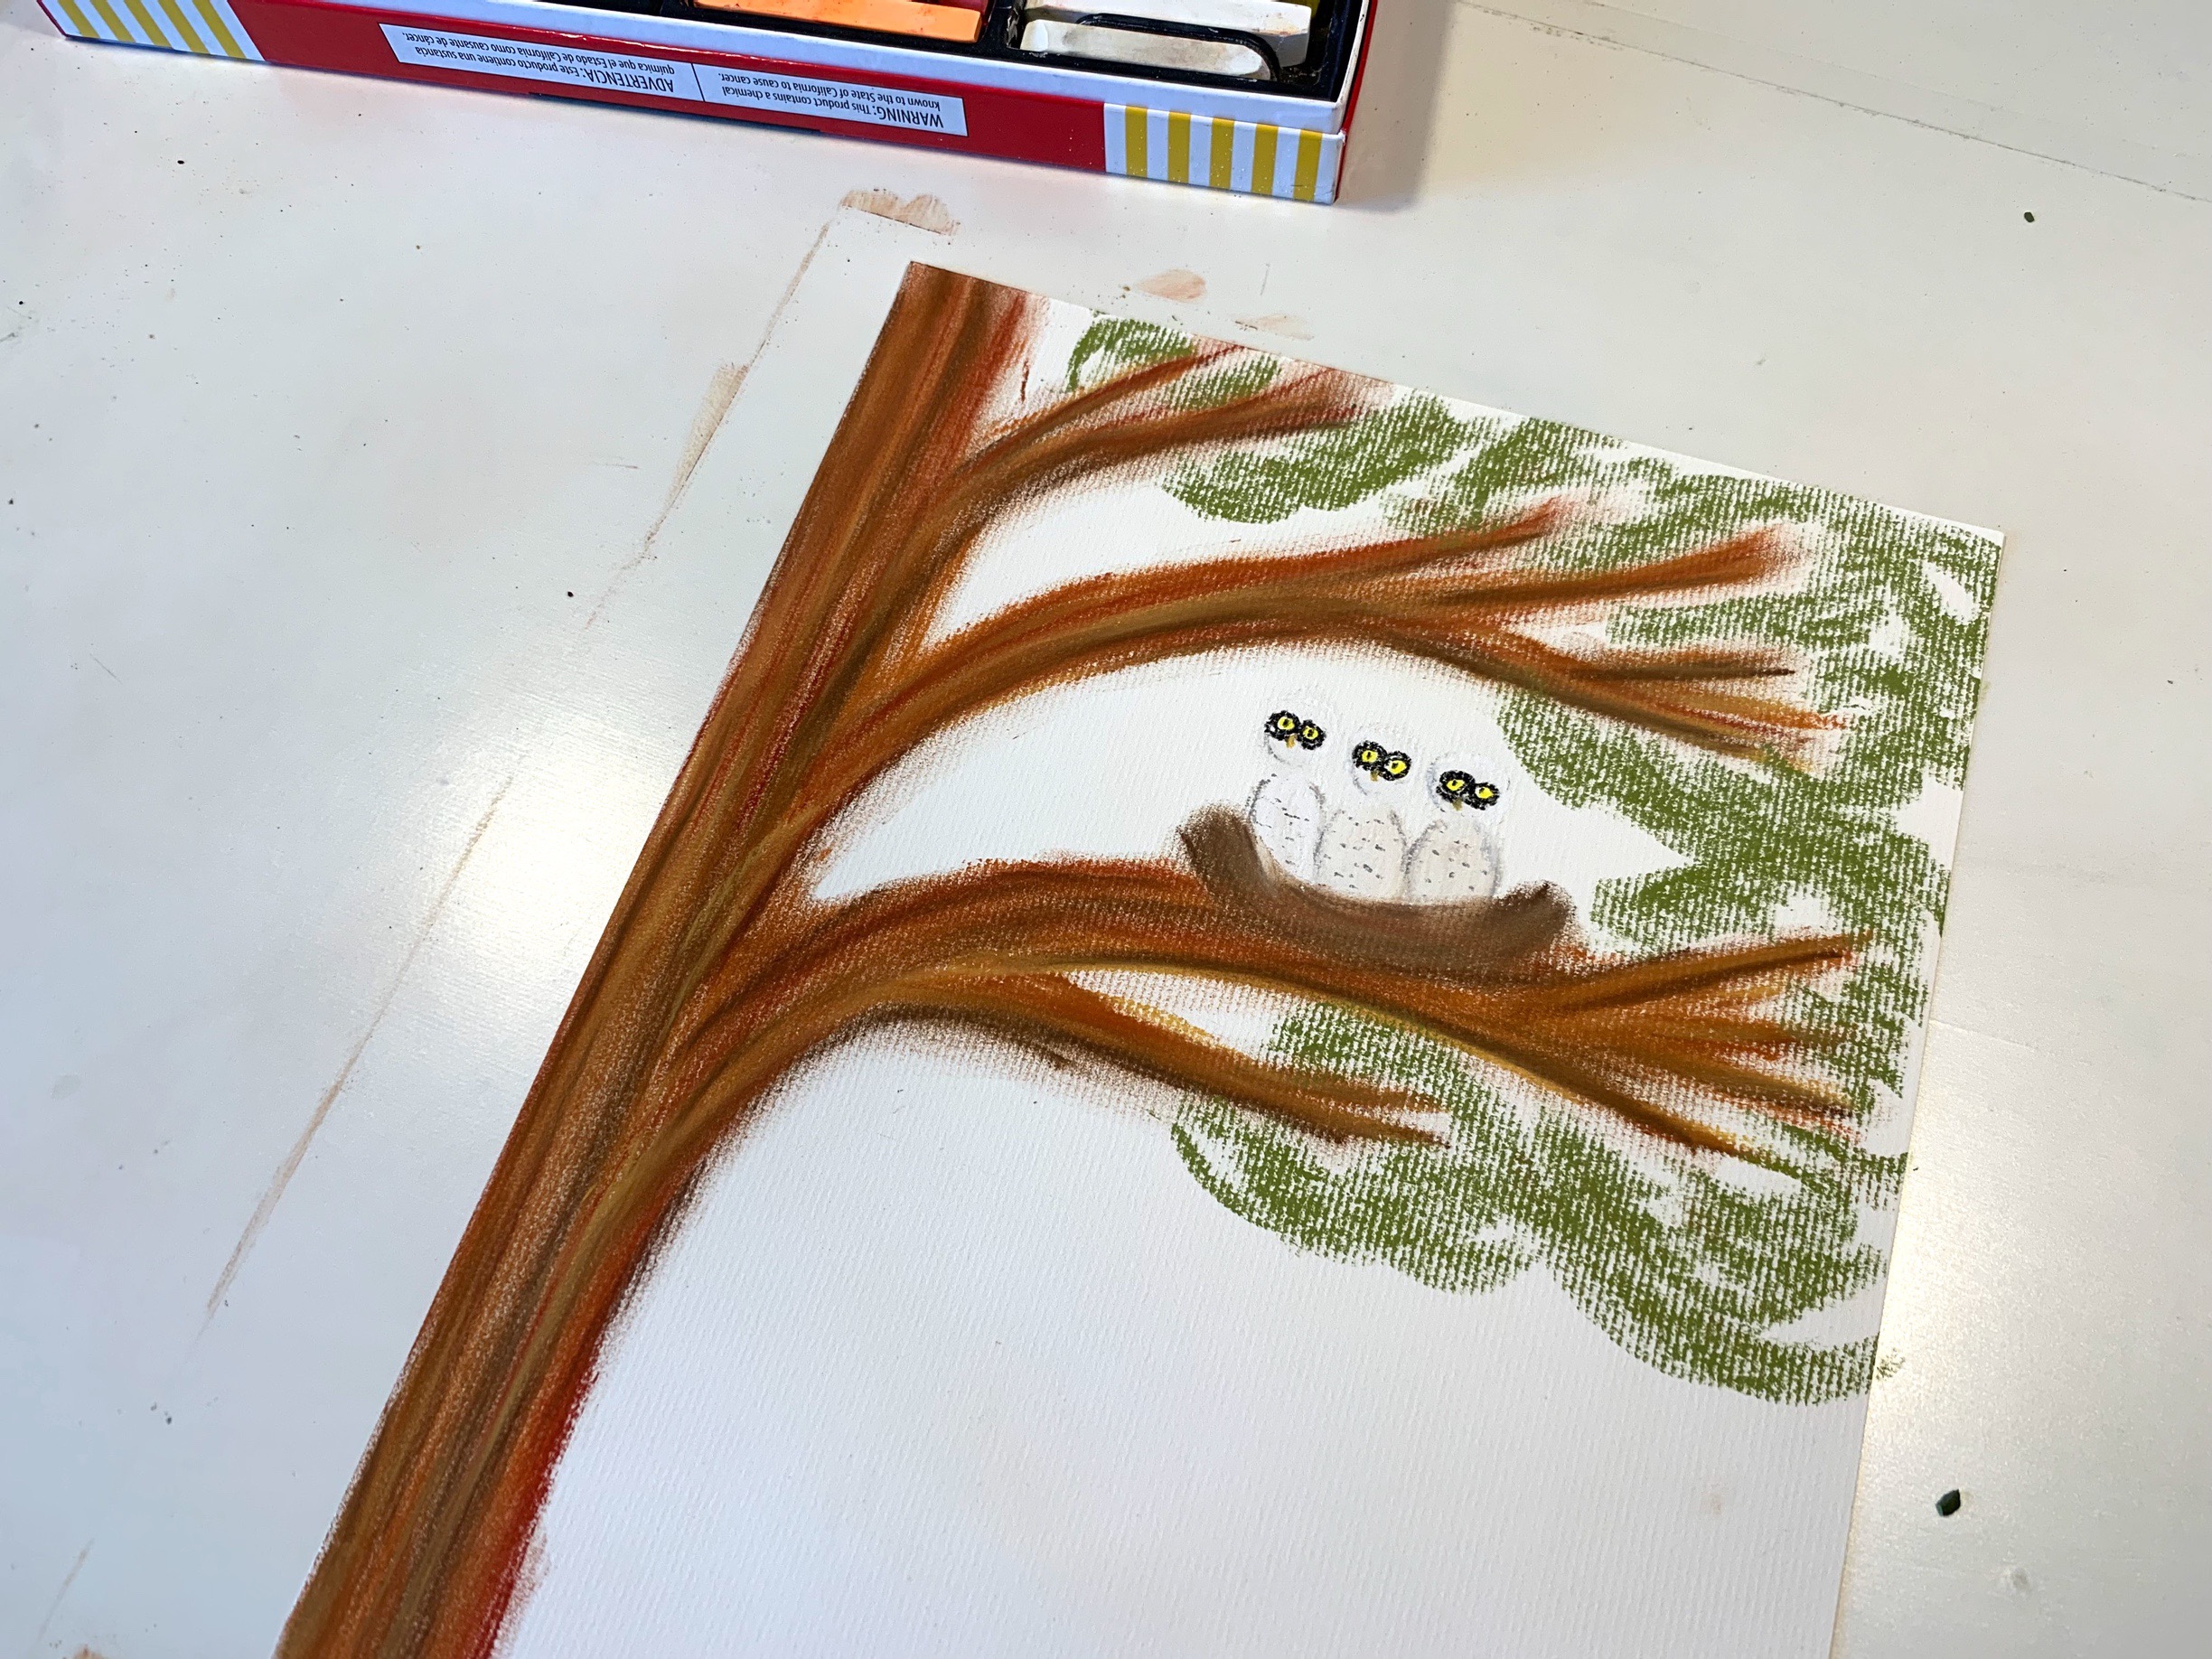
For this lesson, we were inspired by the book “The Barn Owls” by Tony Johnston as well as the Animalium postcards. We pulled out several resources for this project including Zoobooks Owls and Nature Anatomy, but ended up finding the rich paintings in “The Barn Owls” the perfect inspiration for this art project.
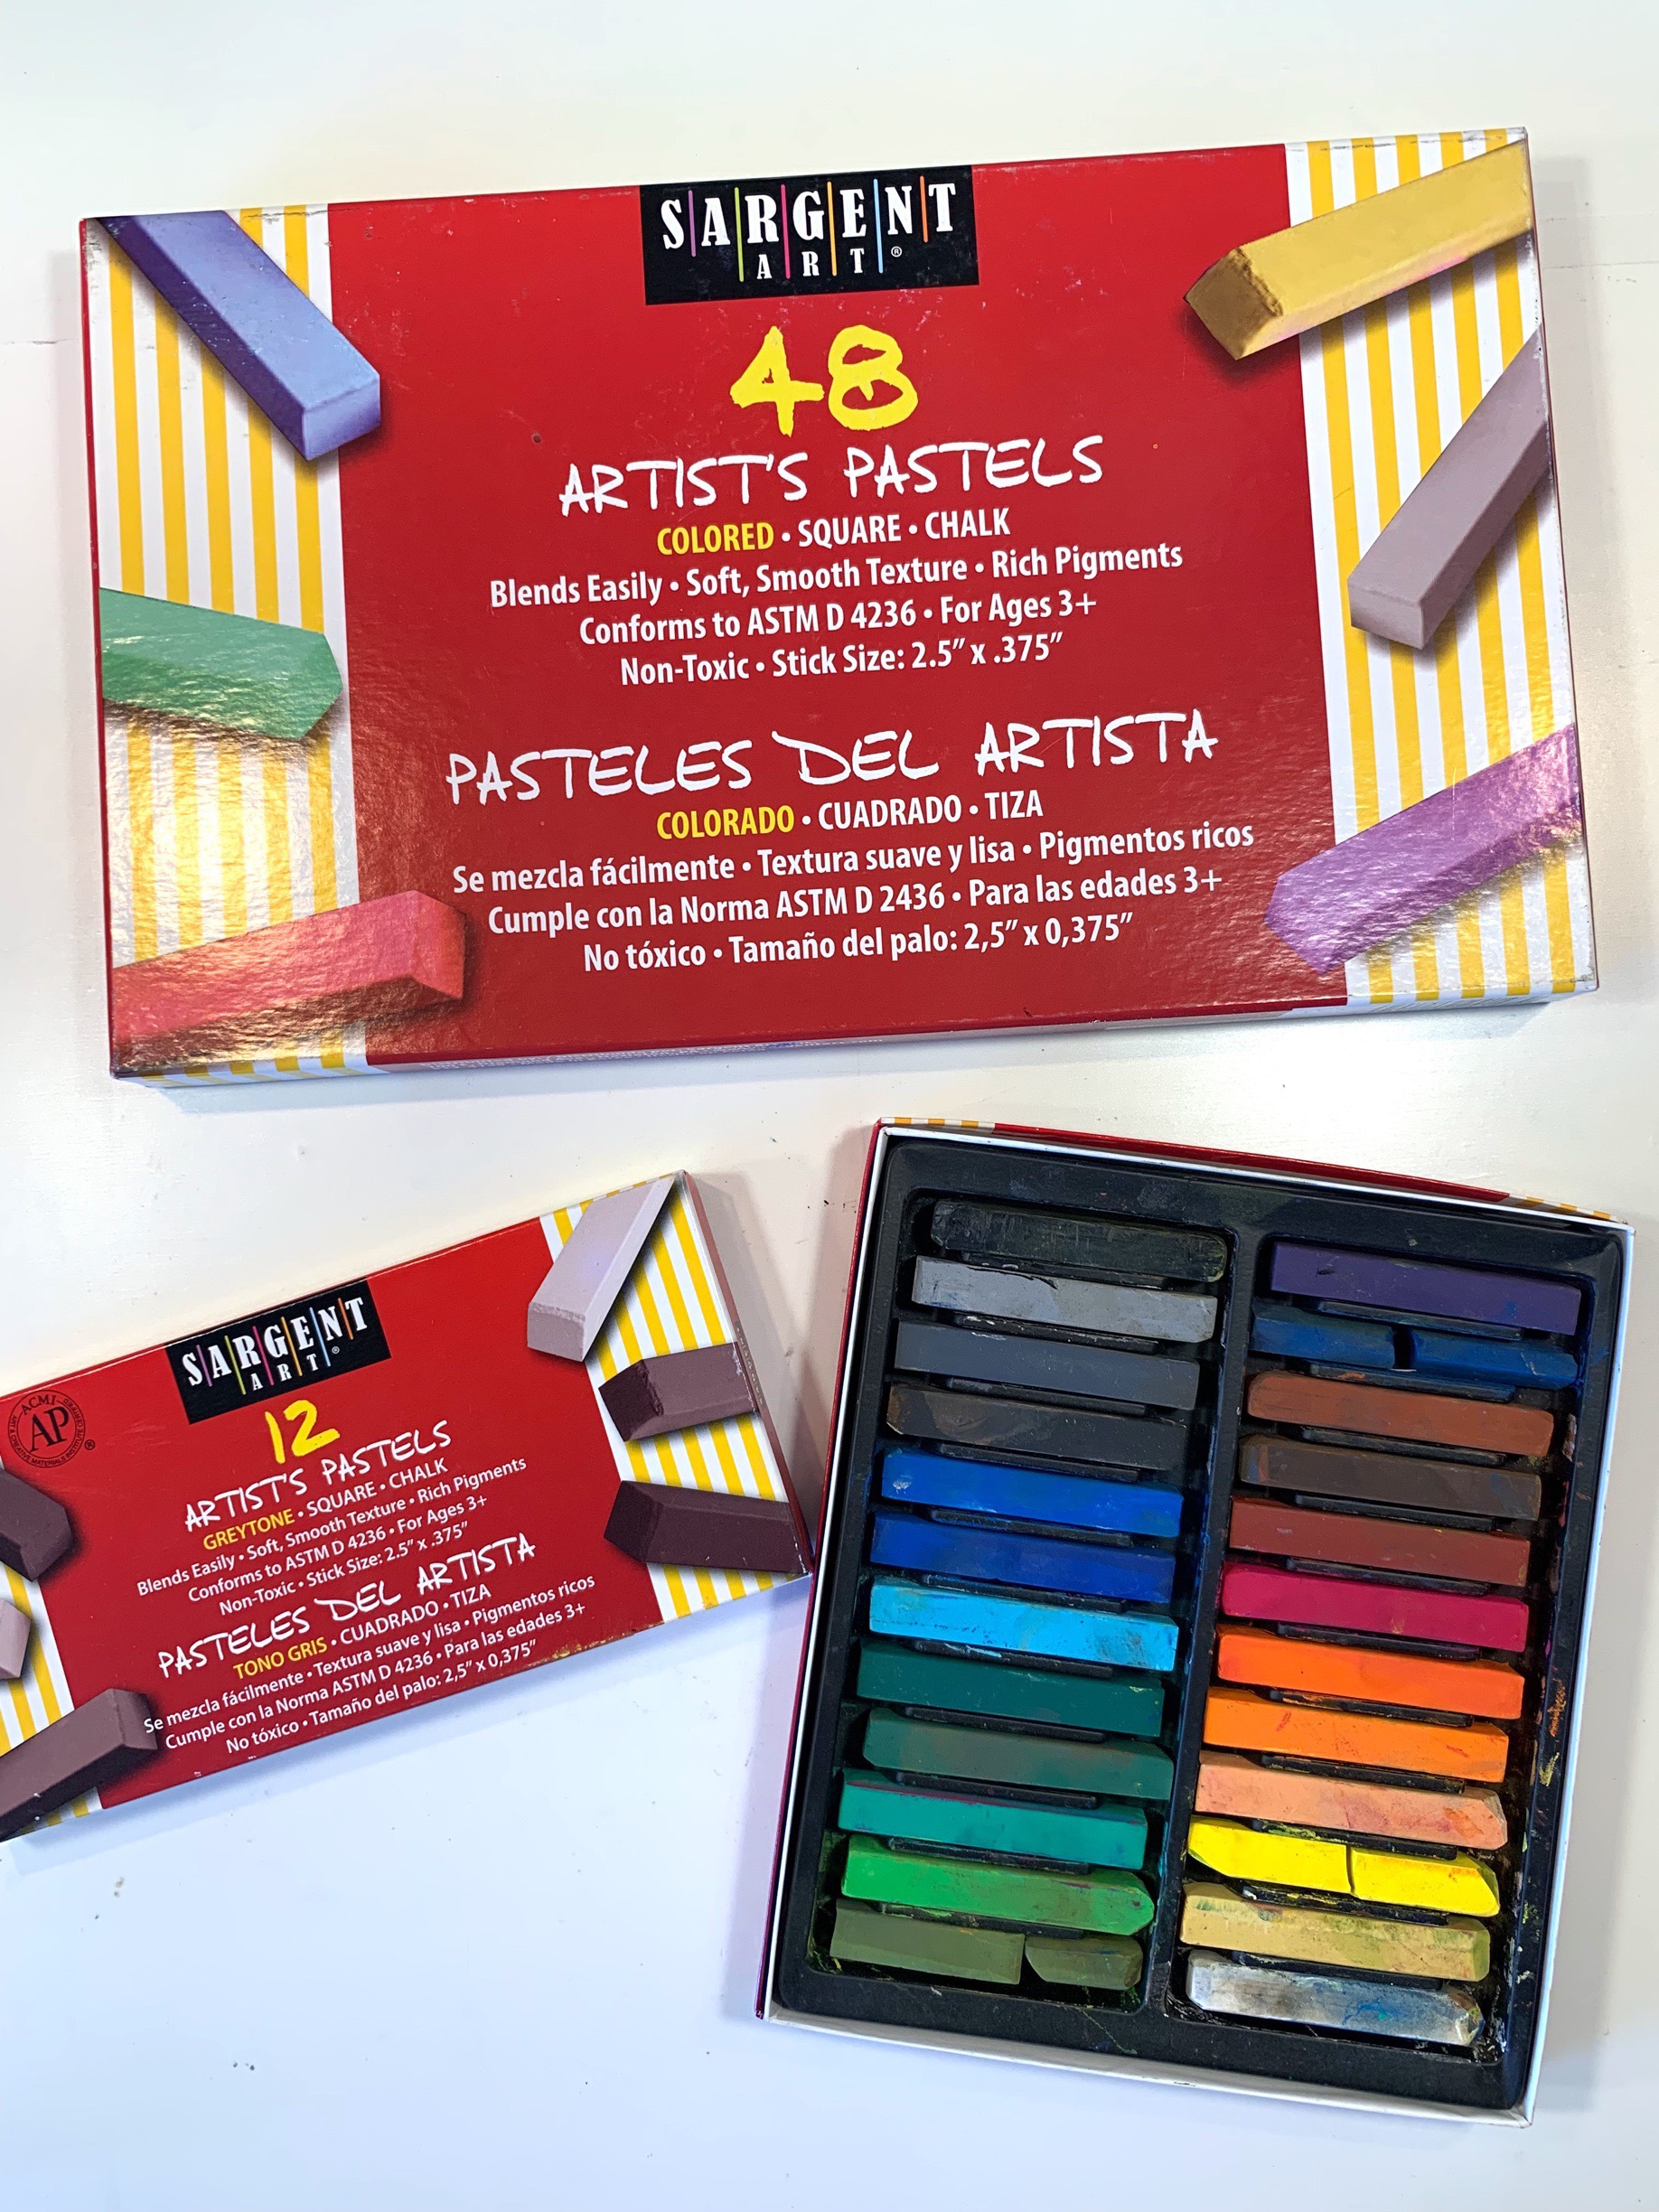
For this project, we used our Sargent Art Square Chalk Pastels available at Dick Blick as well as pastel paper from Waldorf Supplies.
At first, I tried using our oil pastels, but found blending them wasn’t working the way I hoped. After making a sample alongside my 8-year-old daughter, I pulled out our chalk pastels and tried this lesson again. This time we copied the image on the cover of “The Barn Owls”. I liked the results so much, we did another lesson a few days later. Once again we copied an image from the book “The Barn Owls”, but this time, my 12-year-old son didn’t complete his work because he was displeased with the results. Again a few days later, we scoured our resource material and opted to use Zoobooks for our final inspiration. We drew owl chicks in a nest and this time, my 12-year-old son completed his drawing.
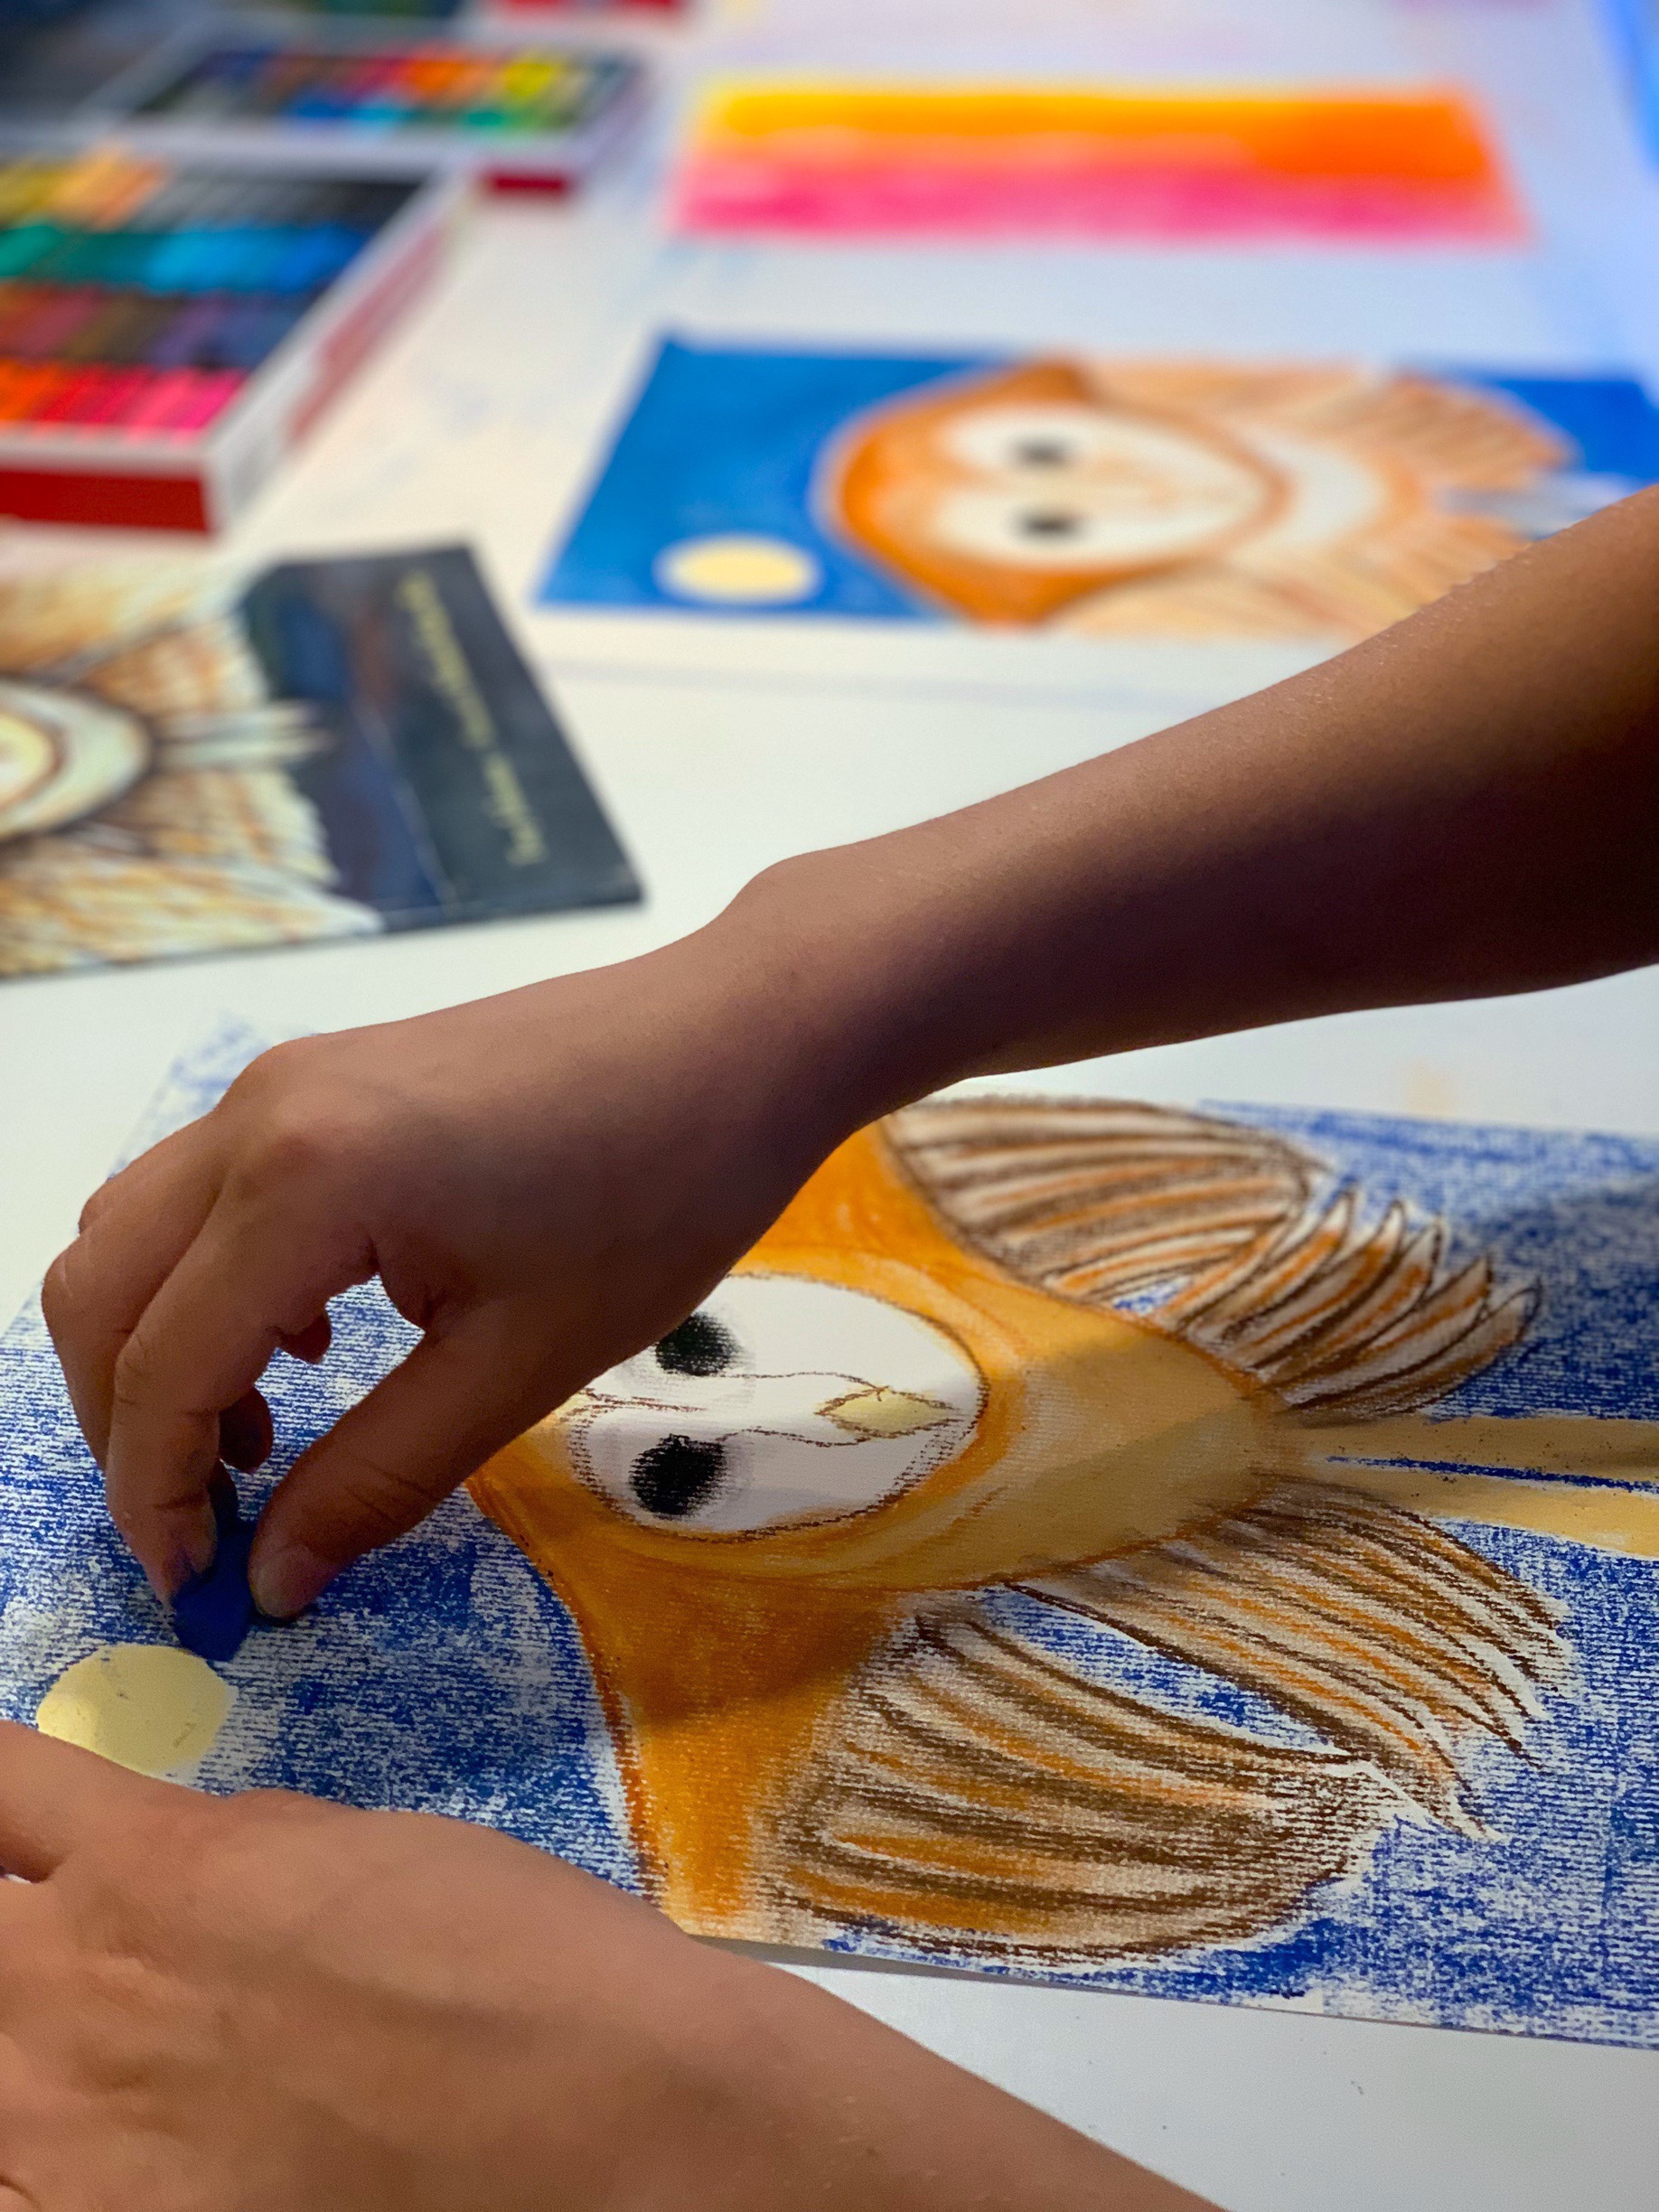

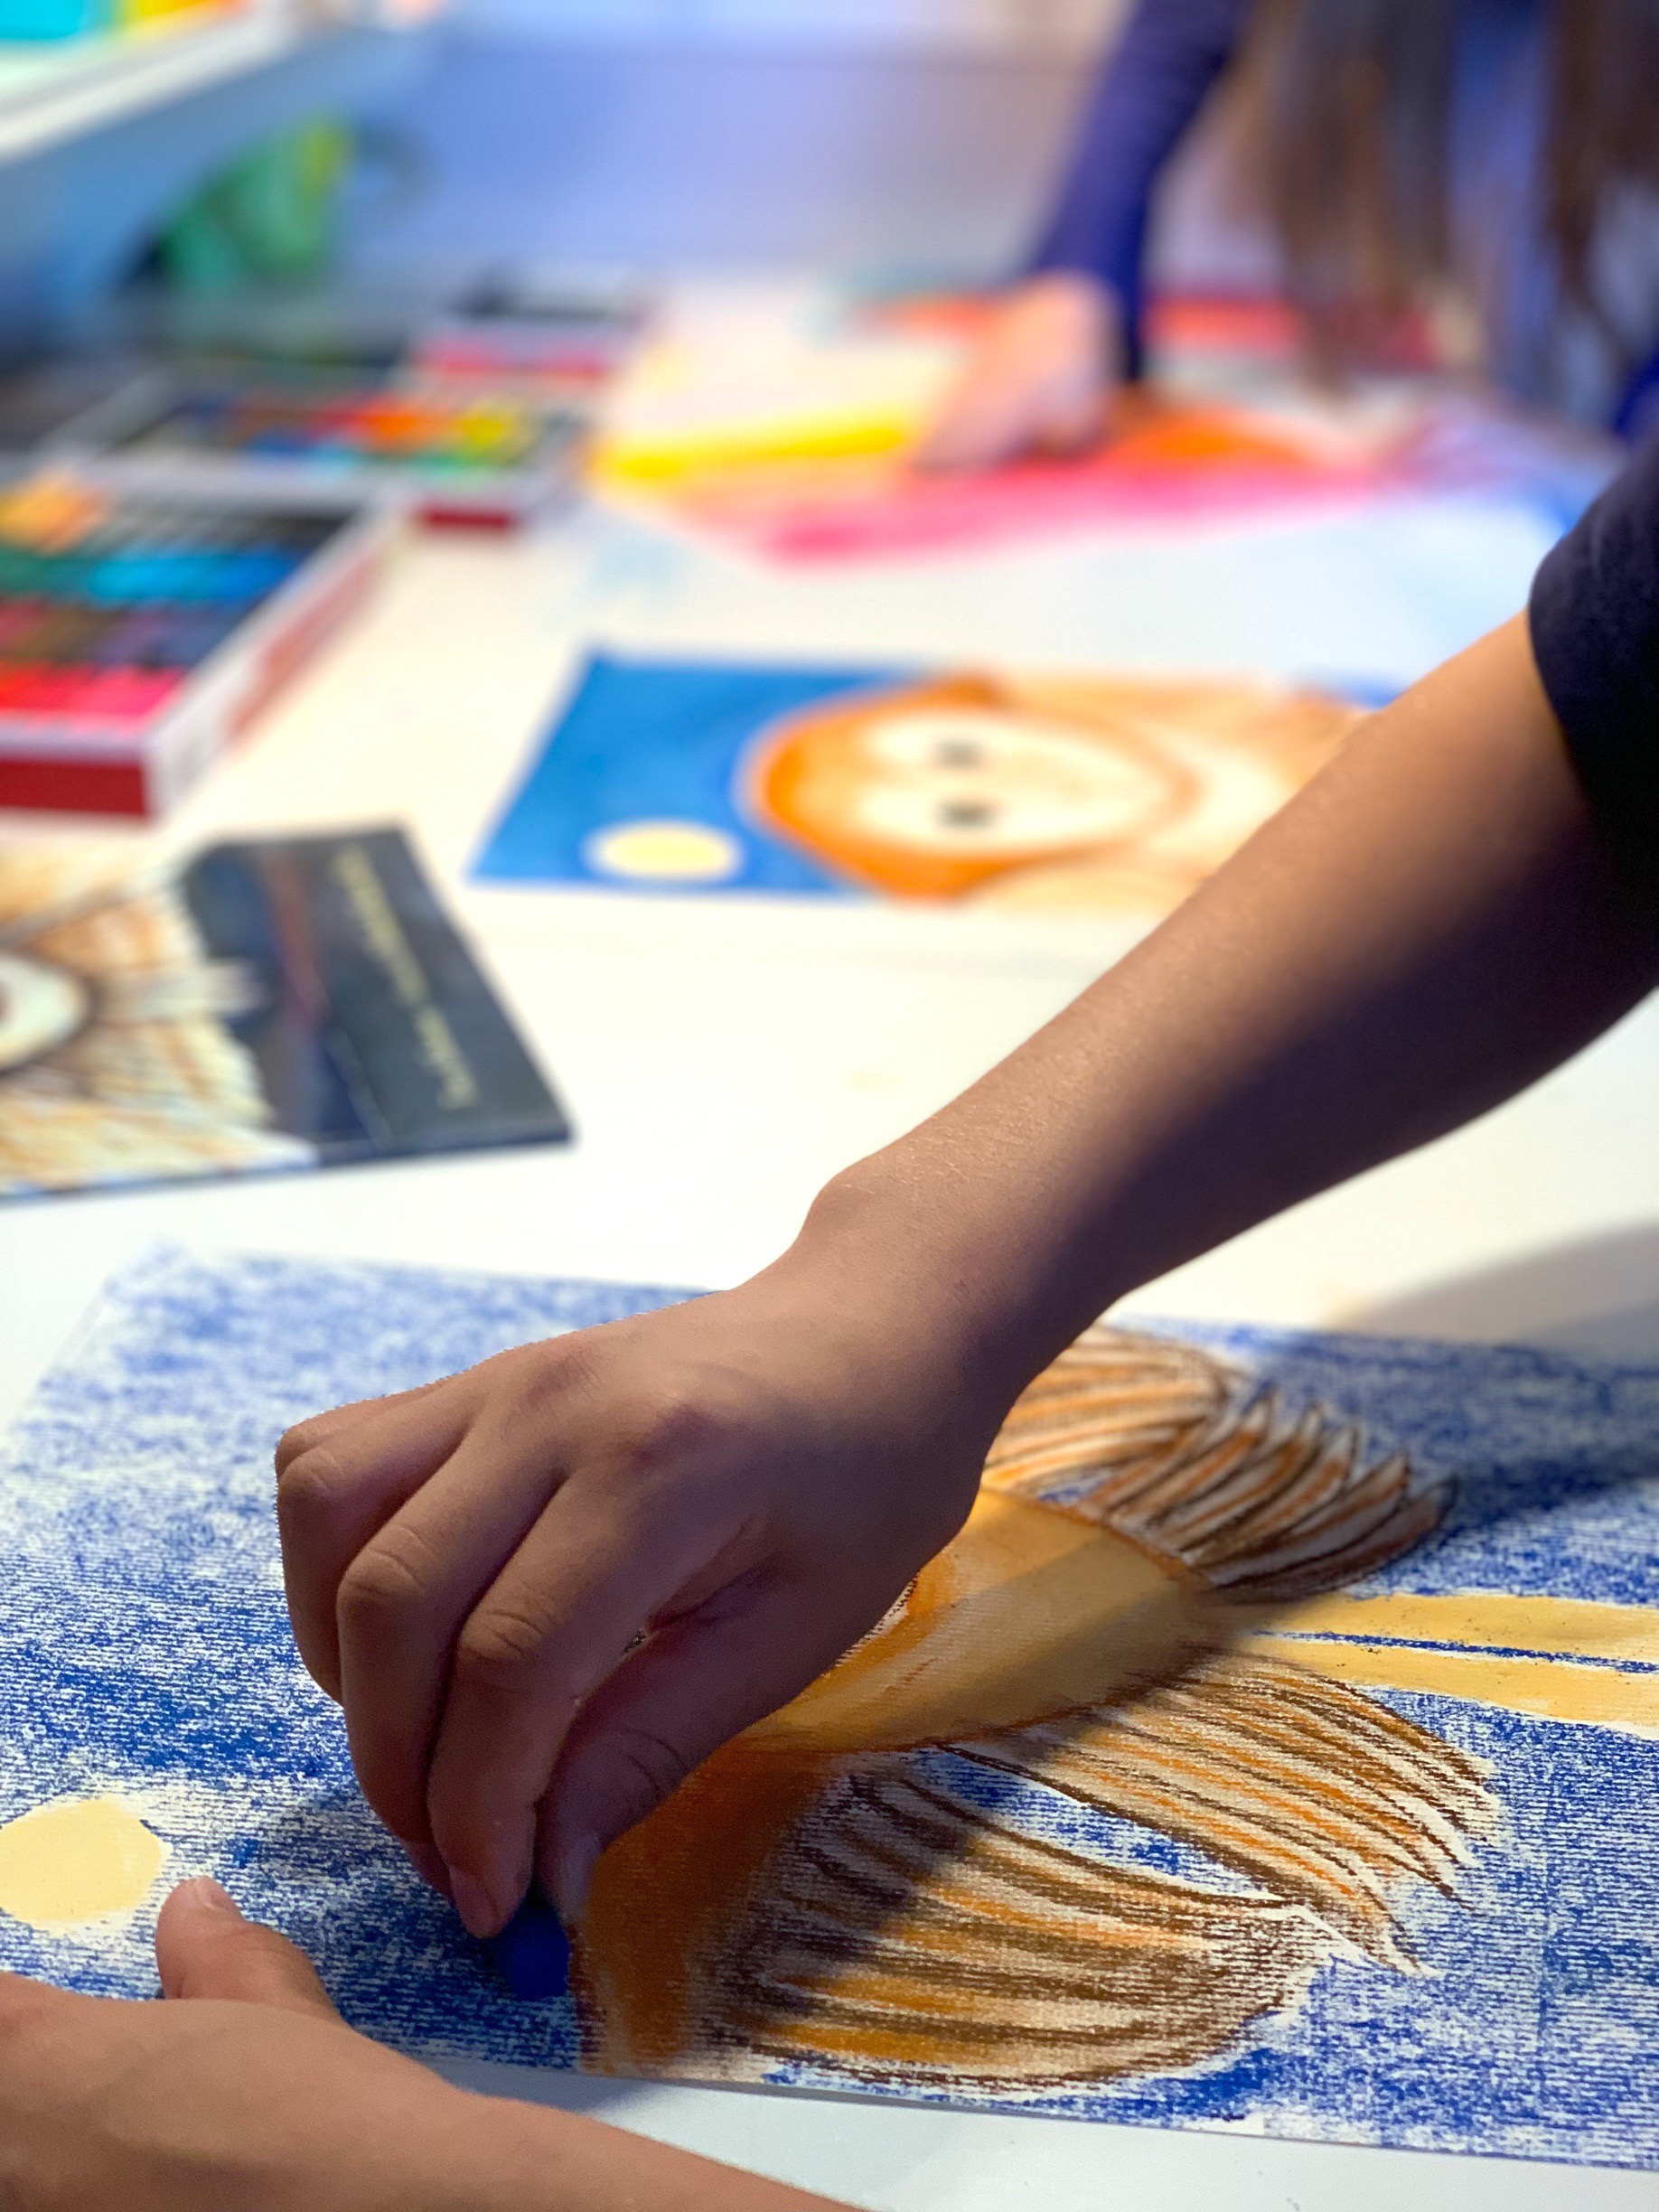
Working with chalk pastels is satisfying but frustrating at the same time. You can’t erase, and very easily, you can get other colors onto your work if you’re not careful as the chalk gets on your fingers easily and if you blend with your fingers, you can mess up your drawing accidentally. What’s great about them is their vibrant colors and ease of blending. Layer a few similar colors together and then watch them blend naturally together as you smudge the chalk with your fingers or a blending tool. We found that our fingers worked best.
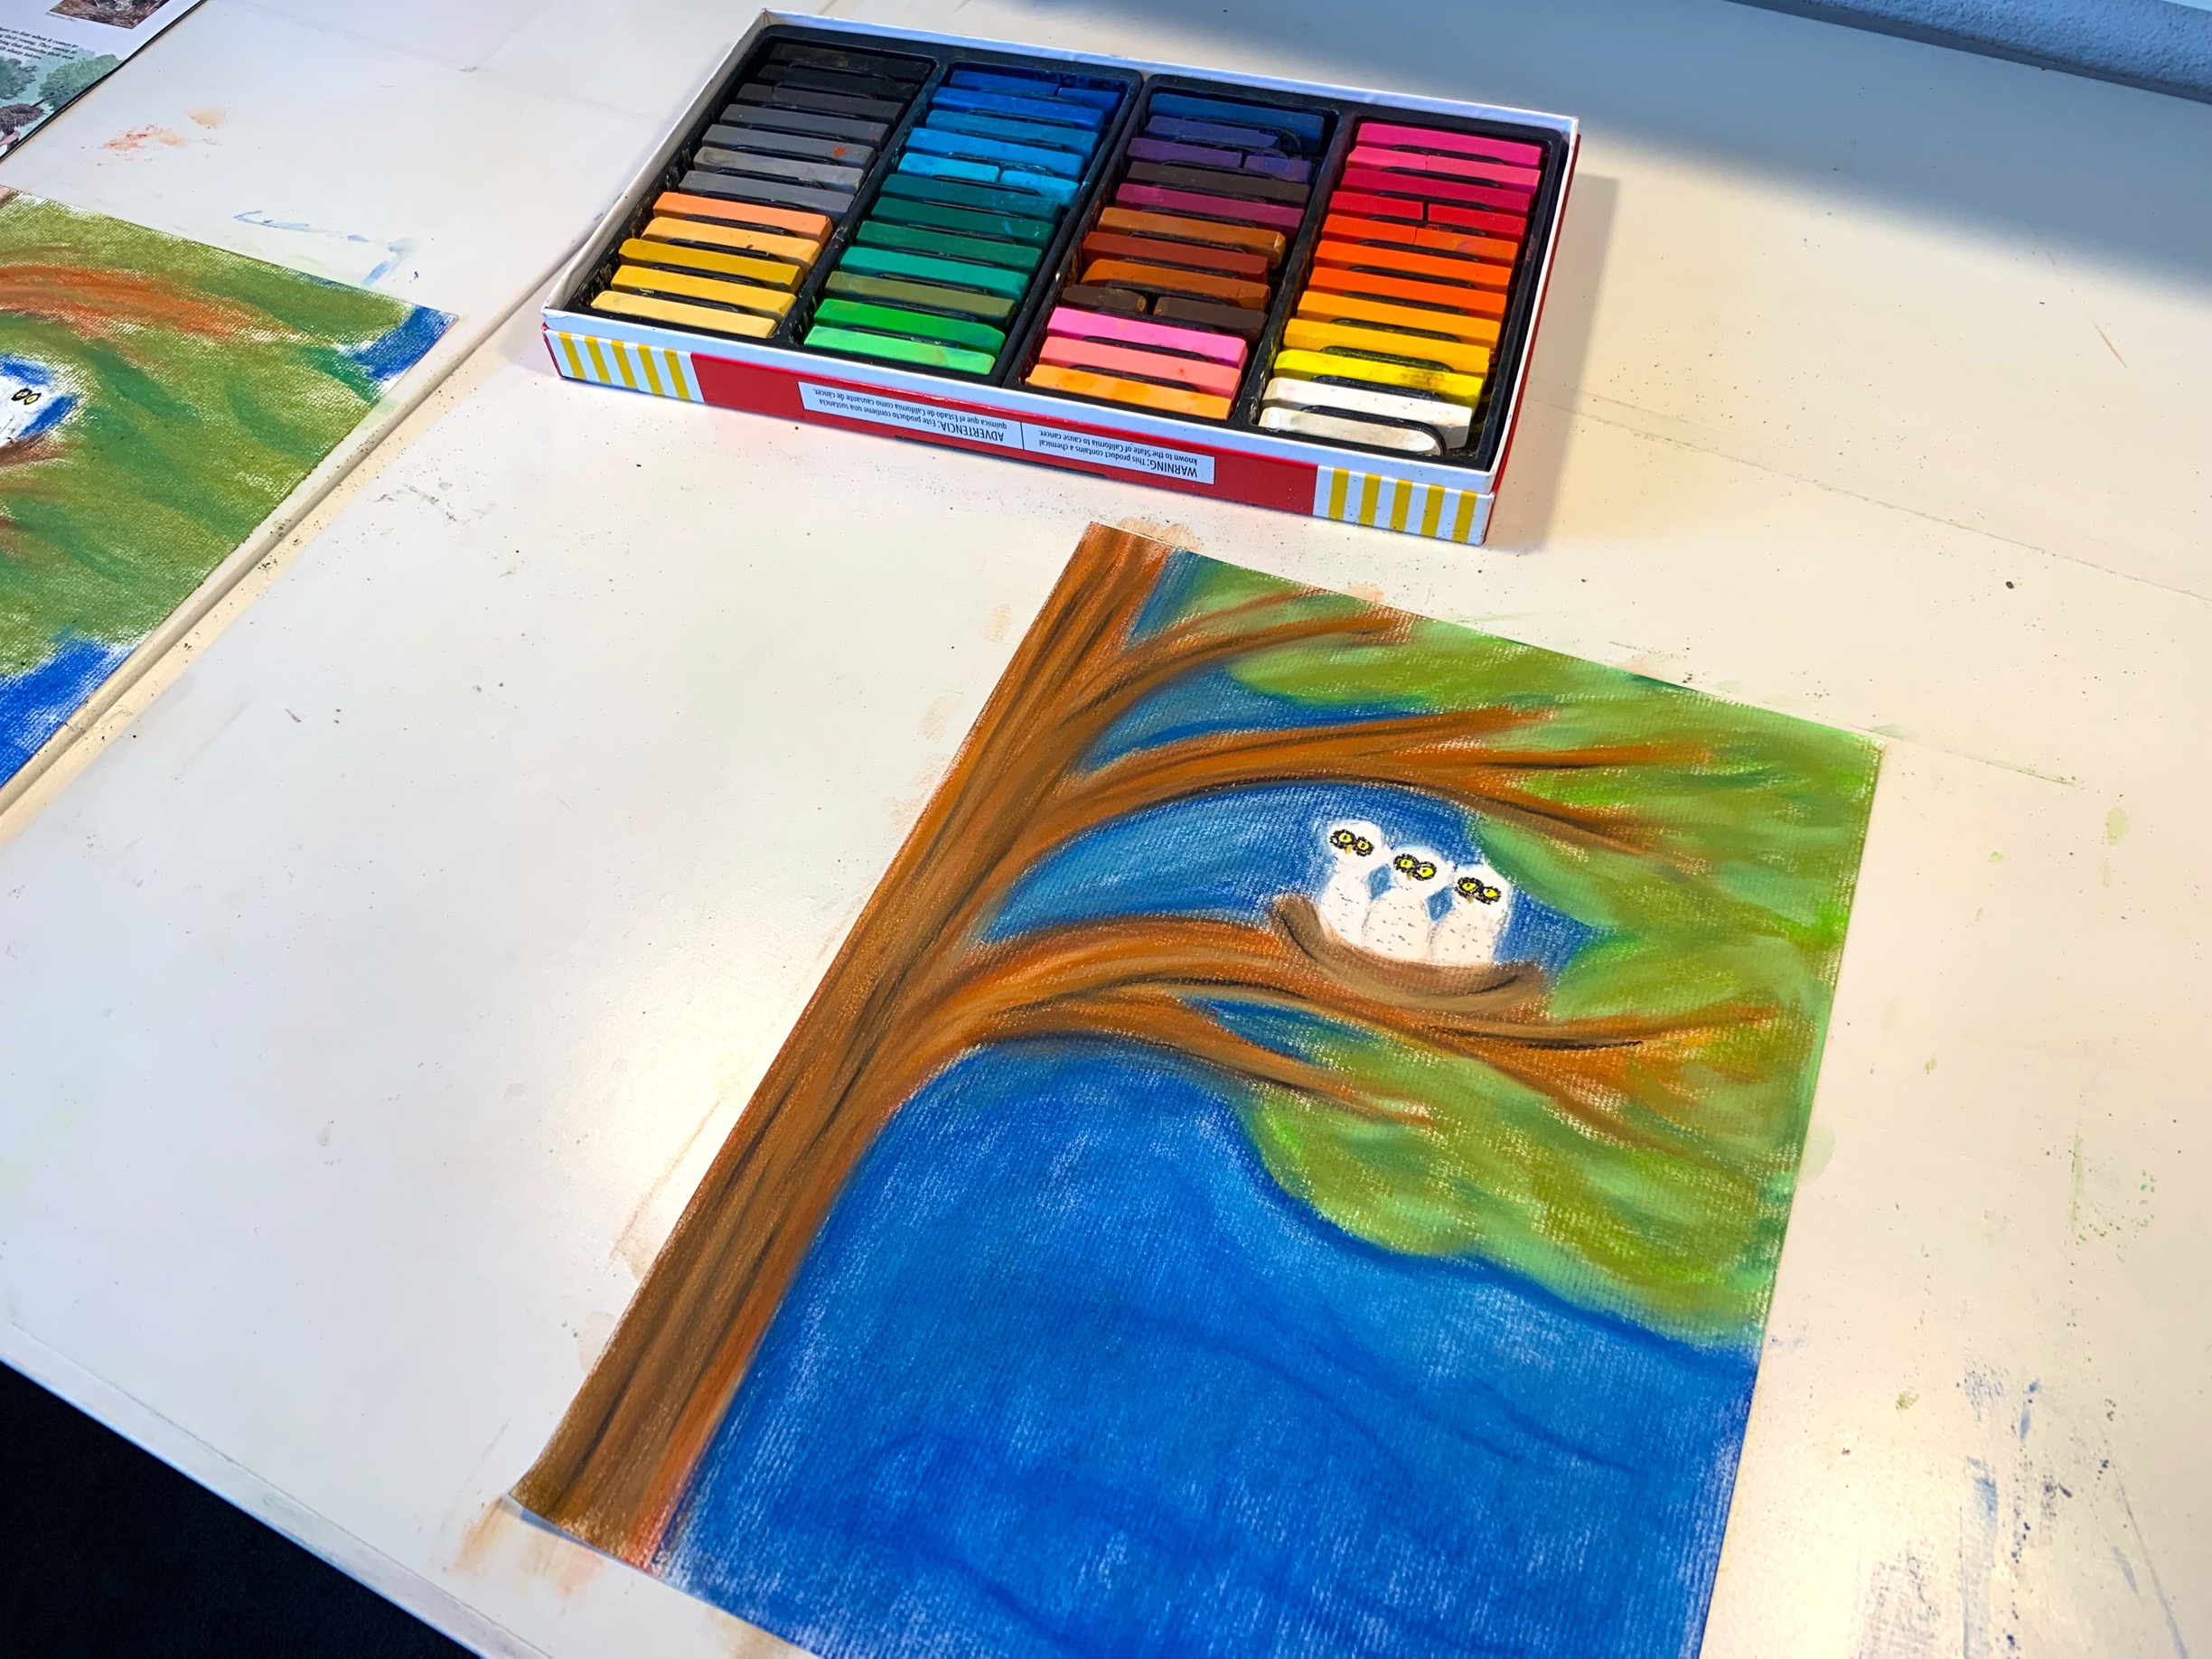
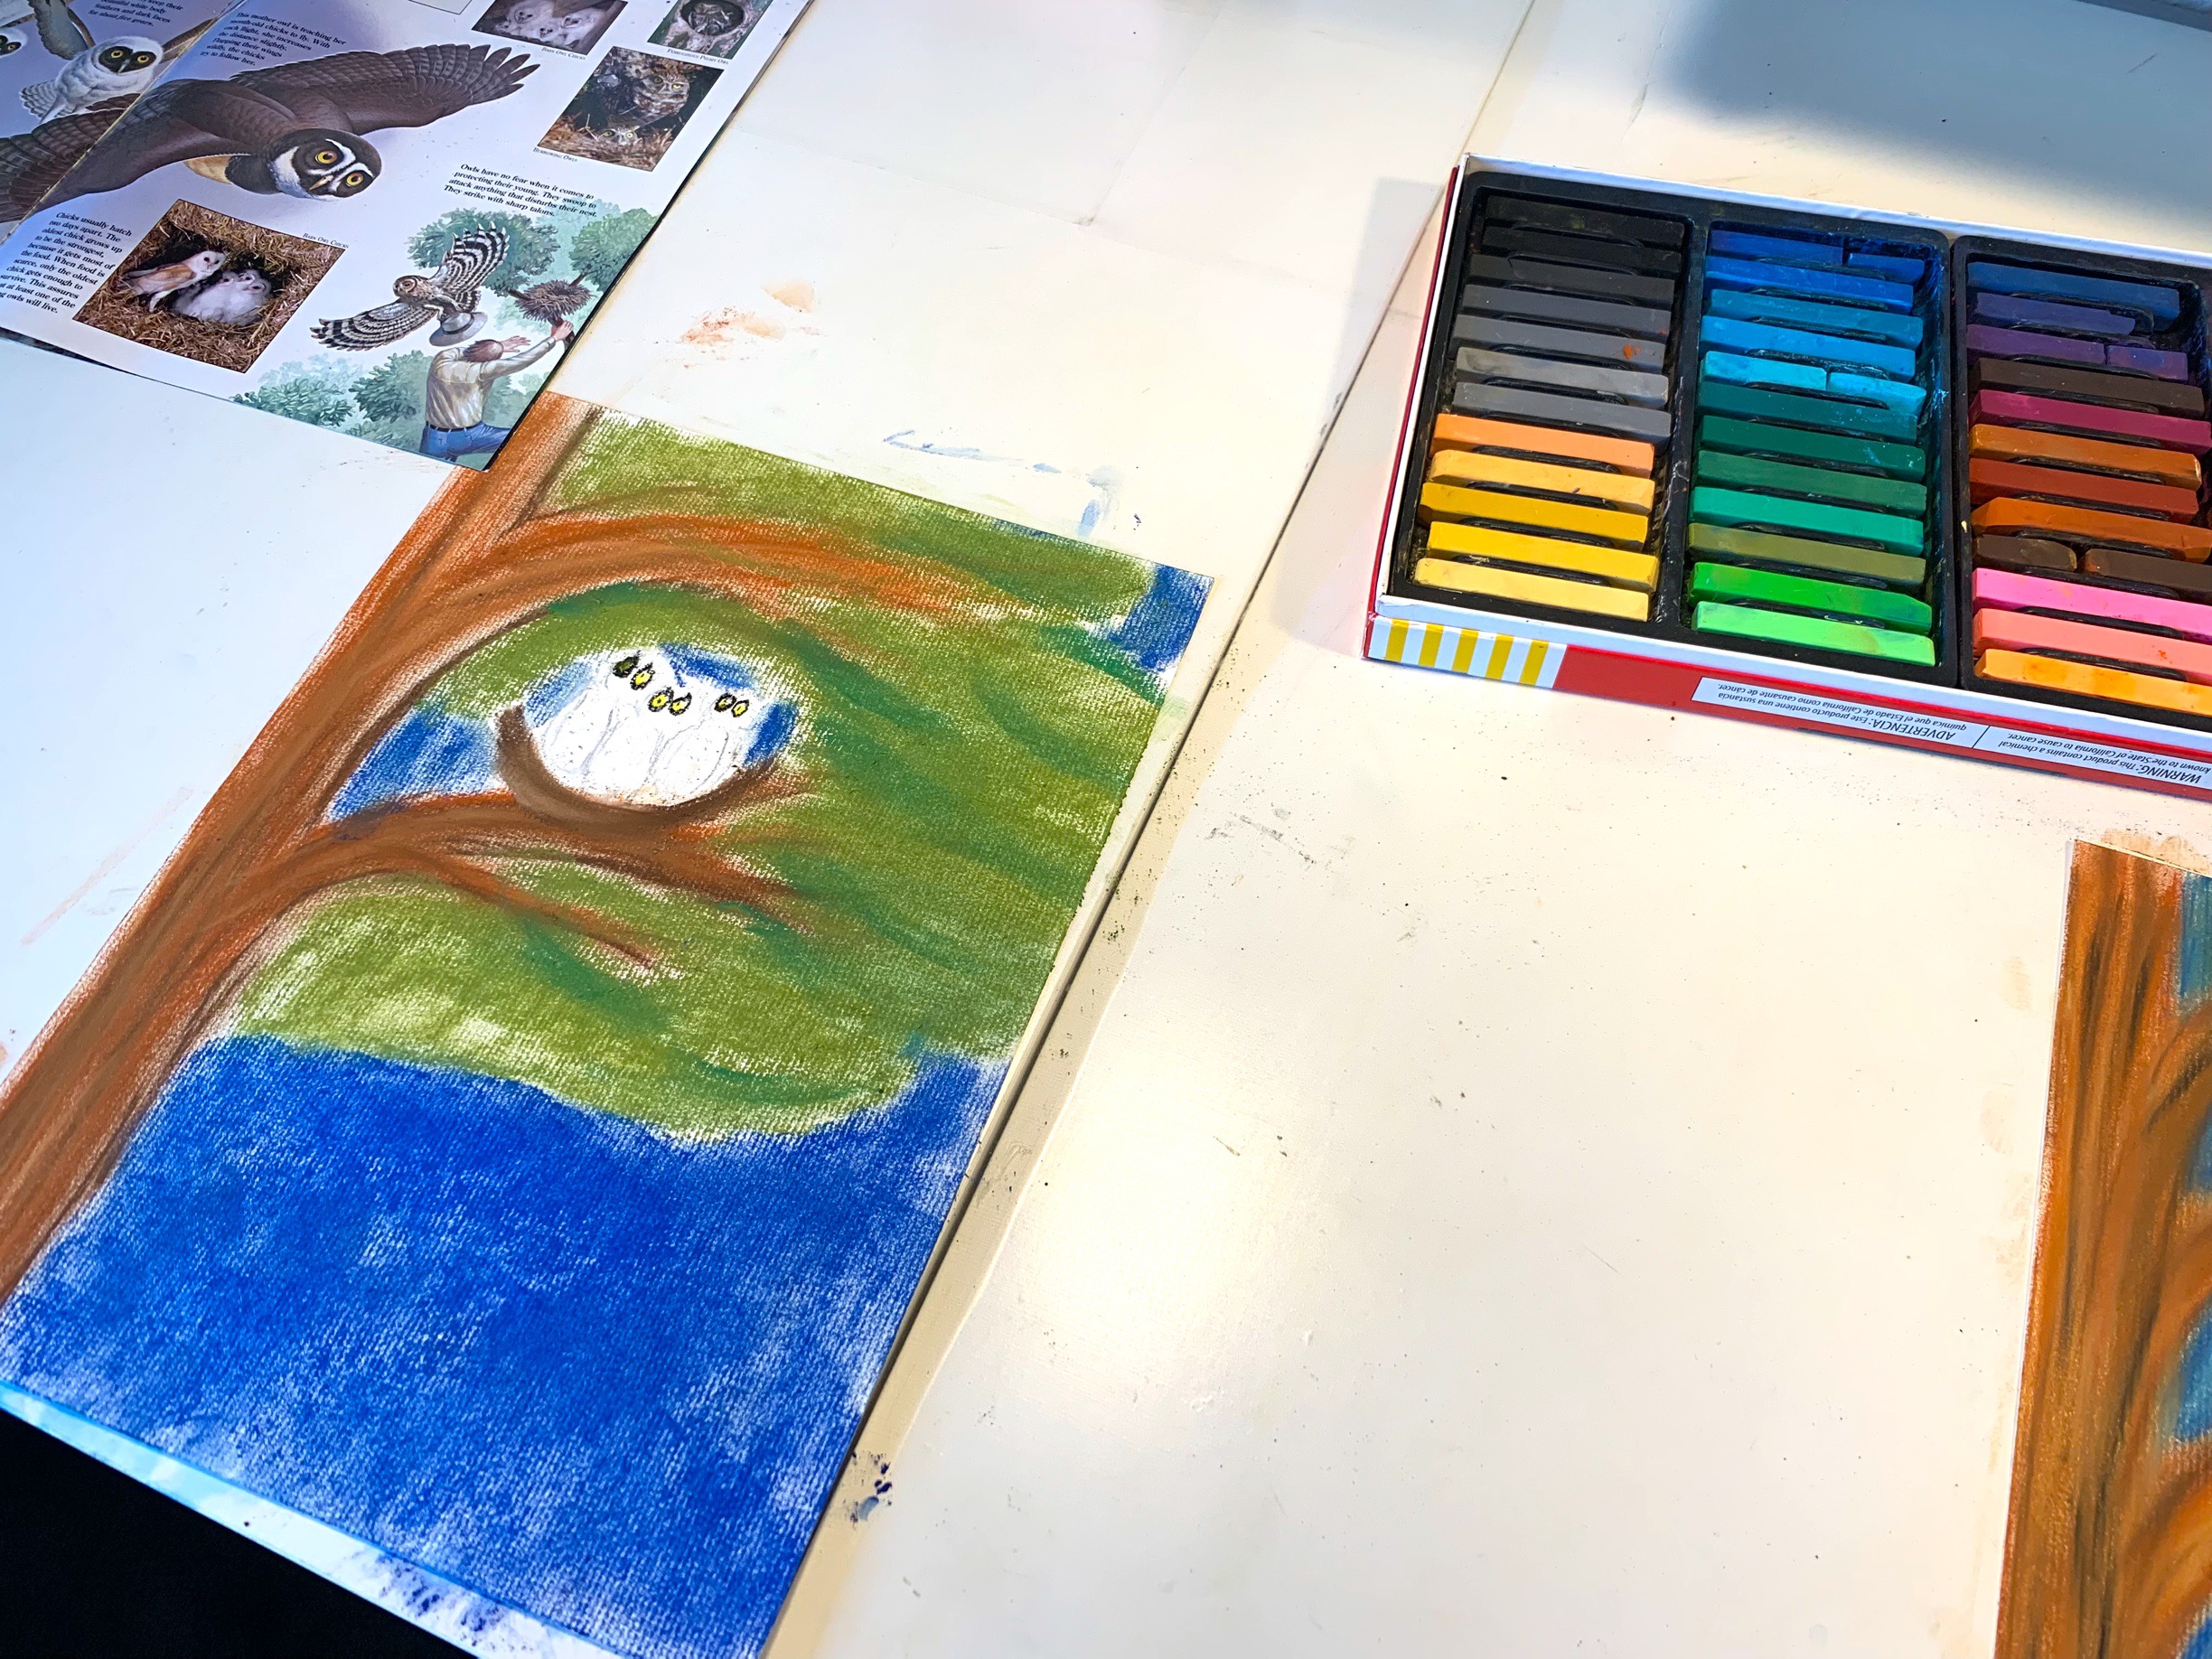
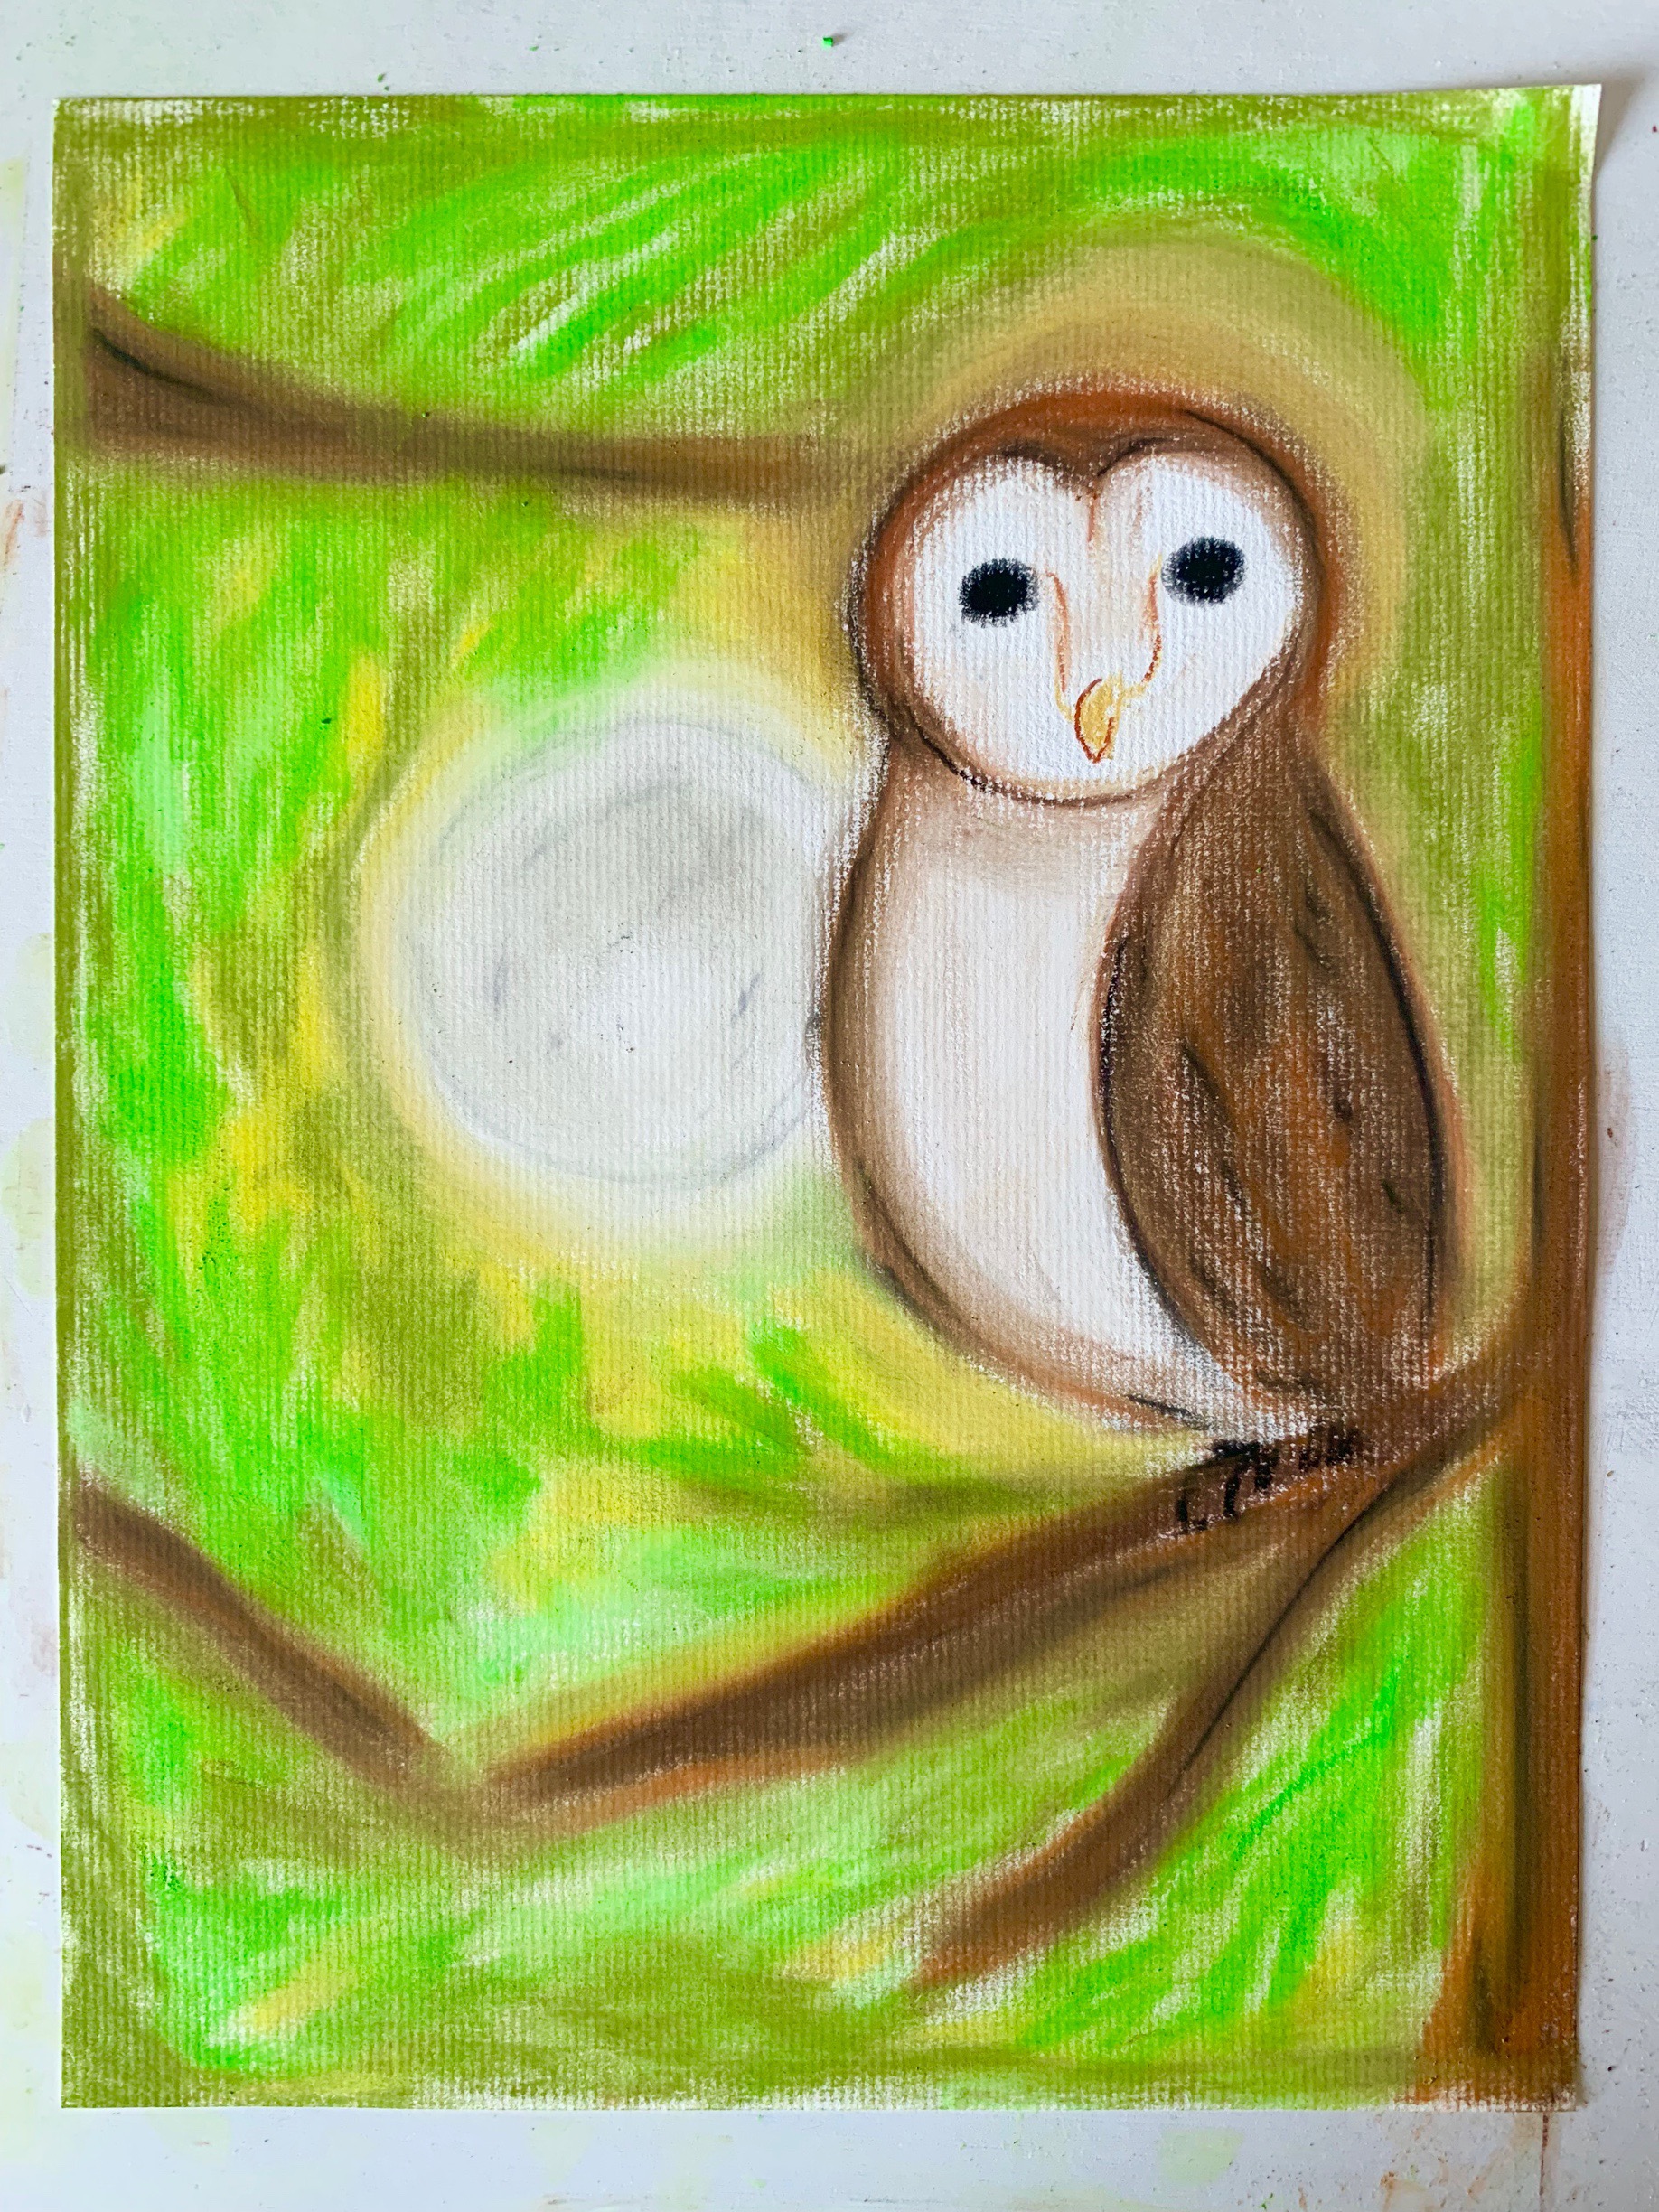
Once your drawing is done, it can easily be damaged if you don’t seal it with a sealant specially designed to seal pastels and other paint mediums. As we ran out of ours, I’m leaving these flat (unstacked) until they can be protected. Once protected, I’ll store them flat after displaying them on the wall of our homeschool room.
Check out our complete Owl Unit Study with videos on how we put this unit together, the resources we used and the projects we did. You can also check out our larger Bird Unit Study which includes more projects and resources.
At the end of most units, I like to share which resources we used, liked, and didn’t like and share the projects we did. Compared to other units, this unit was smaller and consisted of mostly hands-on learning opportunities. Check out the video for a complete look at the projects we did and a detailed review of the materials we used.
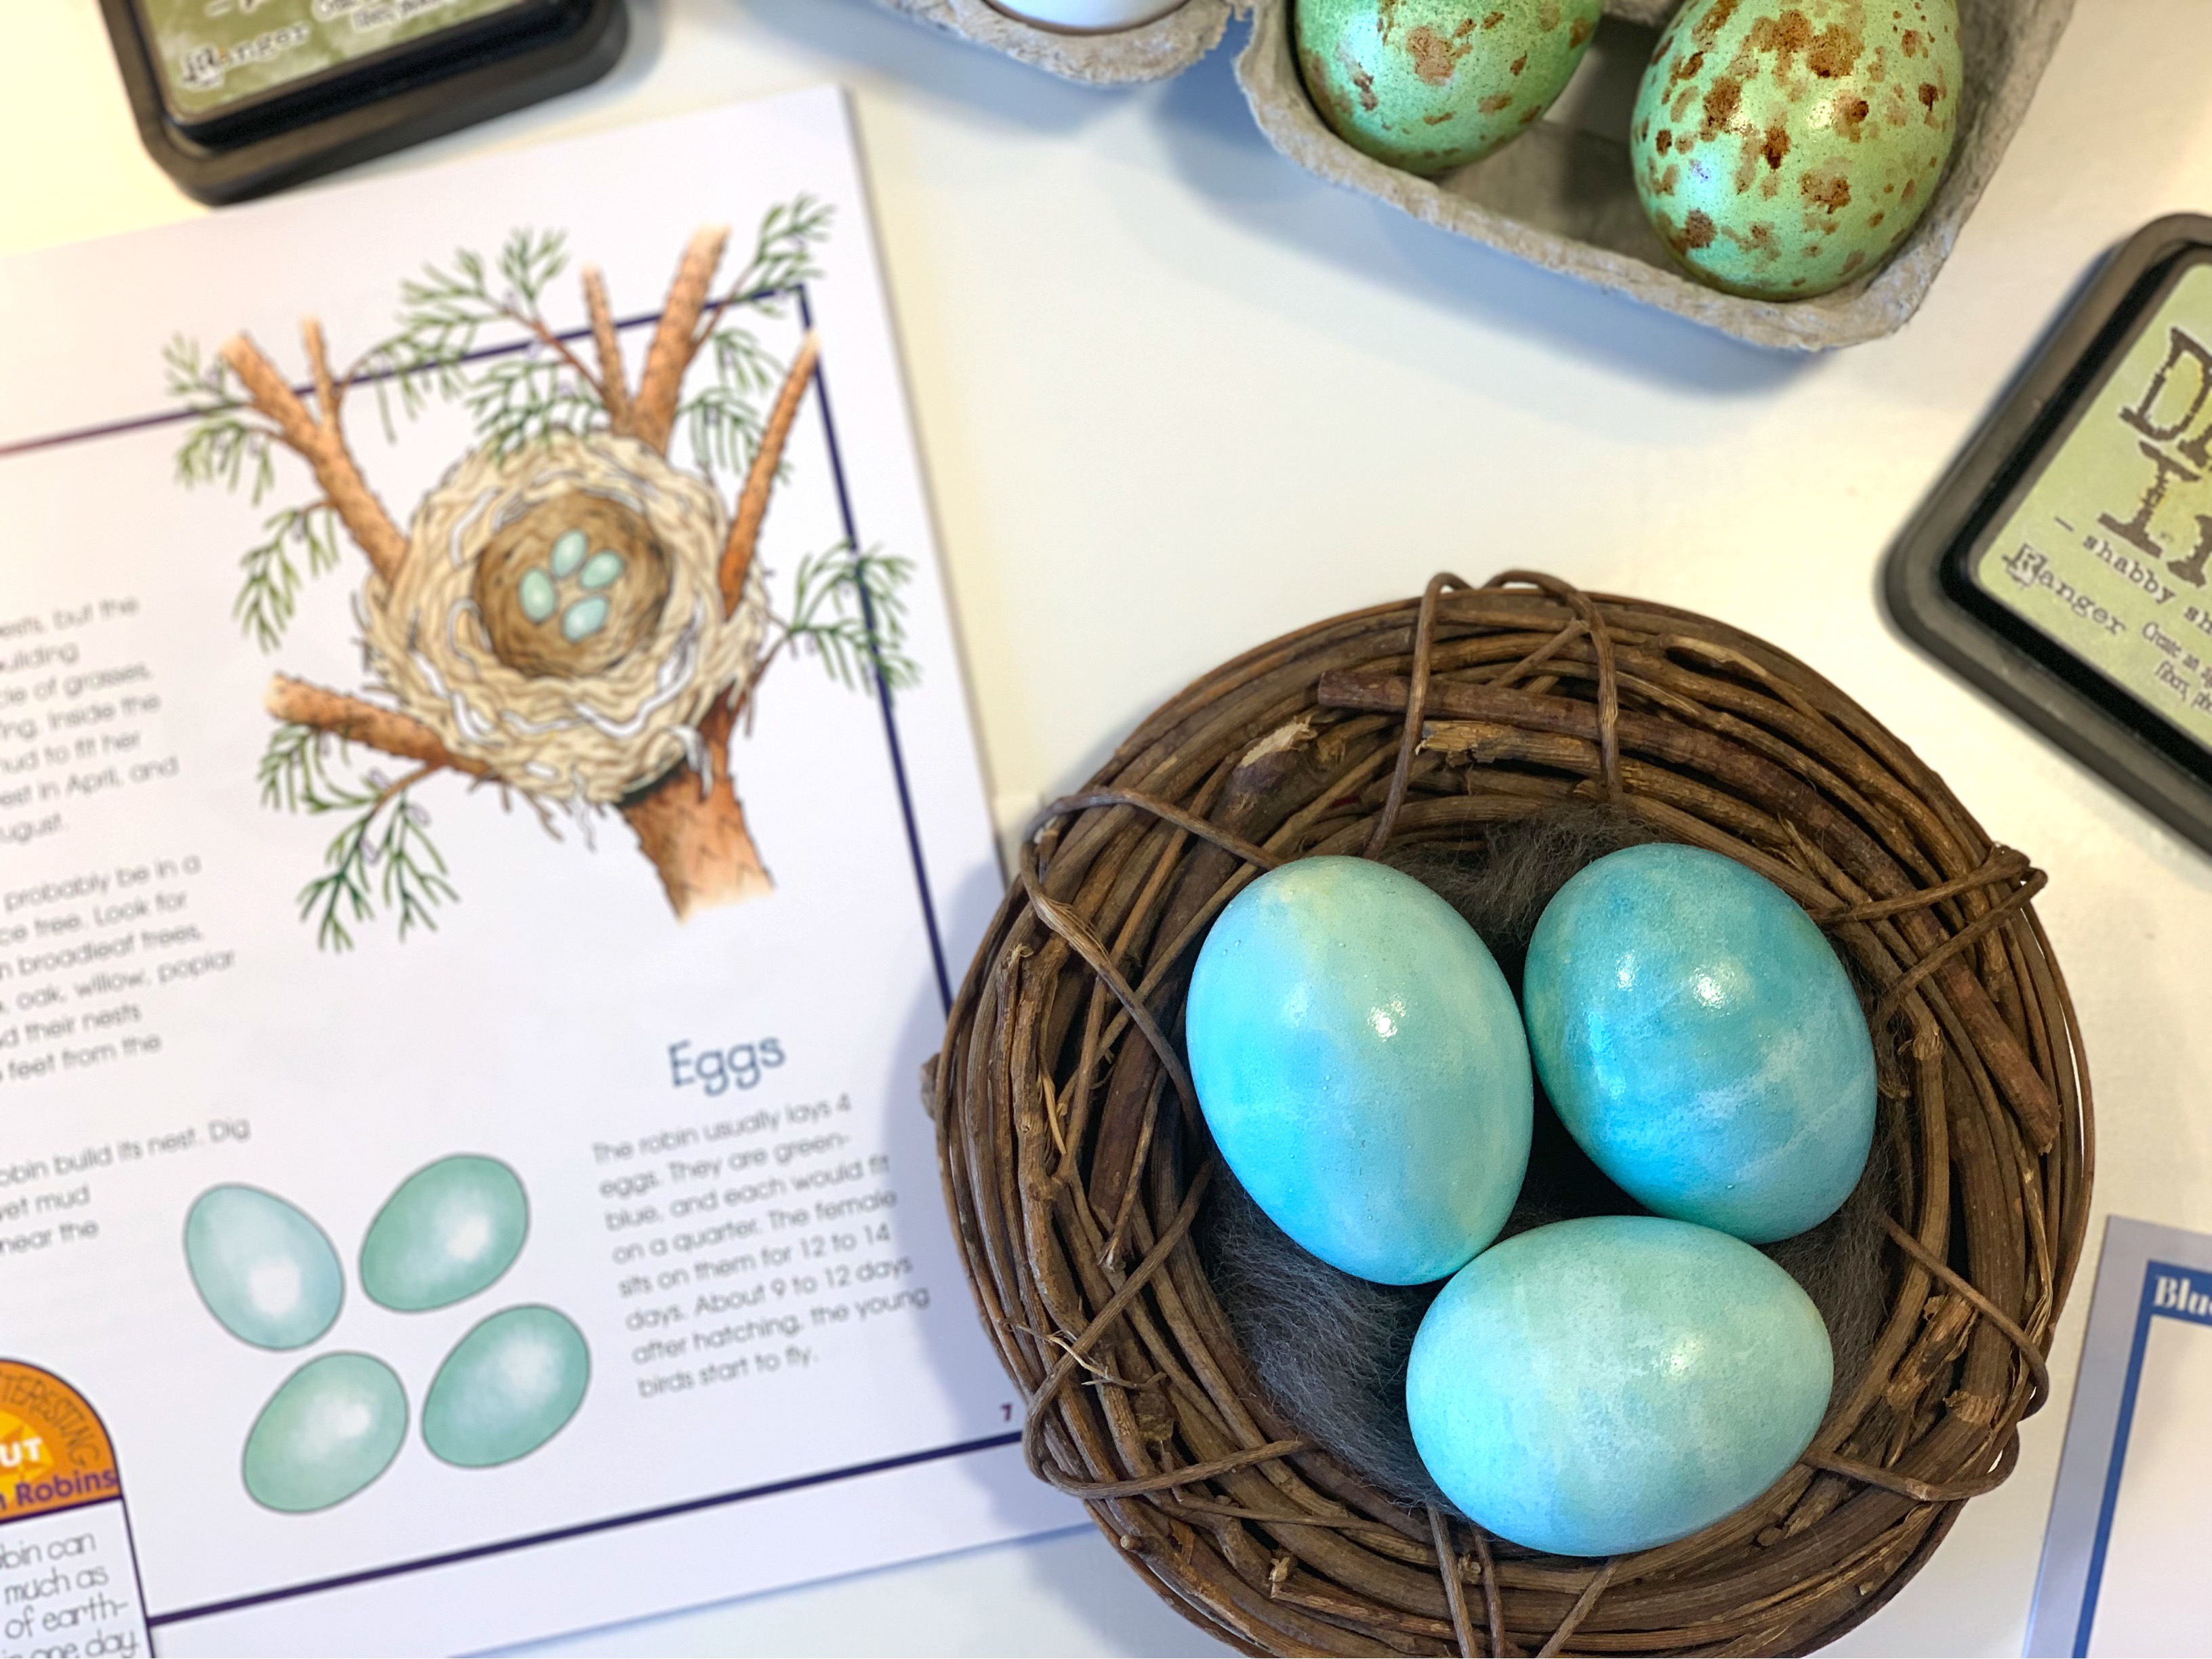
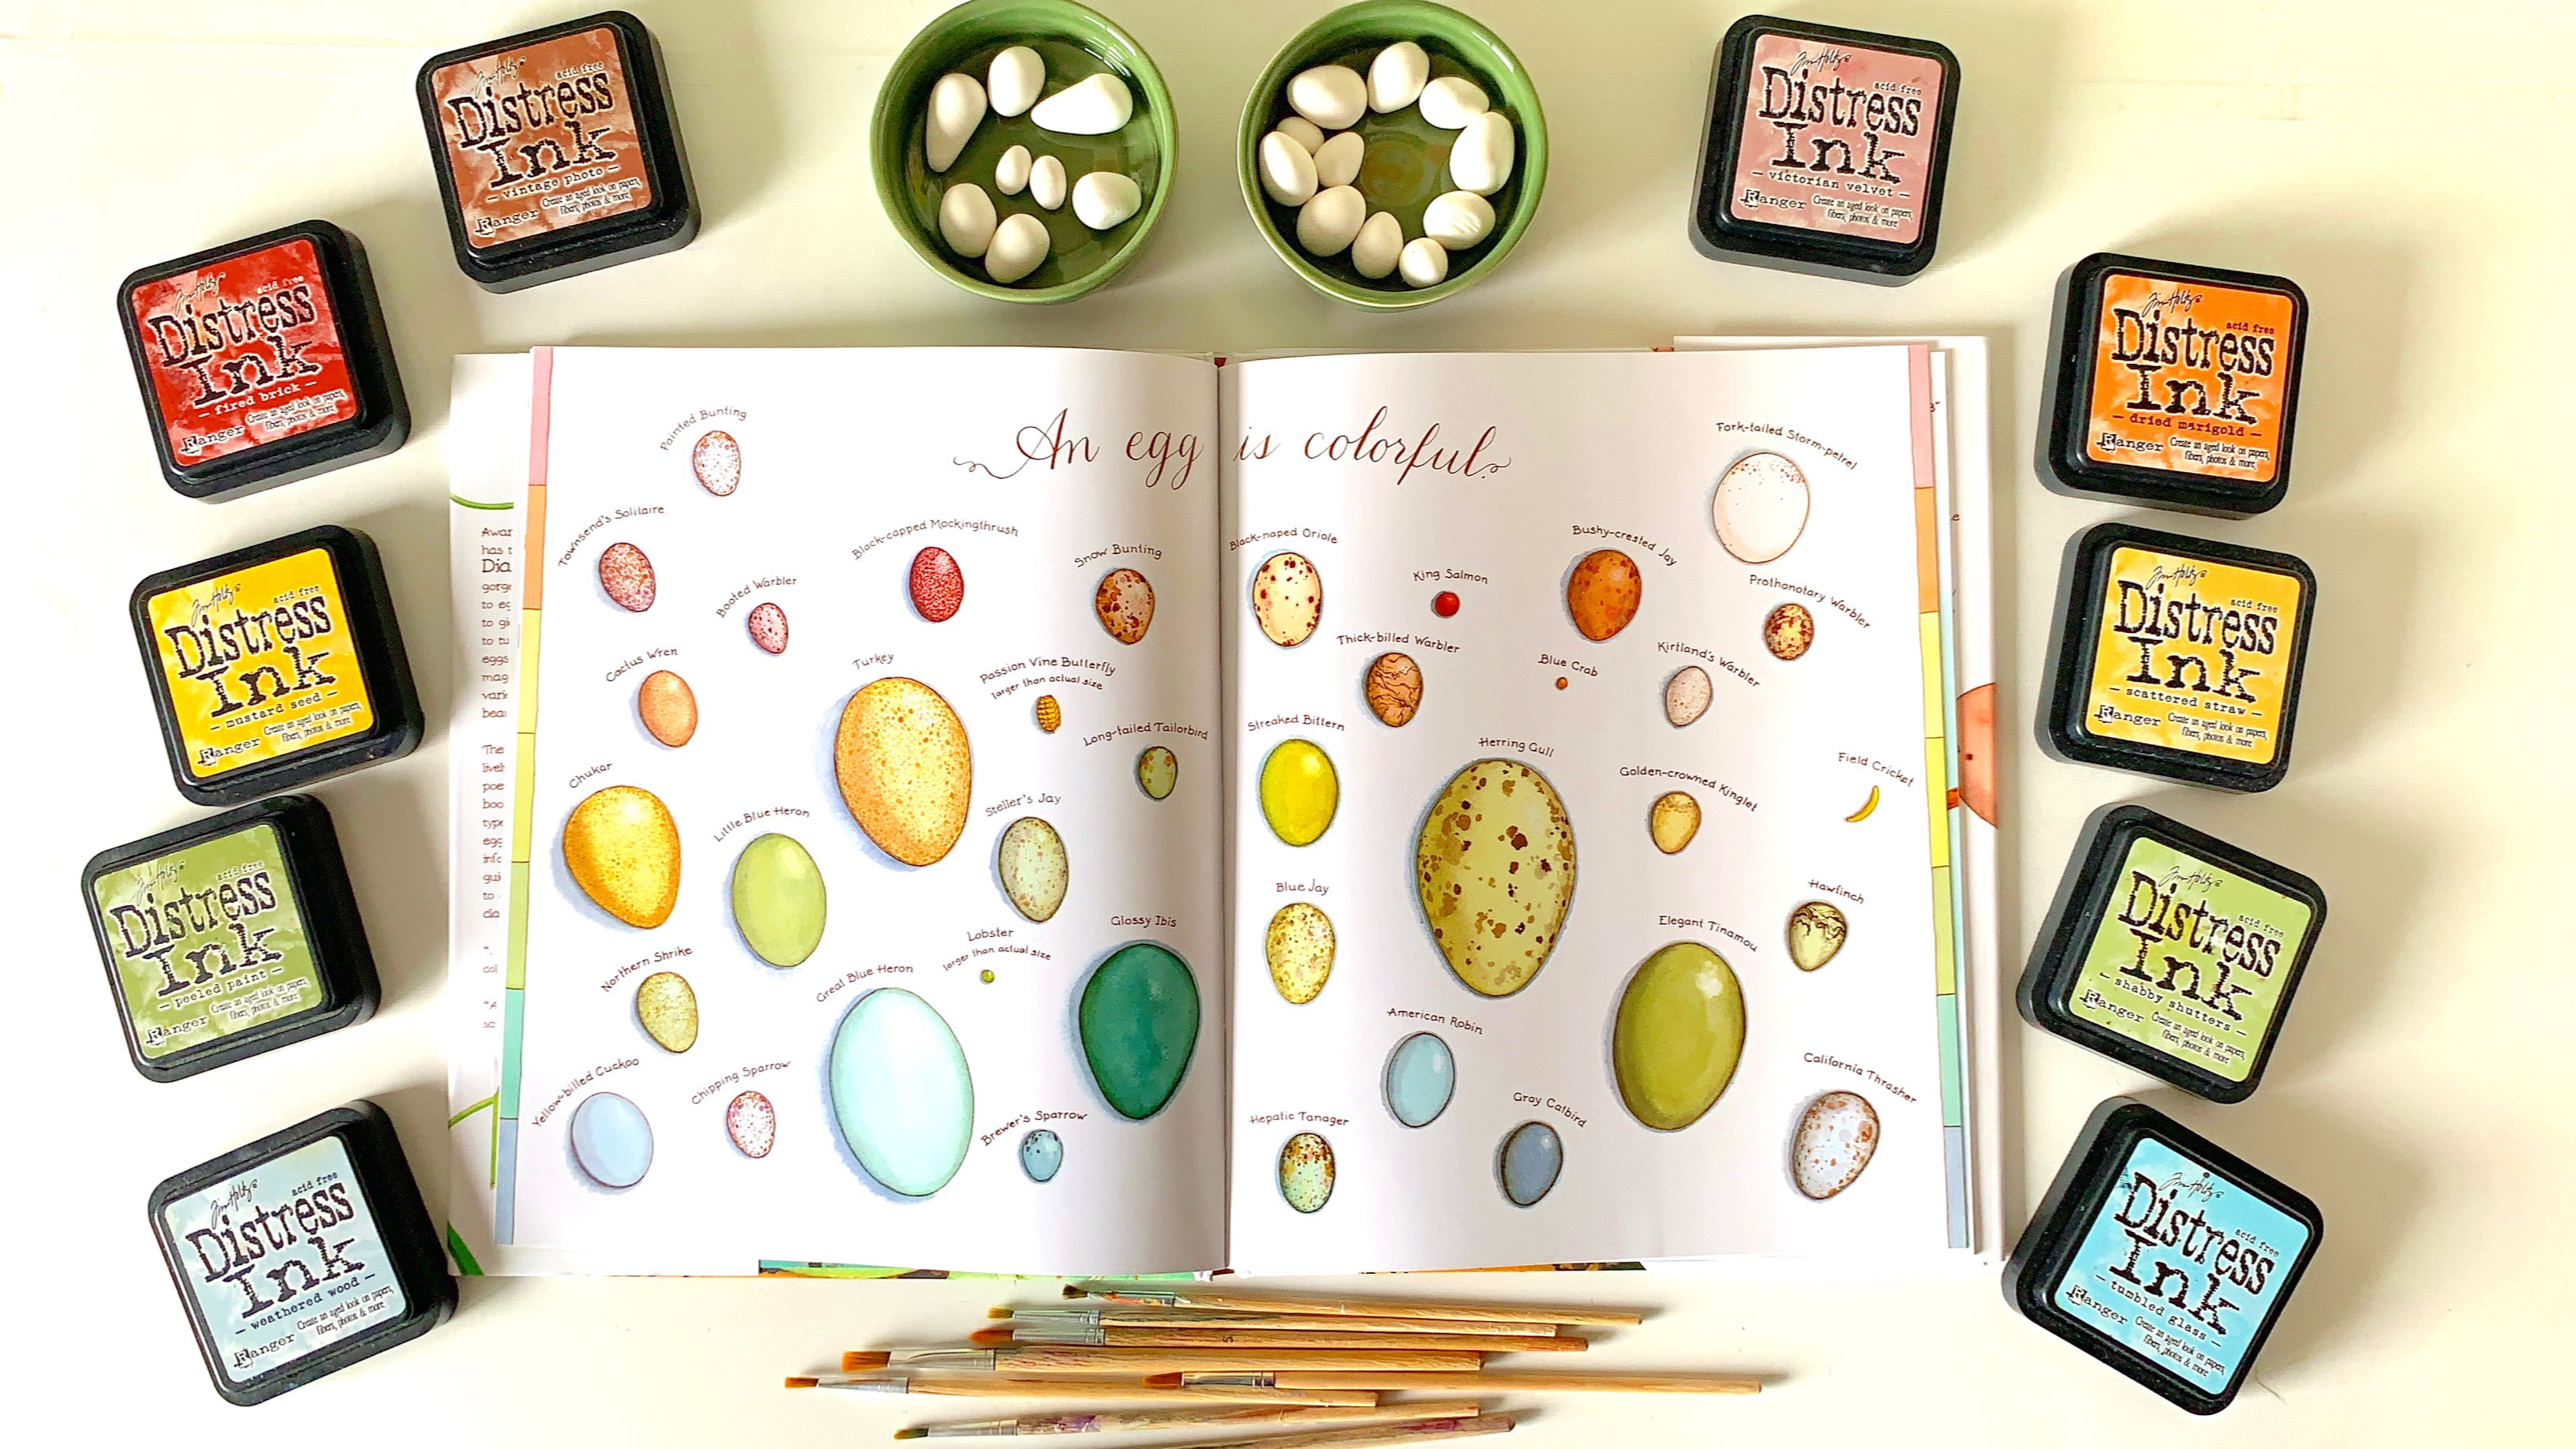
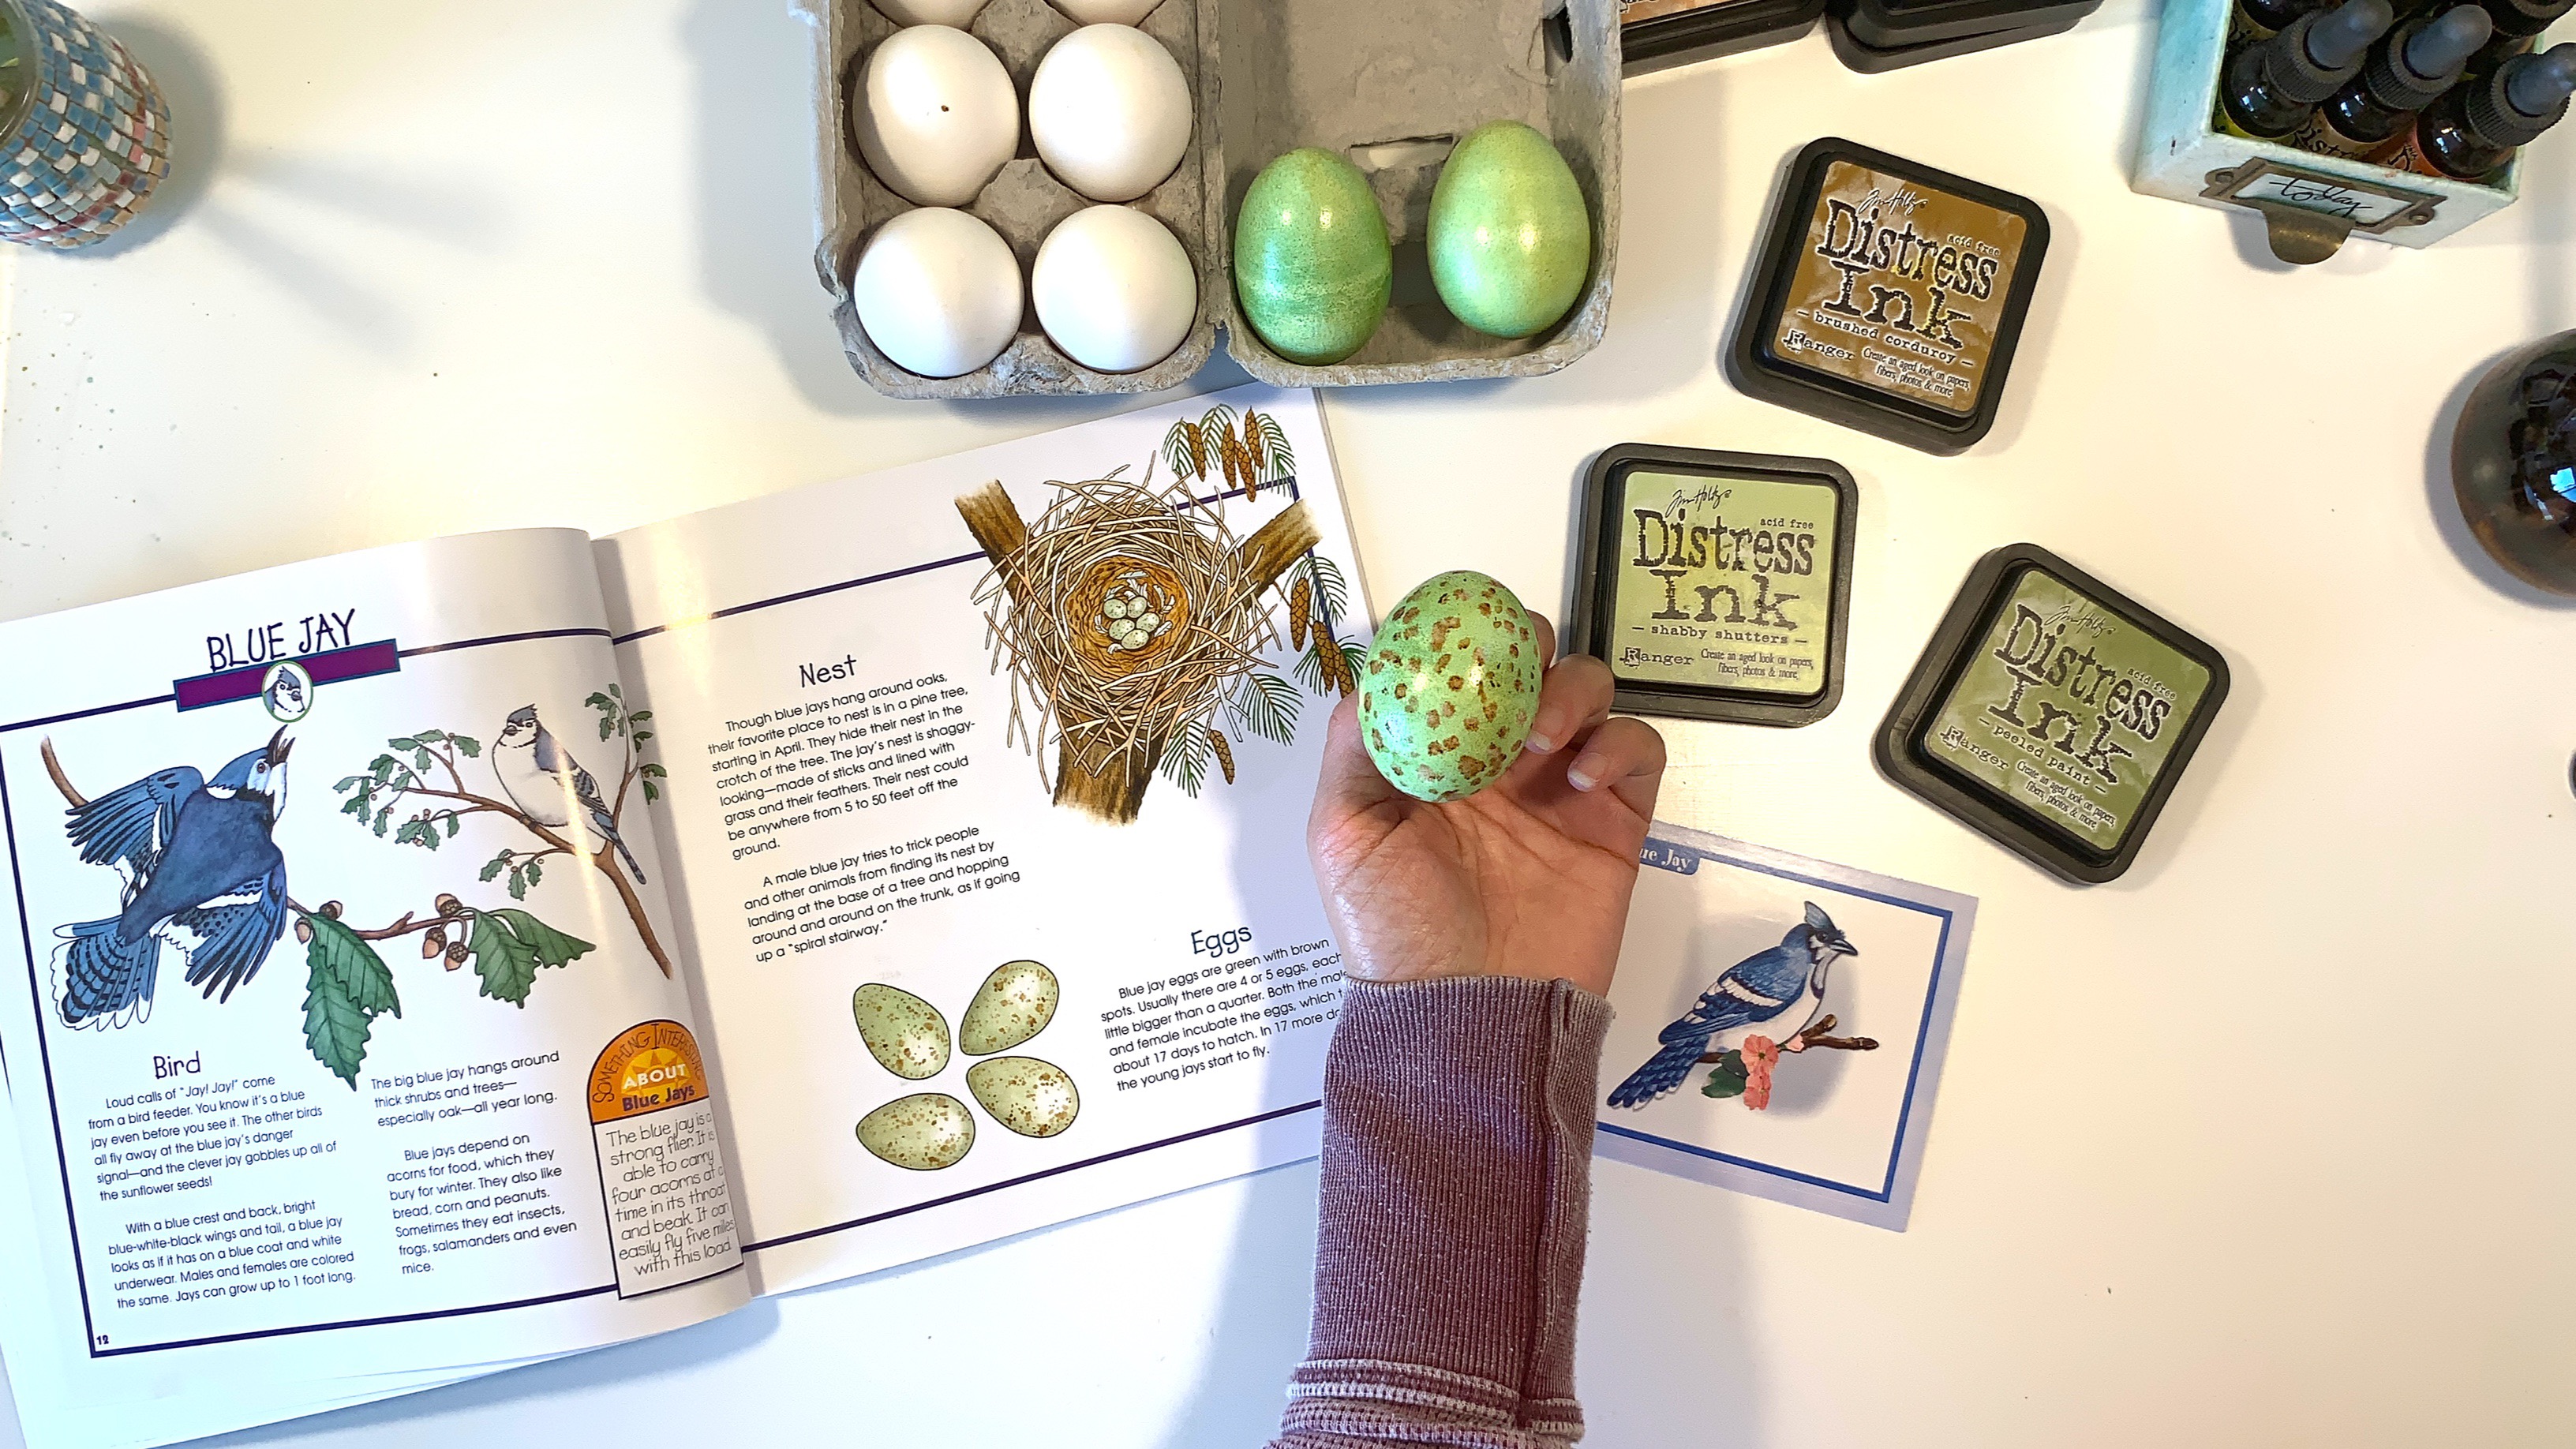
Hi! I love this owl study unit! My mother used it for her sixth grade class and suggested it to me for our homeschool. I’m in the gathering supplies stage. What book has the full spread of different colored eggs? Thank you!
I’m not able to see your video. Do I need to get access and how do I do that?
The one thing I hear often about doing a channel is the overwhelming aspect of it…good for you to notice that and fix it.
But I am wondering… here you say “temporarily unavailable” . Are you planning on putting the videos you have already made back up somewhere just for reference? I hope so! You always recommend such lovely books and I used your videos to come up with my resource list. Just curious. 🙂 Enjoy your family!
Heather