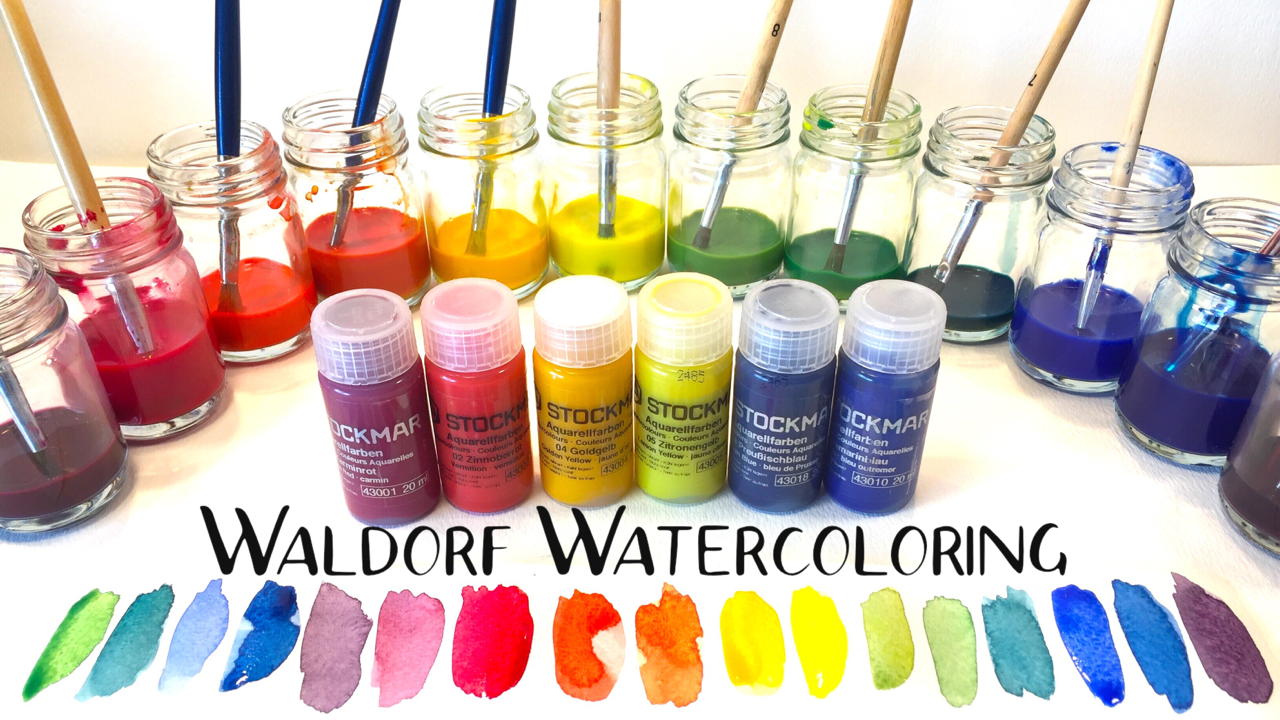
Watercoloring is a quintessential activity you’ll find in Waldorf school starting in kindergarten. And using Stockmar concentrated paints will help you achieve the lessons that are suggested in kindergarten and first grade. These paints come concentrated and need to be mixed with water. I’ll walk you through the steps of mixing the primary, secondary and some tertiary colors. Keeping your supply free of contamination and water ensures that your Concentrated Stockmar paints will last a long time. When you mix your colors, only mix as much as you think you’ll use in about 2 weeks. Storing them any longer heightens the risk that your mixed paints will go bad. They will mold and smell like rotten eggs. While the paints will still work and once dried the paints won’t smell, but to avoid the paints going bad, only mix about 10-20 ml of paint. Depending on what projects you do, this amount should be enough to do several large wet on wet watercolor projects. If you feel that that amount is too much, only mix the primary colors: Lemon Yellow, Ultramarine Blue and Carmine Red. From these three colors, all other colors can be made. In the primary years, these three colors are not only adequate, but highly recommended to that the secondary colors are formed during the watercolor lessons. In fact, the first lessons are ones in which only yellow is used. The following lessons introduce one other color to yellow: blue. Together, the child can see the magic of yellow and blue making green which is fascinating and beautiful. Starting in second grade, the secondary colors can be used without mixing the primary colors during the lesson, you can mix them ahead of time, or use the vermillion and golden yellow provided in the set. Stockmar paints come individually, as a set of three and set of six. Yellow tends to go first as it is used for orange and green and seems like more yellow is needed compared to red and blue when mixing orange and green. Variation of green, orange and purple are achieved by adding more or less of each primary color. Variations on green and purple are also achieved by mixing carmine red and yellow with one of the two blues: Prussian Blue and Ultramarine producing a true purple or plum depending on which blue base was used. The color choices are nearly endless. Mix all colors together to make brown. Using high quality natural brushes is recommended.
Watercoloring in Waldorf Education
Watercoloring in the Waldorf method of wet on wet painting is a skill honed and tool used in Waldorf settings. The at-home teacher may used these methods as well to enhance main lessons. Painting can be relaxing and meditative, but if it doesn’t feel that way to you or your child, don’t despair. You may just need some time to find your way while working with this artistic medium.
About this Watercolor Course
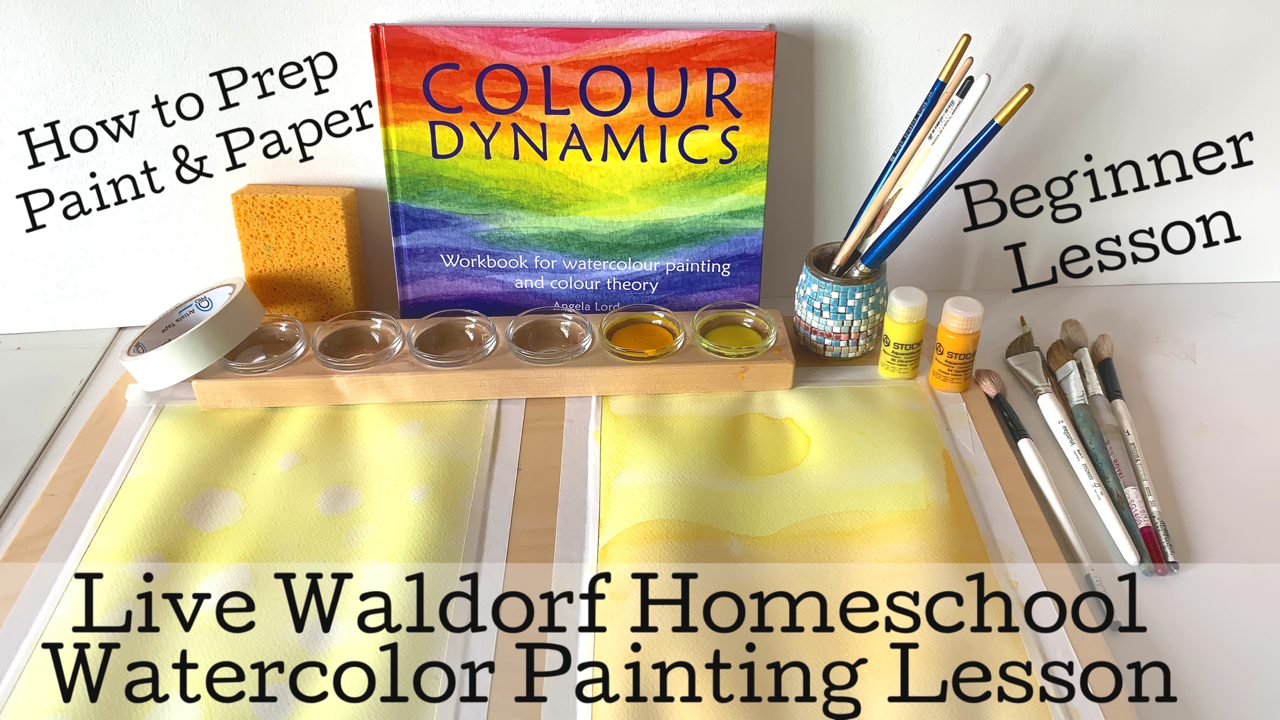
In this series, I’ll share tips and reflections throughout the live video. I’m recording these videos live with no edits (with some exceptions) so you can see the whole process from set up through lesson and clean up. I walk you through the process of mixing paints, preparing your workspace, taping down your paper, explaining which paper to use and which brushes work best. Next, my 8-year-old daughter and I do the watercolor painting lesson. I walk my daughter through the lesson with me, but sometimes we make changes as we go. In this video, I introduce the series and provide a look at the materials you need (and some you may want) for this course.
For these lessons, we are using the book Colour Dynamics by Angela Lord. It has been a tremendous inspiration for these lessons. The book is gorgeous and features a number of examples from beginner level to advanced. You can find this book and others by Angela at my favorite Waldorf vendor A Child’s Dream.
We are using Stockmar watercolor paints. These are concentrated paints need to be diluted with water before use. They don’t last long, maybe a month or so, once mixed if they are covered, but you can put them in the fridge to prolong their life. Otherwise, these paints will mold and smell. For that reason, take care not to introduce water into you tubes. Mix paints in containers, adding about 1/8 of a teaspoon of paint for about 1/4 cup of water. Once mixed, check the paint to see if you have the desired richness. You can also add more water to lighten or more paint to deepen. These Stockmar watercolor paints and painting jars can be found at A Child’s Dream and Waldorf Supplies as well as many other online Waldorf vendors.
Lately, I’ve been using open glass jars for our paints and they’ve worked well for one surprising reason: The paint doesn’t mold! Instead, the water simply evaporates and and leaves a dried cake of paint which can be rehydrated for later use. This has worked out well for this series of lessons because, while we are working through lessons almost daily, we are not using all the colors at the same time, so some of them dry out and all we need to do is add a bit of water and get painting! Our new painting jar holder is from Mercurious. They are a fabulous vendor with high quality Waldorf supplies.
While I would love to use 140lb. Strathmore watercolor paper, it’s beyond our budget to use that for every lesson. We reserve that paper for a main lesson or final project. You can find the superior watercolor paper at Waldorf Supplies. For our everyday use, I love the Fabriano line of paper. They have plenty to choose from, and our current favorites are the 90 and 140lb. cold press and hot press watercolor paper measuring 9″x12″. You can find my favorite paper at one of my favorite art suppliers, Dick Blick.
Paper, painting boards and brushes
Cold press or hot press? 90 lb. or 140 lb.? Which watercolor paper is going to be right for you and your projects? I share my experience with four types of watercolor paper by Fabriano. Hot press paper is smooth to the touch and I’ve used this paper for our geometry main lesson block. Because it’s smooth, we can get clean arcs and lines with our pencil, straightedge and compass. But because it’s watercolor paper, we can watercolor our images without fearing the paper will tear or pill.
Which weight paper is best for you? While I’ve been using the 90 lb. cold press watercolor paper by Fabriano for years for most of our homeschool projects, the 140 lb. paper is ideal for wet on wet watercoloring. For a wet on wet process, you want your paper wet but not sopping wet. You can either run your paper under the tap, spray with water or use a sponge to wet your paper. Then you can begin painting. The paint with move on the page with the water. It’s beautiful to see and just appropriate for young elementary students, especially in a Waldorf educational setting.
I tend to use the 9″x12″ paper for most of our homeschool needs, but Fabriano (and other brands) make larger paper. When working with young elementary students in a Waldorf setting, it’s preferred to use larger paper, in a heavy weight and if there’s cotton in the paper, it’s likely to hold much better to wet on wet techniques. However, for our daily watercolor needs, or practice assignments, I use the 9″x12″ paper by Fabriano because I find it to be an affordable mid range option.
For the course…
During this course, we used the 140lb. cold press watercolor paper. It’s thick and textured and while it does still ripple and buckle, it can hold up satisfactorily to wet on wet watercoloring. Because we opted to tape down our paper on painting boards from Waldorf Supplies, we are not submerging our paper in water first. Instead, we wet our paper with a sponge or our paint brush. You want the paper wet but not sopping, glistening but not pooling with water. You can use a sponge to soak up excess water or a towel. When working during the summer or autumn months, I keep a spray bottle handy to wet my paper if it gets dry. On cooler days, the paper stays wet throughout our lesson.
If you opt not to tape your paper down, we may end up with paint seeping onto the backside of the paper. When my children were younger, I just quickly set them up on our granite countertops and got painting as we didn’t have a lot of time for extra prep work. One perk of taping down is a nice border and a clean back so you can use the paper again.
We are using 1 inch wide paint brushes with all natural bristles. When working with young students, you want to use the largest paper you can afford and a wide yet full paint brush.
Find me on YouTube, Twitter, Instagram and Facebook
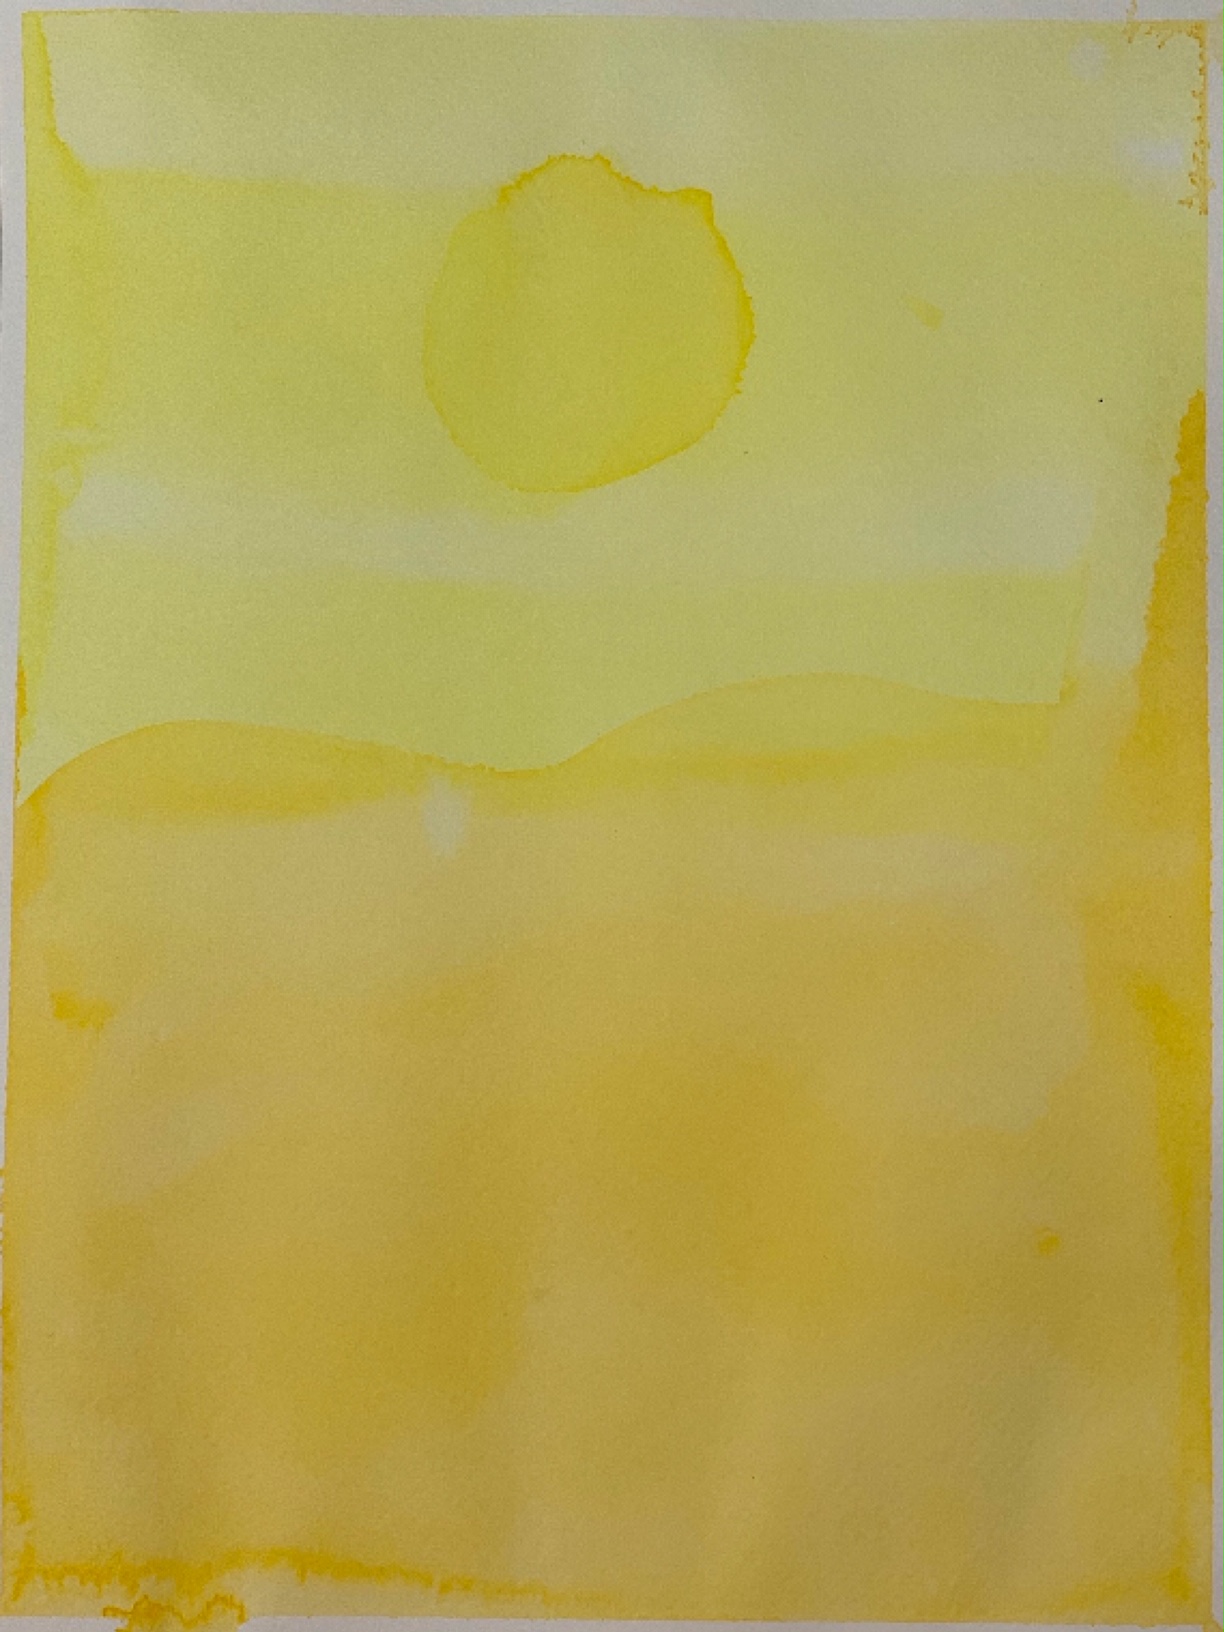
Lesson 1: Yellow
Lesson 1 is all about exploring the color yellow. It seems simple enough and yet in practice it was really challenging! I’m not sure if the challenge is universal and only felt with adults who have already spent their whole life working with colors rather than creating shades of a single one. What you might experience as you go through these lessons is that you, the teacher, are learning too. If you approach this like a student, you may feel less fearful about getting it ‘right’ and feel more joy about playing and exploring color and painting!
student work lesson 1 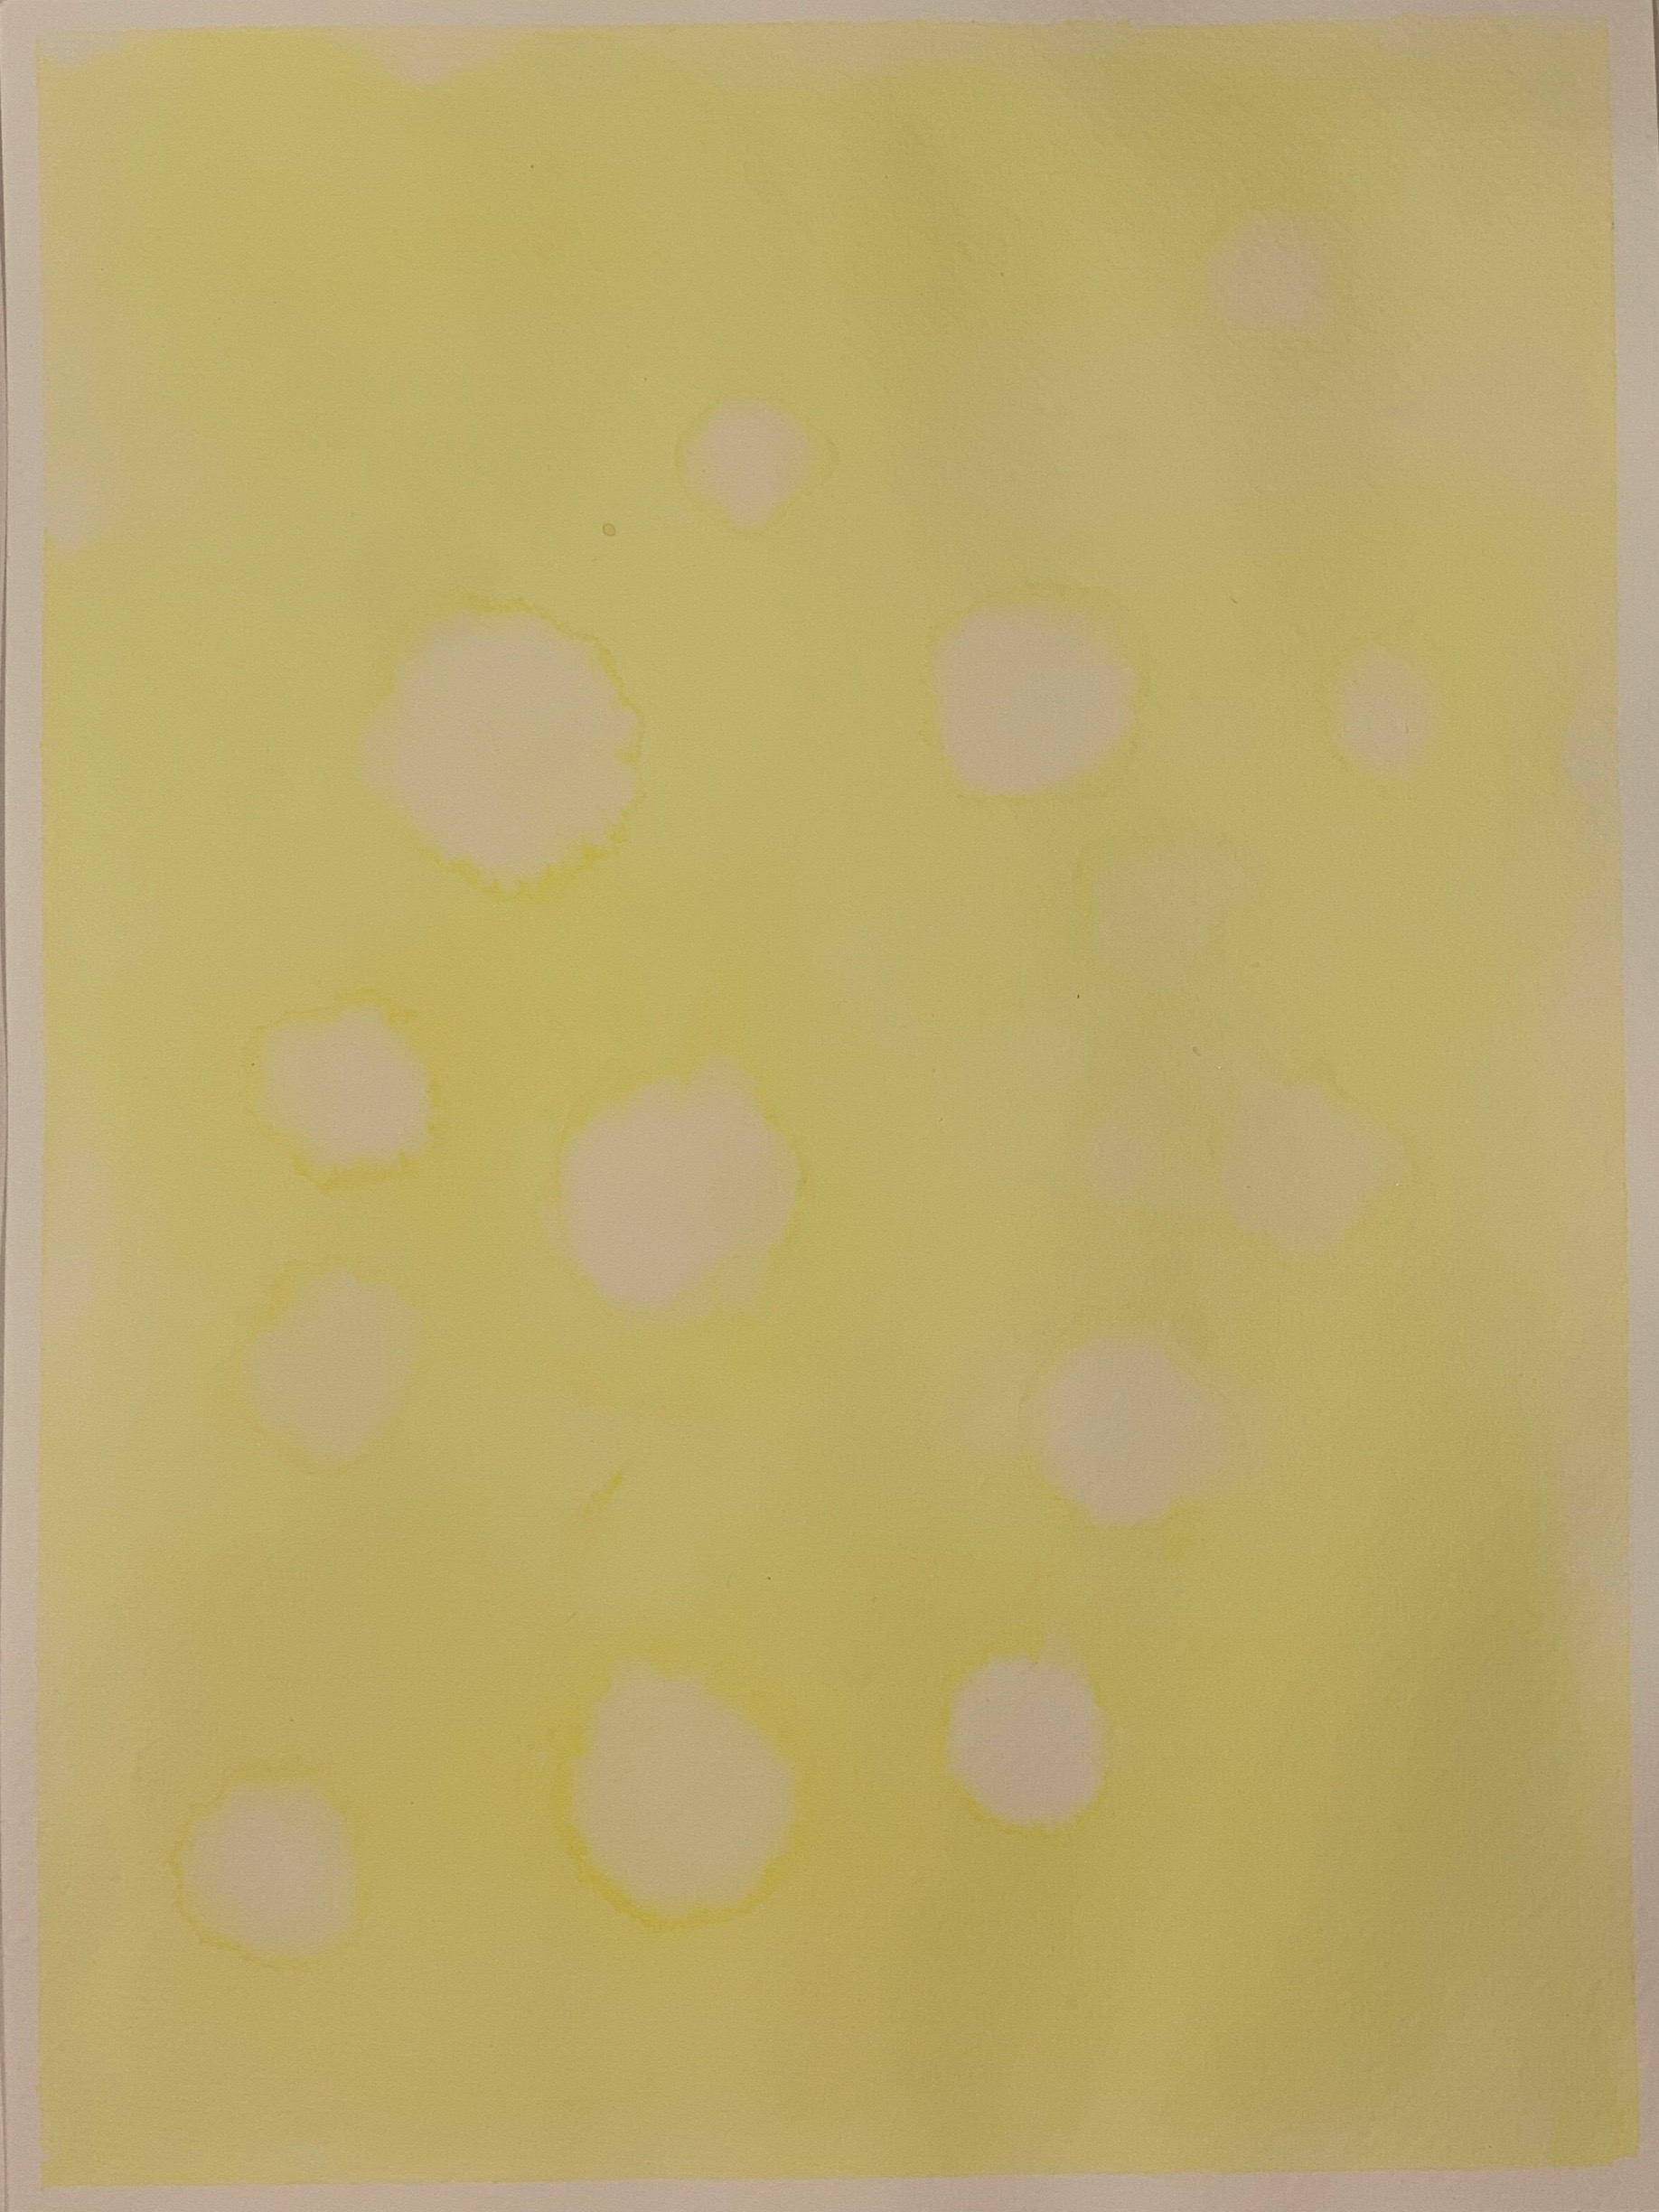
teacher work lesson 1
Lesson 2 : Shades of Yellow
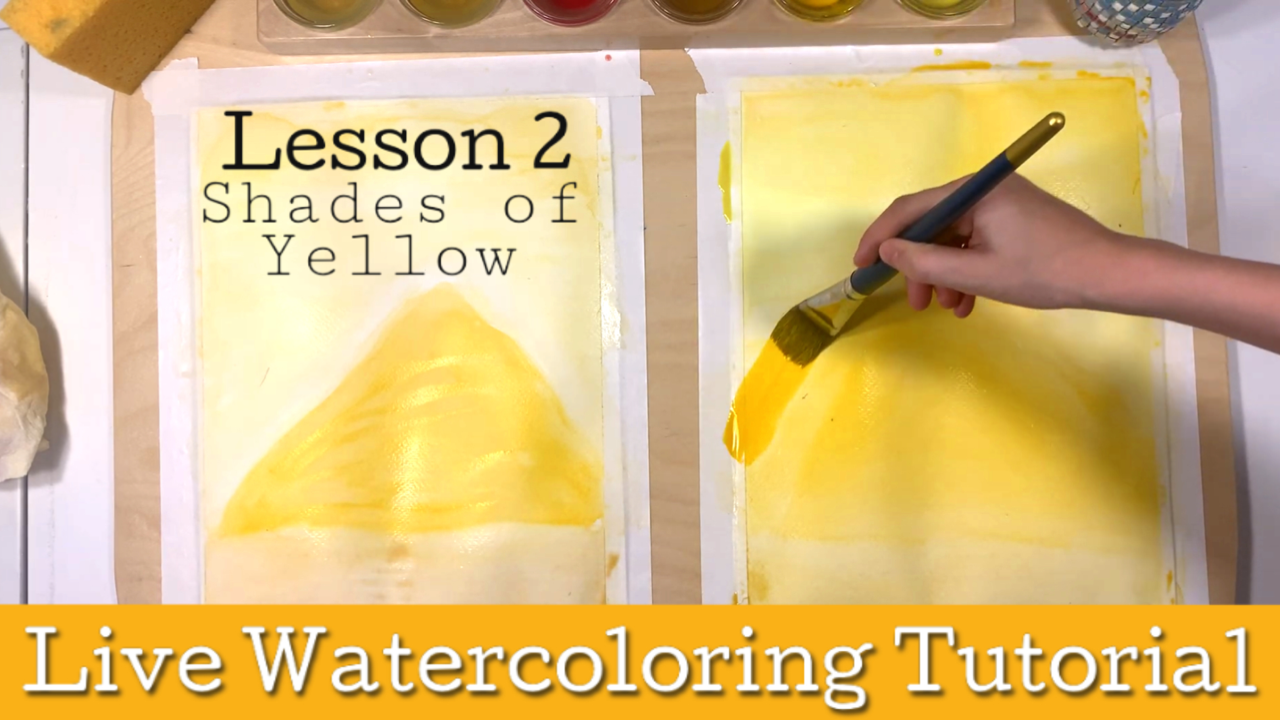
In lesson 2, we dive further into the color yellow. Because the Stockmar paints come with a bright yellow and a warm golden yellow, this lesson lent itself well to exploring both yellows together. While this is a suitable second lesson, you may wish to continue exploring yellow on its own during this lesson, but use the golden yellow instead. You’ll be pleasantly surprised at the results. Was working with golden yellow the same as bright yellow? Which did you prefer? How did this color make you feel? Golden yellow is one of my favorite colors. In fact, my first bedroom set when I was seven years old was a mix of white and yellow. Then 15 years later and hung color block curtains (one panel bright yellow and the other golden yellow) from IKEA in our bedroom. I loved them until I was pregnant with my third child when I had such a strong revolting feeling about the yellow, I swiftly removed the curtains and our pine furniture which had aged a beautiful yellow tone drove them straight to my mother’s house an hour away!
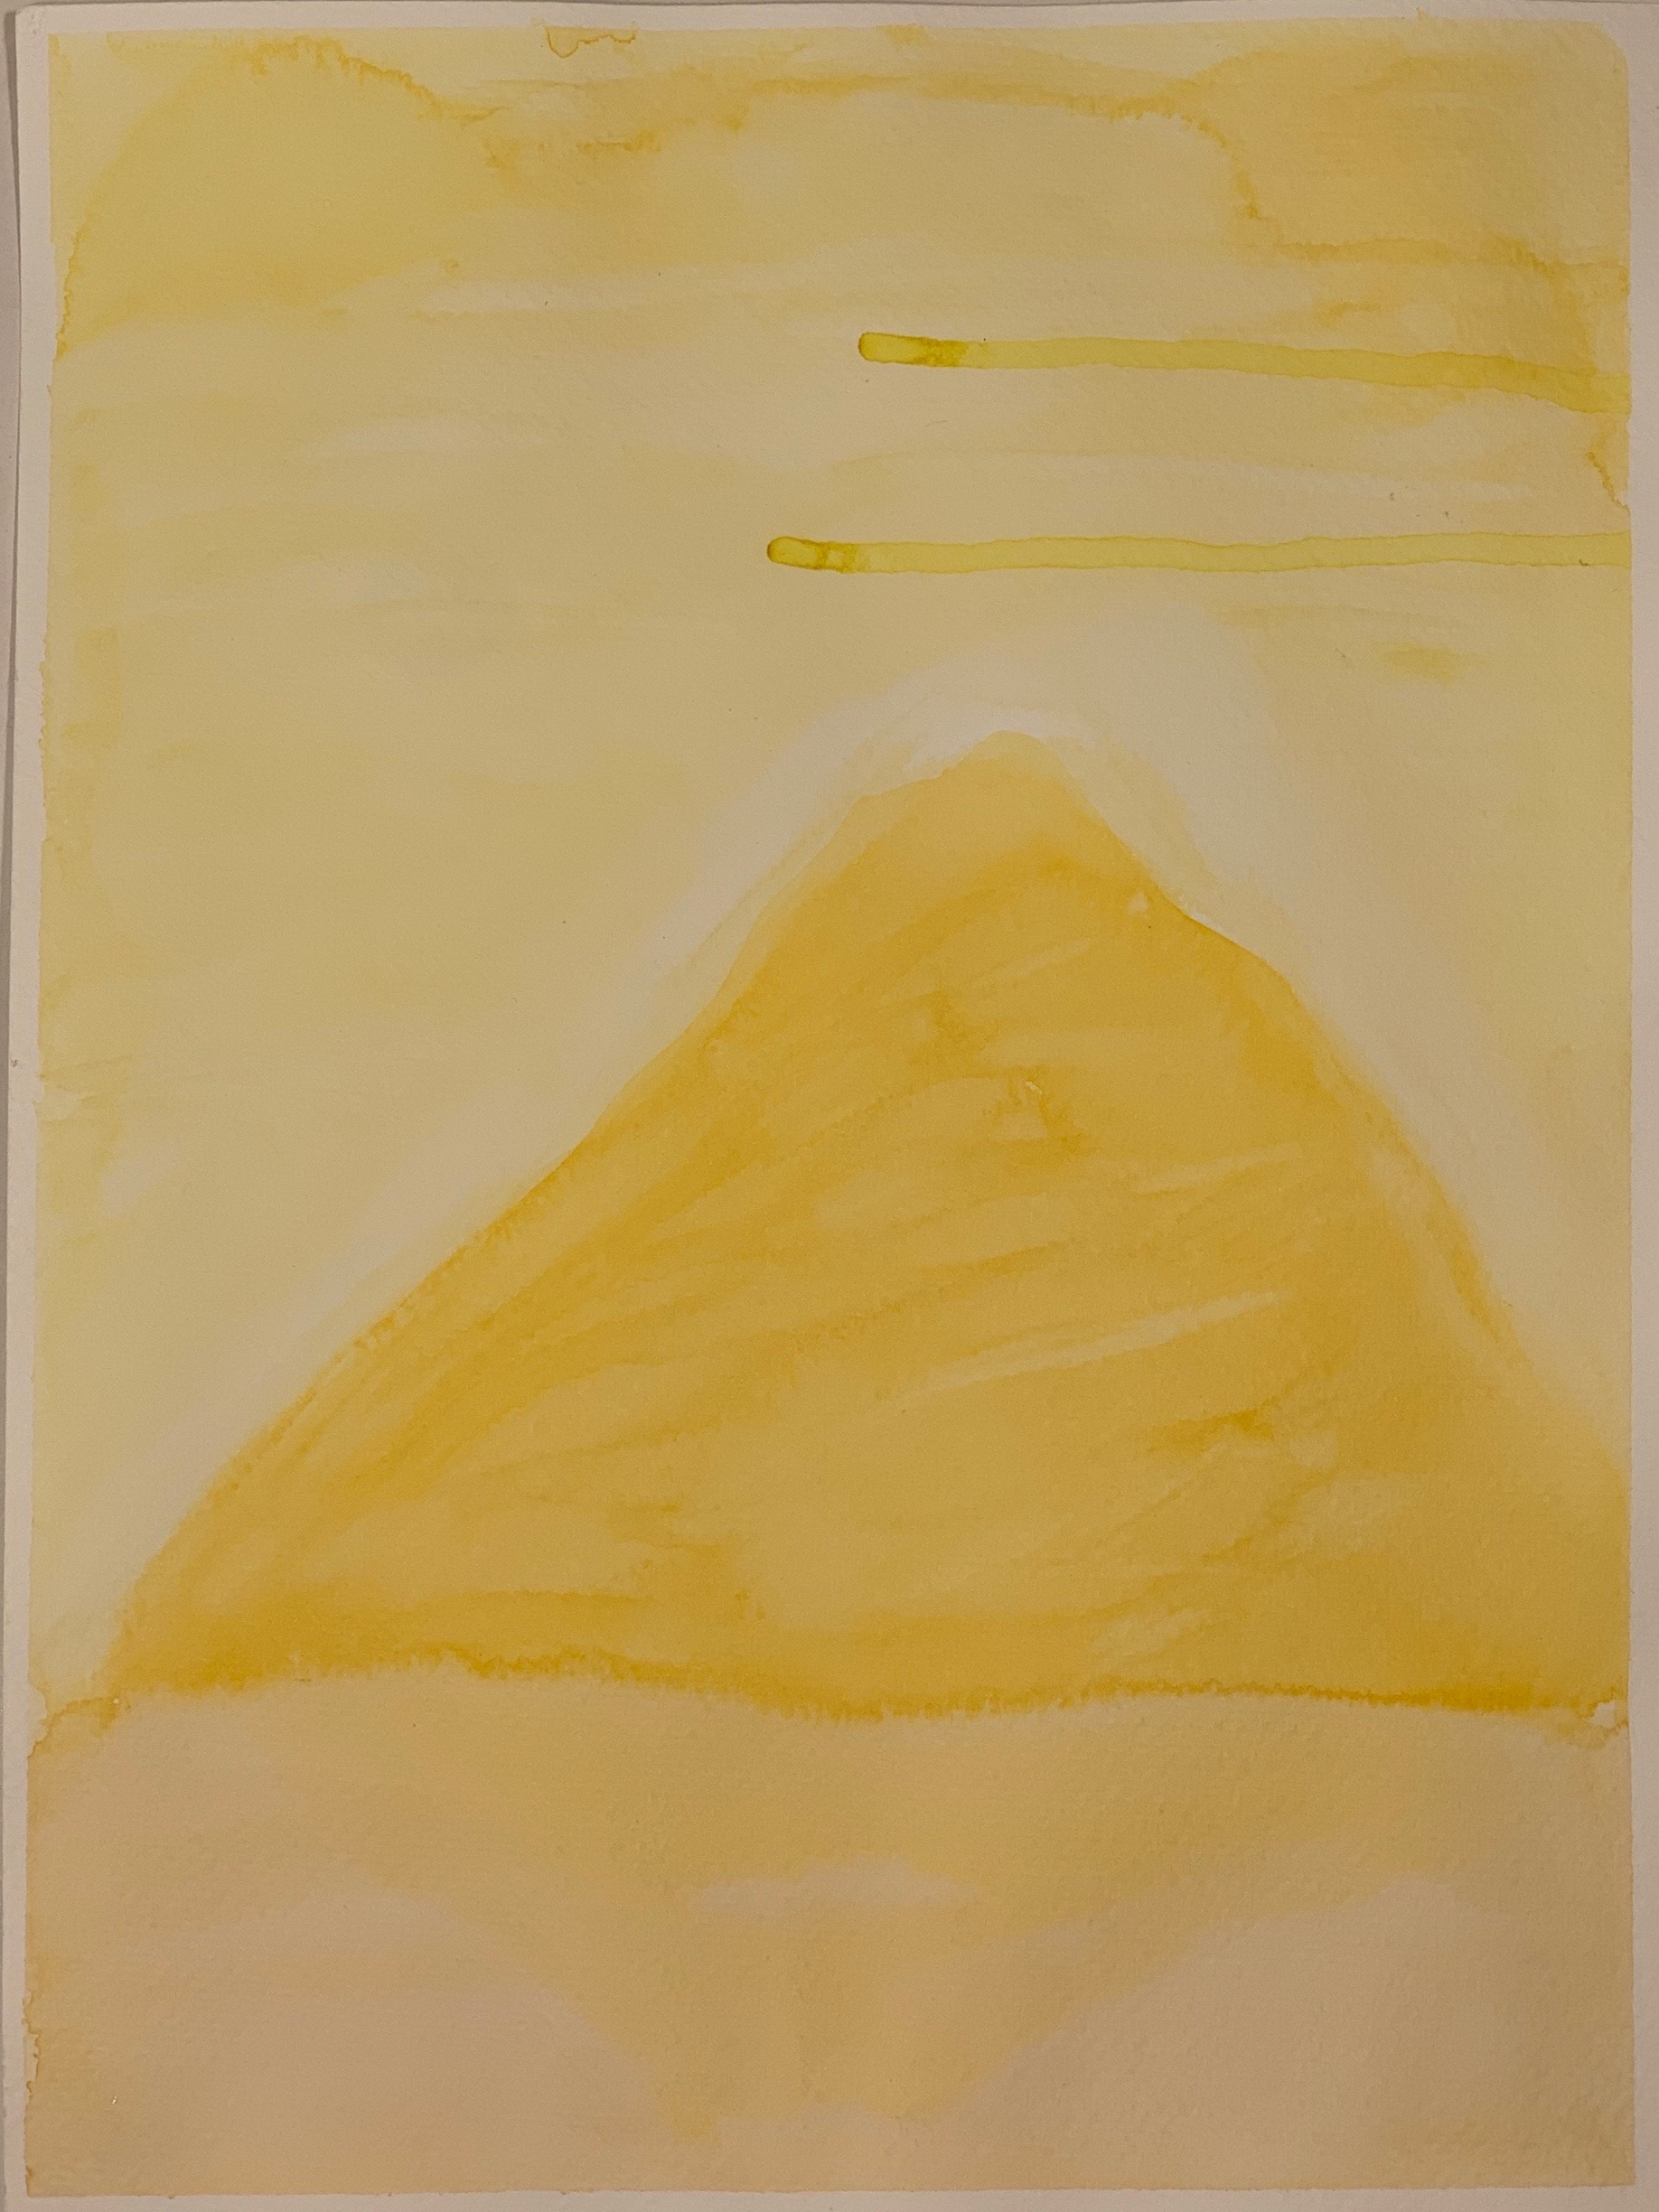
Teacher work for lesson 2 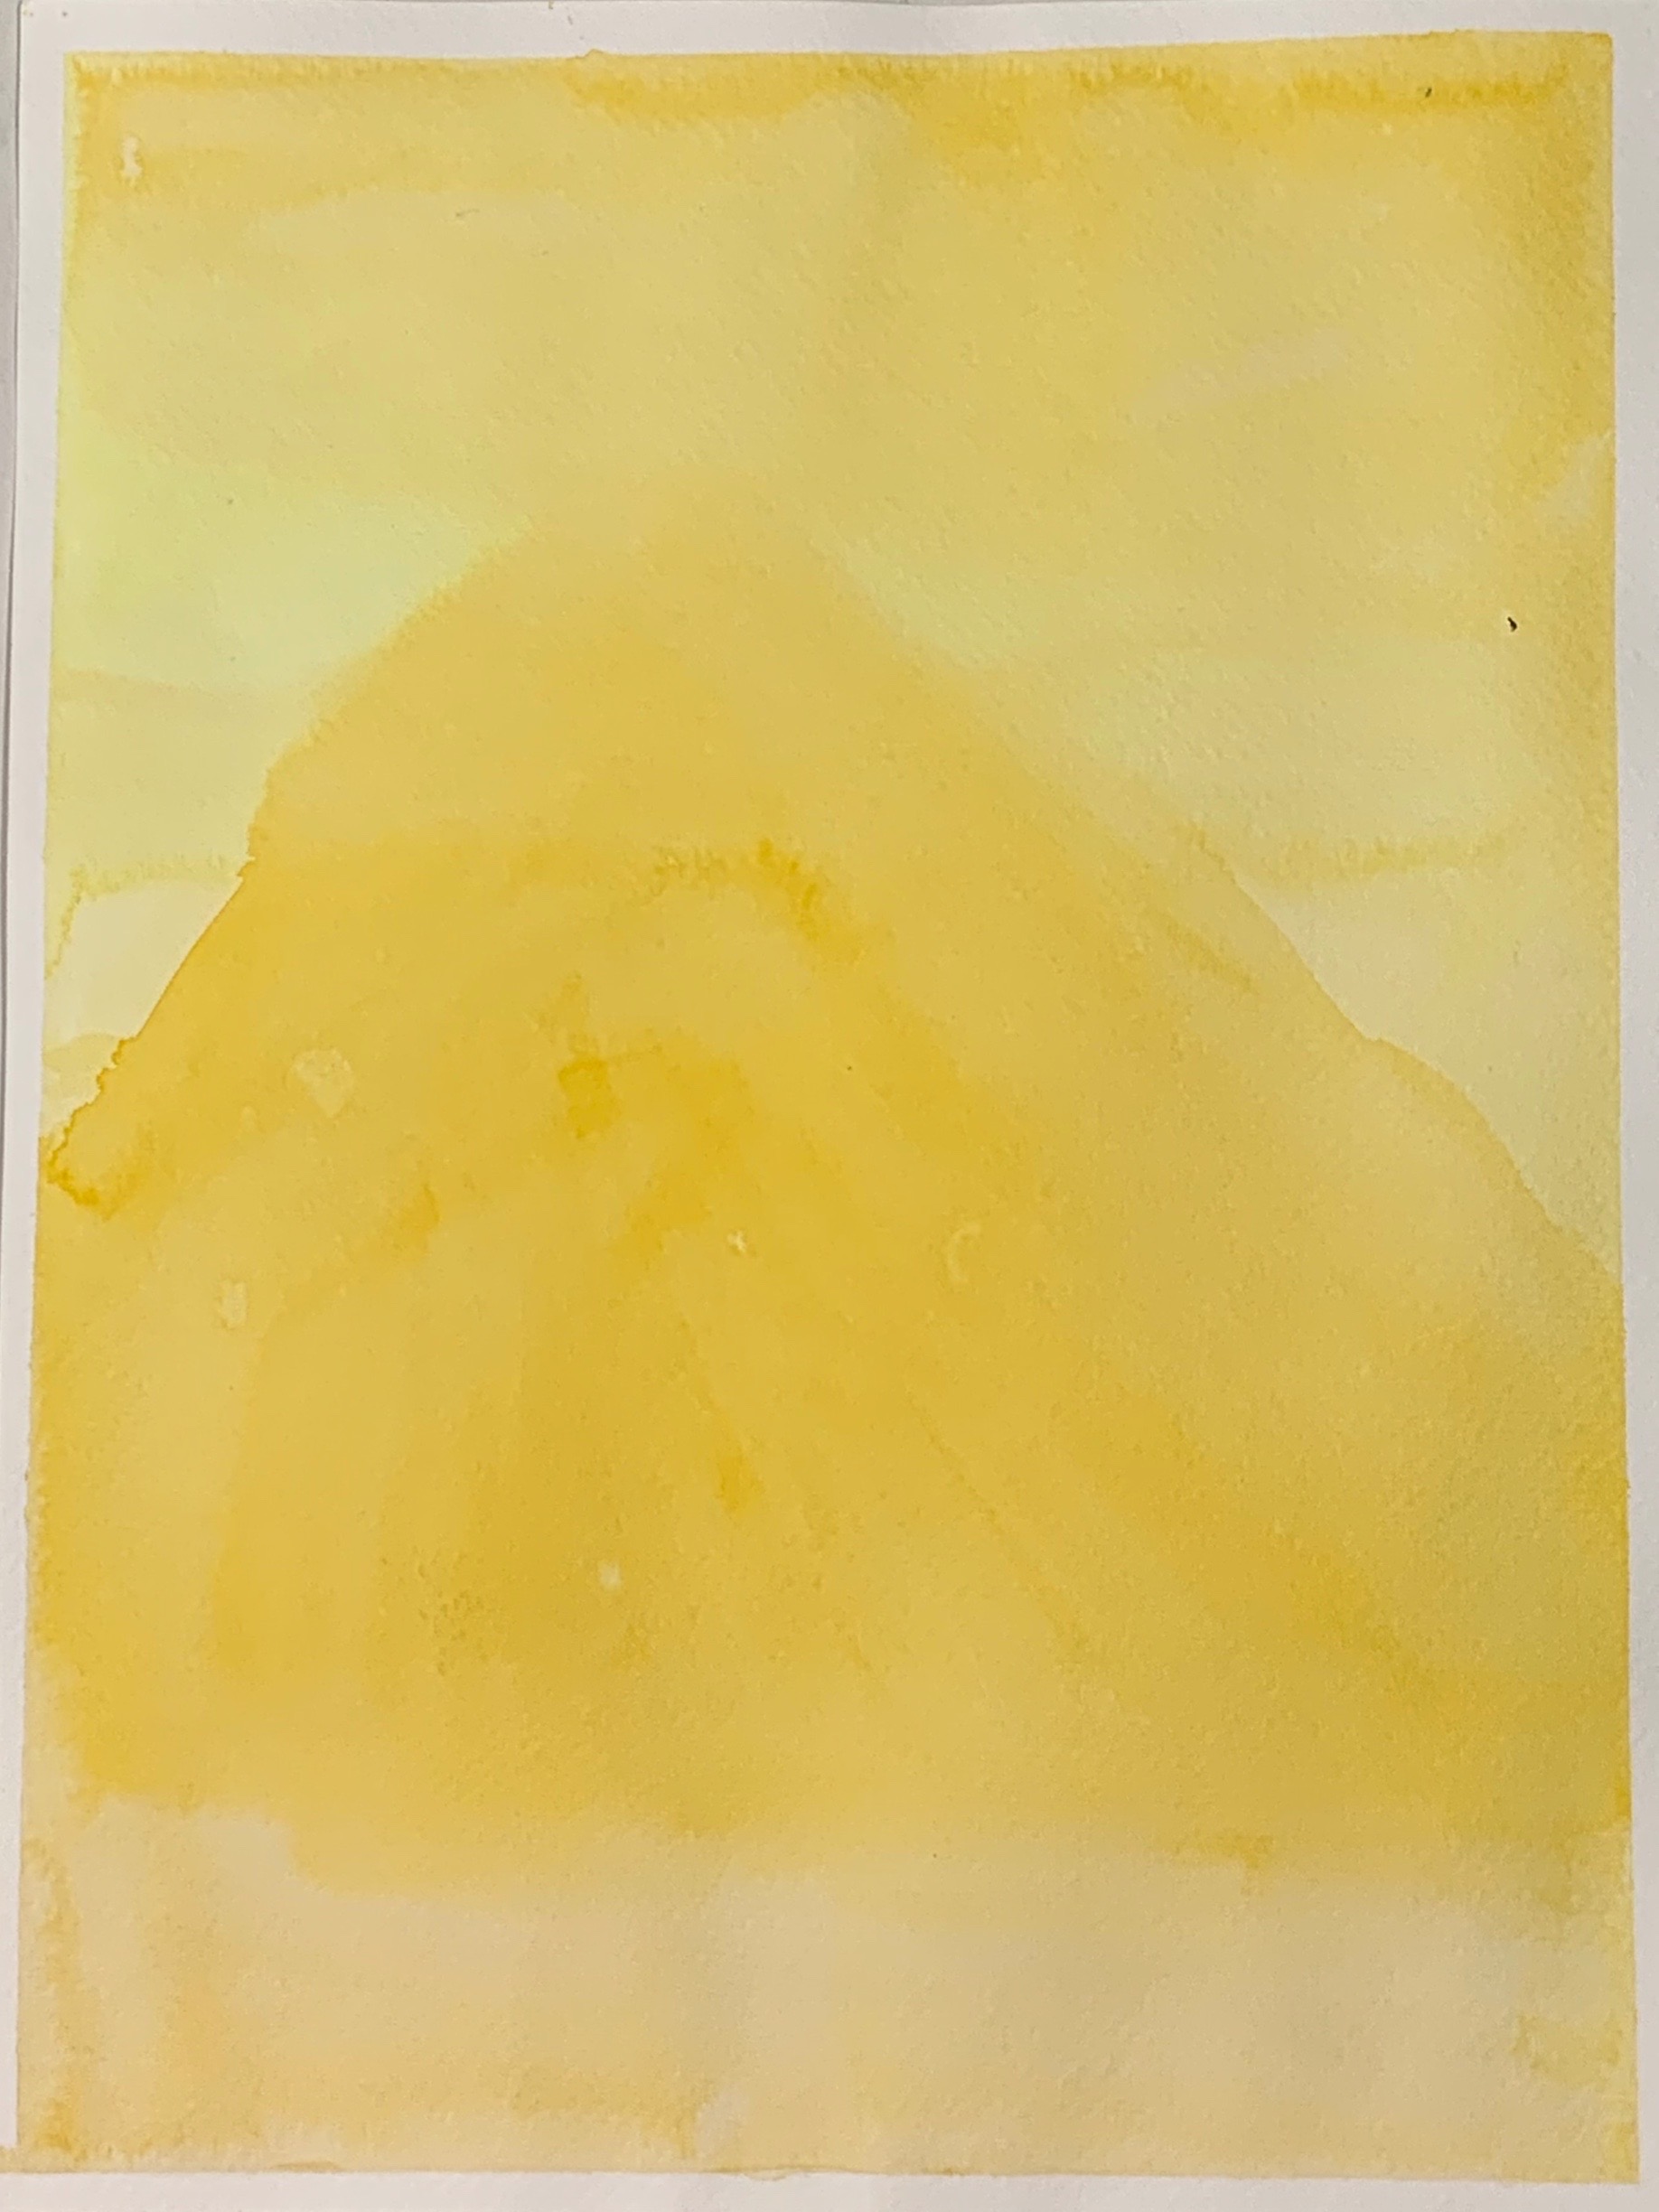
Student work for lesson 2
Lesson 3 : Blue
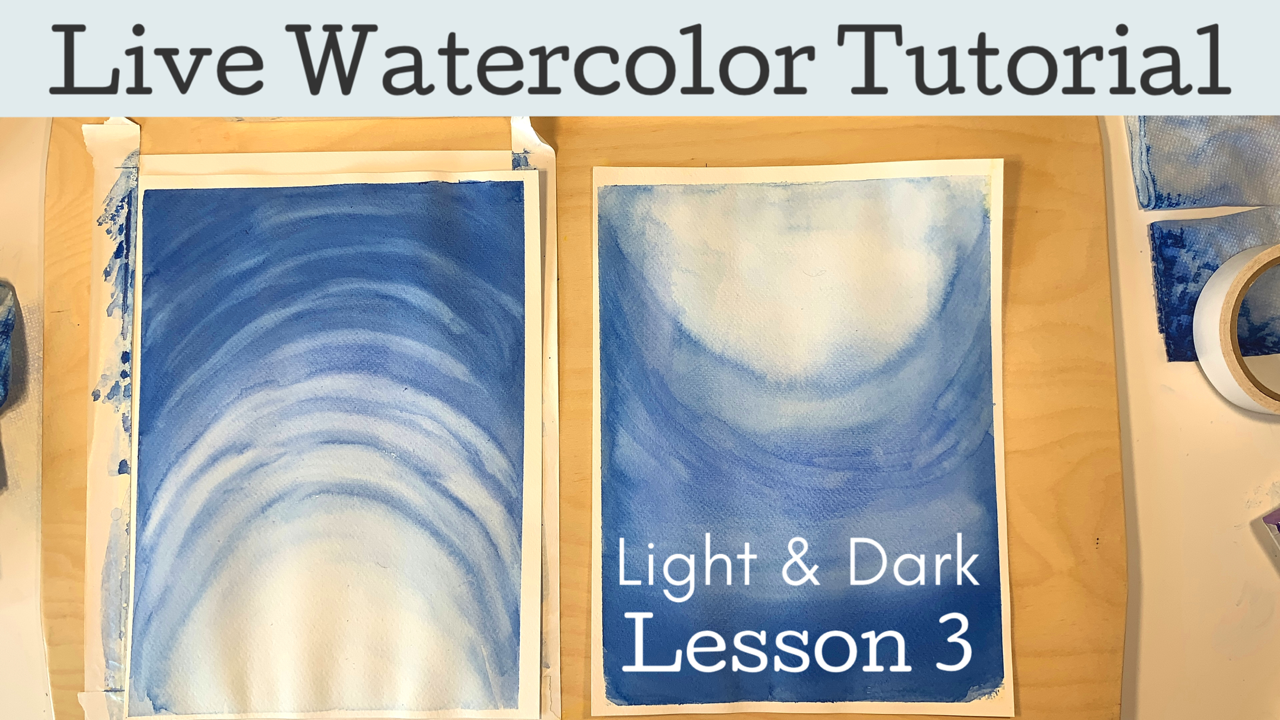
In lesson 3, we explore the color blue. For this lesson we made arches in varying intensities of blue. You may find that some students and teachers are firm, defined and somewhat rigid. Can you tell between us which person was like that? If you look at the final paintings, you’ll see how beautifully my daughter’s shades blended into one another. Mine are so defined and in my opinion, not as beautiful to me for what I was wanting. If you haven’t already ‘met yourself’ in your children, as Melanie Hatch (veteran Waldorf handwork teacher) will tell you, “You meet yourself in your handwork.” You’ll have an opportunity to meet yourself in your painting too. I do… all the time. And it shows to me.
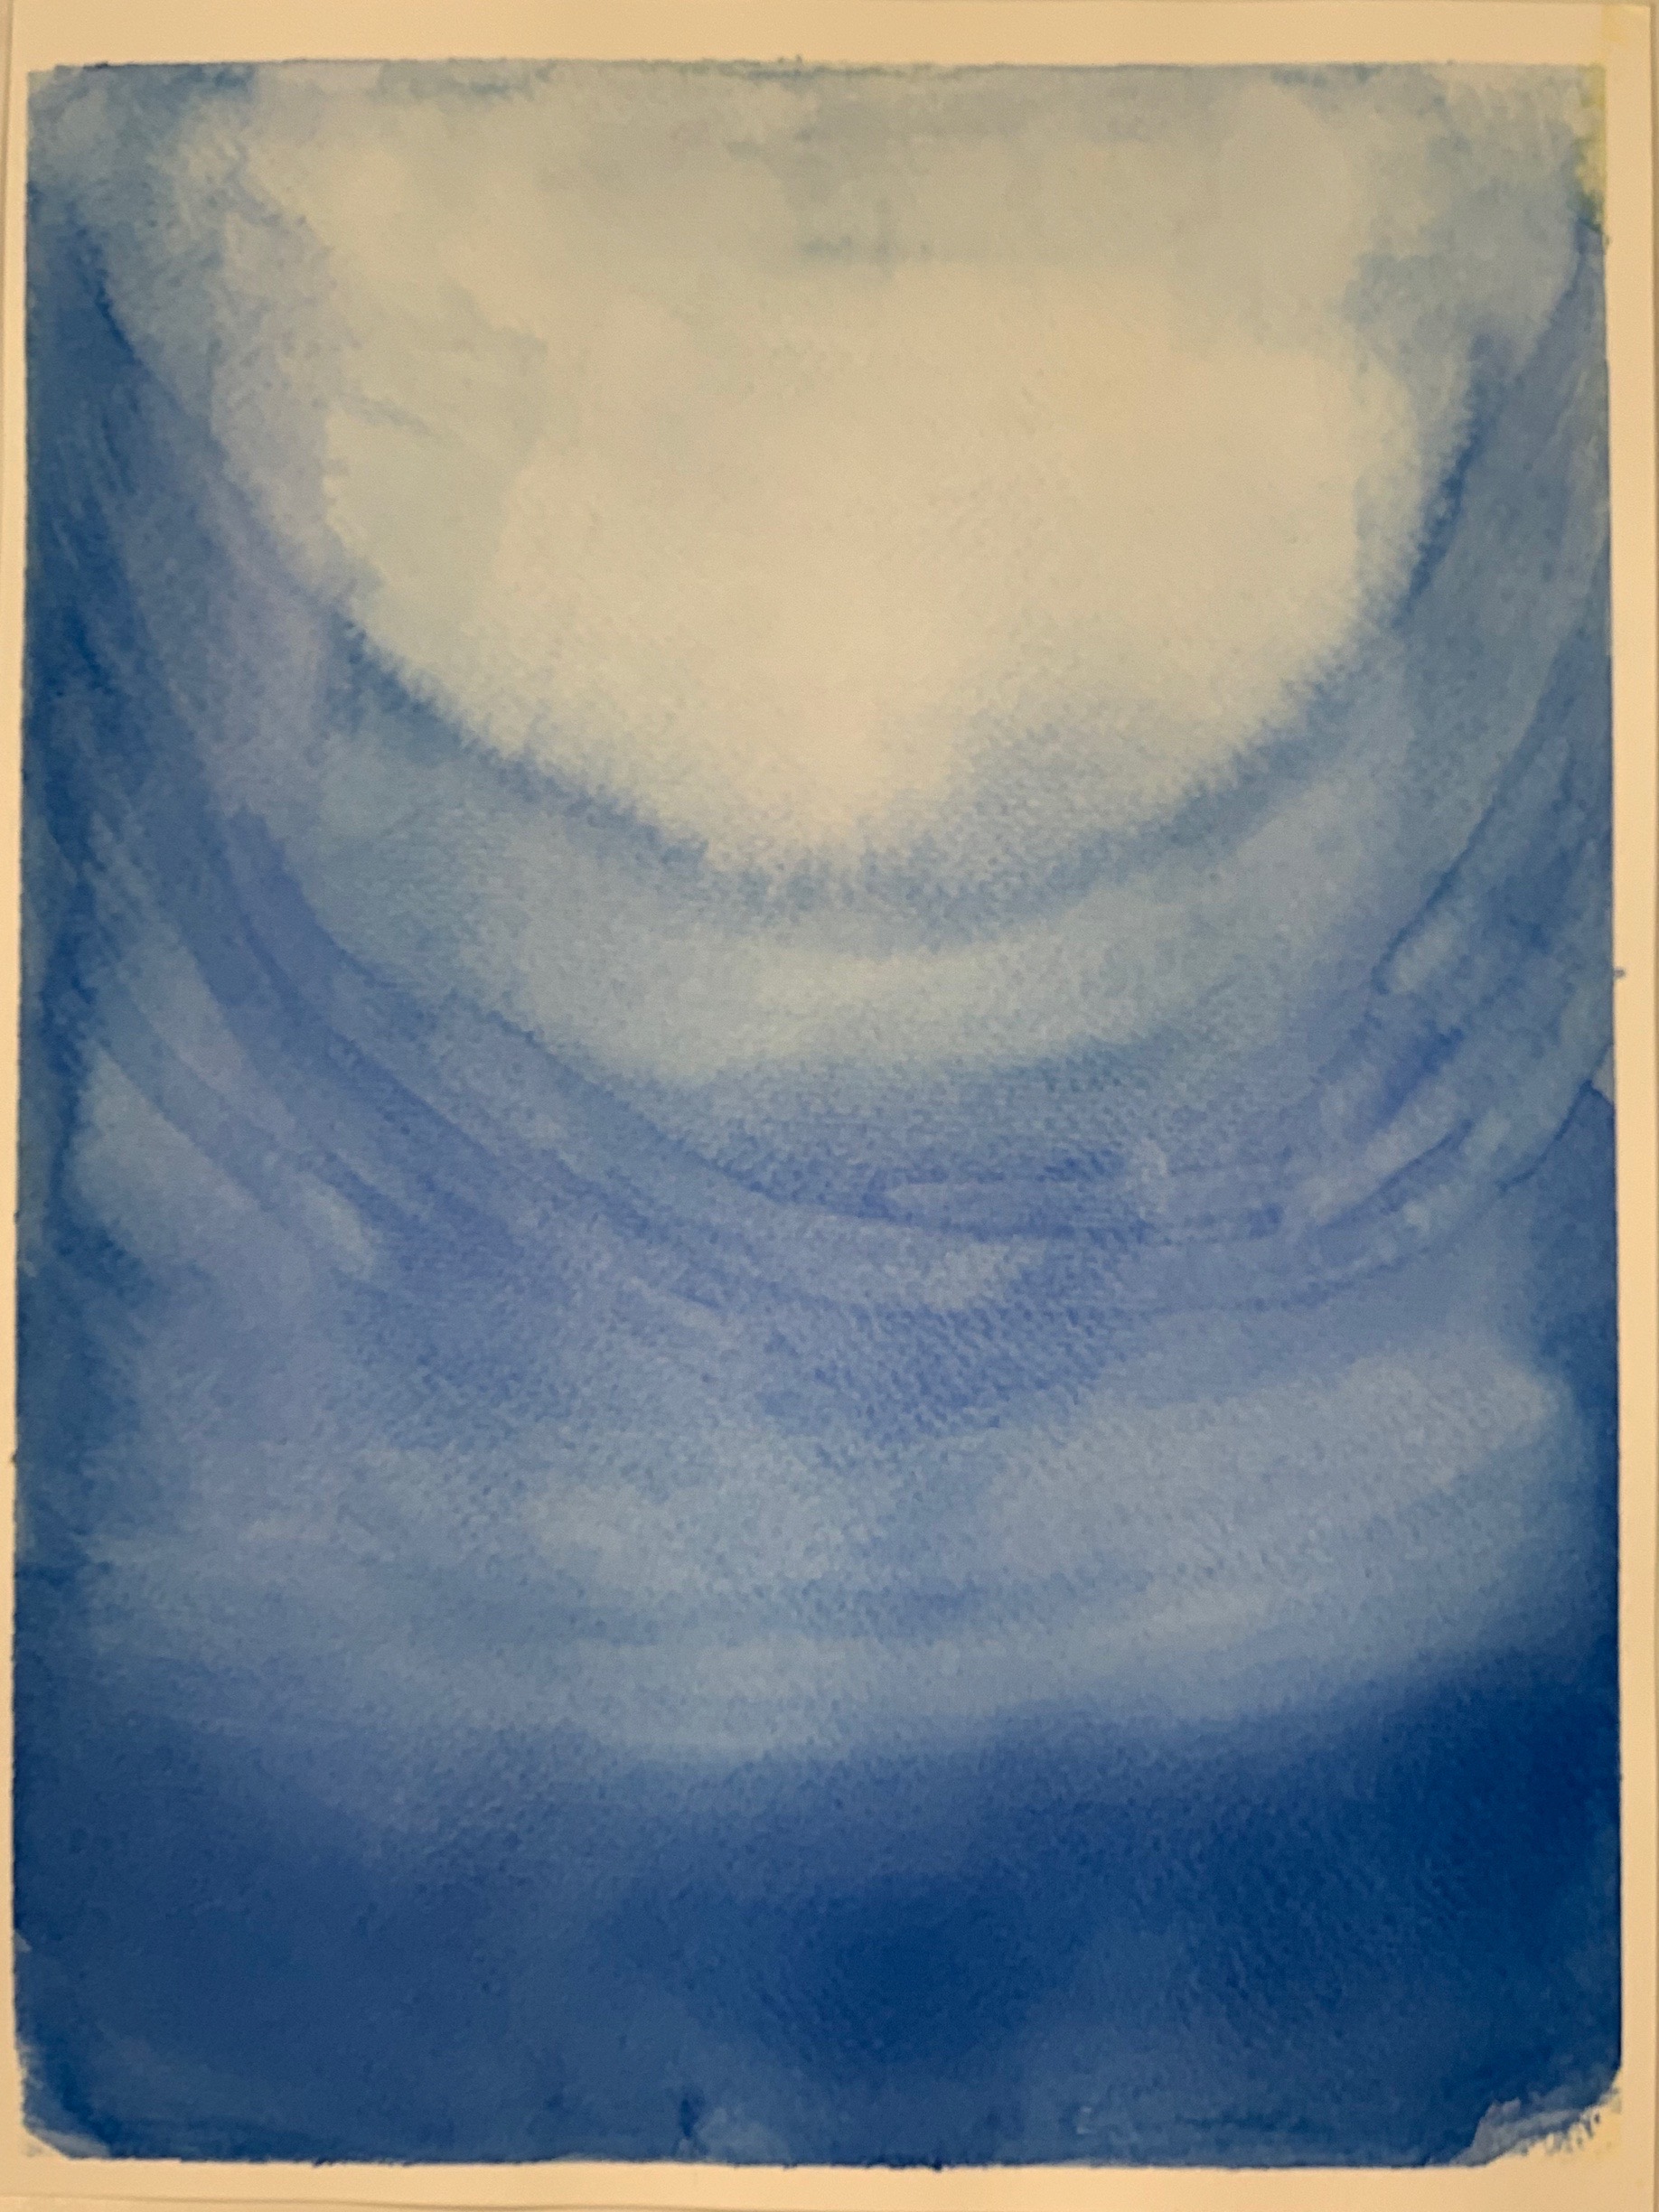
student work lesson 3 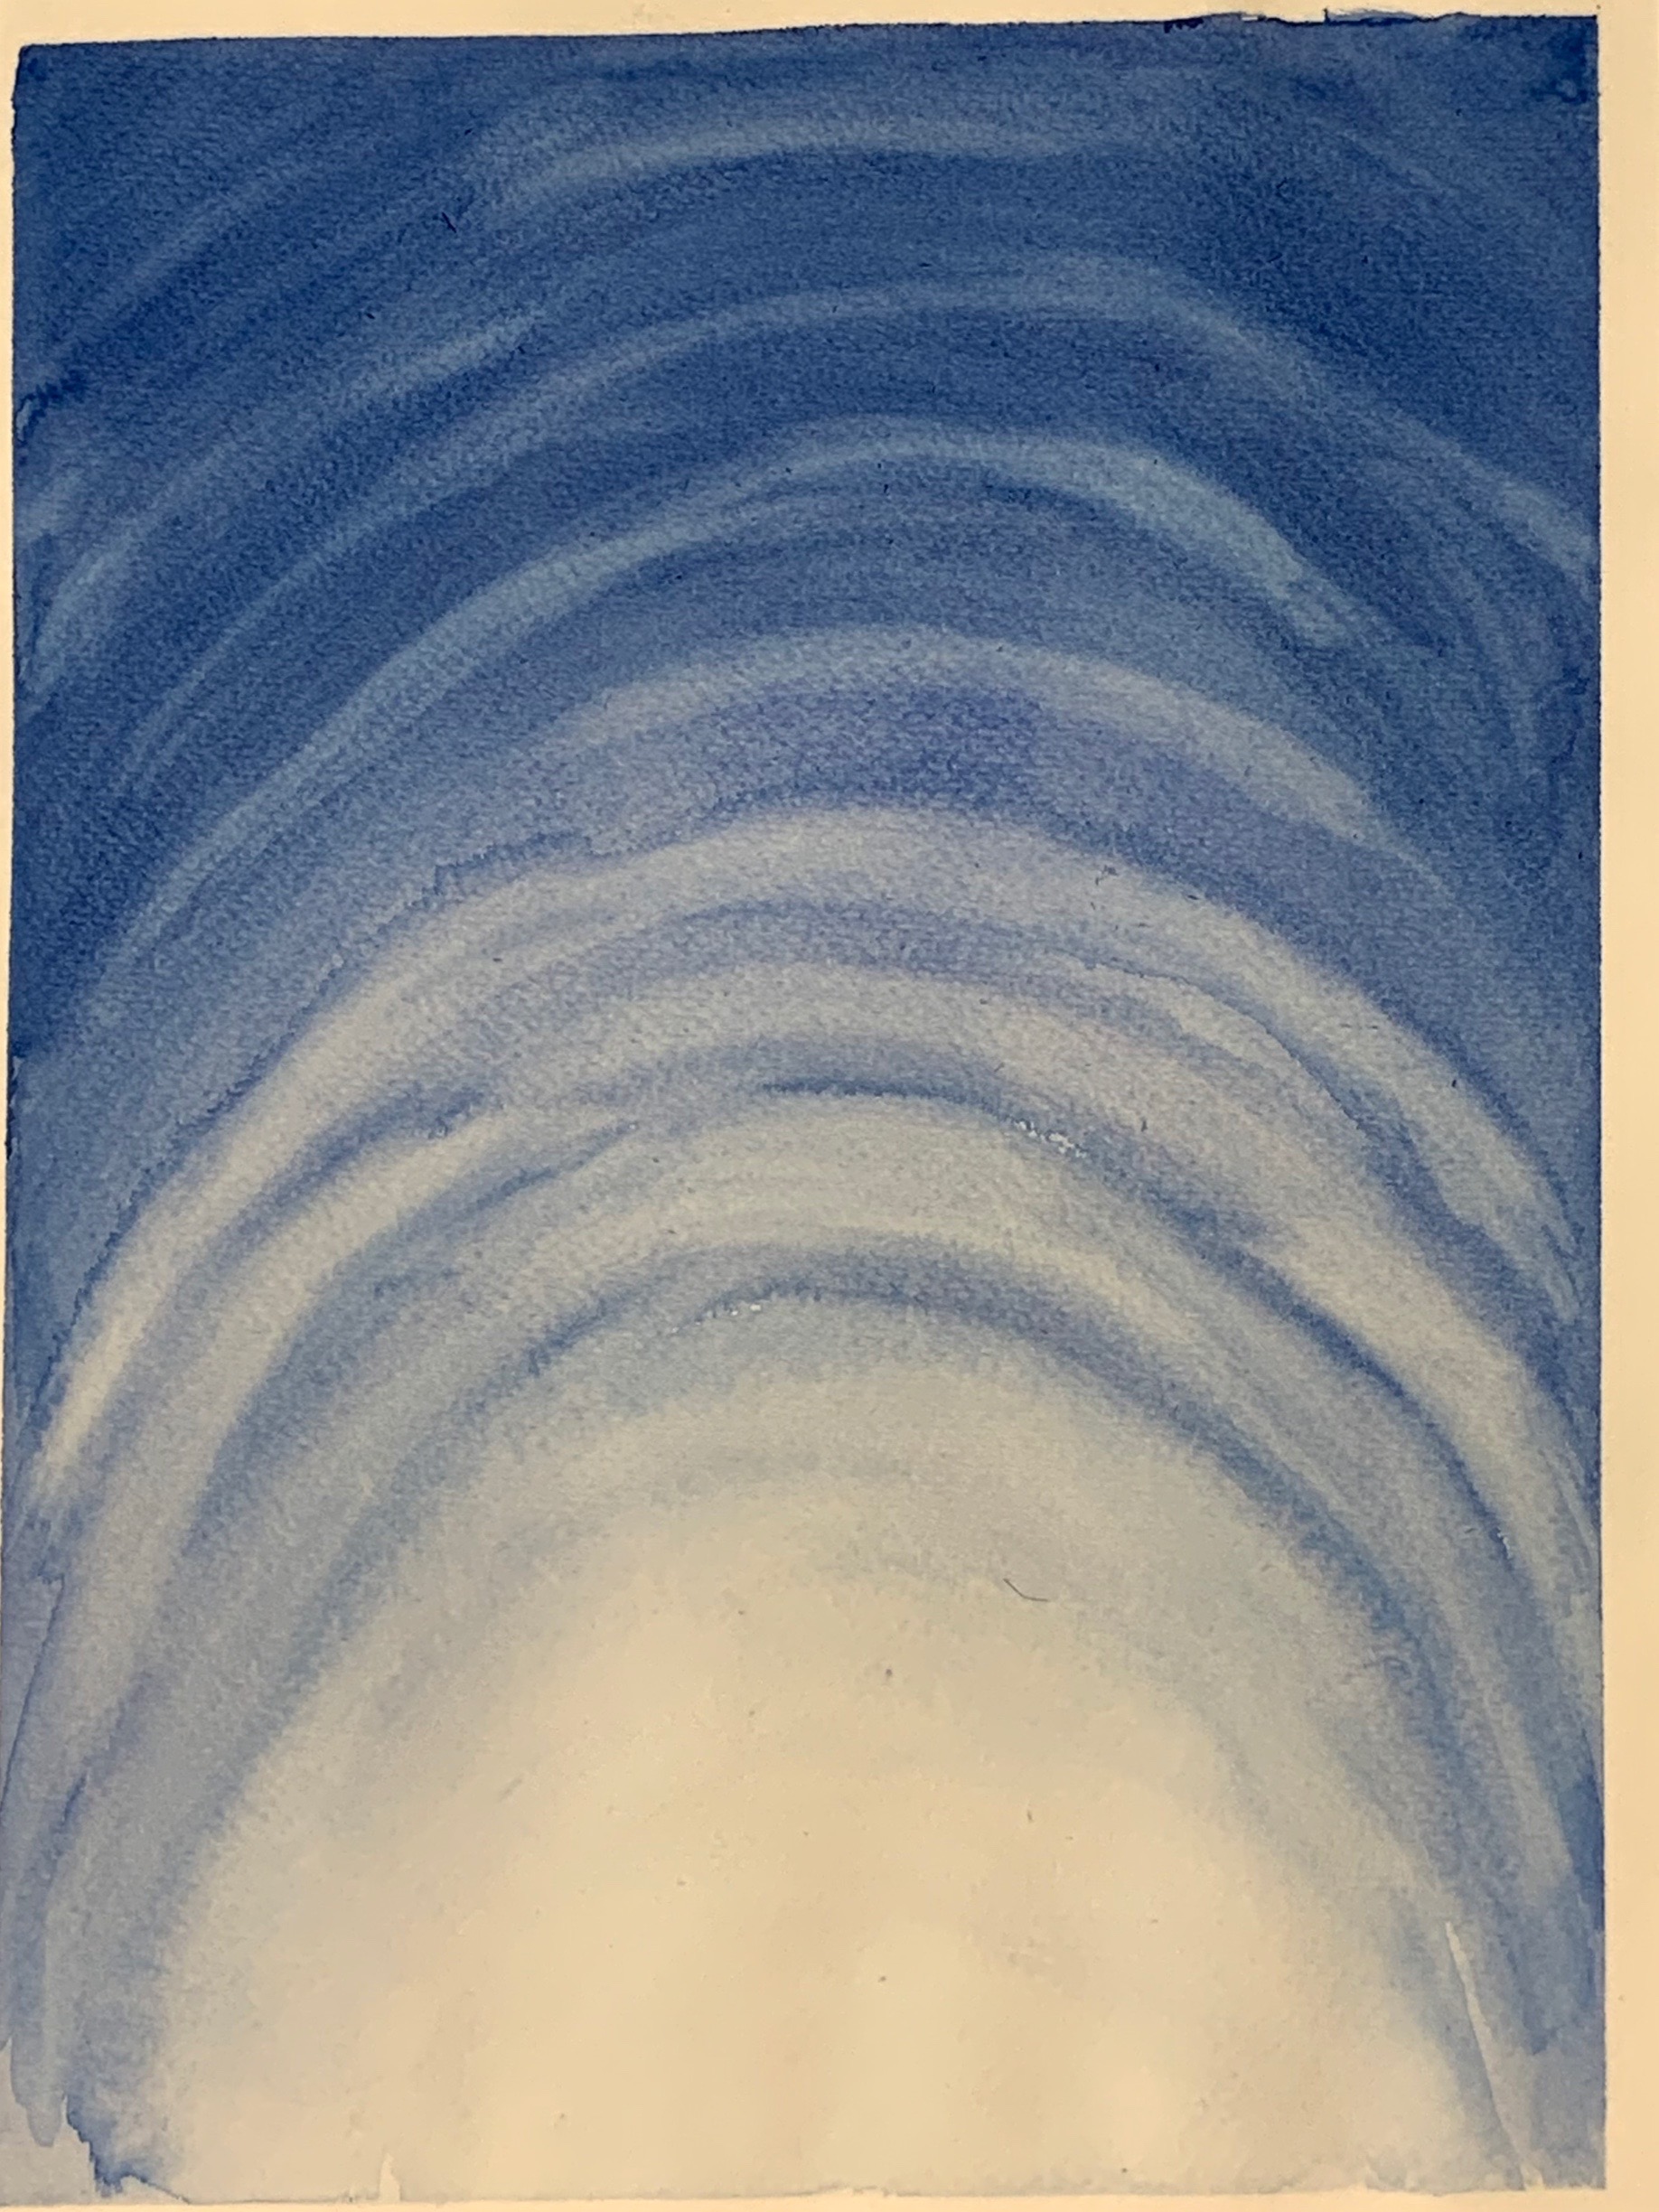
teacher work lesson 3
Find me on YouTube, Twitter, Instagram and Facebook
Contact Hana at hana@pepperandpine.com if the course if full and you want to be on the waitlist for the next launch.
Hi, I am homeschooling my child for this year, 4th Grade. can you please show me link of classes I can purchase for this specific grade? she used to go to a Waldorf school but this year we are homeschooling. I saw the grade 5 – 8 course and will get that one next year.