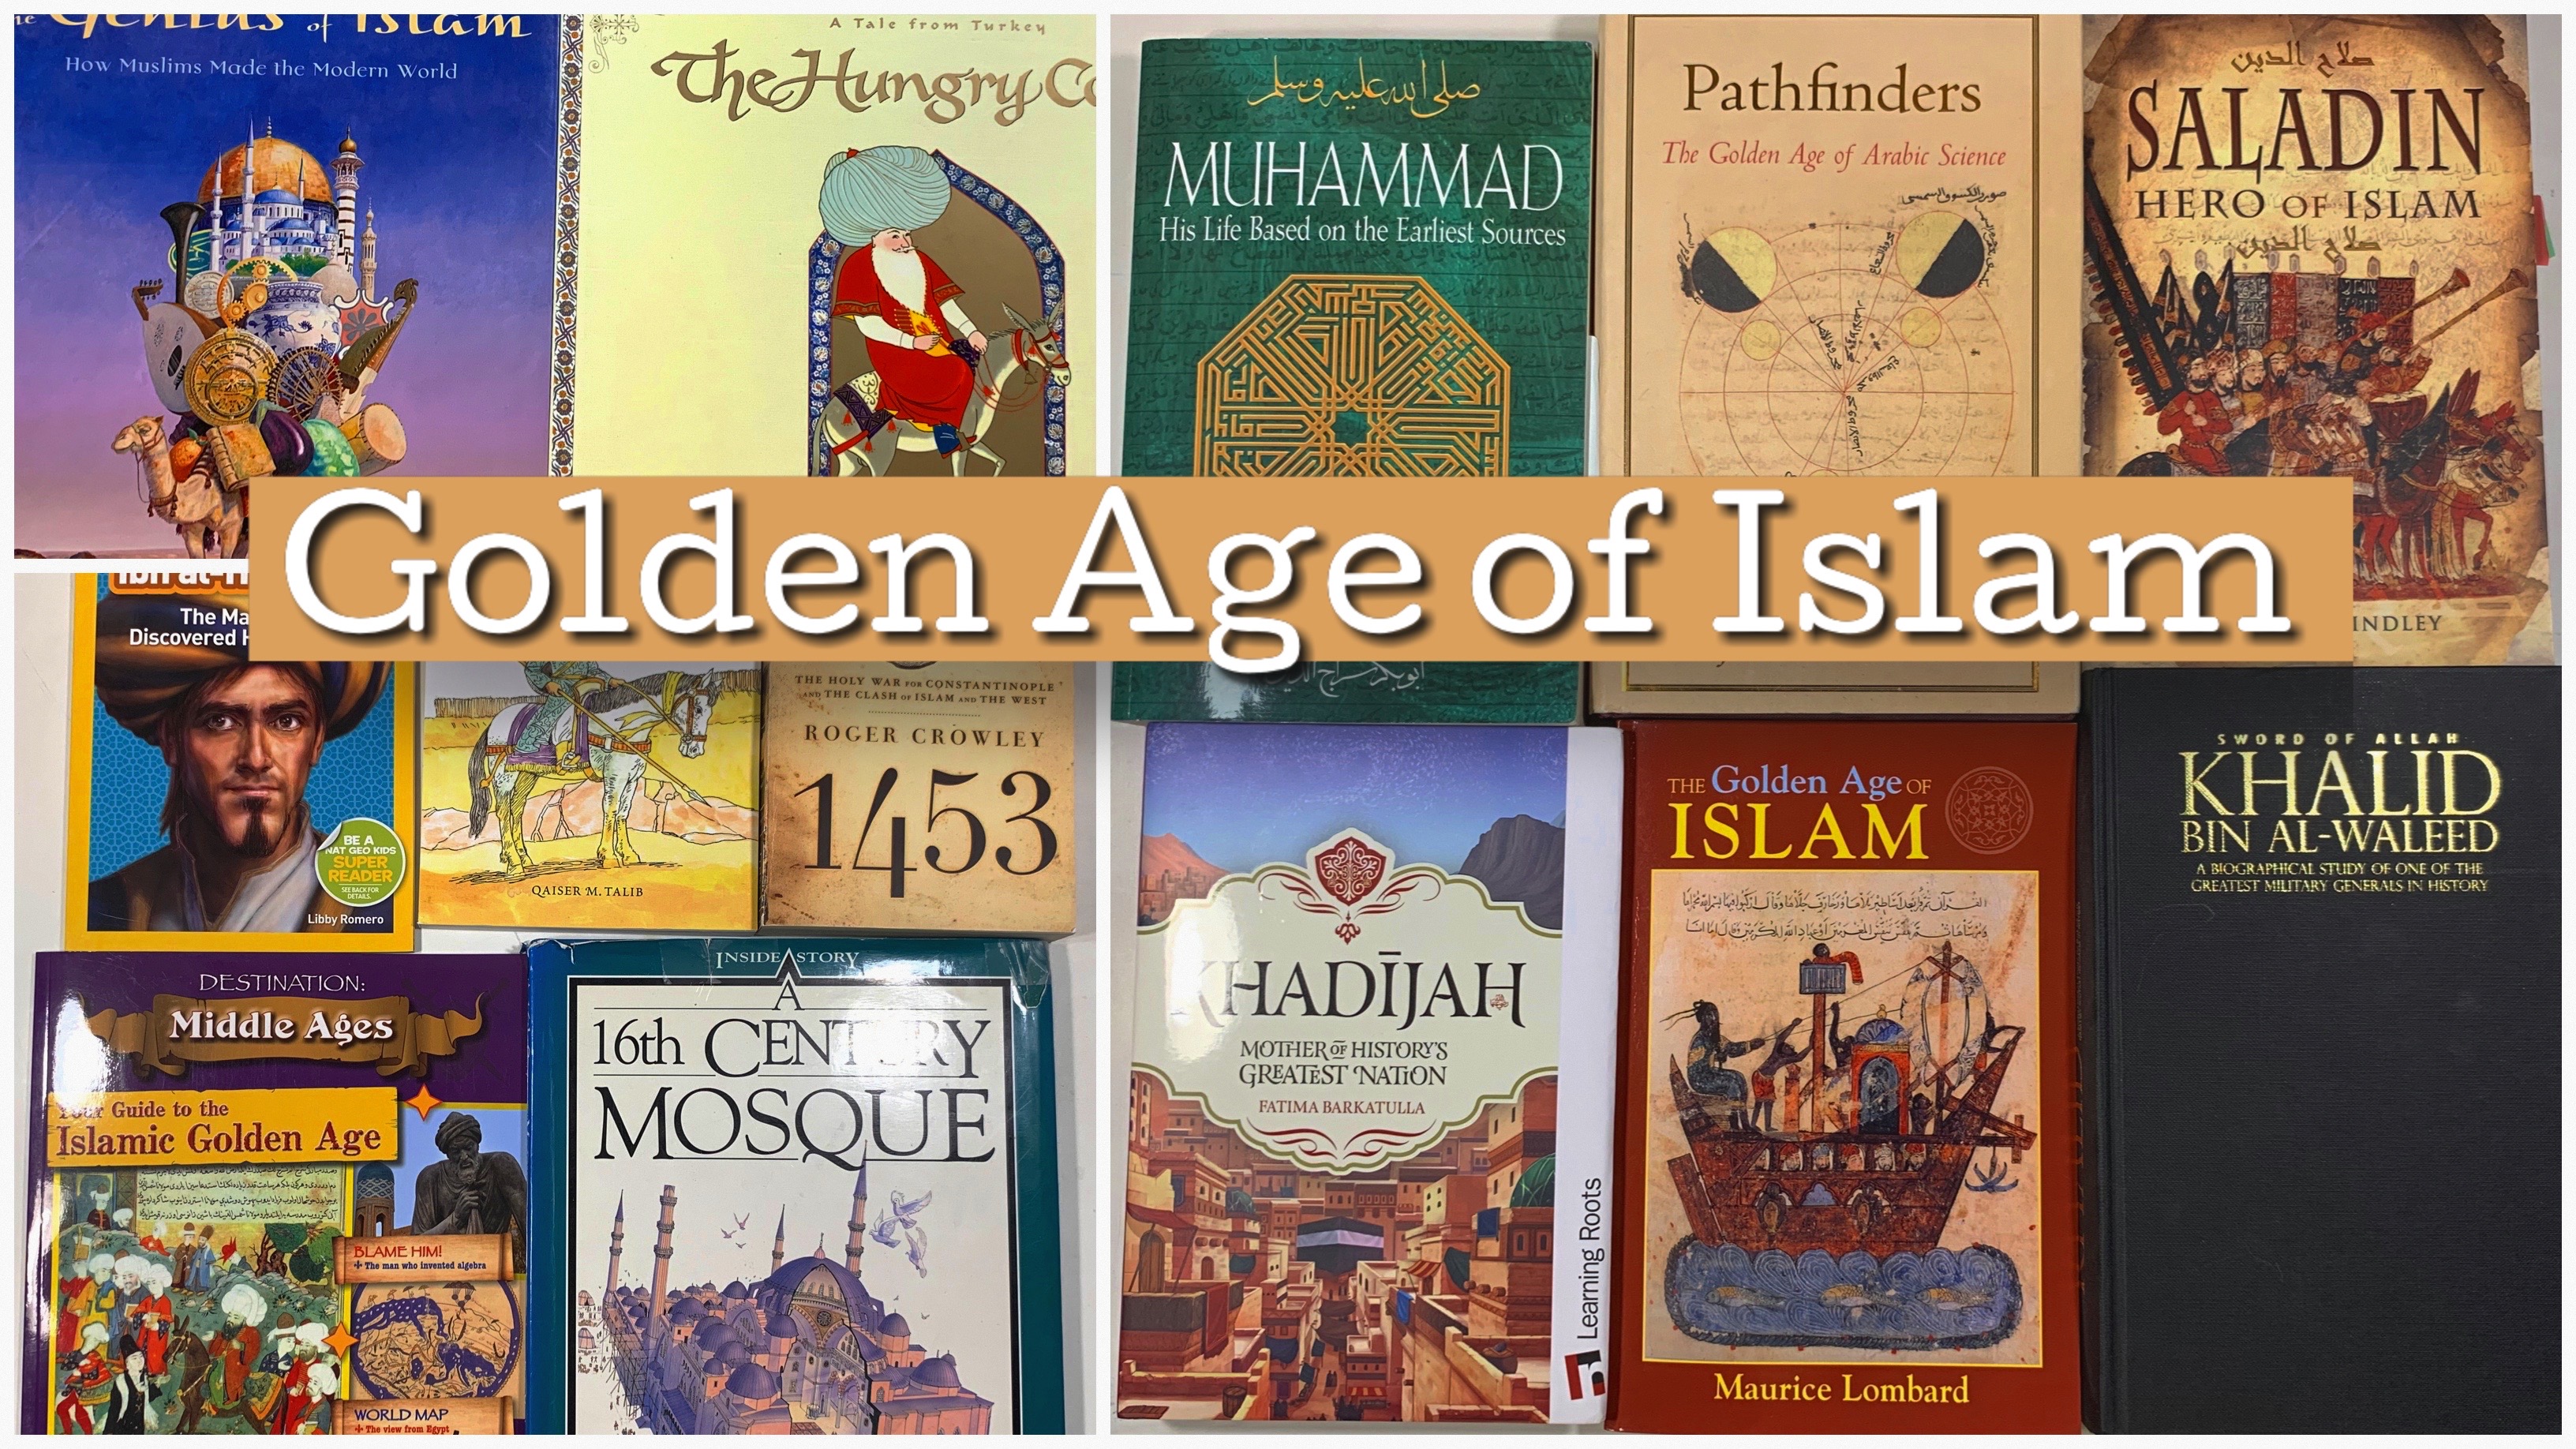
Are you curious what was going on in the rest of world while Europe was deep in the Dark Ages? While it’s considered the Middle Ages or Medieval Times in Europe, other parts of the world had been civilized and had been flourishing for centuries, even millinias. Let’s explore other parts of the world together. I have a series of Main Lesson Blocks and Unit Studies that explore North Africa and Ibn Battuta, West Africa and Mansa Musa, Mongolia and Genghis Khan, Ancient China, China and Kublai Khan, The Silk Road and Marco Polo and the Muslim world of Arabia, Persia and the Ottoman Empire with notable historical figures such as Ibn Haytham, Ibn Sina, Khalid ibn al Walid, Saladin and more.
Today’s video centers on the time period of early 600s through to about the 1200s and covers the area of Arabia and what is modern day Iran. I have some resources on Ottoman Turkey as well and Saladin and the crusades.


Buying Guide
Affiliate links used on this page
Some items for this unit were hard to find. The Dome of the Rock kit can be found at various vendors, though I can’t remember which vendor it was.
Muslim Biographies
These book accompany our Islamic Empire Main Lesson Block and were gifted to me by Siraj Bookstore.
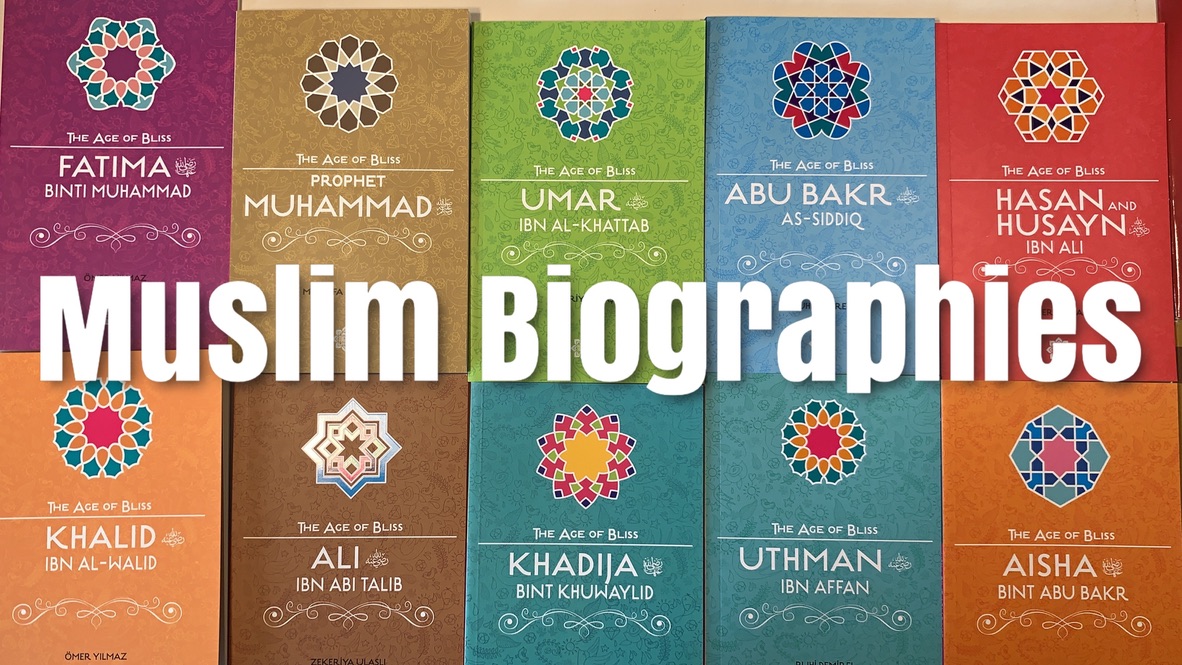
You can find these biographies at Siraj Bookstore. Fatima, Muhammad (saw), Umar, Abu Bakr, Husan & Husayn, Khalid, Ali, Khadija, Uthman and Aisha.
Lesson Plans
Welcome to the Lesson Plans for The Golden Age of Islam Unit Study. When we initially decided to broaden our European Middle Ages main lesson block, we didn’t realize that it would become a 4 year extension! So far, what began as our Silk Road unit became multiple units as each subject area became its own unit. Currently we have units for The Silk Road, Ancient China, Mongolia, West Africa and The Travels of Ibn Battuta.
When putting together these lesson plans, I realized I had far too broad a range of books than could be contained in a short unit study dedicated to a 3-4 year grade range. Usually I am able to create lessons which work for multiple grades and student interests. This unit, however, includes material that’s best suited for high school level and adult so it doesn’t easily work for all grades.
To accommodate the material and grade range, I’ve made this unit 12 weeks long which would be best implemented in 3-4 week blocks throughout 3-4 times in a year or over multiple years in conjunction with other history lessons.
I’ve also included all the materials (books and kits), tutorials, projects and recipes for all 12 grades so you can mix and match the books and lessons you wish to use.
If books or kits are not available or you have other materials you wish to use, please make adjustments as you see fit. These lesson plans may be used as a guide for inspiration rather than a rigid course of lessons. Setting up the lessons in a weekly manner allows for flexibility in how you wish to do the lessons and in which order. The grade range offered is my own estimation, but you will find that your student doesn’t fit that range and you may wish to provide other lessons or modify the materials suggested.


Hand On Projects
DIY Historic Kaaba
While working through our West Africa main lesson block, we learned about Mansa Musa and his great pilgrimage to Makkah to perform Hajj. He is reportedly the wealthiest man in recorded history and carried so much gold to give as charity that he crashed the markets in Egypt with in the influx of gold. This was in the 14th century at a time when Europe was still experiencing its Dark Ages. To see the rest of the world prosper, gain wealth and knowledge and make great discoveries in science and medicine was a stark difference from what was transpiring in Europe. I’m disappointed that the Middle Ages is focused on Europe as if the rest of the world didn’t exist. In fact, because of the Silk Road, travel and trade, there was much exchange of goods, ideas and resources. While studying the rest of the world during the Middle Ages, we came up the empires of Ghana, Mali and Songhai. While learning about these, we discovered the wealthiest man, Mansa Musa, and his massive caravan to Makkah.
For our main lesson block on West Africa and the empire of Mali and the leader Mansa Musa, we collected a number of resources to use. What we couldn’t find, we hands-on kits and projects for with to supplement our unit. As a result, I repurposed a Medieval castle building kit to make our replica model of the Kaaba. While I’m pleased with our ingenuity and creativity, I’m not super pleased with the end result. Our Kaaba doesn’t look like the Kaaba. It’s quite plain in our attempt to recreate a historically accurate depiction of what the Kaaba might have looked like in the 1300s. We did cut a piece of black T-shirt material to drape over the top, but that looked worse. I also wanted to put the Black Stone on the southeast side of the Kaaba, but didn’t find a way of recreating the encasement. We chose a limestone color for our bricks, but they may have been more grey. We used a brick mold from our castle kit and undyed plaster of Paris. We stained popsicle sticks for the roof and made our door with them as well. In the end, I’m glad we made it, but I wish there was a pre-made kit available with more historically accurate supplies.


How To Make A West African Sand Clay Mosque
I’m really happy with the projects we did for our West Africa unit. With few resources to choose from, I came up with my own ideas. I got to flex my creative muscle and it was so satisfying creating the projects from scratch. We made a sand/mud masjid in west African style. This was initially a daunting projects, and I procrastinated for weeks, maybe even months before finally doing it. It turned out to be really simple! I’m really pleased with the outcome. It didn’t take as long as I expected and nearly a year later, it’s standing sturdy in our homeschool room. We used red/brown clay from Aardvark Clay mixed with sand to make the sand/mud mixture which would be the walls and roof of the masjid. We used 1/16″ dowels cut to about 3″ and stained using walnut stain. We also stained popsicle sticks for the door, but that didn’t hold up too well in part because the clay dried and cracked around the door. We assembled the whole thing on a 6”x8” gesso board we smothered with clay to make it appear like it was sand. Together my 13-year-old son and I made four thick rectangular walls for the base of the masjid. We used clay to seal the edges together. Once the majid and courtyard were complete, we inserted the dowels into the walls. You need to work quickly because the clay dries hard, and you won’t be able to mold the clay or insert dowels once it . When the walls (up to about 2 inches) were complete and dried, we moved on to the upper portion. Working this way ensured we didn’t collapse the walls as they bent or draped under the weight of gravity. We assembled the masjid by making four trapezoid shaped walls and lifting them into position. Once with they were positioned. We added the dowels and let it dry before working on the courtyard details and the door.


Graham Cracker Masjid
You can assemble simple project with ingredients you can find at a local grocery store. Of course you can make it from scratch as well. I found that even with store bought graham crackers, meringues and wafers assembling and decorating took a big chunk of time. We also made crescent and star cookies with some icing I made that didn’t work (not shown in the video). This festive project brings joy to my children and creates deep loving memories for Ramadan. Of course you could do this project anytime of year.
This project and 28 more can be found in my Ramadan Blessings in a Box project that is part of the Ramadan Bundle which is on sale now! The bundle includes 8 projects I made for my children and their friends that we have been enjoying over the years. The product is digital and the activities are simple. All you need is some basic office supplies.
For this Graham Cracker Masjid, all you need is a box of graham crackers, some wafer cookies for the minarets, white chocolate chips for decorations on the top of the minaret, meringue cookies (large) for the dome of the masjid and some powdered sugar to make the icing and ‘glue’. Mix 1 cup of powdered sugar with a tablespoon of water. You want the consistency of the icing to be smooth but not to watery. The thicker the better for ‘glue’ and a bit more watery works well for icing. Go slowly with the water. It’s easy to add too much. I did so when I was mixing the chocolate icing. Snap graham crackers in half. If you want to decorate the sides of the masjid, do it before assembling it. Add icing to five graham cracker halves. Add sprinkles or chocolate chunks. Or leave it simple with icing and powdered sugar. Add icing to the edges of the graham crackers and hold for a minute until set. Add roof and dome with icing. Add minarets to the front or all four points. Hold in place until icing is set. Let it set and dry completely before moving them off the wax paper.


Ramadan Calendar
Ramadan is 9th month on the Islamic calendar and the month in which the Qur’an was revealed. Muslims around the world fast during this blessed month. This Ramadan calendar is a way to keep track of the days. The pockets allow for little treats and activities to be stored away so that each day there is something to do or eat as a treat. This Ramadan Calendar uses 100% wool felt from A Child’s Dream. We used the Holland wool variety pack of 12″X12″ squares for the pockets of the calendar cutting them down to 2.75″X2.5″ and the Premium all-wool pre-cut 18″X18″ squares for the backing of the calendar. As the video cut out before the project was completed, I don’t show how the calendar was hung. I purchased a 1/8″ or 1/4″ dowel from Michaels and cut it down to about 19 inches. I sewed a casing for it and fitting the dowel through it. I strung twine from the ends of the dowels and hung it on the wall using a Command hook. I used the Silhouette Cameo program and cutting tool to design inserts for the calendar. For Ramadan 2014 we wrote in Sahaba stories into a fold out card insert with tabs that said “Day 1, Day 2, etc.” For Ramadan 2015, we made “Make Dua For” inserts so we could keep track of the duaas we wanted to make during Ramadan. The circular wood numbers were from Freckled Fawn. The individual numbers were from Craft Cuts. Other wood veneer used (the stars near the title) was from Studio Calico. Wood veneer that wasn’t used but was shown was from the Recollections brand from Michaels. Tombow Mono Aqua glue (blue label) was used to adhere the wood numbers to the felt. Other tools needed for this project: Sewing machine, pencil, ruler, scissors, straight pins and thread.
Phases of the Moon
The study of the moon and its phases is not restricted to the month of Ramadan, but it seems that every year, that’s when we focus our attention on this subject area. Each year we seem to add one more project or activity to help in our understanding of this subject. In the past we’ve done phases of the moon with cookies, cut out a paper mobile of the phases of the moon, assembled a kit of the moon by Nature-Watch, painted peg dolls in the phases of the moon, and probably more that slip my mind. Today’s project was a joy to do, but did take a long time because I not only made mistakes, I complicated the project by painting both sides of the moon tile, added craters on one side and the names of the phases on the other. These additions turned a less-than-an-hour project into a two-day project. I show the whole process so you can see what I did and so that you can skip what doesn’t suit you. While the craters took forever to paint, they are my favorite feature. They really bring this project to life and make it look more authentic.
This kit comes with everything you need to make the phases of the moon, including paint, brush and directions. I happened to have missed the directions, and did them without, which ended up being a blessing because I brought personal touches and authenticity to this project, and I especially like the way it looked in the end. With directions, I’m sure you could do this project easily and quickly. I dipped into a Nature-Watch kit on the Phases of the Moon to help with the phases and how to paint them. I’m sure you’re familiar with the cookie phases of the moon. It’s a delicious project!
I love the new item we have this year which is the Ramadan Moon phases of the moon DIY wooden kit. It looks great hanging just above our Ramadan Table. Our Ramadan Calendar has been a staple in our home for many years, but originally we had a store bought calendar. While it’s common to put a little treat in each pocket, I have 20 non-candy alternatives you can put into each pocket. One year, I painted 30 peg dolls that depicted the phases of the moon. It was a labor intensive project, but I’m super pleased with the results. And, this is one project that can be used year round.
While I don’t have a print out of our sahaba stories, you can click here to see pictures of all of them.
I purchased The Ramadan Moon DIY Kit at the QuadM shops in March of 2019. While at the time, I purchased the last one available, I’m hoping they have been restocked. In the meantime, you can check out the other products by The Rustik Home.
Find me on YouTube, Twitter, Instagram and Facebook
Phases of The Moon Peg Doll
These are probably the cutest peg dolls I’ve ever made! Don’t be deceived by the thumbnail, I actually made a complete lunar phase set to last an entire month! Granted it did get a little tedious and some crescents and moons look awfully similar to one another, but we got a complete set! Now we can track the lunar cycle with these adorable moon phase peg dolls. Of course my 7-year-old will be playing with them, too.
I plan to put each peg doll into our Ramadan calendar for this year and each day we can remove the peg doll and display it on a wooden plaque.
Project details:
Duration: 5+ hours
Level: advanced (young children could do the base color, but details were challenging)
Cost: $20+
Direction: First I painted all the small peg dolls with a coat of blue from our Lyra Watercolor set. Once they were dry, I gave them all a coat of Mr. Huey’s Shine for a bit of shimmer. Before painting the phases of the moon, I polished each one with Beeswax Polish. Finally, I used the white opaque paint that comes with the Lyra watercolors set to paint the phases of the moon. I watered it down until it was smooth and easy to paint and I used a stiff, yet soft bristled pointed brush for best results. While the peg dolls dried, I worked on the wooden plaque. I watercolored it with various shades of blue and white opaque paint. I added Mr. Huey’s shine and let it dry thoroughly before added beeswax polish. Then I painted the faces and hair for each doll varying the hair color, but making all them with sleepy faces. To make the sleepy eyes, just draw two half circles. The circles should be stretched like ovals and should be midway down the face. I used a felt tip marker for most, but you can also use the black paint. For the mouth, I used a magenta colored Sharpie, but red paint for be just fine. I just dotted a little mouth. For the little caps, I cut an elongated semi-circle out of 100% wool felt in various shades of blue. It was a little trial and error till I got the size I wanted with no extra felt hanging over the sides or back. I used hot glue to adhere it to the completely dry peg dolls.


Find me on Twitter, Instagram and Facebook
Regional Food
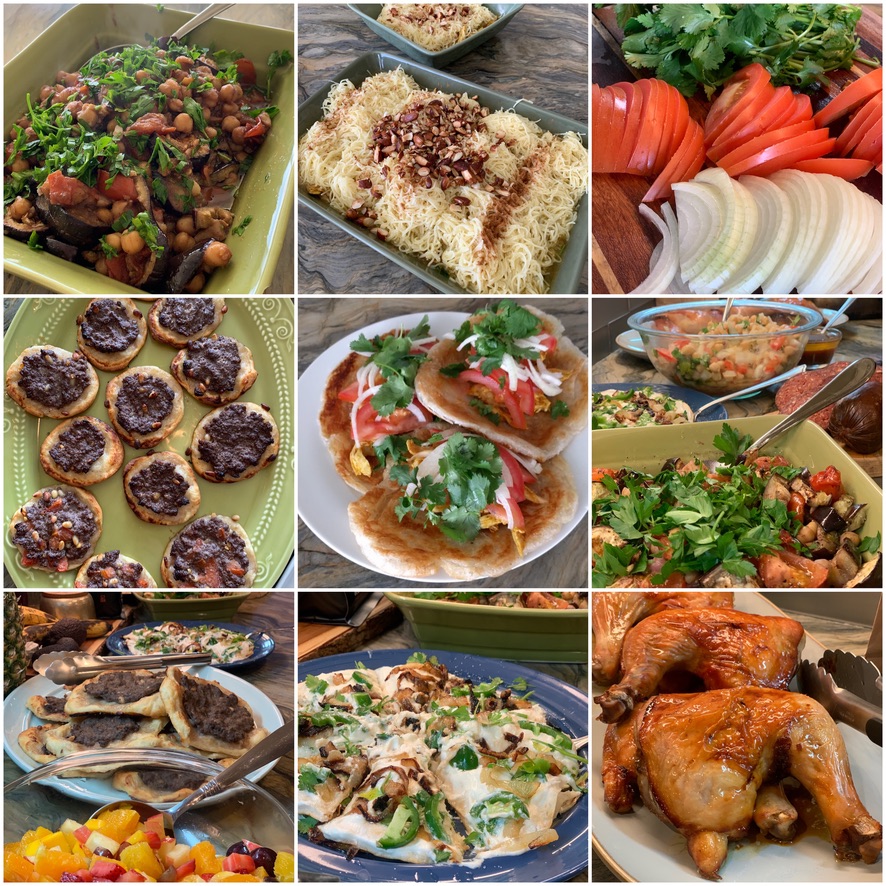
How To Make Lebanese Meat Pies
These Lebanese meat pies were an immediate winner in our home. Everyone loved them and in the years since we’ve learned how to make them, we still do with some modifications. The dough is a dense, dry and flavorful dough that bakes up smooth and delicious. It calls for yogurt and oil which provide a rich flavorful base for the meat. In the years that followed us making this recipe for the first time, I regularly omitted the yogurt because our son has a life threatening dairy allergy. Because the meat is so flavorful, we aren’t missing the yogurt in the dough, though I do prefer it. Also, some of my children don’t care for tomatoes, so we often leave them out and the lastly, if I don’t have lamb, I’ll use ground beef which is a distant second option. The flavor the lamb is incredible compared to ground beef. If you don’t have access to pomegranate syrup you can leave it out, but it adds a sweet tanginess that distinguishes these meat pies, as does the seasonings which are ones we don’t typically use in our cooking, so these are unique for us. However, if you cook with allspice, cumin and cinnamon often, these meat pies might not be as special for you as they are for us. Lastly, the pine nuts add a buttery soft crunch that’s the perfect garnish to this appetizer or side dish. This recipe accompanies our history unit studies and is from the book Arabesque, a Taste of Morocco, Lebanon and Turkey by Claudia Roden.


How to Make Hummus
This isn’t your traditional hummus recipe. For one thing, you’ll find that I didn’t use tahini. While I love tahini and add it often to our homemade hummus, I omitted it this time, and it tastes just as good! Hummus as a food is generally pretty safe for most known allergens. It’s one food my son (who has many allergies) can eat often and safely. But if you have a sesame seed allergy, you know that you can’t even be around people who are eating hummus. So this recipe features the basics of the beloved hummus ingredients with no tahini (sesame seed paste). It’s possible I like it even better! One thing I do like is using a lot of lemon and garlic.
While I share my version of hummus, you may find that you prefer more of one ingredient and less of another. One version my family loves is with curly parsley. We learned that version of hummus from our Palestinian friend. If you want to make this recipe even faster, just use canned chickpeas. I would recommend you warm them up first. One thing you’ll find about using canned chickpeas is that they are make a smooth hummus. I found that I could never achieve a smooth hummus cooking my garbanzo beans on the stove, even for hours. But once I started using my Instant Pot, I found that my hummus was much smoother, though maybe not quick as smooth as store bought. The basic ingredients I use for hummus are garbanzo beans, lemon, garlic, cumin and salt. I use a dash of paprika and cayenne, but those are optional. They do make nice garnishes sprinkled on top with a sprig of parsley and a pickle.


Hummus Chicken Bowl
This recipe for a chicken hummus bowl was such a winner in our home, we have since made it often with great success! One thing that will make preparing this dish even faster is to use store bought hummus or make it from a can. I make mine from scratch so I have to plan ahead when I made this. This recipe is from the September 2020 issue of the Eating Well magazine. I made some changes to the recipe as I always seem to do. I added harissa to the spice mix and to the lemon sauce.


How to Cook Ground Lamb
I’ve altered a recipe we love from the Martha Stewart Living magazine which is an herbed rack of lamb that is paired with a pomegranate rice. We love that recipe so much we cook it often. One day, I made the pomegranate rice but didn’t have anything except ground lamb. So, this is the recipe I came up with to pair with the rice. It’s a distance second to the rack of lamb recipe, but good in a pinch.
Persian Mint Meatballs
This recipe is from the book The New Persian Kitchen by Louisa Shafia. We do a lot of cooking anyway, but especially with our homeschooling. While doing our ancient Persia lessons, we got this and other Persian cookbooks to try some new recipes. This recipe calls for soaked uncooked rice. It’s the first time I tried this and I may have done it wrong or misread the recipe because that part wasn’t super well received by my children. They could feel the granules of rice that didn’t blend well. The one thing that turned out amazing was the tomato sauce! That recipe is one we’ve made again since, but we paired it with a different meat dish.
Tomato sauce: Sauté half a large sliced onion in grapeseed oil Add one can of tomatoes: I used whole tomatoes, with 1-2 teaspoons of dried dill weed, 1 teaspoon of cinnamon and 1 teaspoon of turmeric. Season with salt and pepper and cook everything through.
Meatballs: 1 pound of ground lamb, 1 egg, season with salt and pepper. Blend half onion with 6 garlic cloves, and 1 bunch of mint. Mix thoroughly together. Form into meatballs or kebabs and cook thoroughly and browned on outside before serving with tomato sauce and basmati or baghali polo rice.
Golden Age of Islam Review
When I initially put this unit together I sourced as many secular resources as possible. As we worked through those books, I found that many of them were not accurate and in some cases contained subtle yet damaging information. I began to source material written by Muslims for a Muslim audience and while they are not without errors, they are far superior than the material for the general public. The exception are the biographies which I found to be engaging, accurate and well written. There were some biographies in the Age of Bliss series that my daughter and I didn’t like. That series is available at Siraj Bookstore and there are several authors for that series. The AdabKids series (also from Siraj Bookstore) was excellent! They aren’t the type of book I typically go for, but I found them engaging and informative, and my daughter loved them. Siraj bookstore sent me a number of selections for free, in addition to the books we purchased using our educational funding. Because we are technically secular homeschoolers and use our funding for secular resources, we did not buy any of the material deemed religious. We can include that in our lessons, but not the in lesson work we turn in to our school. All biographies and histories are secular, but the stories of the previous prophets and the seerah (biography of the Prophet (saw)) may not be acceptable in a secular homeschool if they are written for a religious audience.
Since our Golden Age of Islam unit came at the end of our history units for this year, and because we ran out of time and because it coincided with Ramadan, we didn’t get through all the materials and projects we planned and additionally included other material we typically cover during Ramadan. The series by Goodword books by Saniyasnain Khan and the Biography of the Prophet by Lina Al-Keilany are two series we included in our unit that wasn’t part of how we put the unit together. We also didn’t have time to cover our geometry lessons related to this unit at this time, but as we continue with this unit in the future, those lessons will be added to our Golden Age of Islam video playlist as well as on this blog post.