Every year Ramadan comes upon as sooner than the year before. That’s because our Islamic months are based on the lunar calendar while our Gregorian calendar is based on the planet’s revolution around the sun. And each year I plan to be prepared for Ramadan and each year it always seems like I’m stumbling into the month only half prepared. Over the years, I have gotten better about how I want to enjoy this month and reap its benefits. Part of that is enjoying the traditions we have loved as a family which we maintain year after year with some innovations and creative inspirations. We now have a Ramadan Calendar we use every year with pockets to store our Lunar Peg Dolls and Quiz Cards of the Companions. We also have our Phases of the Moon wooden display, an assortment of books, and decorations we can easily pull out and use. We have the Biography of the Prophet (saw) that we now read every Ramadan and special food we seem to only have during Ramadan. Here you’ll find a collection of the things that make Ramadan special to us as a family and especially for the children.
Decorating
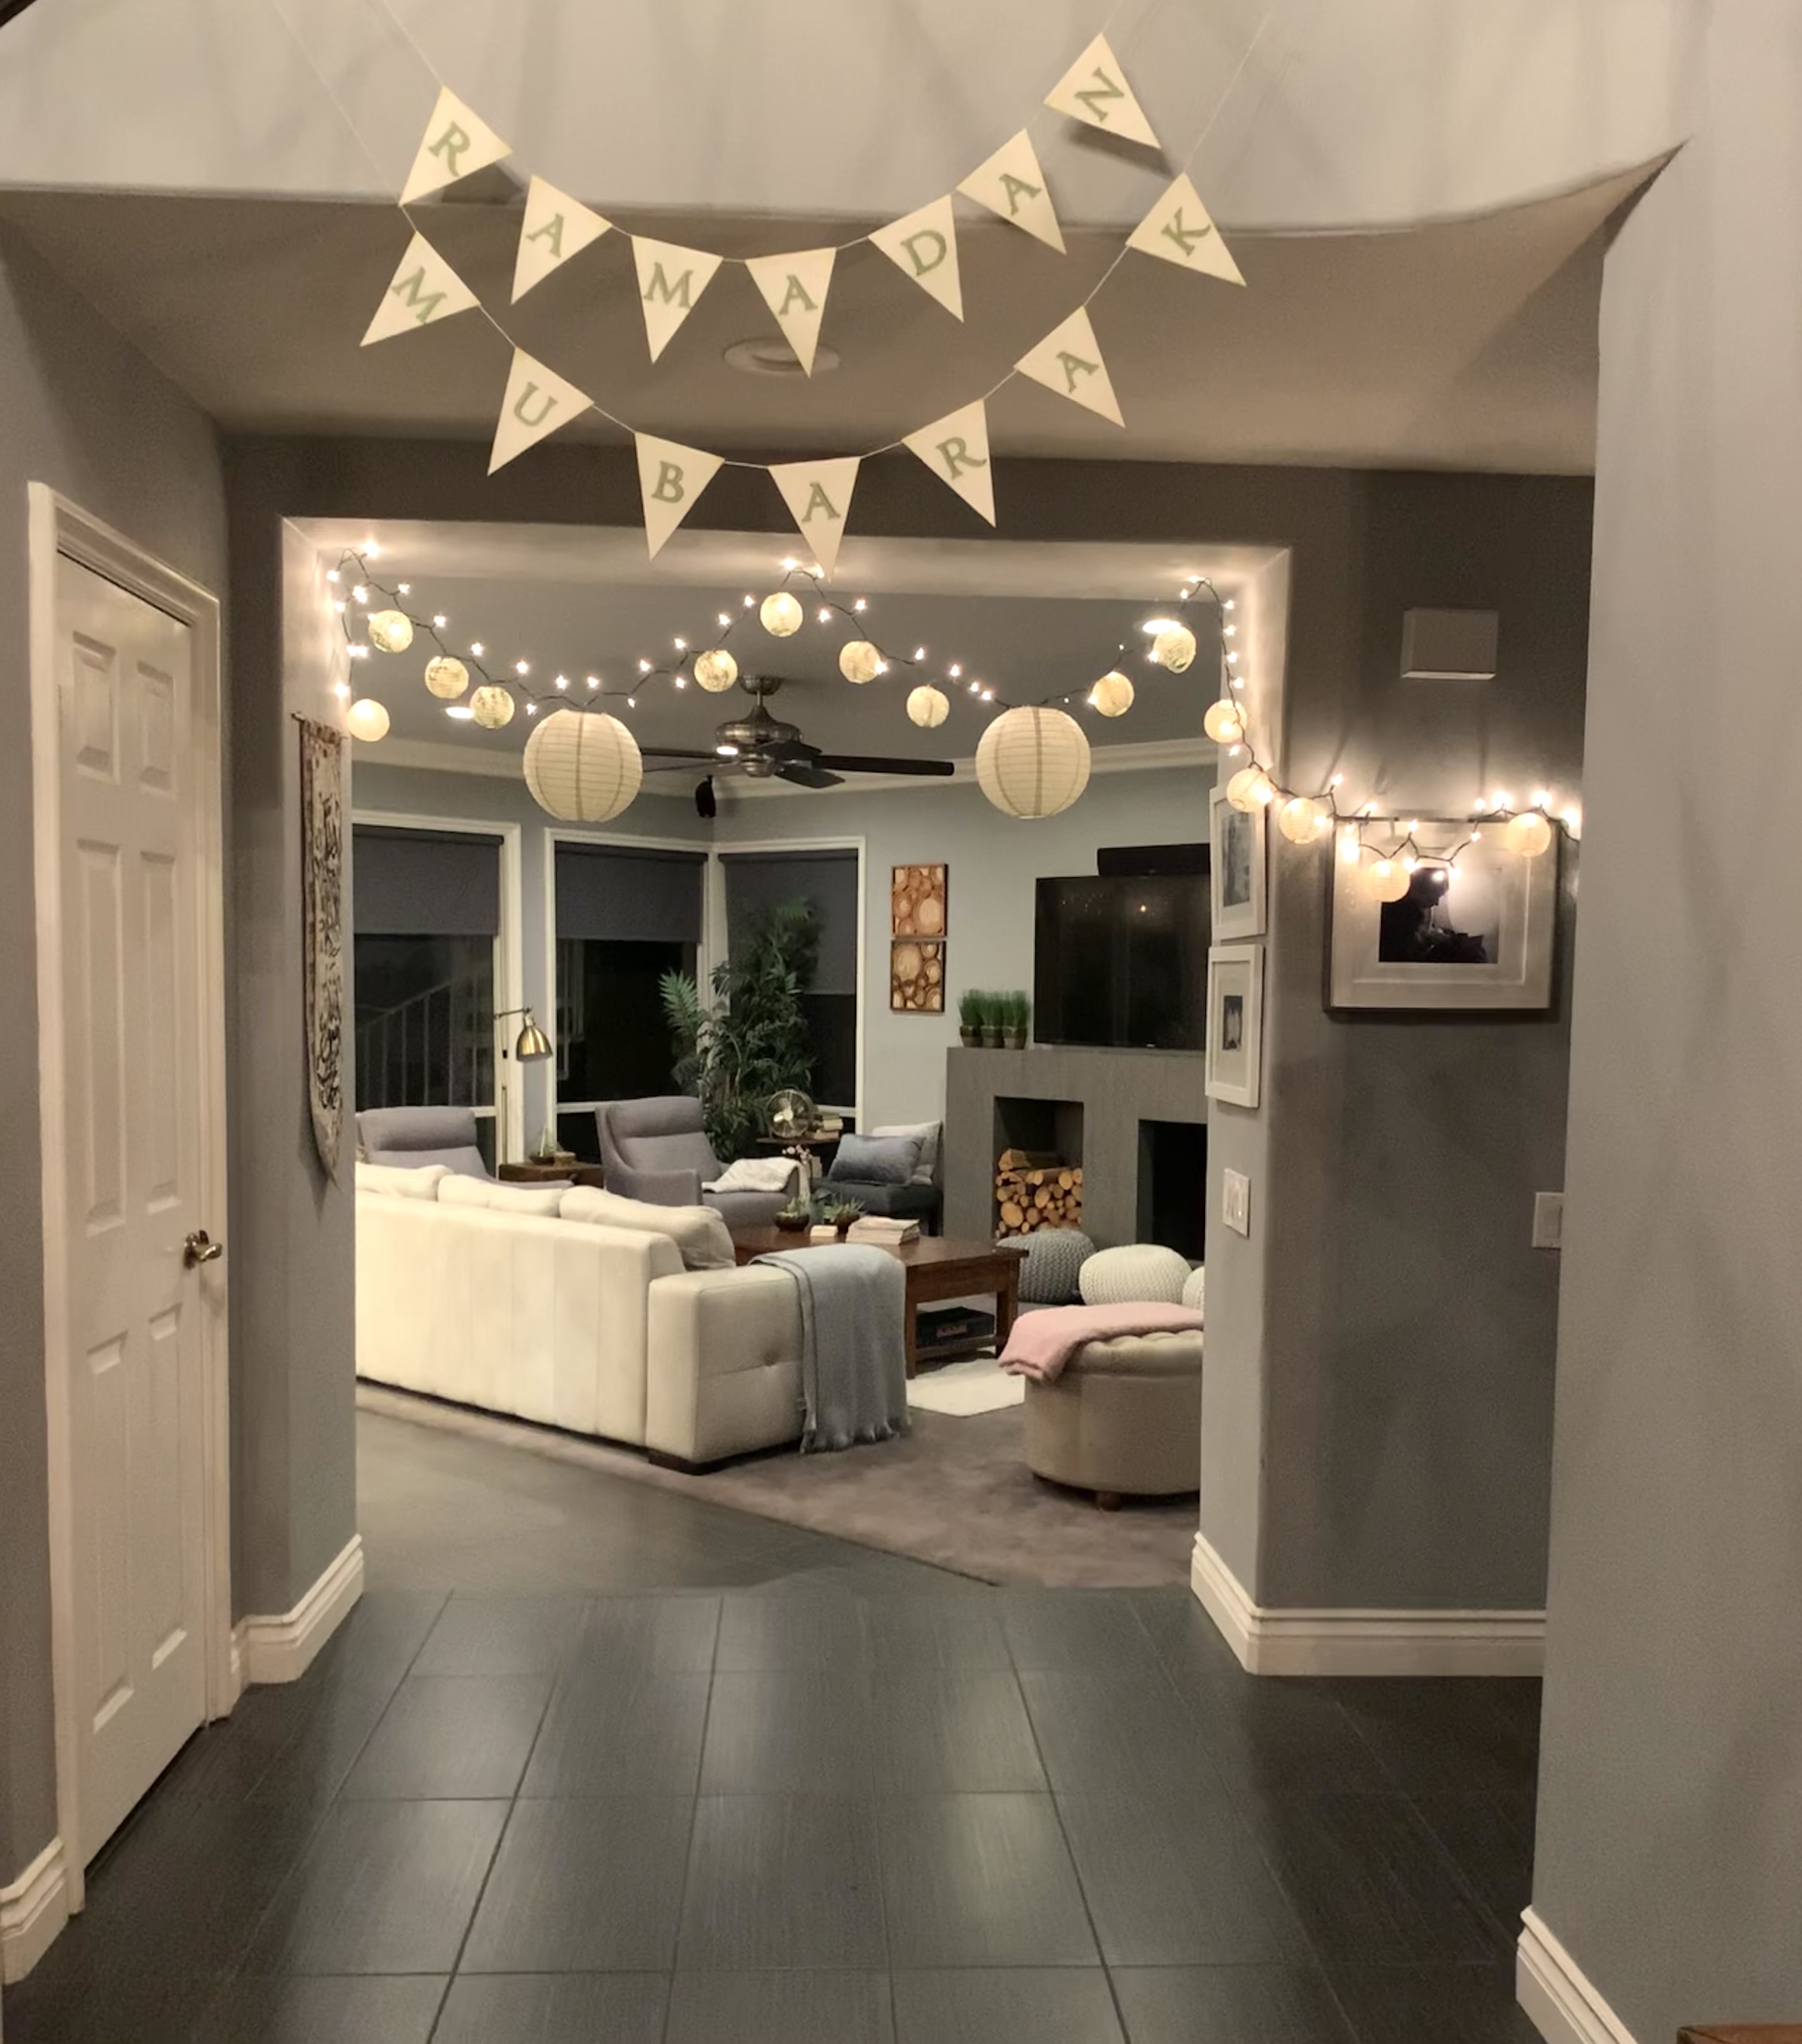
Decorating for Ramadan was something I only did after my children were about 5 years old. At first it was simple and things we made at home. Soon I added lights, moon mobiles, hanging poppers filled with candy or money, books and so much more. One year I decorated with hot air balloons! Then later, I found that so many companies were producing gorgeous Ramadan decorations and I added a few of those things to our supplies.
This is the first year we’ve decorated the homeschool room for Ramadan. Last year we hung some lights that we liked so much, I kept them up year round. This year, in addition to adding a stellar chalk drawing, I decided to cluster a lot of our Ramadan decorations in our school room on the ledge that supports our chalkboard as well as the shelf above it. It made sense to do it this way for a few reasons. The first reason is that we are still homeschooling and having our Ramadan books and Ramadan calendar in the school room means we are more apt to use them and enjoy them. Our Ramadan paper chain is also there and we are finding it easier to remove the chain links and read the hadith or trivia question I’ve printed inside. While we do have other decorations in our home, I’m really happy we decided to decorate the homeschool room. I can see this being a tradition in years to come.
While having a Ramadan table is new for us in the past few years, the concept of having Ramadan themed decorations and activities has been a tradition in our family for over a decade. When the children were young, I made most of our projects by designing them on the computer, printing them out and then cutting and assembling them. Today, I still use my computer, but we also have other materials we use and even better, we have amazing companies that provide Ramadan themed projects for children of all ages. I love the new item we have this year which is the Ramadan Moon phases of the moon DIY wooden kit. I also love having an assortment of picture books, but I must say my collection of Ramadan themed picture books is minimal. That might be a goal for next year! When decorating a space, start with what you have and try to incorporate items that are authentic to you and your style. Bonus points for educational projects that double as decorations. Over the years, our decorations have changed and refined. Some things we still have and use from years and years ago, while other decorations get retired. Every year, I try to incorporate something new. This we we had a few things: The Ramadan Moon, some paper lanterns and a new string of lights.
Phases of the Moon
The study of the moon and its phases is not restricted to the month of Ramadan, but it seems that every year, that’s when we focus our attention on this subject area. Each year we seem to add one more project or activity to help in our understanding of this subject. In the past we’ve done phases of the moon with cookies, cut out a paper mobile of the phases of the moon, assembled a kit of the moon by Nature-Watch, painted peg dolls in the phases of the moon, and probably more that slip my mind. Today’s project was a joy to do, but did take a long time because I not only made mistakes, I complicated the project by painting both sides of the moon tile, added craters on one side and the names of the phases on the other. These additions turned a less-than-an-hour project into a two-day project. I show the whole process so you can see what I did and so that you can skip what doesn’t suit you. While the craters took forever to paint, they are my favorite feature. They really bring this project to life and make it look more authentic.
This kit comes with everything you need to make the phases of the moon, including paint, brush and directions. I happened to have missed the directions, and did them without, which ended up being a blessing because I brought personal touches and authenticity to this project, and I especially like the way it looked in the end. With directions, I’m sure you could do this project easily and quickly. I dipped into a Nature-Watch kit on the Phases of the Moon to help with the phases and how to paint them. I’m sure you’re familiar with the cookie phases of the moon. It’s a delicious project!
I love the new item we have this year which is the Ramadan Moon phases of the moon DIY wooden kit. It looks great hanging just above our Ramadan Table. Our Ramadan Calendar has been a staple in our home for many years, but originally we had a store bought calendar. While it’s common to put a little treat in each pocket, I have 20 non-candy alternatives you can put into each pocket. One year, I painted 30 peg dolls that depicted the phases of the moon. It was a labor intensive project, but I’m super pleased with the results. And, this is one project that can be used year round.
While I don’t have a print out of our sahaba stories, you can click here to see pictures of all of them.
I purchased The Ramadan Moon DIY Kit at the QuadM shops in March of 2019. While at the time, I purchased the last one available, I’m hoping they have been restocked. In the meantime, you can check out the other products by The Rustik Home.
Find me on YouTube, Twitter, Instagram and Facebook
Peg Doll Phases of the Moon
These are probably the cutest peg dolls I’ve ever made! Don’t be deceived by the thumbnail, I actually made a complete lunar phase set to last an entire month! Granted it did get a little tedious and some crescents and moons look awfully similar to one another, but we got a complete set! Now we can track the lunar cycle with these adorable moon phase peg dolls. Of course my 7-year-old will be playing with them, too.
I plan to put each peg doll into our Ramadan calendar for this year and each day we can remove the peg doll and display it on a wooden plaque.
Project details:
Duration: 5+ hours
Level: advanced (young children could do the base color, but details were challenging)
Cost: $20+
Direction: First I painted all the small peg dolls with a coat of blue from our Lyra Watercolor set. Once they were dry, I gave them all a coat of Mr. Huey’s Shine for a bit of shimmer. Before painting the phases of the moon, I polished each one with Beeswax Polish. Finally, I used the white opaque paint that comes with the Lyra watercolors set to paint the phases of the moon. I watered it down until it was smooth and easy to paint and I used a stiff, yet soft bristled pointed brush for best results. While the peg dolls dried, I worked on the wooden plaque. I watercolored it with various shades of blue and white opaque paint. I added Mr. Huey’s shine and let it dry thoroughly before added beeswax polish. Then I painted the faces and hair for each doll varying the hair color, but making all them with sleepy faces. To make the sleepy eyes, just draw two half circles. The circles should be stretched like ovals and should be midway down the face. I used a felt tip marker for most, but you can also use the black paint. For the mouth, I used a magenta colored Sharpie, but red paint for be just fine. I just dotted a little mouth. For the little caps, I cut an elongated semi-circle out of 100% wool felt in various shades of blue. It was a little trial and error till I got the size I wanted with no extra felt hanging over the sides or back. I used hot glue to adhere it to the completely dry peg dolls.


Find me on Twitter, Instagram and Facebook
Ramadan Calendar
Today’s project is a Ramadan Calendar using 100% wool felt from A Child’s Dream.
We used the Holland wool variety pack of 12″X12″ squares for the pockets of the calendar cutting them down to 2.75″X2.5″and the Premium all-wool pre-cut 18″X18″ squares for the backing of the calendar.
As the video cut out before the project was completed, I don’t show how the calendar was hung. I purchased a 1/8″ or 1/4″ dowel from Michaels and cut it down to about 19 inches. I sewed a casing for it and fitting the dowel through it. I strung twine from the ends of the dowels and hung it on the wall using a Command hook.
I used the Silhouette Cameo program and cutting tool to design inserts for the calendar. For Ramadan 2014 we wrote in Sahaba stories into a fold out card insert with tabs that said “Day 1, Day 2, etc.” For Ramadan 2015, we made “Make Dua For” inserts so we could keep track of the duaas we wanted to make during Ramadan.
The circular wood numbers were from Freckled Fawn and the individual numbers were from Craft Cuts. Other wood veneer used (the stars near the title) was from Studio Calico. Wood veneer that wasn’t used but was shown was from the Recollections brand from Michaels
Tombow Mono Aqua glue (blue label) was used to adhere the wood numbers to the felt.
Other tools needed for this project:
Sewing machine, pencil, ruler, scissors, straight pins and thread.
It’s that time of year where Ramadan is fast approaching and plans have to be set before it’s too late. Struggling to find ideas for your Ramadan calendar? Looking for fun educational and candy-free ideas? Look no further! I’ve compiled 20 ideas that are educational, artistic, Islamic and calorie free!! Fill your calendar with inspirational and creative ideas and watch your children jump with delight each day. You can get even more creative and mix and match these ideas!
Check out all the inserts and ideas in the blog post dedicated to this video. You can find it here.
You can also find all the Sahaba insert cards in the Ramadan Bundle.
Ramadan Paper Chain
Making a Ramadan Paper Chain is a wonderful family activity that works for many ages. We’ve had our paper chains for years, and it’s become a staple in our Ramadan decorations. You can get your Ramadan paper chain printouts as well as several more Ramadan activities in the Ramadan Bundle!
This Ramadan paper chain is a countdown chain with Day 1 being Eid and Day 30 being the start of Ramadan. All 30 days should be assembled before Ramadan begins. Then at iftar each night (or often, we do this the following day during our homeschool), we release one chain and read the contents. From day 30 to about mid month, you’ll find hadith or information about Ramadan or Eid, and in the last 14 days, you’ll find trivia questions to test your Ramadan knowledge. Questions are simple and child-friendly. If you wish to print them out on plain paper, you may choose to print the backside with the file with decorative words.
This time, I decided to watercolor the outside for a beautiful rainbow effect. I’ve done paper chains with cardstock, decorative paper and even gold foil one time! However, this is my favorite version so far in over 15 years of making these! For this version, you’ll need to trim down watercolor paper to fit your printer. I used Fabriano 140lb. hot press watercolor paper measuring 9″x12″. I used by Cutterpillar Pro to trim paper to 8.5″x11″. I fed the paper one at a time into my printer but realized it could handle a stack at a time. Once printed, I watercolored the paper using the pan watercolors by Stockmar available at A Child’s Dream. I sprinkled with salt before it was dry but found the colors too pale. So, I added the mixed and diluted concentrated Stockmar watercolors and repainted the paper…twice! Once with salt and the other without salt. I like both, but the salted version may have been hard on my paper trimmer.
Once the paper was dry and trimmed, I added velcro adhesive tabs to the paper chain for easy assembly and even easier disassembly! Now, buy the end of Ramadan, all the strips will be removed without damaging the paper chain, and the following year, it will be easy to reassemble the chain.
Ramadan Activity Cards
Do you need simple ideas to bring some festivity to your Ramadan? If you have children younger than about 12 years old, these cards may be just the ideas you need to bring art, food and acts of service to your Ramadan. I found that when my children were young, they loved making sugar cookies, graham cracker masjid, and date cookies. They loved watercoloring sunset scenes with crescent moons or the Cave of Hira. They loved assembling and disassembling the countdown Ramadan paper chain with trivia questions on each chain. They loved the little art projects that used stars and moons. They worked diligently on their Ramadan lanterns and decorated the house.
Even as the children grew, there were two things that remained fond for them: special food I made just for Ramadan and decorating the house, even if it was just a string of moon and star lights and some lanterns. Even if you live on your own, just with adult children, bringing a bit of festivity into the home is a great way to set the scene for this blessed month.
Ramadan Chalk Drawing
This chalk drawing for Ramadan 2025 turned out cozy and inspiring, but not quite what I was hoping for. I’m working on a 4’x6′ slate chalkboard that I painted with chalkboard paint several years after I got it. It helped for a while, but it is in need of some care before I’m having a hard time getting the chalk to adhere well to the chalkboard.
I’m using Sargent Art square chalk pastels. I like the 48 color set, but it comes in 24 and 12 piece sets as well. I’m gaining inspiration for this illustrations based on the cover of a Ramadan book we read every year as well as other sources. The masjid is in the lower corner nestled among trees with a mountainous backdrop and clear sunset sky with a waxing crescent in the sky. Every couple of days, I add to the moon to match the phase of the moon as the month of Ramadan progresses. I also added a little cottage to the other side of the drawing and a path joining the two lit by lanterns.
This illustration is an idea I would love to realize: A masjid in nature lit with soft natural light from lanterns and candles. The voices carried on the wind not by microphones. Being connected to nature and to worship. While I envisioned this serenity, I think the drawing could use a little more work and details to really evoke that image.
Books and Resources
The book selections I am sharing with you are suitable for all faiths and ages. While they are primarily children’s books, I find them to be both enjoyable to read and educational for children and adults. In fact, I think children’s picture books are an overlooked genre. Aside from them being beautifully illustrated, I’ve mostly found that children’s picture books are written with high quality, easy-to-understand language making them especially great for children and adults. What I also like is that children of multiple ages can also enjoy a single picture book. Young children delight in the illustrations and pick up the content that’s understandable for their age and older children may gather more from the content but still enjoy the illustrations. In my experience, I’ve also found that I learn a lot! I love picture books for that reason. I learn in an easy, educational and enjoyable format. The simplicity, but not rudimentary style of children’s picture books makes them ideal for all audiences.
The Biography of the Noble Prophet by Lina Al-Keilany, is well written and easy to understand. This set of 20 paperback books, is written at a 4th or 5th grade level. The books are workbook size and quality and are about 15 pages each. While each book can be purchased on its own for about $6, you can get the whole set including a sturdy box to hold the 20 books for about $100. This is definitely a pricey option for seerah books.
I really like this set. It’s easy to read, nicely illustrated and broken up into smaller books. The decorative box is lovely and well-made.
The downside is largely the price. I think it’s excessive for the quality of book you’re getting. It’s simply made with a staple binding.
Check out the blog post that accompanies this video for links to all the materials I shared.
You can find these biographies at Siraj Bookstore. Fatima, Muhammad (saw), Umar, Abu Bakr, Husan & Husayn, Khalid, Ali, Khadija, Uthman and Aisha.
You can find links to all these books on the blog post for our Golden Age of Islam unit study.
Hands on Projects and Activities
Moon Cookies
These were surprisingly easy to make and you can make these cookies and icing with no special tools or ingredients. I rummaged through the fridge and cabinets sourcing ingredients I could use to color the icing which was simply a mixture of 1/2 cup of powdered sugar with 1/2-3/4 teaspoons of water. I settled on pomegranate juice for the deep pink/maroon, raspberry puree (from a single smushed fresh raspberry), turmeric and saffron for the yellows and chlorophyll from my supplements for the green. I also mixed vanilla for a light tan color and left one plain white with nothing added. The recipe is just as easy and requires no special mixing bowls or tools and you don’t even need cookie cutters for these ‘full moon’ cookies. The first several times I made these I mixed flour, eggs, sugar and butter together without measuring or mixing dry into wet ingredients. They turned out great but in the spirit of sharing this recipe with you, I altered a Martha Stewart sugar cookie recipe. While her recipe calls for a single egg, 1 cup of sugar, baking powder, salt and brandy, mine is simply 2 cups of organic flour 3/4 cup of organic sugar, 2 pasture raised eggs, 1/2 cup of organic butter (though this time I used a new butter I found that has a cultured butter taste), and a teaspoon and a half of non-alcoholic organic vanilla. This makes about 2 dozen cookies. I also used some Watkins all natural sprinkles for a new of the smaller cookies. Mix the sugar, melted butter, vanilla and eggs together. Add in flour a little at a time. Refrigerate dough for a firmer dough or roll it out on a flat surface with flour. Use a cup or cookie cutter to form shapes. Release cookies with a metal spatula and put them on a baking tray with our without parchment paper. Bake for 5-7 minutes at 350 degrees. Once cooled you can add a dollop of icing and a sprinkle of sprinkles. Let sit and set all the way before stacking. Best eaten within 1-2 days. I used less sugar which means the cookies weren’t as sweet, but because the icing was just sugar, I felt okay doing it this way. They are more like biscuits in their sweetness, but with the icing, I think they are okay. You may add about 1/4 of sugar to make them sweeter.


Crescent Cookies


Graham Cracker Masjid
You can assemble simple project with ingredients you can find at a local grocery store. Of course you can make it from scratch as well. I found that even with store bought graham crackers, meringues and wafers assembling and decorating took a big chunk of time. We also made crescent and star cookies with some icing I made that didn’t work (not shown in the video). This festive project brings joy to my children and creates deep loving memories for Ramadan. Of course you could do this project anytime of year. This project and 28 more can be found in my Ramadan Blessings in a Box project that is part of the Ramadan Bundle which is on sale now! The bundle includes 8 projects I made for my children and their friends that we have been enjoying over the years. The product is digital and the activities are simple. All you need is some basic office supplies.
For this Graham Cracker Masjid, all you need is a box of graham crackers, some wafer cookies for the minarets, white chocolate chips for decorations on the top of the minaret, meringue cookies (large) for the dome of the masjid and some powdered sugar to make the icing and ‘glue’. Mix 1 cup of powdered sugar with a tablespoon of water. You want the consistency of the icing to be smooth but not to watery. The thicker the better for ‘glue’ and a bit more watery works well for icing. Go slowly with the water. It’s easy to add too much. I did so when I was mixing the chocolate icing. Snap graham crackers in half. If you want to decorate the sides of the masjid, do it before assembling it. Add icing to five graham cracker halves. Add sprinkles or chocolate chunks. Or leave it simple with icing and powdered sugar. Add icing to the edges of the graham crackers and hold for a minute until set. Add roof and dome with icing. Add minarets to the front or all four points. Hold in place until icing is set. Let it set and dry completely before moving them off the wax paper.


Family Food Traditions
Ramadan foods are personal traditions and each region or culture has foods that are special for Ramadan. The one food that bears Islamic tradition during Ramadan is the date. Most Muslims break their fast with a date. Here are a collection of recipes that we have loved for many years and each year we seem to add one more food that makes a an appearance just during the month of Ramadan.
Harira soup is a warming scented soup that is dense and filling. You can find the complete recipe on the blog post that accompanies this video. You can find that post here.
Cholay
There are some dishes I tend to make just during Ramadan. This is one of them. It’s an Indian inspired recipe was shared with my by my sister-in-law who knows how to make good food, fast! I even have a secret shortcut to this recipe that you can find on the blog post that accompanies this video tutorial. Cholay is a garbanzo bean side dish that can be served hot or cold and has several varieties. Today’s is a cold version that can be stored in the fridge for hours or even a day or two and the flavors just get better over time. This version may be better known at Chana Chaat. Either way, it’s a delicious protein rich side dish or a meal in itself. You can find the complete recipe on the blog post that accompanies this video with more pics and tips.
Dahinke Polke
Dahinki Pulke or Yogurt Tortilla is a family favorite, especially during Ramadan. We like to break fast with fruit chaat and this layered tortilla dish that’s thick with yogurt and fried onions. While this appetizer is a Ramadan family favorite of ours, you could really have it any time of year. It’s simple to make and other than frying the onions, it’s really fast too. Wow your friends and family at your next dinner party with this crowd pleaser. It’s lightly toasted tortillas layered with yogurt, cilantro, jalapeño or serrano peppers, and fried onions. Layer three times and then let it chill or rest for 20 minutes until the tortillas are moistened by the yogurt. You can also prepare this up to one day in advance by storing it in the refrigerator, but I prefer to eat mine fresh. Just know that you don’t have to eat it directly after making it. The only thing difficult about this dish is cutting it! Oh and eating it! It’s a bit messy, but oh so worth it!
Fruit Chaat
If you’ve never tried fruit salad with spices, I encourage you to try this. You fruit will get a kick out of it, and so will you! You’ll impress your taste buds with cayenne, salt and pepper mixed with sugar and the sweetness of seasonal fruit and fresh juice. The recipe is on a blog post that accompanies this video. You can check that out here.
The first time I tried this salad, I was hooked! That was back in 2003. My sister-in-law made this salad, and I couldn’t get enough of it. I ate everyday for days. While I do like fruit, I don’t seem to eat a lot of it, so spicy, flavorful fruit salad like this certainly helps me get my five servings of fruits and veggies. What’s more, is that it’s hydrating. I’ve found that fruit chaat is especially good during Ramadan or anytime of year in which you are fasting. Either to start or break your fast, this Indian inspired fruit salad will keep you hydrated longer than just drinking water, at least, that’s what I’ve experienced. There are so many varieties of this beloved Ramadan iftar recipe. I hope you find a combination you love as much as I love this one.
Samosa
So the thing is that I only make these during Ramadan, but really, you can make them any time of year. This year, I didn’t make them once for Ramadan. And now that Ramadan is over, I’m making up for lost time and turning out samosas like it’s nobody’s business. This recipe utilizes leftover ground beef or freshly made with a sprinkling of Indian spices and good old fashioned Mission Tortillas. I’ve tried three different varieties of tortillas and the Mission brand is hands down the best. They are light, airy and soft and fry up really nice and crispy. These have been a family favorite and crowd pleaser for many years now. I have my mother in law to thank for this recipe (and many besides). The ingredients and directions are simple, and if you are only making enough for your family, not too time consuming. I’ve made these in the past for big dinner parties, and that’s quite the commitment.
Check out the blog post that accompanies this video for the complete recipe. Check it out here.